Bootstrap 5 card
Bootstrap 5是Bootstrap最新的一个重要版本,在这个版本中,他们对UI进行了改造,做出了各种改变。卡片是Bootstrap 5提供的一个组件,它提供了一个灵活和可扩展的内容容器,有多种变体和选项。它包括页眉和页脚的选项。卡片支持各种各样的内容,包括图片、文本、列表组、链接等等。
语法:
<div class="card"> Card Content ... <div>
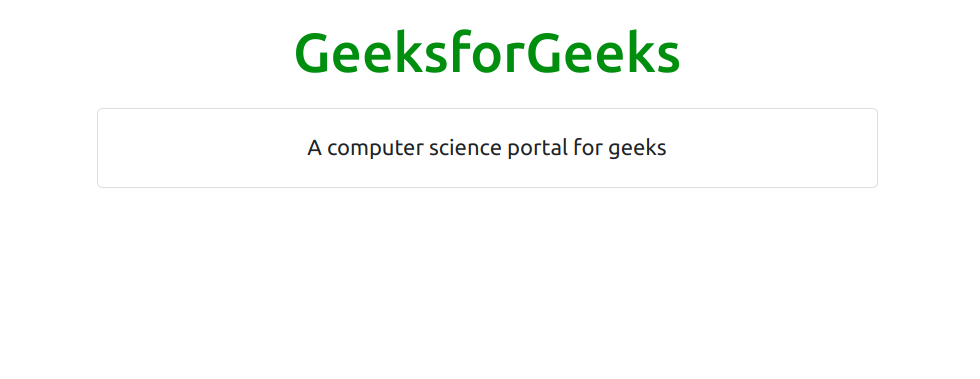
- 基本Card。卡片的基本构件是卡体,以卡类为父本,我们可以创建一个基本卡。
示例:
<!DOCTYPE html>
<html lang="en">
<head>
    <title>Bootstrap Card</title>
    <meta charset="utf-8">
    <meta name="viewport"
    content="width=device-width,initial-scale=1">
    <!-- Load Bootstrap -->
    <link rel="stylesheet" href=
"https://stackpath.bootstrapcdn.com/bootstrap/5.0.0-alpha1/css/bootstrap.min.css"
        integrity=
"sha384-r4NyP46KrjDleawBgD5tp8Y7UzmLA05oM1iAEQ17CSuDqnUK2+k9luXQOfXJCJ4I"
        crossorigin="anonymous">
    <script src=
"https://cdn.jsdelivr.net/npm/popper.js@1.16.0/dist/umd/popper.min.js"
        integrity=
"sha384-Q6E9RHvbIyZFJoft+2mJbHaEWldlvI9IOYy5n3zV9zzTtmI3UksdQRVvoxMfooAo"
        crossorigin="anonymous">
    </script>
    <script src=
"https://stackpath.bootstrapcdn.com/bootstrap/5.0.0-alpha1/js/bootstrap.min.js"
        integrity=
"sha384-oesi62hOLfzrys4LxRF63OJCXdXDipiYWBnvTl9Y9/TRlw5xlKIEHpNyvvDShgf/"
        crossorigin="anonymous">
    </script>
</head>
<body style="text-align: center;">
    <div class="container mt-3">
        <h1 style="color: green;">
            GeeksforGeeks
        </h1>
        <div class="container mt-3" style="width: 600px;">
            <div class="card">
                <div class="card-body">
                    A computer science portal for geeks
                </div>
            </div>
        </div>
    </div>
</body>
</html>
输出:
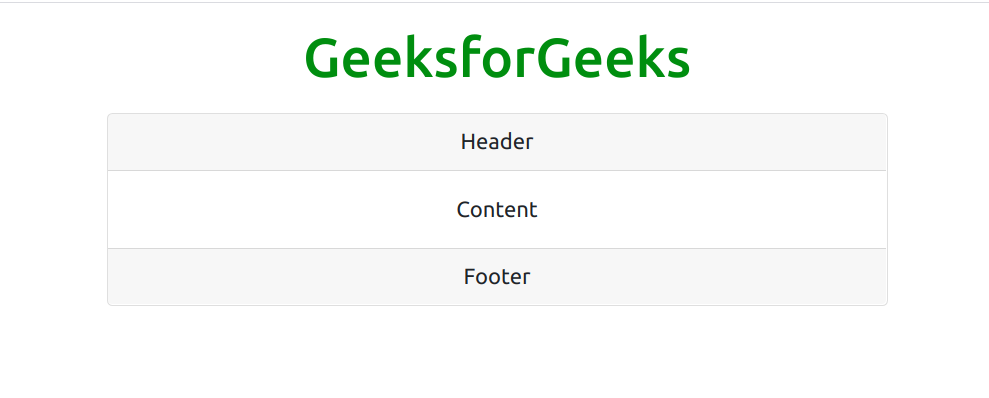
- Header 和 Footer:卡头为卡片提供一个页眉,卡脚为卡片提供一个页脚,如下所示。
示例:
<!DOCTYPE html>
<html lang="en">
<head>
    <title>Bootstrap Card</title>
    <meta charset="utf-8">
    <meta name="viewport"
        content="width=device-width, initial-scale=1">
    <!-- Load Bootstrap -->
    <link rel="stylesheet" href=
"https://stackpath.bootstrapcdn.com/bootstrap/5.0.0-alpha1/css/bootstrap.min.css"
        integrity=
"sha384-r4NyP46KrjDleawBgD5tp8Y7UzmLA05oM1iAEQ17CSuDqnUK2+k9luXQOfXJCJ4I"
        crossorigin="anonymous">
    <script src=
"https://cdn.jsdelivr.net/npm/popper.js@1.16.0/dist/umd/popper.min.js"
        integrity=
"sha384-Q6E9RHvbIyZFJoft+2mJbHaEWldlvI9IOYy5n3zV9zzTtmI3UksdQRVvoxMfooAo"
        crossorigin="anonymous">
    </script>
    <script src=
"https://stackpath.bootstrapcdn.com/bootstrap/5.0.0-alpha1/js/bootstrap.min.js"
        integrity=
"sha384-oesi62hOLfzrys4LxRF63OJCXdXDipiYWBnvTl9Y9/TRlw5xlKIEHpNyvvDShgf/"
        crossorigin="anonymous">
    </script>
</head>
<body style="text-align: center;">
    <div class="container mt-3">
        <h1 style="color: green;">
            GeeksforGeeks
        </h1>
        <div class="container mt-3" style="width: 600px;">
            <div class="card">
                <div class="card-header">Header</div>
                <div class="card-body">Content</div>
                <div class="card-footer">Footer</div>
            </div>
        </div>
    </div>
</body>
</html>
输出:
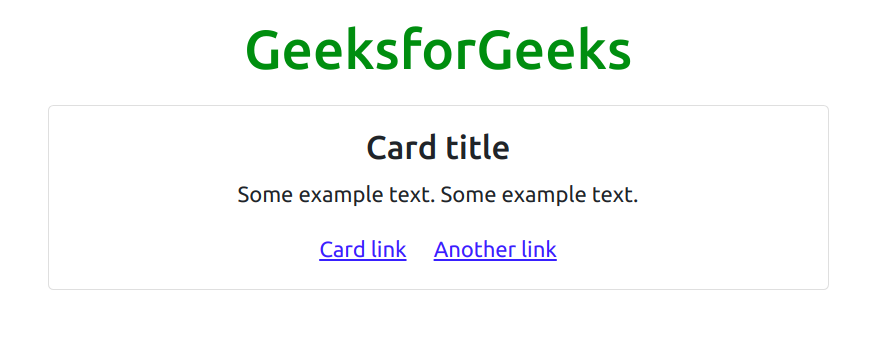
- Title 和 Links。卡片标题是用来给卡片一个标题,卡片链接是用来提供卡片的链接,如果其中有需要的话。
示例:
<!DOCTYPE html>
<html lang="en">
<head>
    <title>Bootstrap Card</title>
    <meta charset="utf-8">
    <meta name="viewport"
        content="width=device-width, initial-scale=1">
    <!-- Load Bootstrap -->
    <link rel="stylesheet" href=
"https://stackpath.bootstrapcdn.com/bootstrap/5.0.0-alpha1/css/bootstrap.min.css"
        integrity=
"sha384-r4NyP46KrjDleawBgD5tp8Y7UzmLA05oM1iAEQ17CSuDqnUK2+k9luXQOfXJCJ4I"
        crossorigin="anonymous">
    <script src=
"https://cdn.jsdelivr.net/npm/popper.js@1.16.0/dist/umd/popper.min.js"
        integrity=
"sha384-Q6E9RHvbIyZFJoft+2mJbHaEWldlvI9IOYy5n3zV9zzTtmI3UksdQRVvoxMfooAo"
        crossorigin="anonymous">
    </script>
    <script src=
"https://stackpath.bootstrapcdn.com/bootstrap/5.0.0-alpha1/js/bootstrap.min.js"
        integrity=
"sha384-oesi62hOLfzrys4LxRF63OJCXdXDipiYWBnvTl9Y9/TRlw5xlKIEHpNyvvDShgf/"
        crossorigin="anonymous">
    </script>
</head>
<body style="text-align: center;">
    <div class="container mt-3">
        <h1 style="color: green;">
            GeeksforGeeks
        </h1>
        <div class="container mt-3" style="width: 600px;">
            <div class="card">
                <div class="card-body">
                    <h4 class="card-title">
                        Card title</h4>
                    <p class="card-text">
                        Some example text.
                        Some example text.</p>

                    <a href="#" class="card-link">
                        Card link</a>
                    <a href="#" class="card-link">
                        Another link</a>
                </div>
            </div>
        </div>
    </div>
</body>
</html>
输出:
- Images。卡片上的图片是用card-img-top和card-img-bottom插入的,在这两个标签的帮助下,img标签被用来添加图片。
示例:
<!DOCTYPE html>
<html lang="en">
<head>
    <title>Bootstrap Card</title>
    <meta charset="utf-8">
    <meta name="viewport"
        content="width=device-width, initial-scale=1">
    <!-- Load Bootstrap -->
    <link rel="stylesheet" href=
"https://stackpath.bootstrapcdn.com/bootstrap/5.0.0-alpha1/css/bootstrap.min.css"
        integrity=
"sha384-r4NyP46KrjDleawBgD5tp8Y7UzmLA05oM1iAEQ17CSuDqnUK2+k9luXQOfXJCJ4I"
        crossorigin="anonymous">
    <script src=
"https://cdn.jsdelivr.net/npm/popper.js@1.16.0/dist/umd/popper.min.js"
        integrity=
"sha384-Q6E9RHvbIyZFJoft+2mJbHaEWldlvI9IOYy5n3zV9zzTtmI3UksdQRVvoxMfooAo"
        crossorigin="anonymous">
    </script>
    <script src=
"https://stackpath.bootstrapcdn.com/bootstrap/5.0.0-alpha1/js/bootstrap.min.js"
        integrity=
"sha384-oesi62hOLfzrys4LxRF63OJCXdXDipiYWBnvTl9Y9/TRlw5xlKIEHpNyvvDShgf/"
        crossorigin="anonymous">
    </script>
</head>
<body style="text-align: center;">
    <div class="container mt-3">
        <h1 style="color: green;">
            GeeksforGeeks
        </h1>
        <div class="container mt-3" style="width: 600px;">
            <div class="card">
                <img class="card-img-top"
                    src=
"https://media.geeksforgeeks.org/wp-content/cdn-uploads/20190530183756/Good-Habits-for-developers-programmers.png"
                    alt="Card image" style="width: 100%;">
                <div class="card-body">
                    <h4 class="card-title">Developer Guy</h4>
                    <p class="card-text">Developer Guy love to
                        develope front-end and back-end
                    </p>

                    <a href="#" class="btn btn-primary">
                        See Profile
                    </a>
                </div>
            </div>
        </div>
    </div>
</body>
</html>
输出:

- 按钮中的图像的例子。
示例:
<!DOCTYPE html>
<html lang="en">
<head>
    <title>Bootstrap Card</title>
    <meta charset="utf-8">
    <meta name="viewport"
        content="width=device-width,initial-scale=1">
    <!-- Load Bootstrap -->
    <link rel="stylesheet" href=
"https://stackpath.bootstrapcdn.com/bootstrap/5.0.0-alpha1/css/bootstrap.min.css"
        integrity=
"sha384-r4NyP46KrjDleawBgD5tp8Y7UzmLA05oM1iAEQ17CSuDqnUK2+k9luXQOfXJCJ4I"
        crossorigin="anonymous">
    <script src=
"https://cdn.jsdelivr.net/npm/popper.js@1.16.0/dist/umd/popper.min.js"
        integrity=
"sha384-Q6E9RHvbIyZFJoft+2mJbHaEWldlvI9IOYy5n3zV9zzTtmI3UksdQRVvoxMfooAo"
        crossorigin="anonymous">
    </script>
    <script src=
"https://stackpath.bootstrapcdn.com/bootstrap/5.0.0-alpha1/js/bootstrap.min.js"
        integrity=
"sha384-oesi62hOLfzrys4LxRF63OJCXdXDipiYWBnvTl9Y9/TRlw5xlKIEHpNyvvDShgf/"
        crossorigin="anonymous">
    </script>
</head>
<body style="text-align: center;">
    <div class="container mt-3">
        <h1 style="color: green;">
            GeeksforGeeks
        </h1>
        <div class="container mt-3" style="width: 600px;">
            <div class="card">
                <div class="card-body">
                    <h4 class="card-title">Developer Guy</h4>
                    <p class="card-text">Developer Guy love to
                        develope front-end and back-end
                    </p>

                    <a href="#" class="btn btn-primary">
                        See Profile
                    </a>
                </div>
                <img class="card-img-bottom" src=
"https://media.geeksforgeeks.org/wp-content/cdn-uploads/20190530183756/Good-Habits-for-developers-programmers.png"
                    alt="Card image" style="width: 100%;">
            </div>
        </div>
    </div>
</body>
</html>
输出:

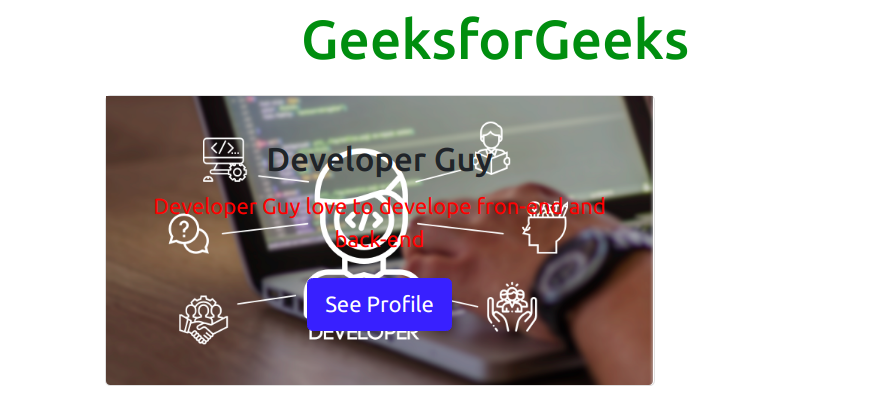
- 图像叠加。在这一点上,我们必须在你用于卡片图像的同一行代码中使用一个额外的类,叫做卡片-img-overlay。这可以把图片变成卡片的背景,并覆盖在卡片的文字上。
示例:
<!DOCTYPE html>
<html lang="en">
<head>
    <title>Bootstrap Card</title>
    <meta charset="utf-8">
    <meta name="viewport"
        content="width=device-width, initial-scale=1">
    <!-- Load Bootstrap -->
    <link rel="stylesheet" href=
"https://stackpath.bootstrapcdn.com/bootstrap/5.0.0-alpha1/css/bootstrap.min.css"
        integrity=
"sha384-r4NyP46KrjDleawBgD5tp8Y7UzmLA05oM1iAEQ17CSuDqnUK2+k9luXQOfXJCJ4I"
        crossorigin="anonymous">
    <script src=
"https://cdn.jsdelivr.net/npm/popper.js@1.16.0/dist/umd/popper.min.js"
        integrity=
"sha384-Q6E9RHvbIyZFJoft+2mJbHaEWldlvI9IOYy5n3zV9zzTtmI3UksdQRVvoxMfooAo"
        crossorigin="anonymous">
    </script>
    <script src=
"https://stackpath.bootstrapcdn.com/bootstrap/5.0.0-alpha1/js/bootstrap.min.js"
        integrity=
"sha384-oesi62hOLfzrys4LxRF63OJCXdXDipiYWBnvTl9Y9/TRlw5xlKIEHpNyvvDShgf/"
        crossorigin="anonymous">
    </script>
</head>
<body style="text-align: center;">
    <div class="container mt-3">
        <h1 style="color: green;">
            GeeksforGeeks
        </h1>
        <div class="container mt-3" style="width: 600px;">
            <div class="card" style="width: 400px;">
                <img class="card-img-bottom"
                    src=
"https://media.geeksforgeeks.org/wp-content/cdn-uploads/20190530183756/Good-Habits-for-developers-programmers.png"
                    alt="Card image" style="width: 100%;">
                <div class="card-img-overlay">
                    <div class="card-body">
                        <h4 class="card-title">
                            Developer Guy
                        </h4>
                        <p class="card-text" style="color: red;">
                            Developer Guy love to develope
                            front-end and back-end
                        </p>

                        <a href="#" class="btn btn-primary">
                            See Profile
                        </a>
                    </div>
                </div>
            </div>
        </div>
    </div>
</body>
</html>
输出:
- 卡片组。使用卡片组将卡片渲染成单一的、具有相同宽度和高度列的附加元素。
示例:
<!DOCTYPE html>
<html lang="en">
<head>
    <title>Bootstrap Card</title>
    <meta charset="utf-8">
    <meta name="viewport"
        content="width=device-width, initial-scale=1">
    <!-- Load Bootstrap -->
    <link rel="stylesheet" href=
"https://stackpath.bootstrapcdn.com/bootstrap/5.0.0-alpha1/css/bootstrap.min.css"
        integrity=
"sha384-r4NyP46KrjDleawBgD5tp8Y7UzmLA05oM1iAEQ17CSuDqnUK2+k9luXQOfXJCJ4I"
        crossorigin="anonymous">
    <script src=
"https://cdn.jsdelivr.net/npm/popper.js@1.16.0/dist/umd/popper.min.js"
        integrity=
"sha384-Q6E9RHvbIyZFJoft+2mJbHaEWldlvI9IOYy5n3zV9zzTtmI3UksdQRVvoxMfooAo"
        crossorigin="anonymous">
    </script>
    <script src=
"https://stackpath.bootstrapcdn.com/bootstrap/5.0.0-alpha1/js/bootstrap.min.js"
        integrity=
"sha384-oesi62hOLfzrys4LxRF63OJCXdXDipiYWBnvTl9Y9/TRlw5xlKIEHpNyvvDShgf/"
        crossorigin="anonymous">
    </script>
</head>
<body style="text-align: center;">
    <div class="container mt-3">
        <h1 style="color: green;">
            GeeksforGeeks
        </h1>
        <div class="container mt-3" style="width: 600px;">
            <div class="card-group">
                <div class="card" style="width: 200px;">
                    <div class="card-body">
                        <h4 class="card-title">
                            Developer Guy I
                        </h4>
                        <p class="card-text">
                            Developer Guy love to develop
                            front-end and back-end
                        </p>

                        <a href="#" class="btn btn-primary">
                            See Profile
                        </a>
                    </div>
                    <img class="card-img-bottom" src=
"https://media.geeksforgeeks.org/wp-content/cdn-uploads/20190530183756/Good-Habits-for-developers-programmers.png"
                        alt="Card image" style="width: 100%;">
                </div>
                <div class="card" style="width: 200px;">
                    <div class="card-body">
                        <h4 class="card-title">
                            Developer Guy II
                        </h4>
                        <p class="card-text">
                            Developer Guy love to develop
                            android apps
                        </p>

                        <a href="#" class="btn btn-primary">
                            See Profile
                        </a>
                    </div>
                    <img class="card-img-bottom" src=
"https://media.geeksforgeeks.org/wp-content/cdn-uploads/20190530183756/Good-Habits-for-developers-programmers.png"
                        alt="Card image" style="width: 100%;">
                </div>
                <div class="card" style="width: 200px;">
                    <div class="card-body">
                        <h4 class="card-title">
                            Developer Guy III
                        </h4>
                        <p class="card-text">
                            Developer Guy love to
                            develop machine learning models
                        </p>

                        <a href="#" class="btn btn-primary">
                            See Profile</a>
                    </div>
                    <img class="card-img-bottom" src=
"https://media.geeksforgeeks.org/wp-content/cdn-uploads/20190530183756/Good-Habits-for-developers-programmers.png"
                        alt="Card image" style="width: 100%;">
                </div>
            </div>
        </div>
    </div>
</body>
</html>
输出:
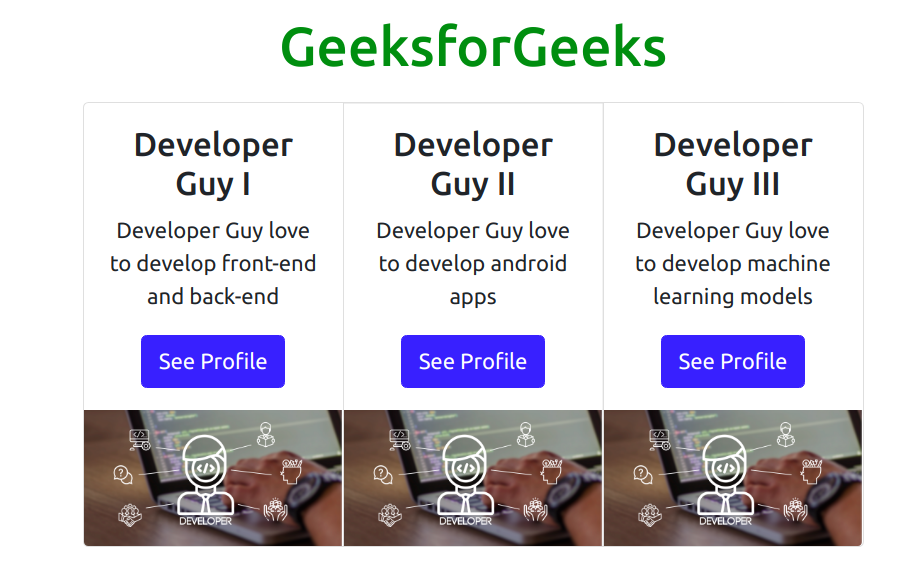
- 列表组。它在卡片中创建了一个内容的列表。
示例:
<html lang="en">
<head>
    <title>Bootstrap Card</title>
    <meta charset="utf-8">
    <meta name="viewport"
        content="width=device-width, initial-scale=1">
    <!-- Load Bootstrap -->
    <link rel="stylesheet" href=
"https://stackpath.bootstrapcdn.com/bootstrap/5.0.0-alpha1/css/bootstrap.min.css"
        integrity=
"sha384-r4NyP46KrjDleawBgD5tp8Y7UzmLA05oM1iAEQ17CSuDqnUK2+k9luXQOfXJCJ4I"
        crossorigin="anonymous">
    <script src=
"https://cdn.jsdelivr.net/npm/popper.js@1.16.0/dist/umd/popper.min.js"
        integrity=
"sha384-Q6E9RHvbIyZFJoft+2mJbHaEWldlvI9IOYy5n3zV9zzTtmI3UksdQRVvoxMfooAo"
        crossorigin="anonymous">
    </script>
    <script src=
"https://stackpath.bootstrapcdn.com/bootstrap/5.0.0-alpha1/js/bootstrap.min.js"
        integrity=
"sha384-oesi62hOLfzrys4LxRF63OJCXdXDipiYWBnvTl9Y9/TRlw5xlKIEHpNyvvDShgf/"
        crossorigin="anonymous">
    </script>
</head>
<body style="text-align: center;">
    <div class="container mt-3">
        <h1 style="color: green;">
            GeeksforGeeks
        </h1>
        <div class="container mt-3" style="width: 600px;">
            <div class="card">
                <ul class="list-group list-group-flush">
                    <li class="list-group-item">
                        Bootstrap
                    </li>
                    <li class="list-group-item">
                        HTML
                    </li>
                    <li class="list-group-item">
                        JavaScript
                    </li>
                </ul>
            </div>
        </div>
    </div>
</body>
</html>
输出:
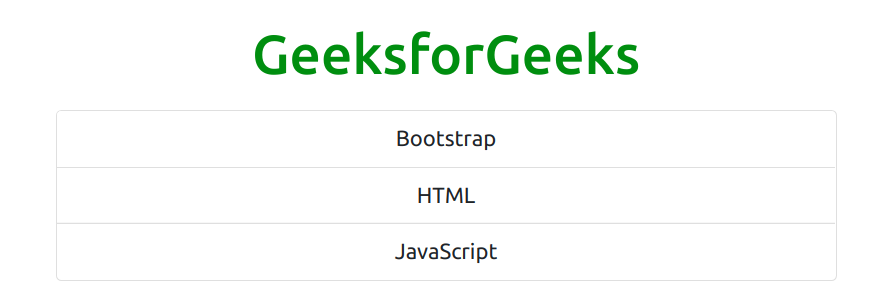
- Kitchen sink。这是一种由所有东西组成的卡片类型的名称,它是一种混合和匹配的多种内容,使你所需要的卡片。
-
Navigation。它在卡片上添加了一个导航栏。
示例:
<html lang="en">
<head>
    <title>Bootstrap Card</title>
    <meta charset="utf-8">
    <meta name="viewport"
        content="width=device-width, initial-scale=1">
    <!-- Load Bootstrap -->
    <link rel="stylesheet" href=
"https://stackpath.bootstrapcdn.com/bootstrap/5.0.0-alpha1/css/bootstrap.min.css"
        integrity=
"sha384-r4NyP46KrjDleawBgD5tp8Y7UzmLA05oM1iAEQ17CSuDqnUK2+k9luXQOfXJCJ4I"
        crossorigin="anonymous">
    <script src=
"https://cdn.jsdelivr.net/npm/popper.js@1.16.0/dist/umd/popper.min.js"
        integrity=
"sha384-Q6E9RHvbIyZFJoft+2mJbHaEWldlvI9IOYy5n3zV9zzTtmI3UksdQRVvoxMfooAo"
        crossorigin="anonymous">
    </script>
    <script src=
"https://stackpath.bootstrapcdn.com/bootstrap/5.0.0-alpha1/js/bootstrap.min.js"
        integrity=
"sha384-oesi62hOLfzrys4LxRF63OJCXdXDipiYWBnvTl9Y9/TRlw5xlKIEHpNyvvDShgf/"
        crossorigin="anonymous">
    </script>
</head>
<body style="text-align: center;">
    <div class="container mt-3">
        <h1 style="color: green;">
            GeeksforGeeks
        </h1>
        <div class="container mt-3" style="width: 600px;">
            <div class="card-text-center">
                <div class="card-header">
                    <ul class="nav nav-tabs card-header-tabs">
                        <li class="nav-item">
                            <a class="nav-link active" href="#">
                                Active
                            </a>
                        </li>
                        <li class="nav-item">
                            <a class="nav-link" href="#">
                                link
                            </a>
                        </li>
                        <li class="nav-item">
                            <a class="nav-link disabled" href="#">
                                Disabled
                            </a>
                        </li>
                    </ul>
                </div>
                <div class="card-block">
                    <h4 class="card-title">Title</h4>
                    <p class="card-text">
                        This the th test area
                    </p>

                    <a href="#" btn-btn-primary>
                        Click me
                    </a>
                </div>
            </div>
        </div>
    </div>
</body>
</html>
输出:
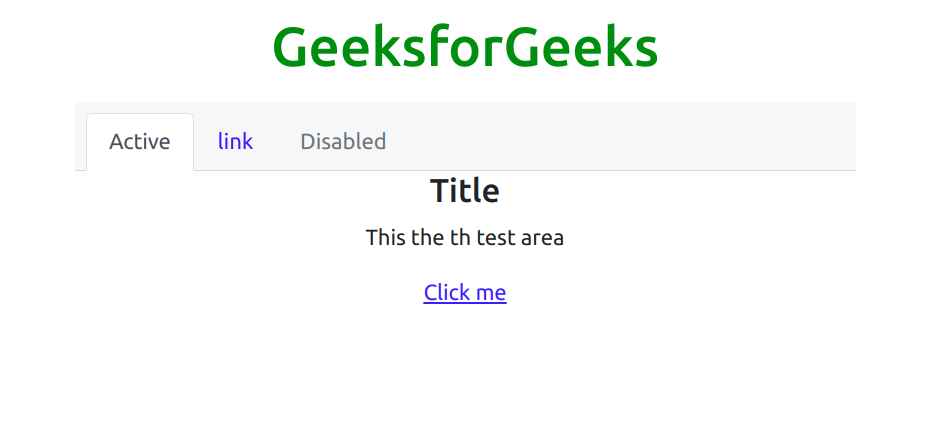
- 另一个以药丸形式出现的例子。
示例:
<html lang="en">
<head>
    <title>Bootstrap Card</title>
    <meta charset="utf-8">
    <meta name="viewport"
        content="width=device-width, initial-scale=1">
    <!-- Load Bootstrap -->
    <link rel="stylesheet" href=
"https://stackpath.bootstrapcdn.com/bootstrap/5.0.0-alpha1/css/bootstrap.min.css"
        integrity=
"sha384-r4NyP46KrjDleawBgD5tp8Y7UzmLA05oM1iAEQ17CSuDqnUK2+k9luXQOfXJCJ4I"
        crossorigin="anonymous">
    <script src=
"https://cdn.jsdelivr.net/npm/popper.js@1.16.0/dist/umd/popper.min.js"
        integrity=
"sha384-Q6E9RHvbIyZFJoft+2mJbHaEWldlvI9IOYy5n3zV9zzTtmI3UksdQRVvoxMfooAo"
        crossorigin="anonymous">
    </script>
    <script src=
"https://stackpath.bootstrapcdn.com/bootstrap/5.0.0-alpha1/js/bootstrap.min.js"
        integrity=
"sha384-oesi62hOLfzrys4LxRF63OJCXdXDipiYWBnvTl9Y9/TRlw5xlKIEHpNyvvDShgf/"
        crossorigin="anonymous">
    </script>
</head>
<body style="text-align: center;">
    <div class="container mt-3">
        <h1 style="color: green;">
            GeeksforGeeks
        </h1>
        <div class="container mt-3" style="width: 600px;">
            <div class="card-text-center">
                <div class="card-header">
                    <ul class="nav nav-pills card-header-tabs">
                        <li class="nav-item">
                            <a class="nav-link active" href="#">
                                Active
                            </a>
                        </li>
                        <li class="nav-item">
                            <a class="nav-link" href="#">
                                link
                            </a>
                        </li>
                        <li class="nav-item">
                            <a class="nav-link disabled" href="#">
                                Disabled
                            </a>
                        </li>
                    </ul>
                </div>
                <div class="card-block">
                    <h4 class="card-title">Title</h4>
                    <p class="card-text">
                        This the th test area
                    </p>

                    <a href="#" btn-btn-primary>
                        Click me
                    </a>
                </div>
            </div>
        </div>
    </div>
</body>
</html>
输出:
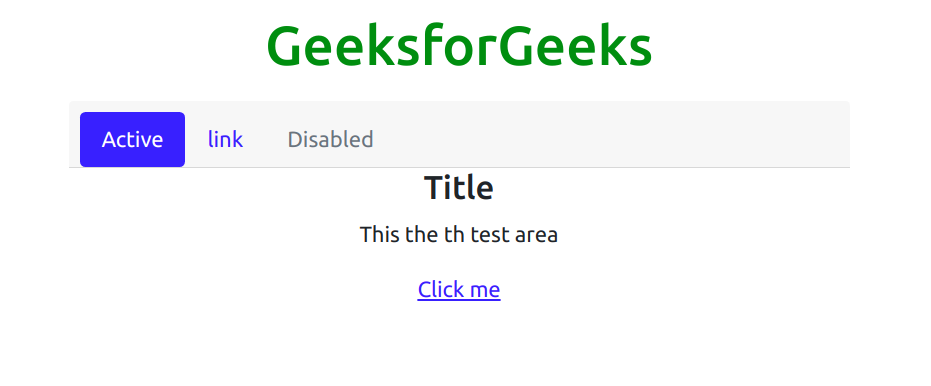
卡片中的文字排列:
我们可以使用Bootstrap的Bootstrap文本对齐类,轻松改变Bootstrap中任何卡片或卡片的特定部分的文本对齐。
下面是一个代码例子,显示了我们必须使用text-align类来改变整个卡片或卡片的特定部分的对齐方式。
Horizontal Card:
使用网格类工具,我们可以创建一个卡片,卡片图片和卡片主体是水平放置的,而不是使用网格工具类垂直放置的。这个功能也是移动友好的,也是对响应式网站有用的。
这里有一个代码例子,我们创建了一个样本卡片,其中图片和卡片正文文字是水平放置的。
代码:
<html lang="en">
<head>
    <title>Bootstrap Card</title>
    <meta charset="utf-8" >
    <meta name="viewport"
        content="width=device-width, initial-scale=1">
    <!--  Bootstrap CSS -->
    <link rel="stylesheet" href=
"https://stackpath.bootstrapcdn.com/bootstrap/5.0.0-alpha1/css/bootstrap.min.css"
        integrity=
"sha384-r4NyP46KrjDleawBgD5tp8Y7UzmLA05oM1iAEQ17CSuDqnUK2+k9luXQOfXJCJ4I"
        crossorigin="anonymous">
<!-- Bootstrap JS -->
    <script src=
"https://cdn.jsdelivr.net/npm/popper.js@1.16.0/dist/umd/popper.min.js"
        integrity=
    "sha384-Q6E9RHvbIyZFJoft+2mJbHaEWldlvI9IOYy5n3zV9zzTtmI3UksdQRVvoxMfooAo"
        crossorigin="anonymous">
    </script>
    <script src=
"https://stackpath.bootstrapcdn.com/bootstrap/5.0.0-alpha1/js/bootstrap.min.js"
        integrity=
"sha384-oesi62hOLfzrys4LxRF63OJCXdXDipiYWBnvTl9Y9/TRlw5xlKIEHpNyvvDShgf/"
        crossorigin="anonymous">
    </script>
</head>
<body>
    <div class="container mt-3">
        <h1 style="color: green; text-align: center;">
            GeeksforGeeks
        </h1>
    </div>
    <div class="card mb-2" style="max-width: 540px;">
        <div class="row g-0">
            <div class="col-md-6">
                <img src="gfg.jpg" class="img-fluid rounded-start"
                    alt="...">
            </div>
            <div class="col-md-6">
                <div class="card-body">
                    <h5 class="card-title">
                        Card title
                    </h5>
                    <p class="card-text">
                        The card body and the card image
                        is placed horizontally.
                    </p>

                </div>
            </div>
        </div>
    </div>
</body>
</html>
输出:

改变卡片的颜色:
我们可以使用Bootstrap中的背景实用类和文本颜色类来改变卡片的颜色。
语法:
<div class="card text-white bg-primary"></div>
代码:
<html lang="en">
<head>
    <title>Bootstrap Card</title>
    <meta charset="utf-8">
    <meta name="viewport"
        content="width=device-width, initial-scale=1">
    <!--  Bootstrap CSS -->
    <link rel="stylesheet" href=
"https://stackpath.bootstrapcdn.com/bootstrap/5.0.0-alpha1/css/bootstrap.min.css"
        integrity=
"sha384-r4NyP46KrjDleawBgD5tp8Y7UzmLA05oM1iAEQ17CSuDqnUK2+k9luXQOfXJCJ4I"
        crossorigin="anonymous">
    <!-- Bootstrap JS -->
    <script src=
"https://cdn.jsdelivr.net/npm/popper.js@1.16.0/dist/umd/popper.min.js"
        integrity=
"sha384-Q6E9RHvbIyZFJoft+2mJbHaEWldlvI9IOYy5n3zV9zzTtmI3UksdQRVvoxMfooAo"
        crossorigin="anonymous">
    </script>
    <script src=
"https://stackpath.bootstrapcdn.com/bootstrap/5.0.0-alpha1/js/bootstrap.min.js"
        integrity=
"sha384-oesi62hOLfzrys4LxRF63OJCXdXDipiYWBnvTl9Y9/TRlw5xlKIEHpNyvvDShgf/"
        crossorigin="anonymous">
    </script>
</head>
<body>
    <div class="container mt-3">
        <h1 style="color: green; text-align: center;">
            GeeksforGeeks
        </h1>
    </div>
    <div class="card text-white bg-primary mb-3"
        style="max-width: 18rem;">
        <div class="card-header">
            This is the card header
        </div>
        <div class="card-body">
            <h5 class="card-title">
                This is card title
            </h5>
            <p class="card-text">
                This is the body of the card
                made using Bootstrap Classes.
            </p>

        </div>
    </div>
    <div class="card text-white bg-secondary mb-3"
        style="max-width: 18rem;">
        <div class="card-header">
            This is the card header
        </div>
        <div class="card-body">
            <h5 class="card-title">
                This is card title
            </h5>
            <p class="card-text">
                This is the body of the card
                made using Bootstrap Classes.
            </p>

        </div>
    </div>
    <div class="card text-white bg-success mb-3"
        style="max-width: 18rem;">
        <div class="card-header">
            This is the card header
        </div>
        <div class="card-body">
            <h5 class="card-title">
                This is card title
            </h5>
            <p class="card-text">
                This is the body of the card
                made using Bootstrap Classes.
            </p>

        </div>
    </div>
    <div class="card text-white bg-danger mb-3"
        style="max-width: 18rem;">
        <div class="card-header">
            This is the card header
        </div>
        <div class="card-body">
            <h5 class="card-title">
                This is card title
            </h5>
            <p class="card-text">
                This is the body of the card
                made using Bootstrap Classes.
            </p>

        </div>
    </div>
</body>
</html>
输出:
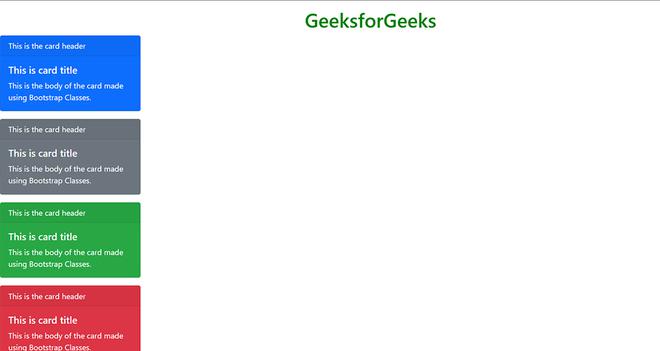
在卡片上添加边框:
我们可以使用Bootstrap框架中的border-utilities类为卡片添加边框,比如border-primary、border-success、border-danger等等。
语法:
<div class="card border-primary"></div>
Full 代码:
<html lang="en">
<head>
    <title>Bootstrap Card</title>
    <meta charset="utf-8">
    <meta name="viewport"
        content="width=device-width, initial-scale=1">
    <!--  Bootstrap CSS -->
    <link rel="stylesheet" href=
"https://stackpath.bootstrapcdn.com/bootstrap/5.0.0-alpha1/css/bootstrap.min.css"
        integrity=
"sha384-r4NyP46KrjDleawBgD5tp8Y7UzmLA05oM1iAEQ17CSuDqnUK2+k9luXQOfXJCJ4I"
        crossorigin="anonymous">
    <!-- Bootstrap JS -->
    <script src=
"https://cdn.jsdelivr.net/npm/popper.js@1.16.0/dist/umd/popper.min.js"
        integrity=
"sha384-Q6E9RHvbIyZFJoft+2mJbHaEWldlvI9IOYy5n3zV9zzTtmI3UksdQRVvoxMfooAo"
        crossorigin="anonymous">
    </script>
    <script src=
"https://stackpath.bootstrapcdn.com/bootstrap/5.0.0-alpha1/js/bootstrap.min.js"
        integrity=
"sha384-oesi62hOLfzrys4LxRF63OJCXdXDipiYWBnvTl9Y9/TRlw5xlKIEHpNyvvDShgf/"
        crossorigin="anonymous">
    </script>
</head>

<body>
    <div class="container mt-3">
        <h1 style="color: green; text-align: center;">
            GeeksforGeeks
        </h1>
    </div>
    <div class="card border-primary text-primary mb-3"
        style="max-width: 18rem;">
        <div class="card-header">
            This is the card header
        </div>
        <div class="card-body">
            <h5 class="card-title">
                This is card title
            </h5>
            <p class="card-text">
                This is the body of the card
                made using Bootstrap Classes.
            </p>

        </div>
    </div>
    <div class="card text-success border-success mb-3"
        style="max-width: 18rem;">
        <div class="card-header">
            This is the card header
        </div>
        <div class="card-body">
            <h5 class="card-title">
                This is card title
            </h5>
            <p class="card-text">
                This is the body of the card
                made using Bootstrap Classes.
            </p>

        </div>
    </div>
    <div class="card text-secondary border-secondary mb-3"
        style="max-width: 18rem;">
        <div class="card-header">
            This is the card header
        </div>
        <div class="card-body">
            <h5 class="card-title">
                This is card title
            </h5>
            <p class="card-text">
                This is the body of the card
                made using Bootstrap Classes.
            </p>

        </div>
    </div>
    <div class="card text-danger border-danger mb-3"
        style="max-width: 18rem;">
        <div class="card-header">
            This is the card header
        </div>
        <div class="card-body">
            <h5 class="card-title">
                This is card title
            </h5>
            <p class="card-text">
                This is the body of the card
                made using Bootstrap Classes.
            </p>

        </div>
    </div>
</body>
</html>
输出:
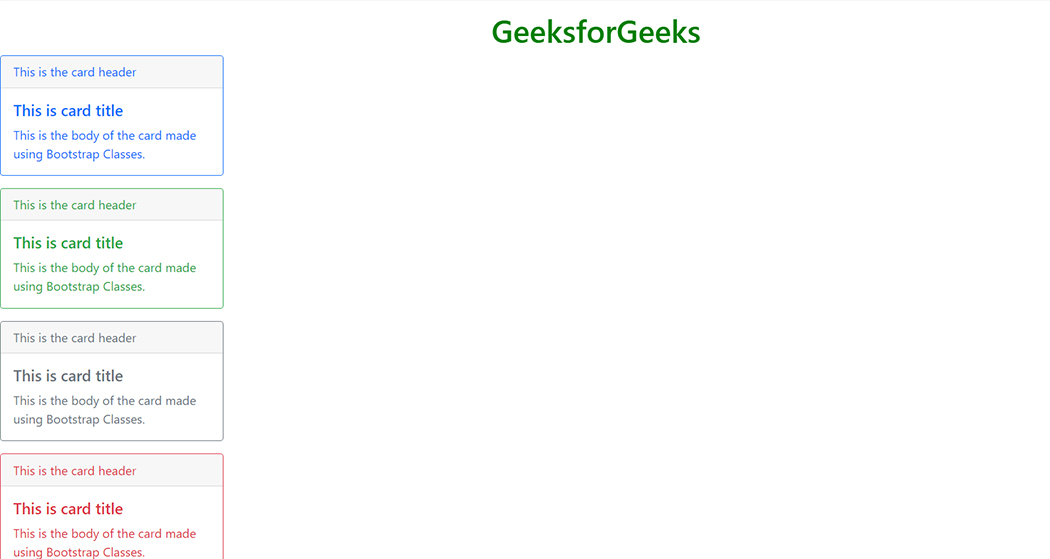
支持的浏览器:
- Google Chrome
- Mozilla Firefox
- Safari
- Brave Browsers
- Opera
 极客教程
极客教程