matplotlib.axes.axes.csd()
matplotlib.axes.axes.csd()函数,使用matplotlib库的axis模块中的Axes.csd()函数来绘制交叉光谱密度图。
语法:
Axes.csd(self, x, y, NFFT=None, Fs=None, Fc=None, detrend=None, window=None, noverlap=None, pad_to=None, sides=None, scale_by_freq=None, return_line=None, *, data=None, **kwargs)
参数:该方法接受如下参数说明:
- x, y:这些参数是数据序列。
- Fs:标量。默认值为2。
- window:该参数接受一个数据段作为参数,并返回该段的窗口版本。其默认值是window_hanning()
- sides:该参数指定返回频谱的哪一边。它可以有以下值:’ default ‘, ‘ onesided ‘和’ twosided ‘。
- pad_to:该参数包含填充数据段的整数值。
- NFFT:该参数包含用于FFT的每个块的数据点的数量。
- detrend:该参数包含在fft-ing之前应用于每个分段的函数,旨在去除平均值或线性趋势{‘ none ‘, ‘ mean ‘, ‘ linear ‘}。
- scale_by_freq:该参数允许对返回的频率值进行集成。
- noverlap:该参数表示块之间的重叠点数量。
- Fc: x的中心频率。
- return_line:该参数包括在返回值中绘制的line对象。
返回如下内容:
- Pxy:返回缩放前的交叉谱P_{xy}的值。
- freqs:返回Pxy中元素的频率。
- line:返回由该函数创建的行。
结果是(Pxy, freqs, line)
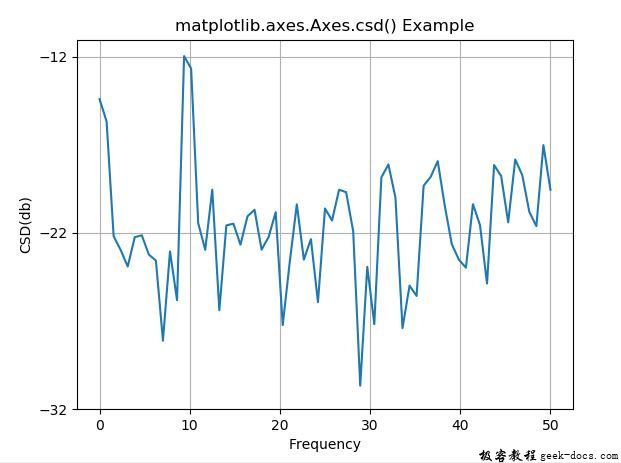
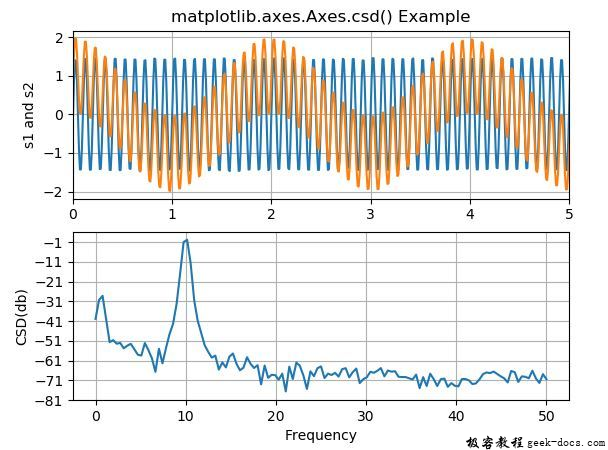
下面的例子演示了matplotlib.axes中的matplotlib.axes.csd()函数:
示例1
# Implementation of matplotlib function
import numpy as np
import matplotlib.pyplot as plt

dt = 0.01
t = np.arange(0, 30, dt)
nse1 = np.random.randn(len(t))
nse2 = np.random.randn(len(t))

s1 = 1.5 * np.sin(2 * np.pi * 10 * t) + nse1
s2 = np.cos(np.pi * t) + nse2

fig, ax1 = plt.subplots()
ax1.csd(s1, s2**2, 128, 1./dt)
ax1.set_xlabel('Frequency')
ax1.set_ylabel('CSD(db)')

ax1.set_title('matplotlib.axes.Axes.csd() Example')
plt.show()
输出:

示例2
# Implementation of matplotlib function
import numpy as np
import matplotlib.pyplot as plt

dt = 0.01
t = np.arange(0, 30, dt)
nse1 = np.random.randn(len(t))
nse2 = np.random.randn(len(t))
r = np.exp(-t / 0.05)

cnse1 = np.convolve(nse1, r, mode ='same')*dt
cnse2 = np.convolve(nse2, r, mode ='same')*dt

s1 = 1.5 * np.sin(2 * np.pi * 10 * t) + cnse1
s2 = np.cos(np.pi * t) + cnse2 + np.sin(2 * np.pi * 10 * t)

fig, [ax1, ax2] = plt.subplots(2, 1)
ax1.plot(t, s1, t, s2)
ax1.set_xlim(0, 5)
ax1.set_ylabel('s1 and s2')
ax1.grid(True)

ax2.csd(s1, s2, 256, 1./dt)
ax2.set_ylabel('CSD(db)')
ax2.set_xlabel('Frequency')

ax1.set_title('matplotlib.axes.Axes.csd() Example')
plt.show()
输出:

 极客教程
极客教程