Bootstrap 4中使用的不同类型的图像形状和角部
在这篇文章中,我们将学习如何使用Bootstrap制作不同的图片形状,并通过实例了解其实现。Bootstrap为图像提供了不同的类,以使它们的外观更好,同时也使它们具有响应性。使图像具有响应性意味着它应该根据其父元素进行缩放。也就是说,图像的大小不应溢出其父元素,而是根据其父元素的大小变化而增长或缩小,同时不失去其长宽比。我们将讨论Bootstrap中为图像提供的不同类别。
在Bootstrap 4中,图像是用<img>标签以不同的形状和角显示的。这些形状和边角可以用类来实现。下面给出了bootstrap中可用于图像的不同形状和角落。
- Rounded Corners
- Circle
- Thumbnail
- Aligning Image
在这里,我们使用了Bootstrap 4的CDN链接,可以很容易地从他们的官方网站上获得。
Bootstrap CDN链接:
复制并粘贴给定的样式表<link>在<head>标签内,在所有其他CSS文件之前加载。
<link rel=”stylesheet” href=”https://maxcdn.bootstrapcdn.com/bootstrap/4.5.2/css/bootstrap.min.css”>
为了使用Javascript功能,我们可以使用下面的CDN链接来实现Javascript。
<script src=”https://ajax.googleapis.com/ajax/libs/jquery/3.5.1/jquery.min.js”></script>
<script src=”https://cdnjs.cloudflare.com/ajax/libs/popper.js/1.16.0/umd/popper.min.js”></script>
<script src=”https://maxcdn.bootstrapcdn.com/bootstrap/4.5.2/js/bootstrap.min.js”></script>
我们将利用上述CDN链接来实现它,以制作不同形状的图像。
圆角:在圆角中,显示的图像将有其圆角。.rounded类将圆角添加到图像中。这个类与<img> 标签一起使用。
语法:
<img src="image_source" class="rounded" alt="description">
例子1:这个例子说明了Bootstrap中.rounded类的使用。
<!DOCTYPE html>
<html lang="en">

<head>
    <title>Bootstrap Example</title>
    <meta charset="utf-8" />
    <meta name="viewport" content=
        "width=device-width, initial-scale=1" />
    <link rel="stylesheet" href=
"https://maxcdn.bootstrapcdn.com/bootstrap/4.5.2/css/bootstrap.min.css" />
</head>

<body>
    <center>
        <h1 class="text-success">GeeksForGeeks</h1>
        <h4 class="text-secondary">Rounded Corners</h4>
        <img src=
"https://media.geeksforgeeks.org/wp-content/uploads/20211006064408/1.png"
            class="rounded" alt="GFG"
            width="150" height="150" />
    </center>
</body>

</html>
输出 。在输出中显示的图像边角是圆的。

圆形: .rounded-circle类用于创建圆形的图像。
语法:
<img src="image_source" class="rounded-circle" alt="description">
例子2:这个例子说明了Bootstrap中.rounded-circle类的使用。
<!DOCTYPE html>
<html lang="en">

<head>
    <title>Bootstrap Example</title>
    <meta charset="utf-8" />
    <meta name="viewport" content=
        "width=device-width, initial-scale=1" />
    <link rel="stylesheet" href=
"https://maxcdn.bootstrapcdn.com/bootstrap/4.5.2/css/bootstrap.min.css" />
</head>

<body>
    <center>
        <h2 class="text-success">
            GeeksForGeeks
        </h2>

        <h4 class="text-secondary">
            Circle Image
        </h4>
        <img src=
"https://media.geeksforgeeks.org/wp-content/uploads/20211006064408/1.png"
            class="rounded-circle" alt="GFG"
            width="150" height="150" />
    </center>
</body>

</html>
输出:图像显示在输出中,是一个圆形图像。

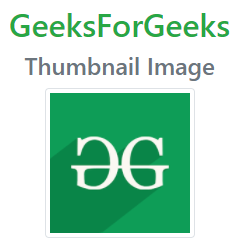
缩略图: 缩略图是一个小的图像,代表一个较大的图像。.img-thumbnail类是用来创建缩略图(有边框)的图像。
语法:
<img src="image_source" class="img-thumbnail"
                        alt="description">
示例3:这个例子说明了Bootstrap中.img-thumbnail类的使用。
<!DOCTYPE html>
<html lang="en">

<head>
    <title>Bootstrap Example</title>
    <meta charset="utf-8" />
    <meta name="viewport" content=
        "width=device-width, initial-scale=1" />
    <link rel="stylesheet" href=
"https://maxcdn.bootstrapcdn.com/bootstrap/4.5.2/css/bootstrap.min.css" />
</head>

<body>
    <center>
        <h2 class="text-success">
            GeeksForGeeks
        </h2>

        <h4 class="text-secondary">
            Thumbnail Image
        </h4>

        <img src=
"https://media.geeksforgeeks.org/wp-content/uploads/20211006064408/1.png"
            class="img-thumbnail" alt="GFG"
            width="150" height="150" />
    </center>
</body>

</html>
输出:显示的图像被一个边框所包围。

对准图像:它用于对准图像的左和右。.float-left和.float-right类是用来设置图像的左右对齐的。
语法:
<img src="image_source" class="float-left/float-right"
                        alt="description">
示例4:本例说明了.float-left或.float-right类的使用,该类将用于设置Bootstrap中图片的左右对齐。
<!DOCTYPE html>
<html lang="en">

<head>
    <title>Bootstrap Example</title>
    <meta charset="utf-8" />
    <meta name="viewport" content=
        "width=device-width, initial-scale=1" />
    <link rel="stylesheet" href=
"https://maxcdn.bootstrapcdn.com/bootstrap/4.5.2/css/bootstrap.min.css" />
</head>

<body>
    <center>
        <h2 class="text-success">
            GeeksForGeeks
        </h2>

        <h4 class="text-secondary">
            Aligning Image
        </h4>

        <img src=
"https://media.geeksforgeeks.org/wp-content/uploads/20211006064408/1.png"
            class="float-left" alt="GFG"
            width="200" height="200" />

        <img src=
"https://media.geeksforgeeks.org/wp-content/uploads/20211006064408/1.png"
            class="float-right" alt="GFG"
            width="200" height="200" />
    </center>
</body>

</html>
输出:从输出来看,一个图像在左边对齐,另一个在右边对齐。

 极客教程
极客教程