解释一下Bootstrap中的Affix插件
Bootstrap中的affix插件允许我们将一个元素固定或稳定在网页上的特定位置或区域。它主要用于导航条,使其固定或锁定在页面顶部,这样如果用户向下滚动页面,导航条对他来说仍然是可见的,用户可以点击任何导航条链接。
如何使用Affix插件:
- data-spy属性。将data-spy=”affix “添加到你想使用Affix插件的元素中。
- data-offset-top|bottom。添加此属性以获得滚动的位置。
语法:
 <nav data-spy="affix" data-offset-bottom="250">
     //content of the element
 </nav>
Affix插件如何工作:
- Affix插件主要由三个类组成:.affix, .affix-top, .affix-bottom。
- .affix-top: affix-top类用于指定元素在页面顶部的初始位置,然后如果用户开始向下滚动页面,.affix-top类将被.affix类取代,使元素固定或锁定在其初始位置。.affix类使用CSS的position: fixed属性来使元素固定在其位置上。
- .affix-bottom : .affix-bottom类用于指定元素在页面底部的初始位置,然后如果用户向下滚动页面,它将被.affix类取代,元素将被固定在给定的初始位置。
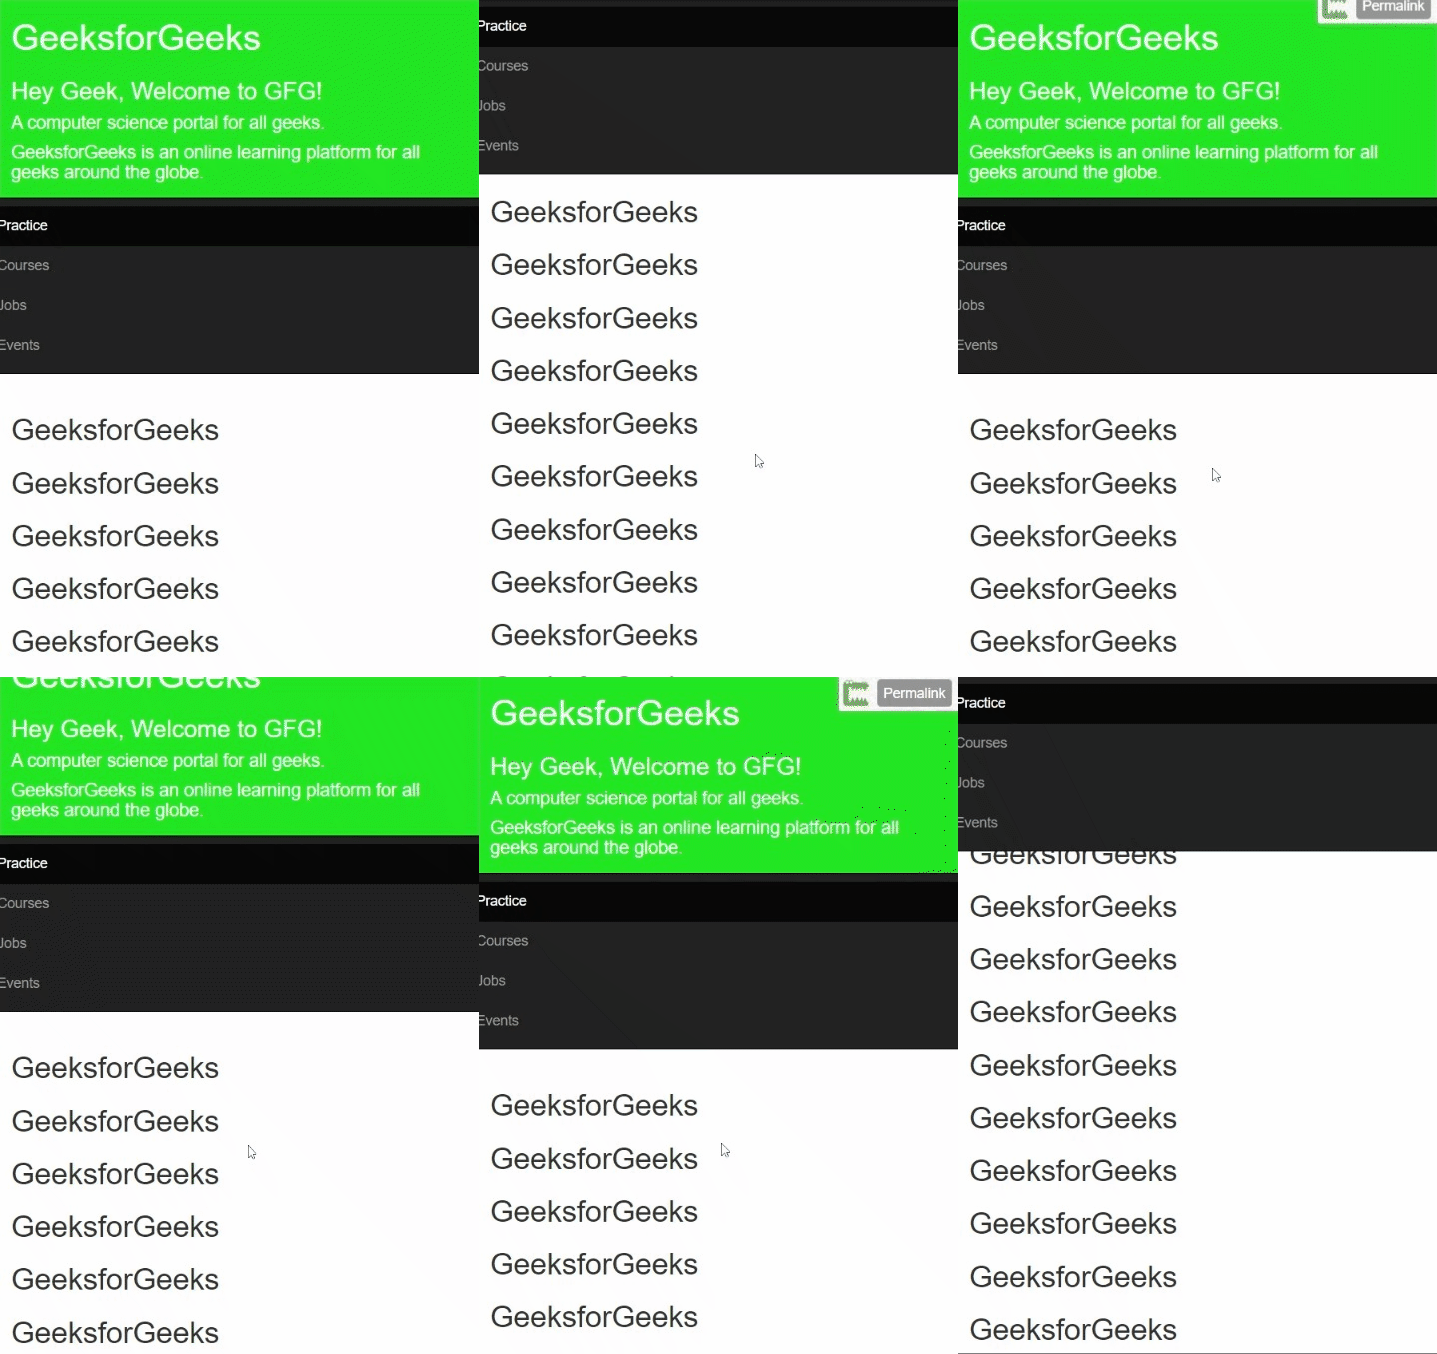
例子1:在这个例子中,我们将通过使用affix插件修复导航条。
<!DOCTYPE html>
<html>
<head>
    <title>Bootstrap Affix plugin</title>
    <meta charset="utf-8">
    <meta name="viewport"
        content="width=device-width, initial-scale=1">
    <link rel="stylesheet" href=
"https://maxcdn.bootstrapcdn.com/bootstrap/3.4.1/css/bootstrap.min.css">
    <script src=
"https://ajax.googleapis.com/ajax/libs/jquery/3.6.0/jquery.min.js">
    </script>
    <script src=
"https://maxcdn.bootstrapcdn.com/bootstrap/3.4.1/js/bootstrap.min.js">
    </script>
    <style>
        .affix {
            top: 0;
            width: 100%;
            z-index: 9999 !important;
        }
        .affix+.container-fluid {
            padding-top: 70px;
        }
    </style>
</head>
<body>
    <div class="container-fluid"
        style="background-color:#24e724;color:#fff;height:200px;">
        <h1>GeeksforGeeks</h1>
        <h3>Hey Geek, Welcome to GFG!</h3>
        <h4>A computer science portal for all geeks.</h4>
        <h4>
            GeeksforGeeks is an online learning
            platform for all geeks around the globe.
        </h4>
    </div>
    <nav class="navbar navbar-inverse" data-spy="affix"
        data-offset-top="197">
        <ul class="nav navbar-nav">
            <li class="active"><a href="#">Practice</a></li>
            <li><a href="#">Courses</a></li>
            <li><a href="#">Jobs</a></li>
            <li><a href="#">Events</a></li>
        </ul>
    </nav>
    <div class="container-fluid" style="height:100vh">
        <h2>GeeksforGeeks</h2>
        <h2>GeeksforGeeks</h2>
        <h2>GeeksforGeeks</h2>
        <h2>GeeksforGeeks</h2>
        <h2>GeeksforGeeks</h2>
        <h2>GeeksforGeeks</h2>
        <h2>GeeksforGeeks</h2>
        <h2>GeeksforGeeks</h2>
        <h2>GeeksforGeeks</h2>
        <h2>GeeksforGeeks</h2>
        <h2>GeeksforGeeks</h2>
        <h2>GeeksforGeeks</h2>
        <h2>GeeksforGeeks</h2>
        <h2>GeeksforGeeks</h2>
        <h2>GeeksforGeeks</h2>
    </div>
</body>
</html>
输出:

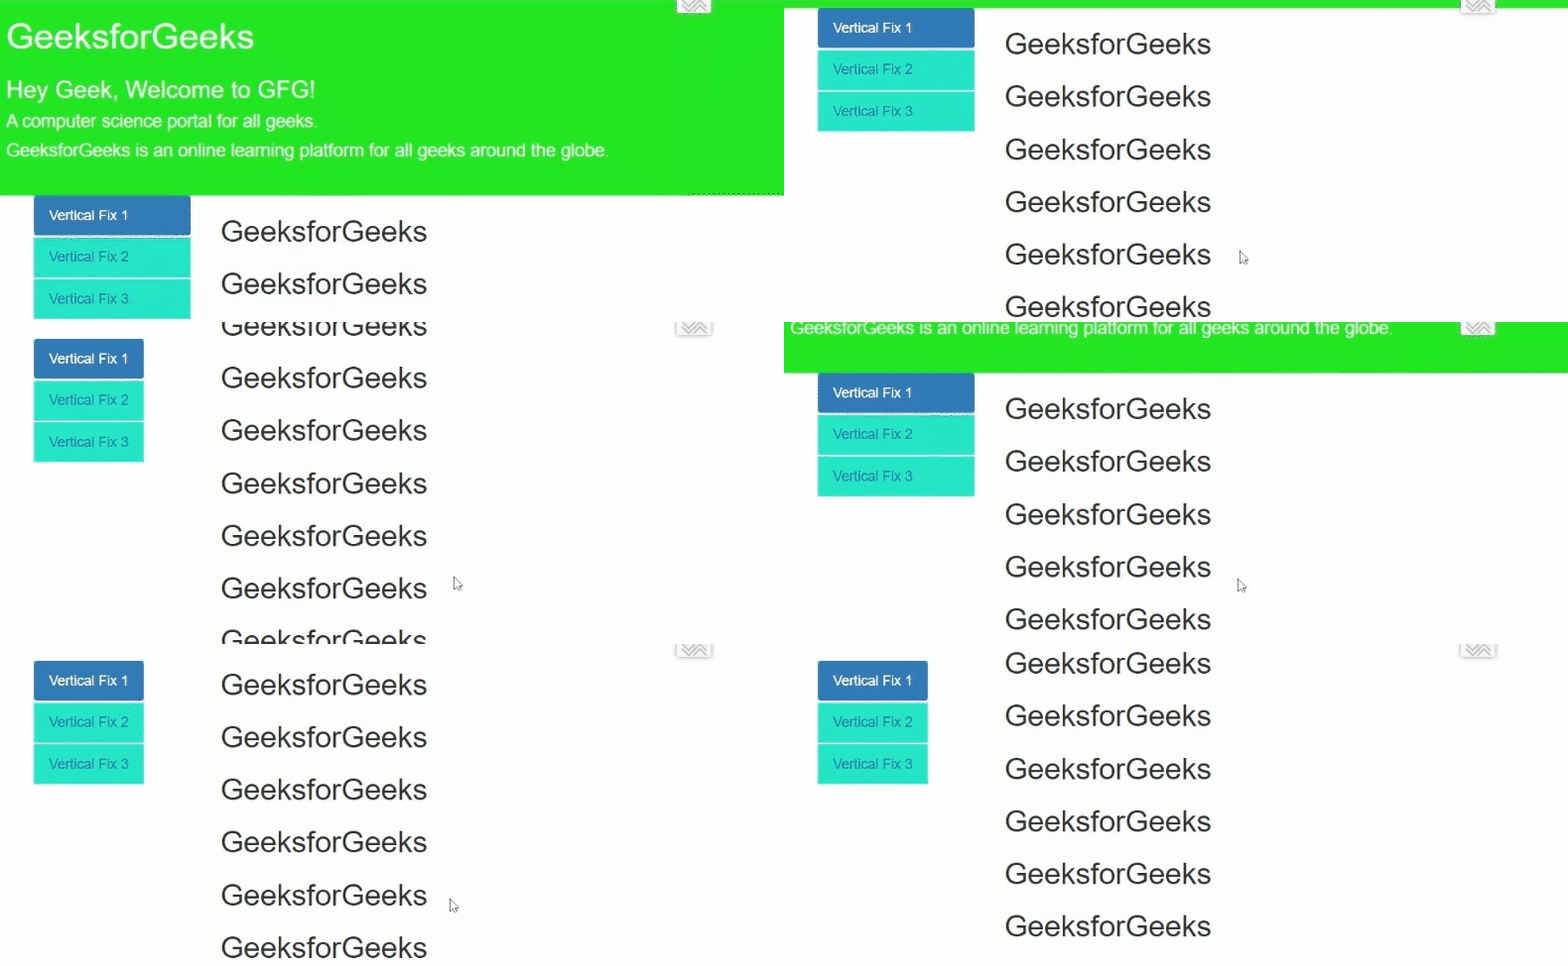
例子2:在这个例子中,我们将通过使用affix插件来修复响应式导航条。
<!DOCTYPE html>
<html>
<head>
    <title>Bootstrap Affix Plugin</title>
    <meta charset="utf-8">
    <meta name="viewport"
        content="width=device-width, initial-scale=1">
    <link rel="stylesheet" href=
"https://maxcdn.bootstrapcdn.com/bootstrap/3.4.1/css/bootstrap.min.css">
    <script src=
"https://ajax.googleapis.com/ajax/libs/jquery/3.6.0/jquery.min.js">
    </script>
    <script src=
"https://maxcdn.bootstrapcdn.com/bootstrap/3.4.1/js/bootstrap.min.js">
    </script>
    <style>
        .affix {
            top: 20px;
            z-index: 9999 !important;
        }
    </style>
</head>
<body>
    <div class="container-fluid"
        style="background-color:#24e724;color:#fff;height:200px;">
        <h1>GeeksforGeeks</h1>
        <h3>Hey Geek, Welcome to GFG!</h3>
        <h4>A computer science portal for all geeks.</h4>
        <h4>
            GeeksforGeeks is an online learning
            platform for all geeks around the globe.
        </h4>
    </div>
    <div class="container">
        <div class="row">
            <nav class="col-sm-3">
                <ul class="nav nav-pills nav-stacked"
                    data-spy="affix" data-offset-top="205">
                    <li style="background-color: #24e7c7;color:#fff;"
                        class="active">
                        <a href=" #section1">Vertical Fix 1</a>
                    </li>
                    <li style="background-color: #24e7c7;color:#fff;">
                        <a href="#section2">Vertical Fix 2</a>
                    </li>
                    <li style="background-color: #24e7c7;color:#fff;">
                        <a href=" #section3">Vertical Fix 3</a>
                    </li>
                </ul>
            </nav>
            <div class="col-sm-9">
                <h2>GeeksforGeeks</h2>
                <h2>GeeksforGeeks</h2>
                <h2>GeeksforGeeks</h2>
                <h2>GeeksforGeeks</h2>
                <h2>GeeksforGeeks</h2>
                <h2>GeeksforGeeks</h2>
                <h2>GeeksforGeeks</h2>
                <h2>GeeksforGeeks</h2>
                <h2>GeeksforGeeks</h2>
                <h2>GeeksforGeeks</h2>
                <h2>GeeksforGeeks</h2>
                <h2>GeeksforGeeks</h2>
                <h2>GeeksforGeeks</h2>
                <h2>GeeksforGeeks</h2>
                <h2>GeeksforGeeks</h2>
            </div>
        </div>
    </div>
</body>
</html>
输出:

 极客教程
极客教程