Matplotlib中的axis.Axis.limit_range_for_scale()函数详解与应用
参考:Matplotlib.axis.Axis.limit_range_for_scale() function in Python
Matplotlib是Python中最流行的数据可视化库之一,它提供了丰富的绘图功能和灵活的自定义选项。在Matplotlib中,axis.Axis.limit_range_for_scale()函数是一个重要的工具,用于调整坐标轴的范围以适应特定的比例尺。本文将深入探讨这个函数的用法、参数和应用场景,并通过多个示例来展示其在实际绘图中的作用。
1. 函数概述
limit_range_for_scale()函数属于Matplotlib的axis.Axis类,它的主要作用是根据当前的比例尺(scale)来调整坐标轴的范围。这个函数通常在内部被Matplotlib自动调用,但了解它的工作原理对于理解和控制图表的显示范围非常有帮助。
函数签名如下:
Axis.limit_range_for_scale(vmin, vmax)
其中,vmin和vmax分别表示坐标轴的最小值和最大值。
2. 函数参数详解
vmin:坐标轴的最小值vmax:坐标轴的最大值
这两个参数定义了坐标轴的初始范围。函数会根据当前的比例尺对这个范围进行调整,并返回调整后的新范围。
3. 函数的工作原理
limit_range_for_scale()函数的工作原理如下:
- 接收初始的坐标轴范围(vmin, vmax)
- 根据当前的比例尺(如线性、对数、对称对数等)检查这个范围是否合适
- 如果范围不合适,则进行调整
- 返回调整后的新范围
这个过程确保了坐标轴的范围与所选的比例尺相兼容,从而避免了一些常见的显示问题,如对数刻度上的负值或零值。
4. 应用场景
limit_range_for_scale()函数在以下场景中特别有用:
- 使用对数刻度时,自动调整范围以避免负值或零值
- 在对称对数刻度中,确保正负值的平衡显示
- 在自定义比例尺中,根据特定需求调整范围
5. 示例代码与解释
5.1 基本使用示例
让我们从一个简单的例子开始,展示如何在线性刻度下使用limit_range_for_scale()函数:
import matplotlib.pyplot as plt
import numpy as np

fig, ax = plt.subplots()

# 生成数据
x = np.linspace(0, 10, 100)
y = np.sin(x)

# 绘制曲线
ax.plot(x, y, label='Sine wave from how2matplotlib.com')

# 获取当前的x轴范围
xmin, xmax = ax.get_xlim()

# 使用limit_range_for_scale()调整范围
new_xmin, new_xmax = ax.xaxis.limit_range_for_scale(xmin, xmax)

# 设置新的x轴范围
ax.set_xlim(new_xmin, new_xmax)

ax.set_title('Using limit_range_for_scale() on Linear Scale')
ax.legend()
plt.show()
Output:
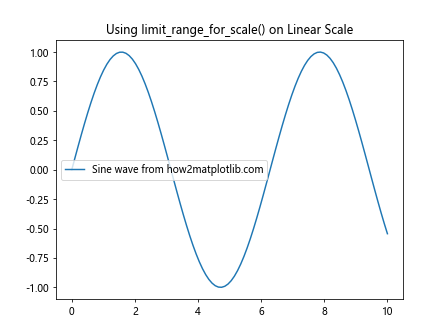
在这个例子中,我们首先绘制了一个正弦波。然后,我们获取当前的x轴范围,并使用limit_range_for_scale()函数来调整这个范围。最后,我们将调整后的范围应用到x轴上。由于这是线性刻度,调整可能不会产生明显的变化,但这个过程展示了函数的基本用法。
5.2 对数刻度示例
对数刻度是limit_range_for_scale()函数发挥作用的典型场景:
import matplotlib.pyplot as plt
import numpy as np

fig, ax = plt.subplots()

# 生成数据
x = np.logspace(0, 5, 100)
y = x**2

# 绘制曲线
ax.plot(x, y, label='Quadratic function from how2matplotlib.com')

# 设置对数刻度
ax.set_xscale('log')
ax.set_yscale('log')

# 获取当前的y轴范围
ymin, ymax = ax.get_ylim()

# 使用limit_range_for_scale()调整范围
new_ymin, new_ymax = ax.yaxis.limit_range_for_scale(ymin, ymax)

# 设置新的y轴范围
ax.set_ylim(new_ymin, new_ymax)

ax.set_title('Using limit_range_for_scale() on Log Scale')
ax.legend()
plt.show()
Output:
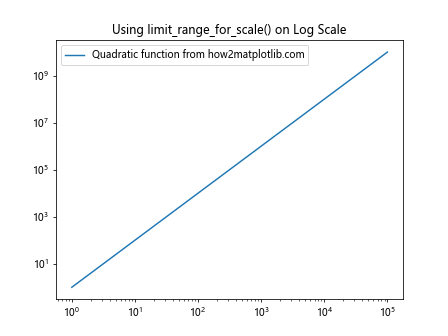
在这个例子中,我们绘制了一个二次函数,并将x轴和y轴都设置为对数刻度。然后,我们使用limit_range_for_scale()函数来调整y轴的范围。这个函数会确保范围内不包含负值或零值,这对于对数刻度来说是必要的。
5.3 对称对数刻度示例
对称对数刻度是另一个limit_range_for_scale()函数非常有用的场景:
import matplotlib.pyplot as plt
import numpy as np

fig, ax = plt.subplots()

# 生成数据
x = np.linspace(-1000, 1000, 1000)
y = x**3 - x

# 绘制曲线
ax.plot(x, y, label='Cubic function from how2matplotlib.com')

# 设置对称对数刻度
ax.set_yscale('symlog')

# 获取当前的y轴范围
ymin, ymax = ax.get_ylim()

# 使用limit_range_for_scale()调整范围
new_ymin, new_ymax = ax.yaxis.limit_range_for_scale(ymin, ymax)

# 设置新的y轴范围
ax.set_ylim(new_ymin, new_ymax)

ax.set_title('Using limit_range_for_scale() on Symmetric Log Scale')
ax.legend()
plt.show()
Output:
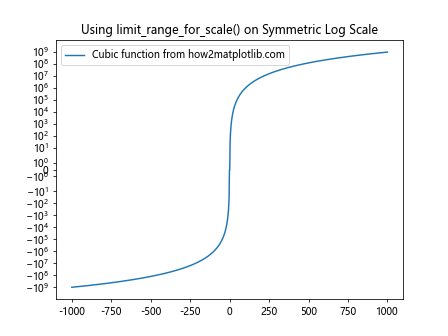
在这个例子中,我们绘制了一个三次函数,并将y轴设置为对称对数刻度。limit_range_for_scale()函数在这里的作用是确保正负值都能够合适地显示在对称对数刻度上。
5.4 自定义比例尺示例
我们还可以创建自定义的比例尺,并使用limit_range_for_scale()函数来调整范围:
import matplotlib.pyplot as plt
import matplotlib.scale as mscale
import matplotlib.transforms as mtransforms
import numpy as np

class SquareRootScale(mscale.ScaleBase):
    name = 'squareroot'

    def __init__(self, axis, **kwargs):
        mscale.ScaleBase.__init__(self, axis)

    def get_transform(self):
        return self.SquareRootTransform()

    def set_default_locators_and_formatters(self, axis):
        axis.set_major_locator(plt.AutoLocator())
        axis.set_major_formatter(plt.ScalarFormatter())

    def limit_range_for_scale(self, vmin, vmax, minpos):
        return max(0., vmin), vmax

    class SquareRootTransform(mtransforms.Transform):
        input_dims = 1
        output_dims = 1
        is_separable = True

        def transform_non_affine(self, a):
            return np.sqrt(a)

        def inverted(self):
            return self.SquareRootTransform.InvertedSquareRootTransform()

    class InvertedSquareRootTransform(mtransforms.Transform):
        input_dims = 1
        output_dims = 1
        is_separable = True

        def transform_non_affine(self, a):
            return a**2

        def inverted(self):
            return self.SquareRootTransform()

mscale.register_scale(SquareRootScale)

fig, ax = plt.subplots()

# 生成数据
x = np.linspace(0, 100, 1000)
y = x**2

# 绘制曲线
ax.plot(x, y, label='Quadratic function from how2matplotlib.com')

# 设置自定义的平方根刻度
ax.set_yscale('squareroot')

# 获取当前的y轴范围
ymin, ymax = ax.get_ylim()

# 使用limit_range_for_scale()调整范围
new_ymin, new_ymax = ax.yaxis.limit_range_for_scale(ymin, ymax)

# 设置新的y轴范围
ax.set_ylim(new_ymin, new_ymax)

ax.set_title('Using limit_range_for_scale() on Custom Square Root Scale')
ax.legend()
plt.show()
在这个复杂的例子中,我们创建了一个自定义的平方根刻度。我们重写了limit_range_for_scale()方法来确保范围的最小值不小于0,因为平方根刻度不适用于负值。这个例子展示了如何在自定义比例尺中使用limit_range_for_scale()函数。
5.5 处理极端值示例
limit_range_for_scale()函数在处理包含极端值的数据时也非常有用:
import matplotlib.pyplot as plt
import numpy as np

fig, ax = plt.subplots()

# 生成包含极端值的数据
x = np.linspace(0, 10, 100)
y = np.exp(x)
y[50] = 1e10  # 添加一个极端值

# 绘制曲线
ax.plot(x, y, label='Exponential with extreme value from how2matplotlib.com')

# 获取当前的y轴范围
ymin, ymax = ax.get_ylim()

# 使用limit_range_for_scale()调整范围
new_ymin, new_ymax = ax.yaxis.limit_range_for_scale(ymin, ymax)

# 设置新的y轴范围
ax.set_ylim(new_ymin, new_ymax)

ax.set_yscale('log')
ax.set_title('Using limit_range_for_scale() to Handle Extreme Values')
ax.legend()
plt.show()
Output:
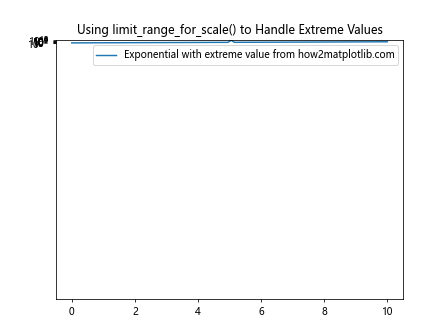
在这个例子中,我们创建了一个指数函数的图表,并在中间添加了一个极端值。通过使用limit_range_for_scale()函数和对数刻度,我们可以更好地显示包含极端值的数据。
5.6 多子图示例
limit_range_for_scale()函数也可以在多子图的情况下使用:
import matplotlib.pyplot as plt
import numpy as np

fig, (ax1, ax2) = plt.subplots(2, 1, figsize=(8, 10))

# 生成数据
x = np.linspace(0, 10, 100)
y1 = np.exp(x)
y2 = np.log(x + 1)

# 绘制第一个子图
ax1.plot(x, y1, label='Exponential from how2matplotlib.com')
ax1.set_yscale('log')
ymin1, ymax1 = ax1.get_ylim()
new_ymin1, new_ymax1 = ax1.yaxis.limit_range_for_scale(ymin1, ymax1)
ax1.set_ylim(new_ymin1, new_ymax1)
ax1.set_title('Subplot 1: Exponential Function')
ax1.legend()

# 绘制第二个子图
ax2.plot(x, y2, label='Logarithm from how2matplotlib.com')
ymin2, ymax2 = ax2.get_ylim()
new_ymin2, new_ymax2 = ax2.yaxis.limit_range_for_scale(ymin2, ymax2)
ax2.set_ylim(new_ymin2, new_ymax2)
ax2.set_title('Subplot 2: Logarithmic Function')
ax2.legend()

plt.tight_layout()
plt.show()
Output:
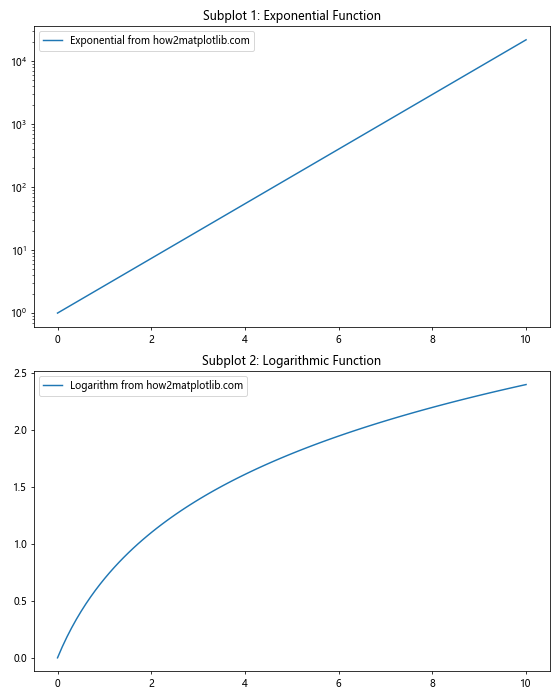
这个例子展示了如何在具有多个子图的图表中使用limit_range_for_scale()函数。我们为每个子图分别调用了这个函数,以确保每个子图都有适当的范围。
5.7 时间序列数据示例
limit_range_for_scale()函数也可以用于处理时间序列数据:
import matplotlib.pyplot as plt
import numpy as np
import pandas as pd

# 创建时间序列数据
dates = pd.date_range(start='2023-01-01', end='2023-12-31', freq='D')
values = np.cumsum(np.random.randn(len(dates))) + 100

fig, ax = plt.subplots(figsize=(10, 6))

# 绘制时间序列
ax.plot(dates, values, label='Time series from how2matplotlib.com')

# 获取当前的y轴范围
ymin, ymax = ax.get_ylim()

# 使用limit_range_for_scale()调整范围
new_ymin, new_ymax = ax.yaxis.limit_range_for_scale(ymin, ymax)

# 设置新的y轴范围
ax.set_ylim(new_ymin, new_ymax)

ax.set_title('Using limit_range_for_scale() with Time Series Data')
ax.legend()

plt.xticks(rotation=45)
plt.tight_layout()
plt.show()
Output:
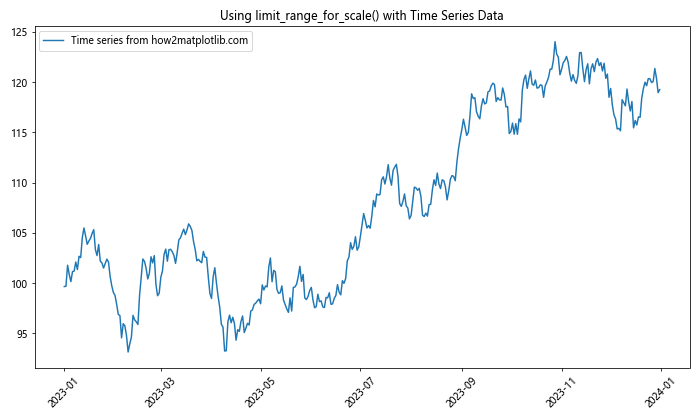
这个例子展示了如何在处理时间序列数据时使用limit_range_for_scale()函数。虽然在这种情况下,函数可能不会对范围进行显著调整,但它确保了y轴的范围适合于当前的数据和比例尺。
5.8 极坐标图示例
limit_range_for_scale()函数也可以应用于极坐标图:
import matplotlib.pyplot as plt
import numpy as np

fig, ax = plt.subplots(subplot_kw=dict(projection='polar'))

# 生成数据
theta = np.linspace(0, 2*np.pi, 100)
r = 1 + np.sin(4*theta)

# 绘制极坐标图
ax.plot(theta, r, label='Polar plot from how2matplotlib.com')

# 获取当前的r轴范围
rmin, rmax = ax.get_ylim()

# 使用limit_range_for_scale()调整范围
new_rmin, new_rmax = ax.yaxis.limit_range_for_scale(rmin, rmax)

# 设置新的r轴范围
ax.set_ylim(new_rmin, new_rmax)

ax.set_title('Using limit_range_for_scale() in Polar Coordinates')
ax.legend()
plt.show()
Output:
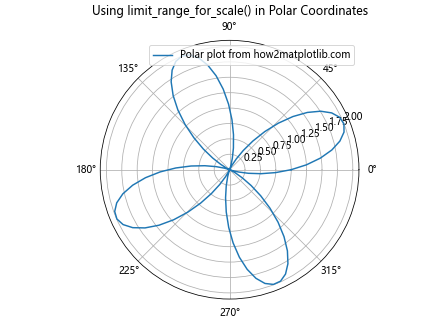
这个例子展示了如何在极坐标图中使用limit_range_for_scale()函数。在极坐标系中,y轴对应于径向坐标(r),我们可以使用这个函数来调整r的范围。
5.9 3D图表示例
虽然limit_range_for_scale()主要用于2D图表,但我们也可以在3D图表的各个轴上使用它:
import matplotlib.pyplot as plt
import numpy as np

fig = plt.figure()
ax = fig.add_subplot(111, projection='3d')

# 生成数据
x = np.linspace(-5, 5, 100)
y = np.linspace(-5, 5, 100)
X, Y = np.meshgrid(x, y)
Z = np.sin(np.sqrt(X**2 + Y**2))

# 绘制3D表面
surf = ax.plot_surface(X, Y, Z, cmap='viridis', label='3D surface from how2matplotlib.com')

# 对每个轴使用limit_range_for_scale()
for axis in [ax.xaxis, ax.yaxis, ax.zaxis]:
    vmin, vmax = axis.get_view_interval()
    new_vmin, new_vmax = axis.limit_range_for_scale(vmin, vmax)
    axis.set_view_interval(new_vmin, new_vmax)

ax.set_title('Using limit_range_for_scale() in 3D Plot')
plt.show()
Output:
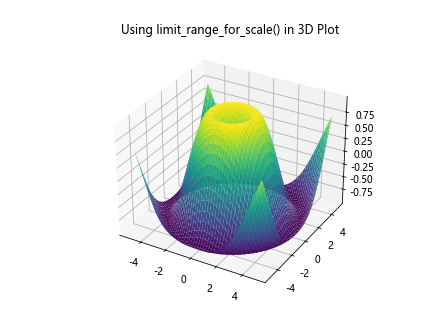
在这个3D图表示例中,我们对x、y和z轴分别应用了limit_range_for_scale()函数。这确保了每个轴的范围都适合当前的数据和比例尺。
5.10 颜色映射示例
limit_range_for_scale()函数也可以用于调整颜色映射的范围:
import matplotlib.pyplot as plt
import numpy as np

fig, ax = plt.subplots()

# 生成数据
x = np.linspace(-2, 2, 100)
y = np.linspace(-2, 2, 100)
X, Y = np.meshgrid(x, y)
Z = np.sin(X) * np.cos(Y)

# 创建颜色映射
im = ax.imshow(Z, cmap='coolwarm', extent=[-2, 2, -2, 2])

# 获取颜色映射的范围
vmin, vmax = im.get_clim()

# 使用limit_range_for_scale()调整范围
new_vmin, new_vmax = ax.yaxis.limit_range_for_scale(vmin, vmax)

# 设置新的颜色映射范围
im.set_clim(new_vmin, new_vmax)

ax.set_title('Using limit_range_for_scale() for Color Mapping')
plt.colorbar(im, label='Values from how2matplotlib.com')
plt.show()
Output:
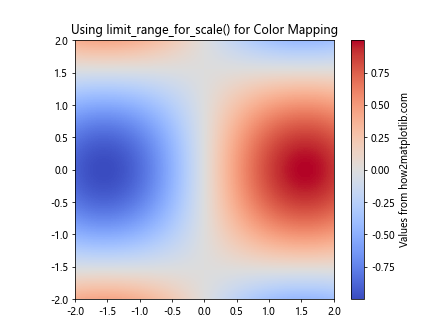
在这个例子中,我们使用limit_range_for_scale()函数来调整颜色映射的范围。虽然这个函数通常用于坐标轴,但在这里我们将其应用于颜色映射的范围,以确保颜色映射适合当前的数据分布。
6. 注意事项和最佳实践
在使用limit_range_for_scale()函数时,有几点需要注意:
- 自动调用:在大多数情况下,Matplotlib会自动调用这个函数,所以通常不需要手动调用。
-
比例尺兼容性:确保使用的比例尺与数据类型兼容。例如,对数刻度不适用于负值或零值。
-
自定义比例尺:如果你创建了自定义比例尺,可能需要重写这个函数以适应特定需求。
-
极端值处理:当数据包含极端值时,这个函数可能会调整范围以更好地显示数据。
-
多轴图表:在具有多个轴的图表中,可能需要为每个轴单独调用这个函数。
7. 高级应用
7.1 动态调整范围
在交互式图表中,我们可以结合使用limit_range_for_scale()和事件处理来动态调整范围:
import matplotlib.pyplot as plt
import numpy as np

fig, ax = plt.subplots()

x = np.linspace(0, 10, 100)
y = np.exp(x)

line, = ax.plot(x, y, label='Exponential from how2matplotlib.com')
ax.set_yscale('log')

def on_xlims_change(event_ax):
    xmin, xmax = event_ax.get_xlim()
    ymin, ymax = np.exp(xmin), np.exp(xmax)
    new_ymin, new_ymax = ax.yaxis.limit_range_for_scale(ymin, ymax)
    ax.set_ylim(new_ymin, new_ymax)

ax.callbacks.connect('xlim_changed', on_xlims_change)

ax.set_title('Dynamic Range Adjustment with limit_range_for_scale()')
ax.legend()
plt.show()
Output:
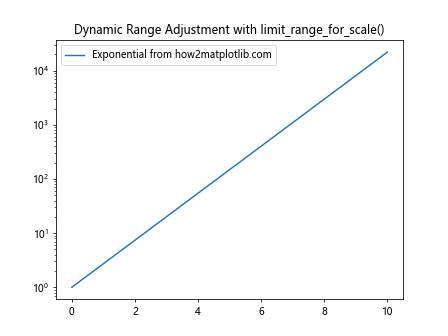
这个例子展示了如何在用户交互(如缩放)时动态调用limit_range_for_scale()函数来调整y轴的范围。
7.2 自定义比例尺的高级应用
我们可以创建一个更复杂的自定义比例尺,并使用limit_range_for_scale()来确保适当的范围:
import matplotlib.pyplot as plt
import matplotlib.scale as mscale
import matplotlib.transforms as mtransforms
import numpy as np

class CubicScale(mscale.ScaleBase):
    name = 'cubic'

    def __init__(self, axis, **kwargs):
        mscale.ScaleBase.__init__(self, axis)

    def get_transform(self):
        return self.CubicTransform()

    def set_default_locators_and_formatters(self, axis):
        axis.set_major_locator(plt.AutoLocator())
        axis.set_major_formatter(plt.ScalarFormatter())

    def limit_range_for_scale(self, vmin, vmax, minpos):
        return np.cbrt(vmin), np.cbrt(vmax)

    class CubicTransform(mtransforms.Transform):
        input_dims = 1
        output_dims = 1
        is_separable = True

        def transform_non_affine(self, a):
            return np.sign(a) * np.abs(a)**(1/3)

        def inverted(self):
            return self.CubicTransform.InvertedCubicTransform()

    class InvertedCubicTransform(mtransforms.Transform):
        input_dims = 1
        output_dims = 1
        is_separable = True

        def transform_non_affine(self, a):
            return np.sign(a) * np.abs(a)**3

        def inverted(self):
            return self.CubicTransform()

mscale.register_scale(CubicScale)

fig, ax = plt.subplots()

x = np.linspace(-10, 10, 1000)
y = x**3

ax.plot(x, y, label='Cubic function from how2matplotlib.com')
ax.set_yscale('cubic')

ymin, ymax = ax.get_ylim()
new_ymin, new_ymax = ax.yaxis.limit_range_for_scale(ymin, ymax)
ax.set_ylim(new_ymin, new_ymax)

ax.set_title('Custom Cubic Scale with limit_range_for_scale()')
ax.legend()
plt.show()
这个高级例子展示了如何创建一个立方根刻度,并使用自定义的limit_range_for_scale()方法来确保适当的范围。
8. 总结
axis.Axis.limit_range_for_scale()函数是Matplotlib中一个强大而灵活的工具,用于确保坐标轴的范围与所选的比例尺相兼容。虽然在大多数情况下,这个函数会被Matplotlib自动调用,但了解它的工作原理可以帮助我们更好地控制图表的显示效果,特别是在处理特殊比例尺、极端值或自定义可视化时。
通过本文的详细介绍和多个示例,我们探讨了limit_range_for_scale()函数在各种场景下的应用,包括线性刻度、对数刻度、对称对数刻度、自定义比例尺、多子图、时间序列数据、极坐标图和3D图表等。我们还讨论了一些高级应用,如动态范围调整和复杂的自定义比例尺。
在实际应用中,合理使用这个函数可以帮助我们创建更加清晰、准确和信息丰富的数据可视化。无论是处理简单的2D图表还是复杂的多维数据,limit_range_for_scale()函数都是确保最佳数据展示的有力工具。
 极客教程
极客教程