TFLearn和它在Tensorflow中的安装
TFLearn可以说是在Tensorflow框架之上创建的一个透明和模块化的深度学习库。TFLearn的首要目标是为Tensorflow提供一个更高级别的API,以促进和加速实验,同时与Tensorflow保持完全兼容和透明。
功能
- TFLearn很容易理解,是一个用户友好的高级API,用于构建深度神经网络结构。
- 通过内置的神经网络层、优化器、正则器、指标等的高兼容性,它可以进行快速原型设计。
- TFLearn函数也可以独立使用,因为所有的函数都建立在张量之上。
- 通过使用强大的辅助函数,任何TensorFlow图都可以很容易地进行训练,接受多个输入、输出和优化器等。
- TFLearn还可以用来创建宏伟的图形可视化,并提供梯度、权重、激活等细节,毫不费力。
- 易于放置设备,以利用多个CPU/GPU。
许多最近流行的深度学习网络架构,如Convolutions、Residual networks、LSTM、PReLU、BatchNorm、Generative Networks等都被这个高级API所支持。
注意: TFLearn v0.5仅与TensorFlow 2.x版本兼容。
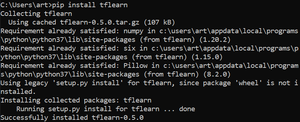
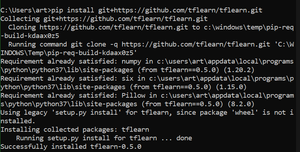
通过执行此命令安装TFLearn:
对于稳定版本:
pip install tflearn

最新的版本:
pip install git+https://github.com/tflearn/tflearn.git

tflearn的例子
通过下面的例子,我们可以看到TFLearn回归的应用。
# Importing tflearn library
import tflearn
from tflearn.layers.conv import conv_2d, max_pool_2d, input_data
from tflearn.layers.core import dropout, fully_connected
from tflearn.layers.estimator import regression
import tflearn.datasets.mnist as mnist

# Extracting MNIST dataset & dividing into
# training and validation dataset
x_train,y_train,x_test,y_test = mnist.load_data(one_hot=True)

# Reshaping dataset from (55000,784) to (55000,28,28,1)
# using reshape
x_train = x_train.reshape([-1, 28, 28, 1])
x_test = x_test.reshape([-1, 28, 28, 1])

# Defining input shape (28,28,1) for network
network = input_data(shape=[None, 28, 28, 1], name='input')

# Defining conv_2d layer
# Shape: [None,28,28,32]
network = conv_2d(network, 32, 2, activation='relu')

# Defining max_pool_2d layer
# Shape: [None,14,14,32]
network = max_pool_2d(network, 2)

# Defining conv_2d layer
# Shape: [None,28,28,64]
network = conv_2d(network, 64, 2, activation='relu')

# Defining max_pool_2d layer
# Shape: [None,7,7,64]
network = max_pool_2d(network, 2)

# Defining fully connected layer
# Shape: [None,1024]
network = fully_connected(network, 512, activation='relu')

# Defining dropout layer
# Shape: [None,1024]
network = dropout(network, 0.3)

# Defining fully connected layer
# Here 10 represents number of classes
# Shape: [None,10]
network = fully_connected(network, 10, activation='softmax')

# Defining regression layer
# Passing last fully connected layer as parameter,
# adam as optimizer,
# 0.001 as learning rate, categorical_crossentropy as loss
# Shape: [None,10]
network = regression(network, optimizer='adam',
                     learning_rate=0.001,
                     loss='categorical_crossentropy',
                     name='targets')

# Passing network made as parameter
model = tflearn.DNN(network)

# Fitting the model with training set:{x_train, y_train}
# testing set:{x_test, y_test}
model.fit({'input': x_test}, {'targets': y_test},
          n_epoch=10,
          snapshot_step=500, run_id='mnist',
        validation_set=({'input': x_test}, {'targets': y_test}),
        show_metric=True)
输出:

解释:
为了使用tflearn实现分类器,第一步是导入tflearn库和子模块,如conv(用于卷积层)、core(用于dropout和全连接层)、估算器(用于应用线性或逻辑回归)和数据集(用于访问MNIST、CIFAR10等数据集)。
使用load_data,MNIST数据集被提取出来并分为训练集和验证集,输入x的形状为(samples,784)。现在为了使用输入x进行训练,我们使用.reshape(NewShape)将其从(samples,784)重塑为(samples, 28,28,1)。在这之后,我们为网络定义同样的新形状。现在为了定义网络模型,我们将一些卷积2d层和max_pooling2d层堆叠在一起,然后再堆叠dropout和全连接层。
 极客教程
极客教程