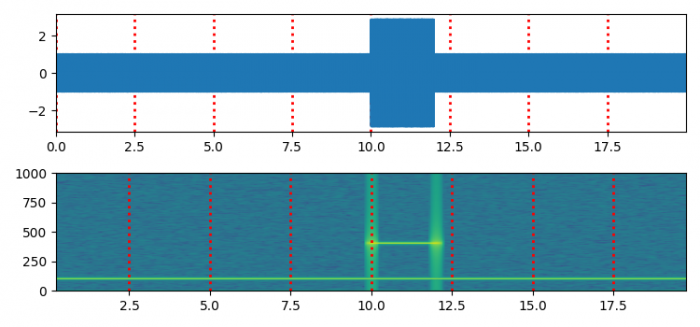
如何绘制与pylab的specgram()函数相同的频谱图?(Matplotlib)
我们可以按照以下步骤绘制与pylab的specgram()函数相同的频谱图 –
- 设置图形大小并调整子图之间和周围的间距。
- 使用numpy创建 t,s1,s2,nse,x,NEFT 和 Fs 数据点。
- 使用具有 nrows = 2 的 subplots() 方法创建一个新图形或激活现有图形。
- 使用 plot() 方法绘制 t 和 x 数据点。
- 以当前线条样式布置网格。
- 设置X轴边距。
- 使用 specgram() 方法绘制频谱图。
- 使用点状线样式和其他属性在当前线条样式中布置网格。
- 使用 show() 方法显示图形。
示例
import matplotlib.pyplot as plt
import numpy as np

plt.rcParams["figure.figsize"] = [7.50, 3.50]
plt.rcParams["figure.autolayout"] = True

dt = 0.0005
t = np.arange(0.0, 20.0, dt)
s1 = np.sin(2 * np.pi * 100 * t)
s2 = 2 * np.sin(2 * np.pi * 400 * t)
s2[t <= 10] = s2[12 <= t] = 0
nse = 0.01 * np.random.random(size=len(t))
x = s1 + s2 + nse
NFFT = 1024
Fs = int(1.0 / dt)

fig, (ax1, ax2) = plt.subplots(nrows=2)
ax1.plot(t, x)
ax1.grid(axis="x", ls="dotted", lw=2, color="red")
ax1.margins(x=0)

Pxx, freqs, bins, im = ax2.specgram(x, NFFT=NFFT, Fs=Fs, noverlap=900)
ax2.grid(axis="x", ls="dotted", lw=2, color="red")

plt.show()
输出

 极客教程
极客教程