Matplotlib.pyplot.margins()函数:轻松调整图表边距的利器
参考:Matplotlib.pyplot.margins() function in Python
Matplotlib是Python中最流行的数据可视化库之一,它提供了丰富的绘图功能和灵活的自定义选项。在使用Matplotlib创建图表时,合理设置图表边距是非常重要的,因为它直接影响图表的整体布局和可读性。本文将深入探讨Matplotlib.pyplot.margins()函数,这是一个强大而简单的工具,用于调整图表的边距。我们将详细介绍其用法、参数、应用场景以及与其他相关函数的配合使用,帮助您更好地掌握这个实用的函数。
1. margins()函数简介
matplotlib.pyplot.margins()函数是Matplotlib库中用于设置和获取坐标轴边距的重要工具。它允许用户以简单直观的方式调整图表内容与坐标轴之间的距离,从而优化图表的整体布局和可视效果。
1.1 基本语法
margins()函数的基本语法如下:
matplotlib.pyplot.margins(*margins, x=None, y=None, tight=True)
这个函数可以接受多种参数组合,使其具有很高的灵活性。下面我们来看一个简单的示例:
import matplotlib.pyplot as plt
import numpy as np

x = np.linspace(0, 10, 100)
y = np.sin(x)

plt.plot(x, y, label='sin(x)')
plt.title('How to use margins() - how2matplotlib.com')
plt.margins(0.1)
plt.legend()
plt.show()
Output:
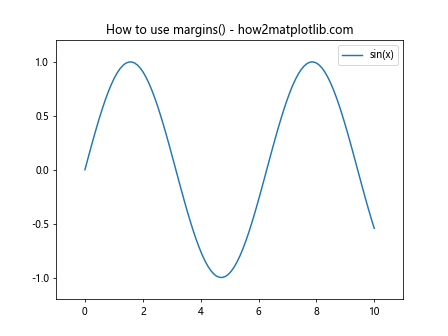
在这个例子中,我们绘制了一个简单的正弦曲线,并使用plt.margins(0.1)设置了10%的边距。这会在x轴和y轴方向上均匀地增加空白区域,使图表内容不会紧贴坐标轴边缘。
1.2 参数说明
margins()函数的参数可以有多种组合方式,主要包括:
- 单个参数:同时设置x轴和y轴的边距
- 两个参数:分别设置x轴和y轴的边距
- 关键字参数x和y:明确指定x轴和y轴的边距
- tight参数:控制是否应用紧凑布局
让我们通过一些示例来详细了解这些参数的使用方法。
2. 设置统一边距
最简单的使用方式是为margins()函数提供一个单一的值,这将同时设置x轴和y轴的边距。
import matplotlib.pyplot as plt
import numpy as np

x = np.linspace(0, 2*np.pi, 100)
y = np.sin(x)

plt.plot(x, y, label='sin(x)')
plt.title('Uniform margins - how2matplotlib.com')
plt.margins(0.2)
plt.legend()
plt.show()
Output:
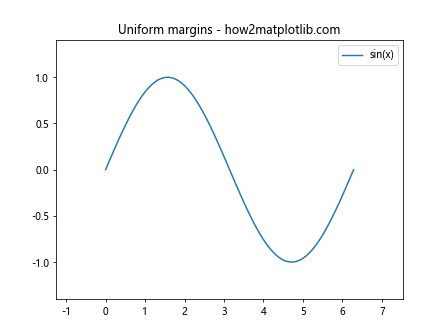
在这个例子中,我们设置了20%的统一边距。这意味着图表内容周围会有额外20%的空白区域,使得图表看起来更加宽松和美观。
3. 分别设置x轴和y轴边距
如果您想对x轴和y轴应用不同的边距,可以为margins()函数提供两个参数。
import matplotlib.pyplot as plt
import numpy as np

x = np.linspace(0, 4*np.pi, 100)
y = np.sin(x) * np.exp(-x/10)

plt.plot(x, y, label='Damped sine wave')
plt.title('Different x and y margins - how2matplotlib.com')
plt.margins(0.05, 0.1)
plt.legend()
plt.show()
Output:
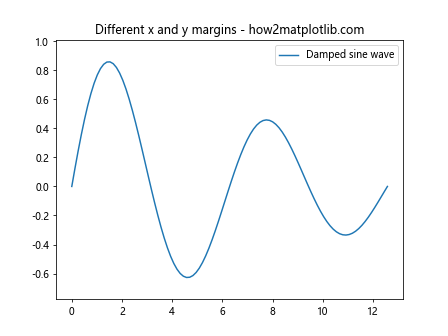
在这个例子中,我们为x轴设置了5%的边距,为y轴设置了10%的边距。这种方法在处理不同比例或重要性的x轴和y轴数据时特别有用。
4. 使用关键字参数
margins()函数还支持使用x和y关键字参数来明确指定各轴的边距。这种方法提供了更清晰的代码可读性。
import matplotlib.pyplot as plt
import numpy as np

t = np.linspace(0, 2*np.pi, 100)
x = 16 * np.sin(t)**3
y = 13 * np.cos(t) - 5 * np.cos(2*t) - 2 * np.cos(3*t) - np.cos(4*t)

plt.plot(x, y, label='Heart curve')
plt.title('Using keyword arguments - how2matplotlib.com')
plt.margins(x=0.15, y=0.1)
plt.legend()
plt.show()
Output:

在这个示例中,我们绘制了一个心形曲线,并使用关键字参数为x轴设置了15%的边距,为y轴设置了10%的边距。这种方法使代码的意图更加明确。
5. tight参数的使用
tight参数控制是否应用紧凑布局。当tight=True(默认值)时,边距设置会影响整个子图区域。当tight=False时,边距设置只影响数据区域。
import matplotlib.pyplot as plt
import numpy as np

x = np.linspace(0, 10, 100)
y1 = np.sin(x)
y2 = np.cos(x)

fig, (ax1, ax2) = plt.subplots(2, 1, figsize=(8, 8))

ax1.plot(x, y1, label='sin(x)')
ax1.set_title('tight=True (default) - how2matplotlib.com')
ax1.margins(0.2, tight=True)
ax1.legend()

ax2.plot(x, y2, label='cos(x)')
ax2.set_title('tight=False - how2matplotlib.com')
ax2.margins(0.2, tight=False)
ax2.legend()

plt.tight_layout()
plt.show()
Output:
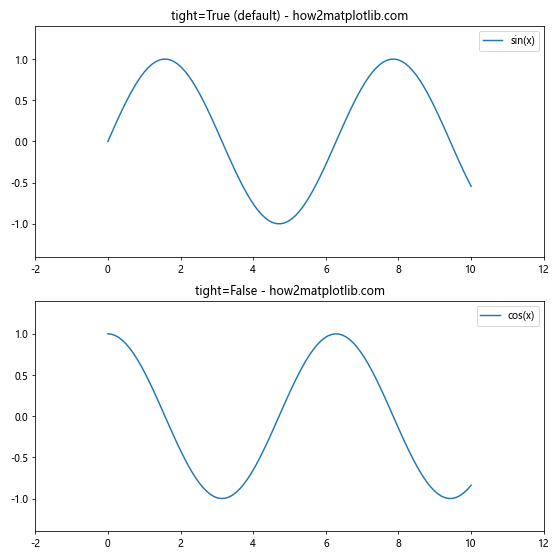
这个例子展示了tight参数的效果。上面的子图使用默认的tight=True,而下面的子图使用tight=False。您可以观察到边距设置对整体布局的影响有所不同。
6. 负边距的应用
margins()函数还支持设置负边距,这可以用来放大图表的某些部分。但要注意,使用负边距可能会导致部分数据被裁剪。
import matplotlib.pyplot as plt
import numpy as np

x = np.linspace(0, 2*np.pi, 100)
y = np.sin(x)

plt.plot(x, y, label='sin(x)')
plt.title('Negative margins - how2matplotlib.com')
plt.margins(-0.1)
plt.legend()
plt.show()
Output:
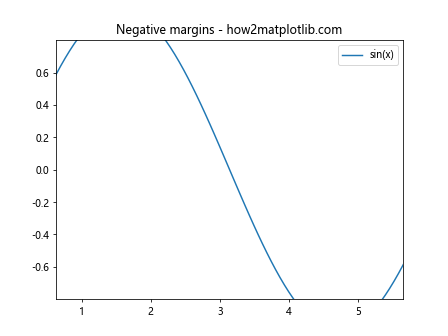
在这个例子中,我们设置了-10%的边距,这会使图表内容略微超出坐标轴的范围,产生一种放大效果。
7. 与其他布局函数的配合使用
margins()函数通常与其他布局相关的函数一起使用,以实现更精细的控制。例如,它可以与tight_layout()或subplots_adjust()配合使用。
import matplotlib.pyplot as plt
import numpy as np

x = np.linspace(0, 2*np.pi, 100)
y1 = np.sin(x)
y2 = np.cos(x)

fig, (ax1, ax2) = plt.subplots(1, 2, figsize=(12, 5))

ax1.plot(x, y1, label='sin(x)')
ax1.set_title('Subplot 1 - how2matplotlib.com')
ax1.margins(0.05)
ax1.legend()

ax2.plot(x, y2, label='cos(x)')
ax2.set_title('Subplot 2 - how2matplotlib.com')
ax2.margins(0.1)
ax2.legend()

plt.tight_layout()
plt.show()
Output:
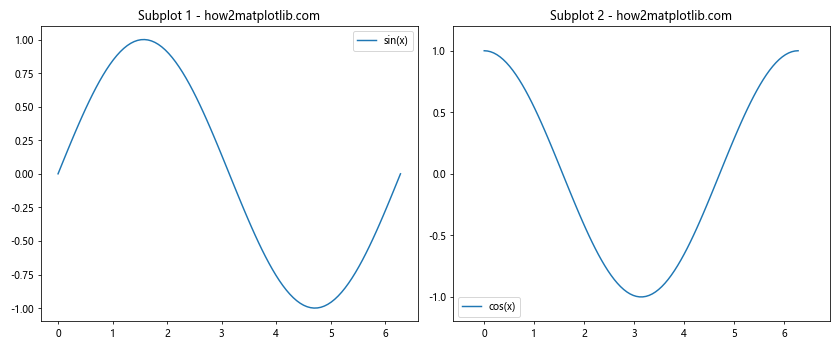
在这个例子中,我们创建了两个子图,分别设置了不同的边距,然后使用tight_layout()函数来自动调整子图之间的间距。
8. 在3D图表中使用margins()
margins()函数也可以用于3D图表,但它只影响x轴和y轴的边距,不影响z轴。
import matplotlib.pyplot as plt
import numpy as np
from mpl_toolkits.mplot3d import Axes3D

fig = plt.figure(figsize=(10, 8))
ax = fig.add_subplot(111, projection='3d')

x = np.linspace(-5, 5, 100)
y = np.linspace(-5, 5, 100)
X, Y = np.meshgrid(x, y)
Z = np.sin(np.sqrt(X**2 + Y**2))

surf = ax.plot_surface(X, Y, Z, cmap='viridis')
ax.set_title('3D plot with margins - how2matplotlib.com')
ax.margins(0.1)

plt.colorbar(surf)
plt.show()
Output:
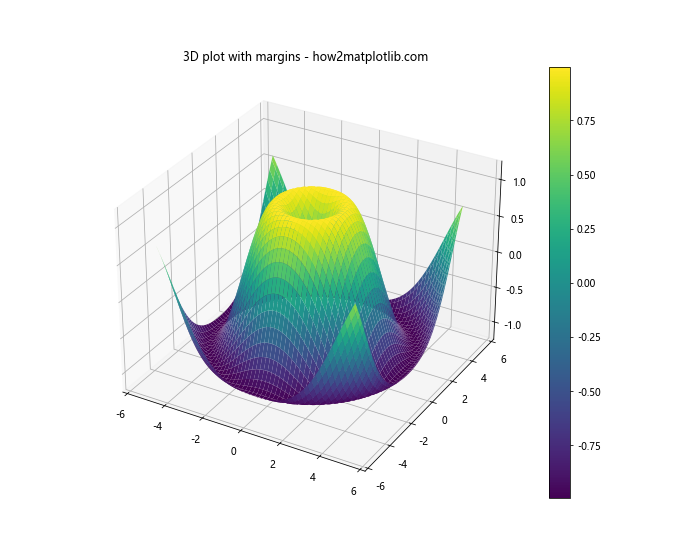
这个例子展示了如何在3D图表中使用margins()函数。注意,虽然我们设置了边距,但它只影响了x轴和y轴的显示范围。
9. 动态调整边距
在某些情况下,您可能需要根据数据动态调整边距。以下是一个示例,展示如何根据数据的范围来设置合适的边距:
import matplotlib.pyplot as plt
import numpy as np

def plot_with_dynamic_margins(x, y):
    plt.figure(figsize=(10, 6))
    plt.plot(x, y, label='Data')

    x_range = np.ptp(x)
    y_range = np.ptp(y)

    x_margin = 0.05 * x_range
    y_margin = 0.1 * y_range

    plt.margins(x=x_margin/x_range, y=y_margin/y_range)

    plt.title('Dynamic margins - how2matplotlib.com')
    plt.legend()
    plt.show()

# 生成示例数据
x = np.linspace(0, 10, 100)
y = np.sin(x) * np.exp(-x/10)

plot_with_dynamic_margins(x, y)
Output:

在这个例子中,我们定义了一个函数来动态计算和设置边距。这种方法特别适用于处理不同尺度的数据集。
10. 在极坐标图中使用margins()
margins()函数在极坐标图中的行为略有不同。在这种情况下,它主要影响径向方向的边距。
import matplotlib.pyplot as plt
import numpy as np

theta = np.linspace(0, 2*np.pi, 100)
r = 1 + 0.5 * np.sin(5*theta)

plt.figure(figsize=(8, 8))
ax = plt.subplot(111, projection='polar')
ax.plot(theta, r)
ax.set_title('Polar plot with margins - how2matplotlib.com')
ax.margins(0.1)

plt.show()
Output:
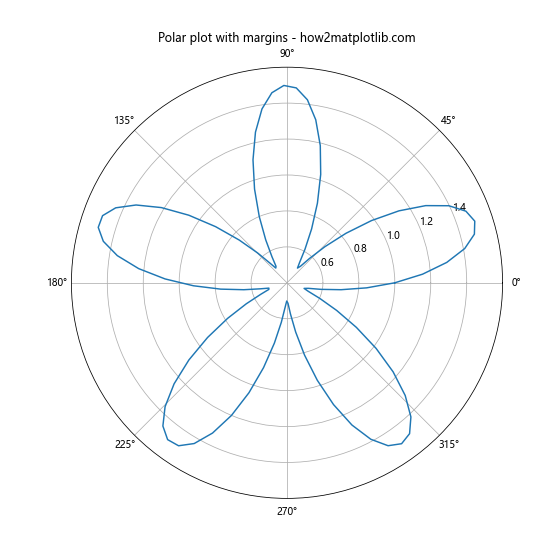
这个例子展示了如何在极坐标图中使用margins()函数。注意边距主要影响了图表的径向范围。
11. 结合autoscale()使用margins()
margins()函数通常与autoscale()函数一起使用,以实现更精细的轴范围控制。
import matplotlib.pyplot as plt
import numpy as np

x = np.linspace(0, 10, 100)
y = np.sin(x)

plt.figure(figsize=(10, 6))
plt.plot(x, y, label='sin(x)')
plt.title('Margins with autoscale - how2matplotlib.com')

plt.margins(0.1)
plt.autoscale(tight=True)

plt.legend()
plt.show()
Output:
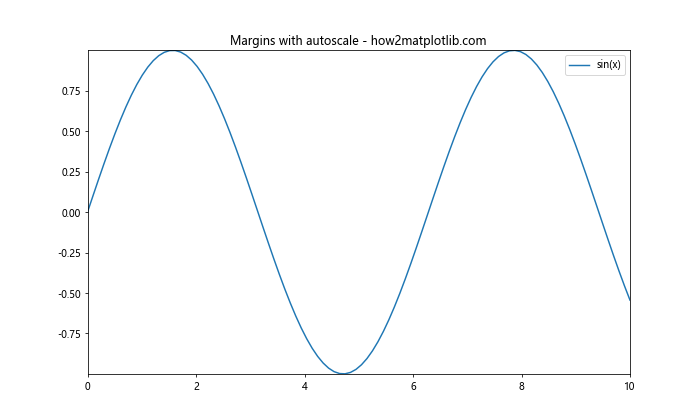
在这个例子中,我们首先设置了边距,然后使用autoscale()来调整轴的范围。这种组合可以在保持一定边距的同时,确保所有数据点都被包含在图表中。
12. 在共享轴的子图中使用margins()
当创建具有共享轴的子图时,margins()函数的行为可能会有所不同。以下是一个示例:
import matplotlib.pyplot as plt
import numpy as np

x = np.linspace(0, 10, 100)
y1 = np.sin(x)
y2 = np.cos(x)

fig, (ax1, ax2) = plt.subplots(2, 1, figsize=(10, 8), sharex=True)

ax1.plot(x, y1, label='sin(x)')
ax1.set_title('Subplot 1 - how2matplotlib.com')
ax1.margins(x=0.1, y=0.2)
ax1.legend()

ax2.plot(x, y2, label='cos(x)')
ax2.set_title('Subplot 2 - how2matplotlib.com')
ax2.margins(x=0.1, y=0.1)
ax2.legend()

plt.tight_layout()
plt.show()
Output:
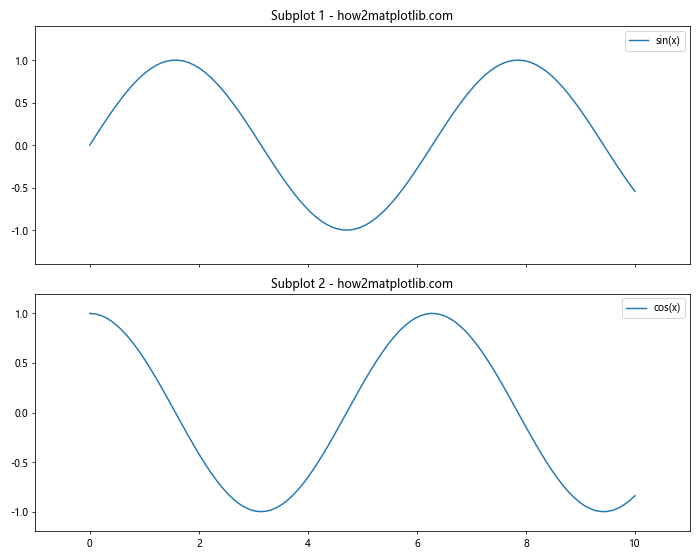
在这个例子中,两个子图共享x轴。注意,虽然我们为每个子图单独设置了边距,但x轴的边距将由最后一个设置决定。
13. 使用margins()突出显示数据的特定区域
margins()函数可以用来突出显示数据的特定区域,通过为不同的轴设置不同的边距。
import matplotlib.pyplot as plt
import numpy as np

x = np.linspace(0, 2*np.pi, 100)
y = np.sin(x)

plt.figure(figsize=(10, 6))
plt.plot(x, y, label='sin(x)')
plt.title('Highlighting specific area - how2matplotlib.com')

plt.margins(x=0.02, y=0.3)
plt.axhline(y=0, color='r', linestyle='--')

plt.legend()
plt.show()
Output:
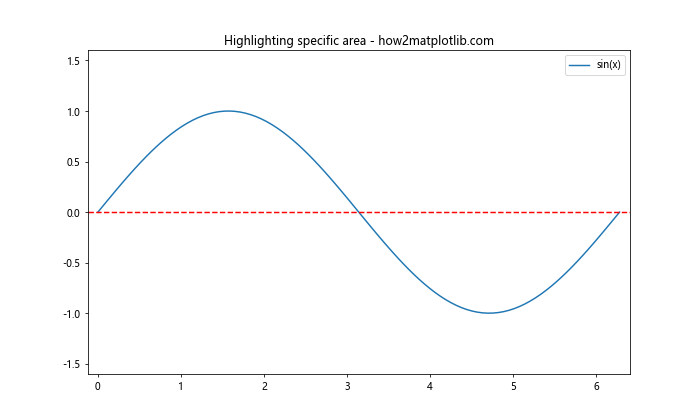
在这个例子中,我们为x轴设置了较小的边距,为y轴设置了较大的边距。这样可以突出显示正弦波的波峰和波谷,同时保持x轴方向的紧凑性。
14. 在对数刻度图中使用margins()
margins()函数在对数刻度图中也可以使用,但其效果可能不太直观。以下是一个示例:
import matplotlib.pyplot as plt
import numpy as np

x = np.logspace(0, 3, 50)
y = x**2

plt.figure(figsize=(10, 6))
plt.loglog(x, y, label='y = x^2')
plt.title('Margins in log-scale plot - how2matplotlib.com')
plt.margins(0.1)
plt.legend()
plt.grid(True)
plt.show()
Output:
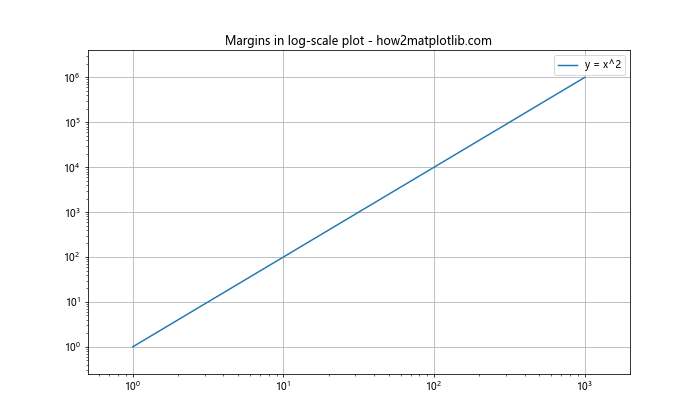
在这个例子中,我们创建了一个双对数图,并设置了10%的边距。注意,在对数刻度中,边距的效果可能看起来与线性刻度不同。
15. 使用margins()处理异常值
当数据中存在异常值时,margins()函数可以帮助我们更好地展示整体数据分布,而不会被异常值过度影响。
import matplotlib.pyplot as plt
import numpy as np

np.random.seed(42)
x = np.linspace(0, 10, 100)
y = np.sin(x) + np.random.normal(0, 0.1, 100)
y[80] = 5  # 添加一个异常值

plt.figure(figsize=(12, 5))

plt.subplot(121)
plt.plot(x, y, label='Data with outlier')
plt.title('Without margins - how2matplotlib.com')
plt.legend()

plt.subplot(122)
plt.plot(x, y, label='Data with outlier')
plt.title('With margins - how2matplotlib.com')
plt.margins(0.1)
plt.legend()

plt.tight_layout()
plt.show()
Output:
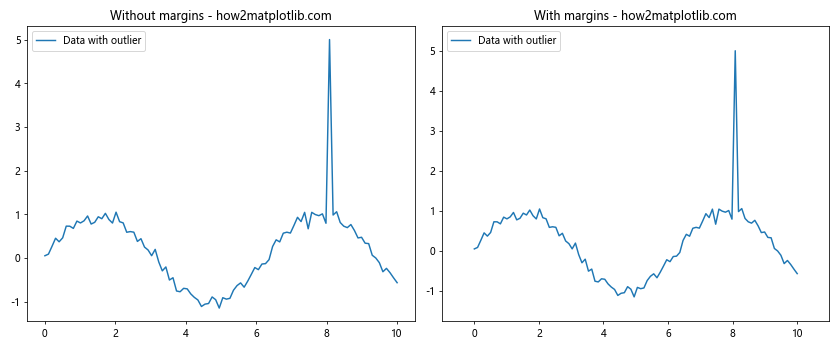
在这个例子中,我们创建了两个子图来对比使用margins()和不使用margins()的效果。右侧的图使用了margins()函数,可以看到它提供了更好的整体数据视图,而不会被单个异常值过度影响。
16. 在动画中使用margins()
margins()函数也可以在动画中使用,以确保动态变化的数据始终保持适当的边距。以下是一个简单的动画示例:
import matplotlib.pyplot as plt
import numpy as np
from matplotlib.animation import FuncAnimation

fig, ax = plt.subplots(figsize=(10, 6))
line, = ax.plot([], [])
ax.set_xlim(0, 2*np.pi)
ax.set_ylim(-1.5, 1.5)

def init():
    line.set_data([], [])
    return line,

def animate(i):
    x = np.linspace(0, 2*np.pi, 100)
    y = np.sin(x + i/10)
    line.set_data(x, y)
    ax.set_title(f'Frame {i} - how2matplotlib.com')
    ax.margins(0.1)
    return line,

anim = FuncAnimation(fig, animate, init_func=init, frames=100, interval=50, blit=True)
plt.show()
Output:
在这个动画中,我们在每一帧都调用了margins()函数,以确保图表始终保持适当的边距。
17. 在多个轴对象上使用margins()
当处理多个轴对象时,可以为每个轴单独设置边距:
import matplotlib.pyplot as plt
import numpy as np

fig, (ax1, ax2) = plt.subplots(1, 2, figsize=(12, 5))

x = np.linspace(0, 10, 100)
y1 = np.sin(x)
y2 = np.cos(x)

ax1.plot(x, y1, label='sin(x)')
ax1.set_title('Axis 1 - how2matplotlib.com')
ax1.margins(0.05)
ax1.legend()

ax2.plot(x, y2, label='cos(x)')
ax2.set_title('Axis 2 - how2matplotlib.com')
ax2.margins(0.2)
ax2.legend()

plt.tight_layout()
plt.show()
Output:
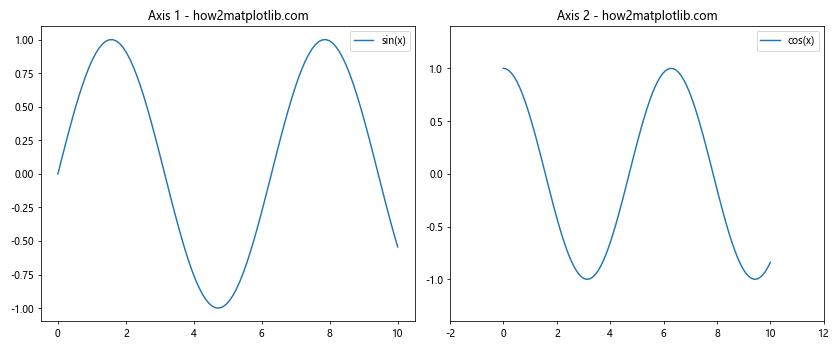
在这个例子中,我们为两个不同的轴对象设置了不同的边距,展示了margins()函数在多轴图表中的灵活应用。
18. 结合set_xlim()和set_ylim()使用margins()
有时,您可能想要结合使用margins()和set_xlim()/set_ylim()来精确控制图表的显示范围:
import matplotlib.pyplot as plt
import numpy as np

x = np.linspace(0, 10, 100)
y = np.sin(x)

plt.figure(figsize=(10, 6))
plt.plot(x, y, label='sin(x)')
plt.title('Combining margins with set_xlim and set_ylim - how2matplotlib.com')

plt.margins(0.1)
plt.xlim(2, 8)
plt.ylim(-0.8, 0.8)

plt.legend()
plt.grid(True)
plt.show()
Output:
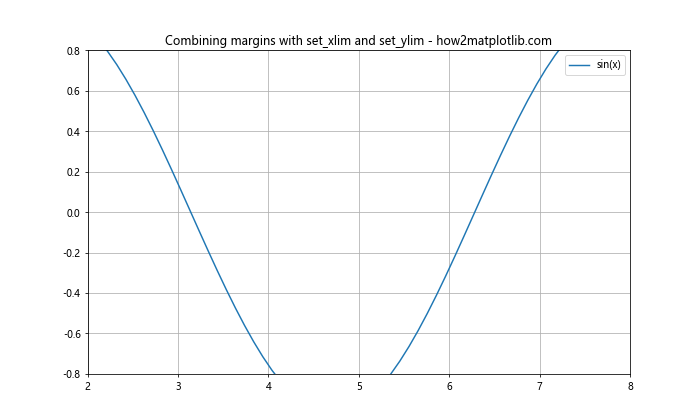
在这个例子中,我们首先设置了边距,然后使用set_xlim()和set_ylim()进一步调整了坐标轴的范围。这种组合可以让您更精确地控制图表的显示区域。
结论
Matplotlib.pyplot.margins()函数是一个强大而灵活的工具,用于调整图表的边距和整体布局。通过本文的详细介绍和丰富的示例,我们探讨了margins()函数的各种用法、参数设置以及在不同场景下的应用。
从基本的边距设置到处理复杂的多子图布局,从处理异常值到创建动画,margins()函数都展现出了其强大的功能和灵活性。它不仅可以改善图表的视觉效果,还能帮助突出显示重要的数据特征。
在实际应用中,合理使用margins()函数可以显著提升图表的可读性和美观度。它可以与其他Matplotlib函数如tight_layout()、subplots_adjust()等配合使用,以实现更精细的布局控制。
然而,需要注意的是,margins()函数的效果可能会因图表类型(如极坐标图、对数刻度图)或特定的布局设置(如共享轴)而有所不同。因此,在使用时需要根据具体情况进行调整和测试。
总的来说,掌握margins()函数的使用可以让您在创建数据可视化时有更多的控制力,从而制作出更专业、更有吸引力的图表。无论是进行数据分析、科学研究还是商业报告,熟练运用margins()函数都将成为您图表制作过程中的有力工具。
 极客教程
极客教程