Matplotlib中的Artist.get_zorder()方法:控制绘图元素的叠加顺序
参考:Matplotlib.artist.Artist.get_zorder() in Python
Matplotlib是Python中最流行的数据可视化库之一,它提供了丰富的绘图功能和灵活的自定义选项。在Matplotlib中,几乎所有可见的元素都是Artist对象,包括Figure、Axes以及各种图形元素如线条、文本、图例等。这些Artist对象的绘制顺序对最终图像的呈现效果有着重要影响。本文将详细介绍Matplotlib中的Artist.get_zorder()方法,这个方法用于获取Artist对象的z-order值,从而帮助我们理解和控制绘图元素的叠加顺序。
1. 什么是z-order?
在计算机图形学中,z-order(也称为深度顺序)是一个用于确定重叠二维对象的绘制顺序的概念。在Matplotlib中,z-order值决定了不同Artist对象的绘制顺序。具有较高z-order值的对象会被绘制在具有较低z-order值的对象之上。
默认情况下,Matplotlib会根据对象创建的顺序自动分配z-order值。然而,我们可以通过设置z-order值来手动控制绘制顺序,从而实现更复杂的图形效果。
让我们通过一个简单的例子来理解z-order的概念:
import matplotlib.pyplot as plt

fig, ax = plt.subplots()

# 绘制两个重叠的圆
circle1 = plt.Circle((0.5, 0.5), 0.4, color='red', alpha=0.5)
circle2 = plt.Circle((0.7, 0.7), 0.4, color='blue', alpha=0.5)

ax.add_artist(circle1)
ax.add_artist(circle2)

ax.set_xlim(0, 1)
ax.set_ylim(0, 1)
ax.set_title('Z-order Example - how2matplotlib.com')

plt.show()
Output:
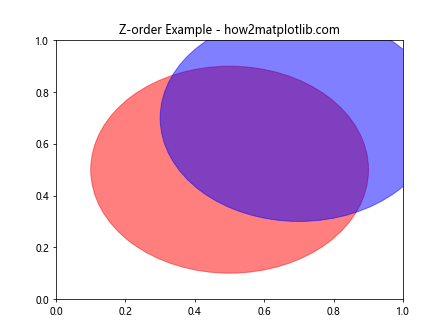
在这个例子中,我们创建了两个部分重叠的圆。由于circle2是后添加的,它会被绘制在circle1之上。这就是默认的z-order行为。
2. Artist.get_zorder()方法简介
Artist.get_zorder()是Matplotlib中Artist类的一个方法,用于获取指定Artist对象的当前z-order值。这个方法不接受任何参数,返回一个表示z-order值的浮点数。
让我们看一个使用get_zorder()方法的简单例子:
import matplotlib.pyplot as plt

fig, ax = plt.subplots()

line = ax.plot([0, 1], [0, 1], label='Line - how2matplotlib.com')[0]
scatter = ax.scatter([0.5], [0.5], color='red', label='Scatter - how2matplotlib.com')

print(f"Line z-order: {line.get_zorder()}")
print(f"Scatter z-order: {scatter.get_zorder()}")

ax.legend()
plt.title('get_zorder() Example - how2matplotlib.com')
plt.show()
Output:
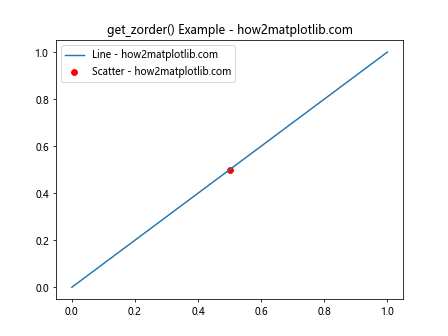
在这个例子中,我们创建了一条线和一个散点,然后使用get_zorder()方法获取它们的z-order值。默认情况下,线的z-order值为2,而散点的z-order值为3。
3. 理解默认的z-order值
在Matplotlib中,不同类型的Artist对象有不同的默认z-order值。了解这些默认值可以帮助我们更好地控制图形元素的叠加顺序。以下是一些常见Artist对象的默认z-order值:
- Patch对象(如Rectangle、Circle等):1
- Line2D对象(如plot()创建的线):2
- Text对象:3
- Scatter对象:3
- Collection对象(如scatter()创建的点集):3
- AxesImage对象(如imshow()创建的图像):0
让我们通过一个例子来验证这些默认值:
import matplotlib.pyplot as plt

fig, ax = plt.subplots()

# 创建不同类型的Artist对象
patch = plt.Rectangle((0.1, 0.1), 0.3, 0.3, color='red', alpha=0.5)
line = ax.plot([0, 1], [0, 1], 'b-', label='Line - how2matplotlib.com')[0]
text = ax.text(0.5, 0.5, 'Text - how2matplotlib.com', ha='center', va='center')
scatter = ax.scatter([0.7], [0.7], color='green', s=100, label='Scatter - how2matplotlib.com')
image = ax.imshow([[1]], extent=[0.4, 0.6, 0.4, 0.6], cmap='gray')

ax.add_patch(patch)

# 获取并打印各对象的z-order值
print(f"Patch z-order: {patch.get_zorder()}")
print(f"Line z-order: {line.get_zorder()}")
print(f"Text z-order: {text.get_zorder()}")
print(f"Scatter z-order: {scatter.get_zorder()}")
print(f"Image z-order: {image.get_zorder()}")

ax.set_xlim(0, 1)
ax.set_ylim(0, 1)
ax.legend()
plt.title('Default Z-order Values - how2matplotlib.com')
plt.show()
Output:
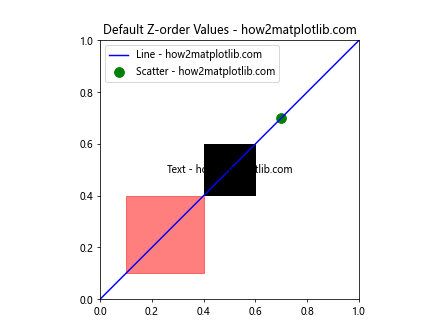
这个例子创建了多种类型的Artist对象,并打印它们的默认z-order值。通过运行这段代码,我们可以验证前面提到的默认z-order值。
4. 使用set_zorder()方法修改z-order值
虽然get_zorder()方法只能获取z-order值,但Matplotlib提供了配套的set_zorder()方法来修改Artist对象的z-order值。这使我们能够精确控制绘图元素的叠加顺序。
让我们看一个使用set_zorder()方法的例子:
import matplotlib.pyplot as plt

fig, (ax1, ax2) = plt.subplots(1, 2, figsize=(12, 5))

# 默认z-order
circle1 = plt.Circle((0.5, 0.5), 0.4, color='red', alpha=0.5)
circle2 = plt.Circle((0.7, 0.7), 0.4, color='blue', alpha=0.5)

ax1.add_artist(circle1)
ax1.add_artist(circle2)
ax1.set_title('Default Z-order - how2matplotlib.com')

# 修改z-order
circle3 = plt.Circle((0.5, 0.5), 0.4, color='red', alpha=0.5)
circle4 = plt.Circle((0.7, 0.7), 0.4, color='blue', alpha=0.5)

circle3.set_zorder(2)
circle4.set_zorder(1)

ax2.add_artist(circle3)
ax2.add_artist(circle4)
ax2.set_title('Modified Z-order - how2matplotlib.com')

for ax in (ax1, ax2):
    ax.set_xlim(0, 1)
    ax.set_ylim(0, 1)

plt.tight_layout()
plt.show()
Output:
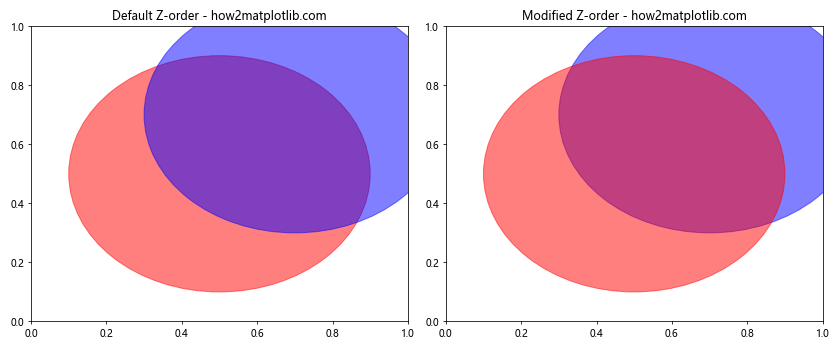
在这个例子中,我们创建了两个子图。左边的子图使用默认的z-order,而右边的子图通过set_zorder()方法修改了圆的z-order值。这导致了两个子图中圆的叠加顺序不同。
5. z-order与图层概念的关系
虽然z-order值决定了Artist对象的绘制顺序,但它并不完全等同于图层的概念。在Matplotlib中,某些容器对象(如Axes)会为其子对象创建独立的渲染组。这意味着,即使一个对象的z-order值较高,它也可能被绘制在属于不同渲染组的低z-order值对象之下。
让我们通过一个例子来说明这一点:
import matplotlib.pyplot as plt

fig, ax = plt.subplots()

# 创建背景矩形
background = plt.Rectangle((0, 0), 1, 1, facecolor='lightgray')
ax.add_artist(background)

# 创建两条线
line1 = ax.plot([0, 1], [0.3, 0.3], 'r-', linewidth=2, label='Line 1 - how2matplotlib.com')[0]
line2 = ax.plot([0, 1], [0.7, 0.7], 'b-', linewidth=2, label='Line 2 - how2matplotlib.com')[0]

# 设置z-order
background.set_zorder(10)
line1.set_zorder(1)
line2.set_zorder(2)

print(f"Background z-order: {background.get_zorder()}")
print(f"Line 1 z-order: {line1.get_zorder()}")
print(f"Line 2 z-order: {line2.get_zorder()}")

ax.set_xlim(0, 1)
ax.set_ylim(0, 1)
ax.legend()
plt.title('Z-order vs Layers - how2matplotlib.com')
plt.show()
Output:
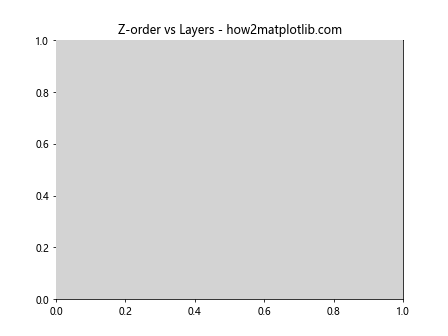
在这个例子中,尽管背景矩形的z-order值(10)高于两条线(1和2),但它仍然被绘制在线的下方。这是因为背景矩形属于Axes的背景渲染组,而线条属于主要内容渲染组。
6. 在复杂图表中使用get_zorder()和set_zorder()
在创建复杂的图表时,合理使用get_zorder()和set_zorder()方法可以帮助我们精确控制各个元素的叠加顺序,从而实现理想的视觉效果。让我们通过一个更复杂的例子来说明这一点:
import matplotlib.pyplot as plt
import numpy as np

fig, ax = plt.subplots(figsize=(10, 6))

# 创建背景网格
ax.grid(True, linestyle='--', alpha=0.7)

# 绘制多条线
x = np.linspace(0, 10, 100)
for i in range(5):
    y = np.sin(x + i*np.pi/5)
    line = ax.plot(x, y, label=f'Line {i+1} - how2matplotlib.com')[0]
    print(f"Line {i+1} initial z-order: {line.get_zorder()}")

# 添加散点
scatter = ax.scatter(x[::10], np.sin(x[::10]), c='red', s=50, label='Scatter - how2matplotlib.com')
print(f"Scatter initial z-order: {scatter.get_zorder()}")

# 添加文本注释
text = ax.text(5, 0, 'Important Note - how2matplotlib.com', ha='center', va='center', fontsize=12, bbox=dict(facecolor='white', edgecolor='black', alpha=0.8))
print(f"Text initial z-order: {text.get_zorder()}")

# 修改z-order
ax.lines[2].set_zorder(10)  # 将第三条线置于顶层
scatter.set_zorder(5)  # 将散点置于线的下方
text.set_zorder(15)  # 将文本置于最顶层

print("\nAfter modification:")
print(f"Line 3 new z-order: {ax.lines[2].get_zorder()}")
print(f"Scatter new z-order: {scatter.get_zorder()}")
print(f"Text new z-order: {text.get_zorder()}")

ax.set_xlabel('X-axis - how2matplotlib.com')
ax.set_ylabel('Y-axis - how2matplotlib.com')
ax.legend()
plt.title('Complex Z-order Example - how2matplotlib.com')
plt.tight_layout()
plt.show()
Output:
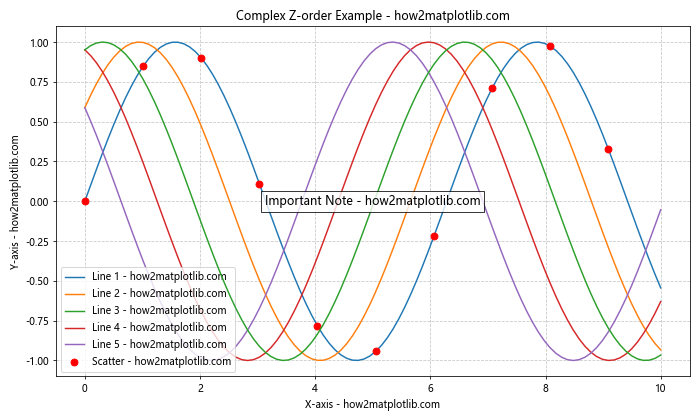
在这个复杂的例子中,我们创建了一个包含多条线、散点和文本注释的图表。通过使用get_zorder()和set_zorder()方法,我们可以查看和修改各个元素的z-order值,从而精确控制它们的叠加顺序。
7. z-order与透明度的结合使用
z-order和透明度(alpha)的结合使用可以创造出更加丰富和有层次感的视觉效果。透明度允许低z-order的对象部分可见,而z-order确保了正确的叠加顺序。
让我们看一个结合使用z-order和透明度的例子:
import matplotlib.pyplot as plt
import numpy as np

fig, ax = plt.subplots(figsize=(8, 6))

# 创建背景
background = plt.Rectangle((0, 0), 1, 1, facecolor='lightgray')
ax.add_artist(background)

# 创建多个半透明圆
np.random.seed(42)
n_circles = 20
for i in range(n_circles):
    x, y = np.random.rand(2)
    size = np.random.uniform(0.1, 0.3)
    color = np.random.rand(3)
    circle = plt.Circle((x, y), size, facecolor=color, alpha=0.5)
    ax.add_artist(circle)
    circle.set_zorder(i)

    print(f"Circle {i+1} z-order: {circle.get_zorder()}")

# 添加文本标签
text = ax.text(0.5, 0.5, 'Layered Circles - how2matplotlib.com', ha='center', va='center', fontsize=16, fontweight='bold', bbox=dict(facecolor='white', edgecolor='black', alpha=0.8))
text.set_zorder(n_circles)  # 确保文本在最顶层

ax.set_xlim(0, 1)
ax.set_ylim(0, 1)
ax.set_aspect('equal')
ax.axis('off')

plt.title('Z-order and Transparency - how2matplotlib.com')
plt.show()
Output:
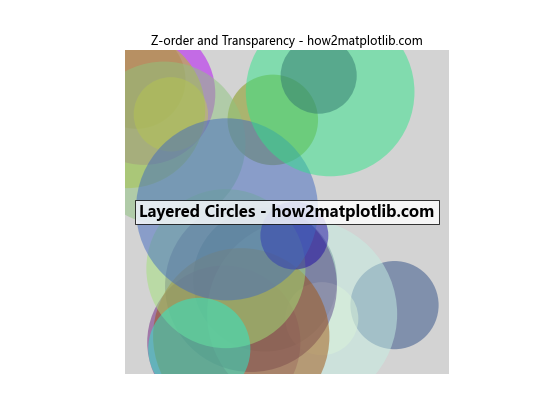
在这个例子中,我们创建了多个半透明的圆,并为每个圆设置了不同的z-order值。这样,我们可以看到z-order如何影响重叠对象的视觉效果,同时透明度允许我们看到下层的对象。
8. 动态调整z-order
在某些情况下,我们可能需要根据数据或用户交互动态调整z-order。Matplotlib允许我们在绘图过程中随时修改z-order值。这对于创建交互式可视化或动画特别有用。
下面是一个简单的动画示例,展示了如何动态调整z-order:
import matplotlib.pyplot as plt
import matplotlib.animation as animation
import numpy as np

fig, ax = plt.subplots()

# 创建两个圆
circle1 = plt.Circle((0.3, 0.5), 0.2, color='red', alpha=0.5)
circle2 = plt.Circle((0.7, 0.5), 0.2, color='blue', alpha=0.5)

ax.add_artist(circle1)
ax.add_artist(circle2)

ax.set_xlim(0, 1)
ax.set_ylim(0, 1)

# 动画更新函数
def update(frame):
    if frame % 2 == 0:
        circle1.set_zorder(2)
        circle2.set_zorder(1)
    else:
        circle1.set_zorder(1)
        circle2.set_zorder(2)
    return circle1, circle2

# 创建动画
ani = animation.FuncAnimation(fig, update, frames=10, interval=500, blit=True)

plt.title('Dynamic Z-order Adjustment - how2matplotlib.com')
plt.show()
Output:
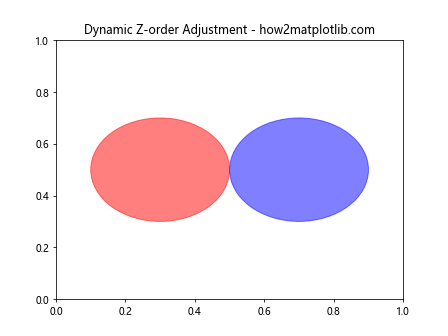
这个例子创建了一个简单的动画,两个圆的z-order值交替变化,导致它们的叠加顺序不断切换。
9. z-order在3D图形中的应用
虽然z-order主要用于2D图形,但在3D图形中也有其应用。在3D图形中,z-order可以帮助控制某些元素的可见性,尤其是当默认的深度排序不能满足需求时。
让我们看一个在3D图形中使用z-order的例子:
import matplotlib.pyplot as plt
import numpy as np

fig = plt.figure(figsize=(10, 8))
ax = fig.add_subplot(111, projection='3d')

# 创建一个平面
x = y = np.arange(-3, 3, 0.1)
X, Y = np.meshgrid(x, y)
Z = np.zeros_like(X)

# 绘制平面
surface = ax.plot_surface(X, Y, Z, alpha=0.5, color='gray')

# 创建一些3D散点
n_points = 100
x_scatter = np.random.uniform(-3, 3, n_points)
y_scatter = np.random.uniform(-3, 3, n_points)
z_scatter = np.random.uniform(-1, 1, n_points)

scatter = ax.scatter(x_scatter, y_scatter, z_scatter, c=z_scatter, cmap='viridis')

# 设置z-order
surface.set_zorder(1)
scatter.set_zorder(2)

print(f"Surface z-order: {surface.get_zorder()}")
print(f"Scatter z-order: {scatter.get_zorder()}")

ax.set_xlabel('X-axis - how2matplotlib.com')
ax.set_ylabel('Y-axis - how2matplotlib.com')
ax.set_zlabel('Z-axis - how2matplotlib.com')

plt.title('Z-order in 3D Plot - how2matplotlib.com')
plt.show()
Output:
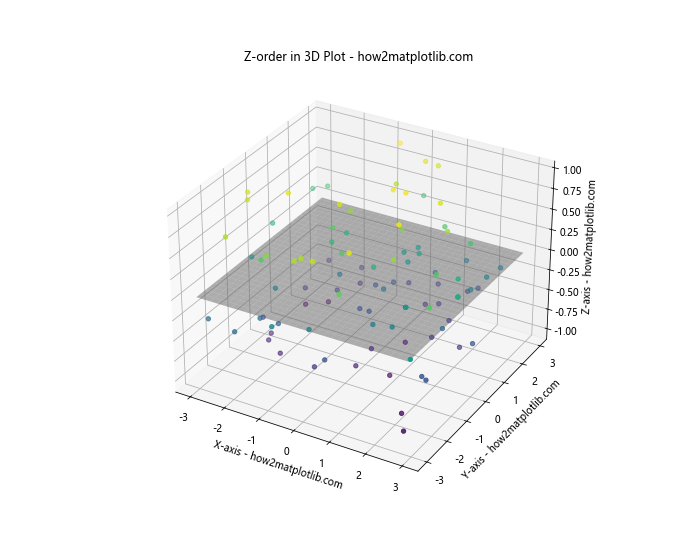
在这个3D图形例子中,我们创建了一个平面和一些3D散点。通过设置z-order,我们可以确保散点始终显示在平面之上,即使某些点可能在平面下方。
10. z-order与图例的交互
图例是图表中的重要元素,它通常需要位于其他元素之上。Matplotlib默认会为图例分配一个较高的z-order值,但有时我们可能需要手动调整。
以下是一个展示z-order与图例交互的例子:
import matplotlib.pyplot as plt
import numpy as np

fig, ax = plt.subplots(figsize=(8, 6))

# 创建一些重叠的数据
x = np.linspace(0, 10, 100)
y1 = np.sin(x)
y2 = np.cos(x)

# 绘制线条和填充区域
line1 = ax.plot(x, y1, 'r-', label='Sin - how2matplotlib.com')[0]
line2 = ax.plot(x, y2, 'b-', label='Cos - how2matplotlib.com')[0]
fill = ax.fill_between(x, y1, y2, alpha=0.3, color='green', label='Area - how2matplotlib.com')

# 创建图例
legend = ax.legend(loc='upper right')

# 打印初始z-order值
print("Initial z-order values:")
print(f"Line 1 z-order: {line1.get_zorder()}")
print(f"Line 2 z-order: {line2.get_zorder()}")
print(f"Fill z-order: {fill.get_zorder()}")
print(f"Legend z-order: {legend.get_zorder()}")

# 调整z-order
fill.set_zorder(1)
line1.set_zorder(3)
line2.set_zorder(4)
legend.set_zorder(5)

# 打印调整后的z-order值
print("\nAdjusted z-order values:")
print(f"Line 1 z-order: {line1.get_zorder()}")
print(f"Line 2 z-order: {line2.get_zorder()}")
print(f"Fill z-order: {fill.get_zorder()}")
print(f"Legend z-order: {legend.get_zorder()}")

plt.title('Z-order and Legend Interaction - how2matplotlib.com')
plt.show()
Output:
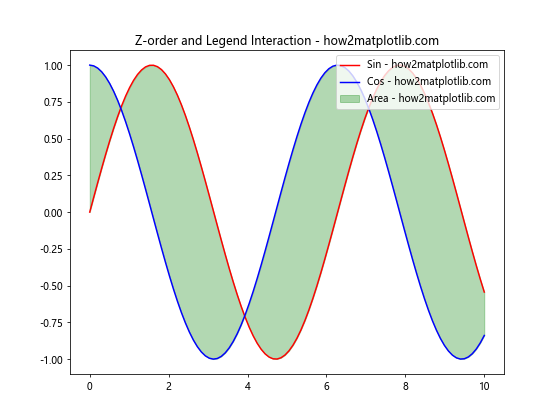
在这个例子中,我们创建了两条线、一个填充区域和一个图例。通过调整各个元素的z-order值,我们可以精确控制它们的叠加顺序,确保图例始终位于最顶层。
11. 使用z-order解决绘图问题
有时,默认的绘图顺序可能导致某些元素被意外遮挡。在这种情况下,调整z-order可以帮助解决问题。以下是一个常见问题的解决方案:
import matplotlib.pyplot as plt
import numpy as np

fig, (ax1, ax2) = plt.subplots(1, 2, figsize=(12, 5))

# 创建数据
x = np.linspace(0, 10, 100)
y1 = np.sin(x)
y2 = np.cos(x)

# 问题示例
ax1.plot(x, y1, 'r-', linewidth=2, label='Sin - how2matplotlib.com')
ax1.plot(x, y2, 'b-', linewidth=2, label='Cos - how2matplotlib.com')
ax1.fill_between(x, y1, y2, alpha=0.3, color='green')
ax1.set_title('Problem: Lines Covered by Fill')
ax1.legend()

# 解决方案
line1 = ax2.plot(x, y1, 'r-', linewidth=2, label='Sin - how2matplotlib.com')[0]
line2 = ax2.plot(x, y2, 'b-', linewidth=2, label='Cos - how2matplotlib.com')[0]
fill = ax2.fill_between(x, y1, y2, alpha=0.3, color='green')

# 调整z-order
fill.set_zorder(1)
line1.set_zorder(2)
line2.set_zorder(2)

ax2.set_title('Solution: Adjusted Z-order')
ax2.legend()

plt.tight_layout()
plt.show()
Output:
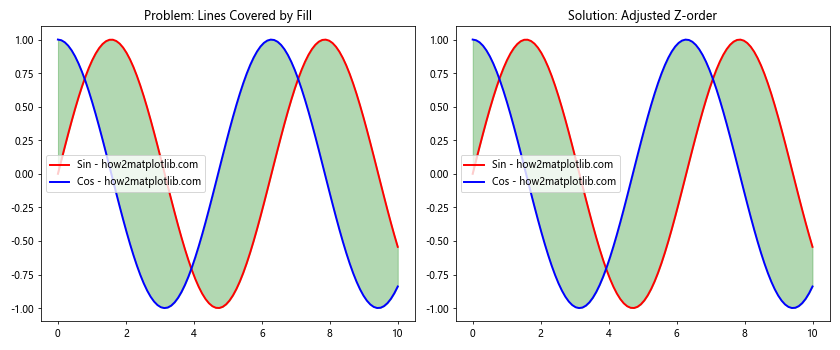
在这个例子中,左侧的图表展示了一个常见问题:填充区域覆盖了线条。右侧的图表通过调整z-order解决了这个问题,使线条显示在填充区域之上。
12. z-order在多子图中的应用
当处理多个子图时,每个子图都有自己的z-order系统。但是,我们可以使用z-order来控制子图之间的元素叠加顺序。以下是一个示例:
import matplotlib.pyplot as plt
import numpy as np

fig = plt.figure(figsize=(10, 8))

# 创建重叠的子图
ax1 = fig.add_axes([0.1, 0.1, 0.6, 0.6])
ax2 = fig.add_axes([0.4, 0.4, 0.6, 0.6])

# 在两个子图中绘制数据
x = np.linspace(0, 10, 100)
ax1.plot(x, np.sin(x), 'r-', label='Sin - how2matplotlib.com')
ax2.plot(x, np.cos(x), 'b-', label='Cos - how2matplotlib.com')

# 设置子图的z-order
ax1.set_zorder(1)
ax2.set_zorder(2)

# 使子图背景透明
ax1.patch.set_alpha(0.5)
ax2.patch.set_alpha(0.5)

ax1.set_title('Subplot 1')
ax2.set_title('Subplot 2')

ax1.legend()
ax2.legend()

plt.suptitle('Z-order in Multiple Subplots - how2matplotlib.com', fontsize=16)
plt.show()
Output:
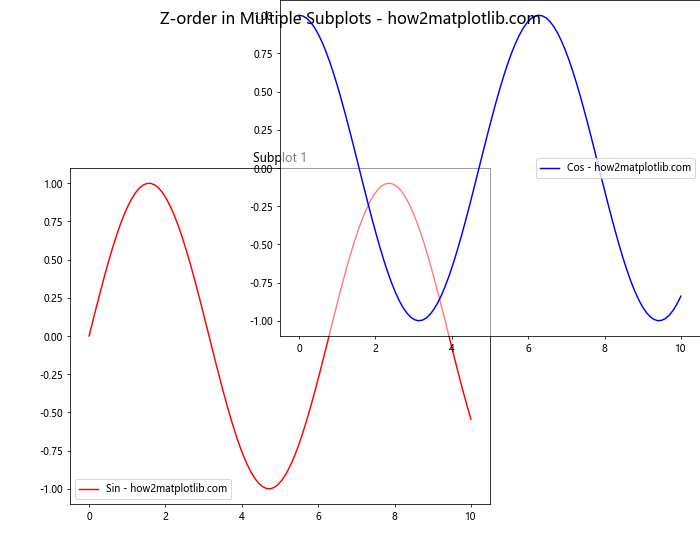
在这个例子中,我们创建了两个重叠的子图,并通过设置它们的z-order来控制哪个子图显示在上方。
13. z-order与自定义Artist对象
当创建自定义的Artist对象时,我们也可以利用z-order来控制它们的绘制顺序。以下是一个使用自定义Artist的例子:
import matplotlib.pyplot as plt
import matplotlib.patches as patches

class CustomArtist(patches.Circle):
    def __init__(self, xy, radius, **kwargs):
        super().__init__(xy, radius, **kwargs)
        self.set_clip_on(False)

fig, ax = plt.subplots(figsize=(8, 6))

# 创建自定义Artist对象
custom1 = CustomArtist((0.3, 0.5), 0.2, facecolor='red', alpha=0.5)
custom2 = CustomArtist((0.7, 0.5), 0.2, facecolor='blue', alpha=0.5)

# 添加到Axes
ax.add_artist(custom1)
ax.add_artist(custom2)

# 设置z-order
custom1.set_zorder(2)
custom2.set_zorder(1)

print(f"Custom1 z-order: {custom1.get_zorder()}")
print(f"Custom2 z-order: {custom2.get_zorder()}")

ax.set_xlim(0, 1)
ax.set_ylim(0, 1)
ax.set_title('Custom Artists with Z-order - how2matplotlib.com')
plt.show()
Output:
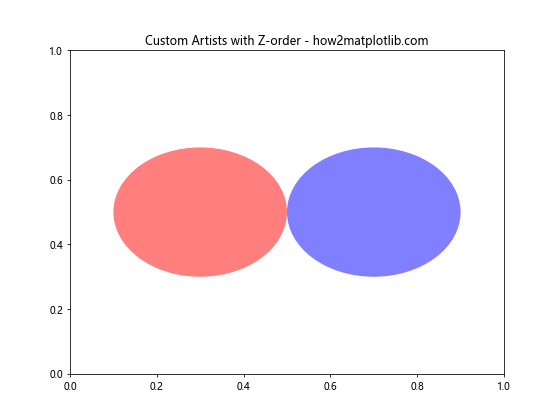
在这个例子中,我们创建了一个自定义的Artist类,并展示了如何为这些自定义对象设置和获取z-order值。
结论
通过本文的详细介绍,我们深入了解了Matplotlib中Artist.get_zorder()方法的使用及其在控制绘图元素叠加顺序中的重要作用。我们探讨了z-order的概念、默认值、修改方法,以及在各种复杂场景中的应用。掌握z-order的使用可以帮助我们创建更精确、更有层次感的数据可视化作品。
无论是处理简单的2D图表,还是复杂的3D可视化,合理利用z-order都能帮助我们实现理想的视觉效果。在实际应用中,建议结合透明度、图例位置等其他绘图技巧,以创造出既美观又信息丰富的数据可视化作品。
希望这篇文章能够帮助你更好地理解和运用Matplotlib中的z-order概念,从而在数据可视化工作中得心应手。记住,熟练掌握z-order的使用需要大量的实践和经验积累,所以不要害怕尝试和实验不同的设置,以找到最适合你的可视化需求的方案。
 极客教程
极客教程