Angular PrimeNG BlockUI属性
Angular PrimeNG是一个开源框架,拥有丰富的原生Angular UI组件,可用于出色的造型,这个框架用于制作响应式网站,非常容易。在这篇文章中,我们将学习如何在Angular PrimeNG中使用BlockUI属性。**我们还将学习这些属性,以及它们在代码中的语法。
BlockUI组件是用来封锁组件或整个页面的。
Angular PrimeNG BlockUI属性:
- blocked:它用于控制封锁的状态。它是布尔数据类型,默认值是false。
- target:它用于定义本地ng-template变量的名称,指的是另一个组件。它是字符串数据类型,默认值为文档。
- baseZIndex:它用于定义分层时使用的基础Z指数值。它是数字数据类型,默认值是0。
- autoZIndex:它用于是否自动管理分层。它是一个布尔数据类型,默认值为真。
- styleClass:它用于定义组件的风格类。它是字符串数据类型,默认值为false。
语法:
<p-blockUI [blocked]="blocked">
    ...
</p-blockUI>
创建Angular应用程序和模块安装
第1步:使用以下命令创建一个Angular应用程序。
ng new appname
第2步:创建你的项目文件夹即appname后,使用以下命令移动到它。
cd appname
第3步:在你给定的目录中安装PrimeNG。
npm install primeng --save
npm install primeicons --save
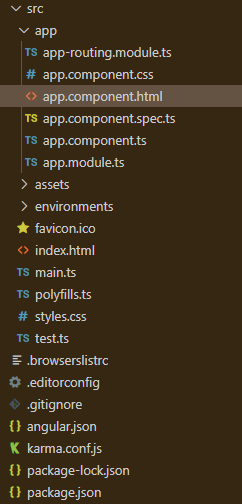
项目结构:完成安装后,它将看起来像下面这样。
- 要运行上述文件,请运行以下命令。
ng serve --save
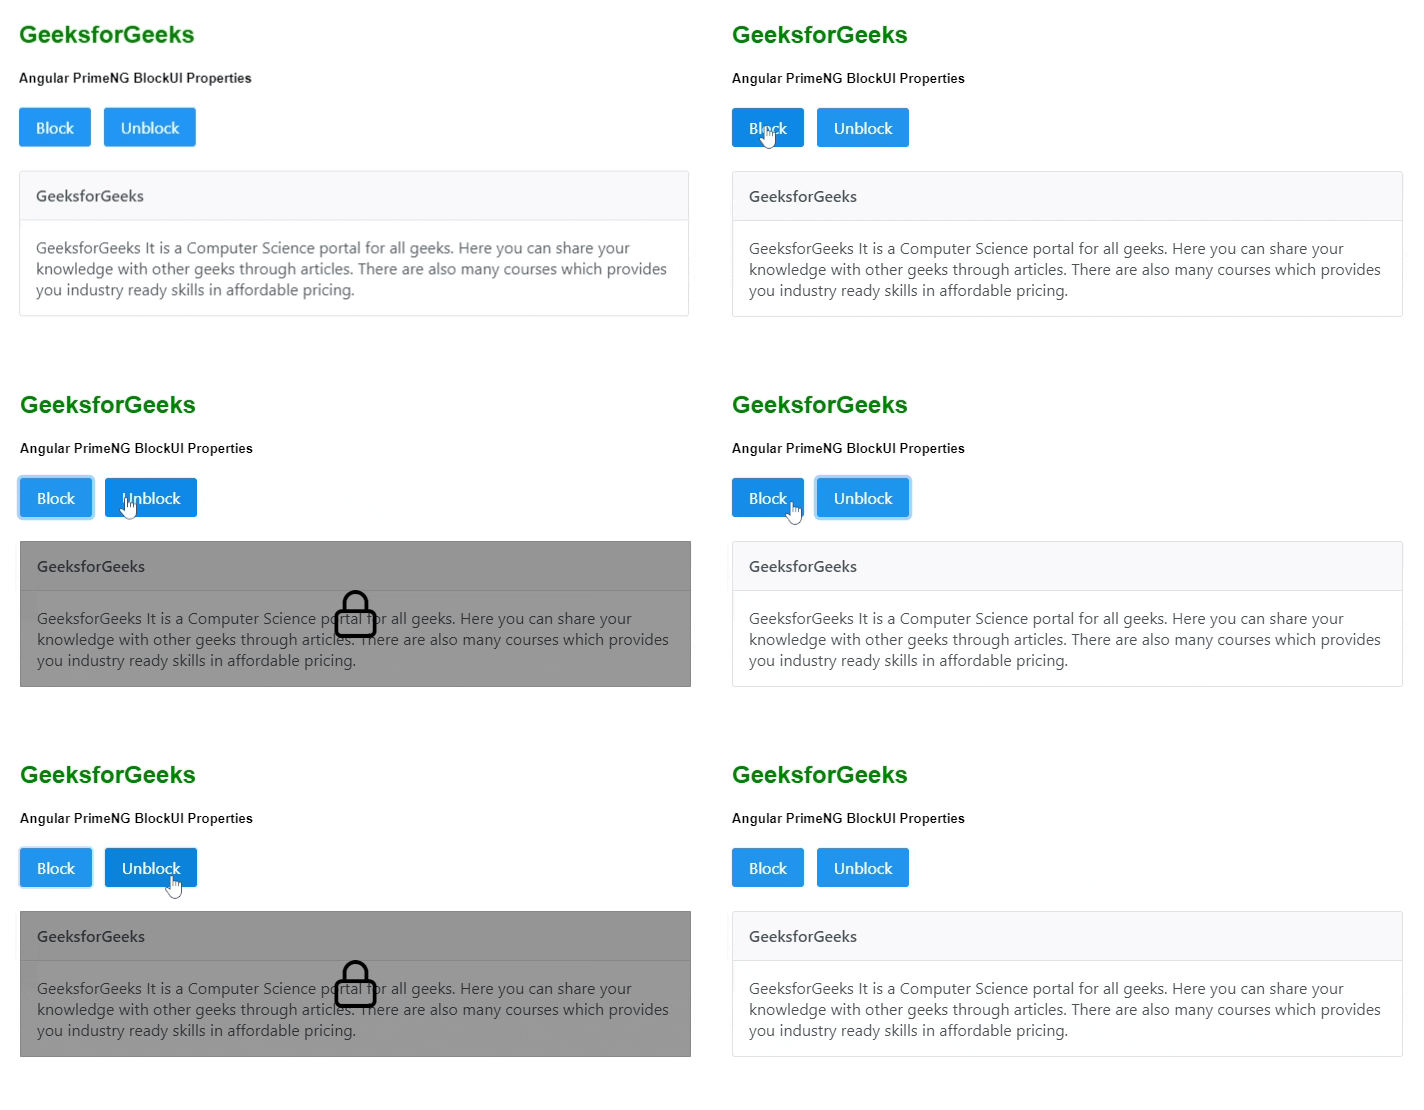
例子1:这是一个基本的例子,展示了如何使用**Angular PrimeNG BlockUI属性。
- app.component.html:
<h2 style="color: green">GeeksforGeeks</h2>
<h5>Angular PrimeNG BlockUI Properties</h5>

<button type="button"
        pButton
        pRipple
        label="Block"
        (click)="gfg=true">
</button>
<button type="button"
        pButton
        pRipple
        label="Unblock"
        (click)="gfg=false">
</button>

<p-blockUI [target]="geeks"
           [blocked]="gfg">
    <i class="pi pi-lock"
       style="font-size: 3rem">
      </i>
</p-blockUI>

<p-panel #geeks header="GeeksforGeeks"
                 styleClass="p-mt-4">
    <p class="p-m-0">
        GeeksforGeeks It is a Computer
        Science portal for all geeks.
        Here you can share your knowledge
        with other geeks through articles.
        There are also many courses which
        provides you industry ready skills
        in affordable pricing.
    </p>
</p-panel>
- app.component.ts:
import { Component } from "@angular/core";

@Component({
    selector: "app-root",
    templateUrl: "./app.component.html",
})

export class AppComponent {
    gfg: boolean = false;
}
- app.module.ts:
import { NgModule } from '@angular/core';
import { BrowserModule }
    from '@angular/platform-browser';
import { BrowserAnimationsModule }
    from '@angular/platform-browser/animations';
import { AppComponent } from './app.component';
import { BlockUIModule } from 'primeng/blockui';
import { PanelModule } from 'primeng/panel';
import { ButtonModule } from 'primeng/button';

@NgModule({
    imports: [
        BrowserModule,
        BrowserAnimationsModule,
        BlockUIModule,
        ButtonModule,
        PanelModule
    ],
    declarations: [AppComponent],
    bootstrap: [AppComponent],
})
export class AppModule { }
输出:

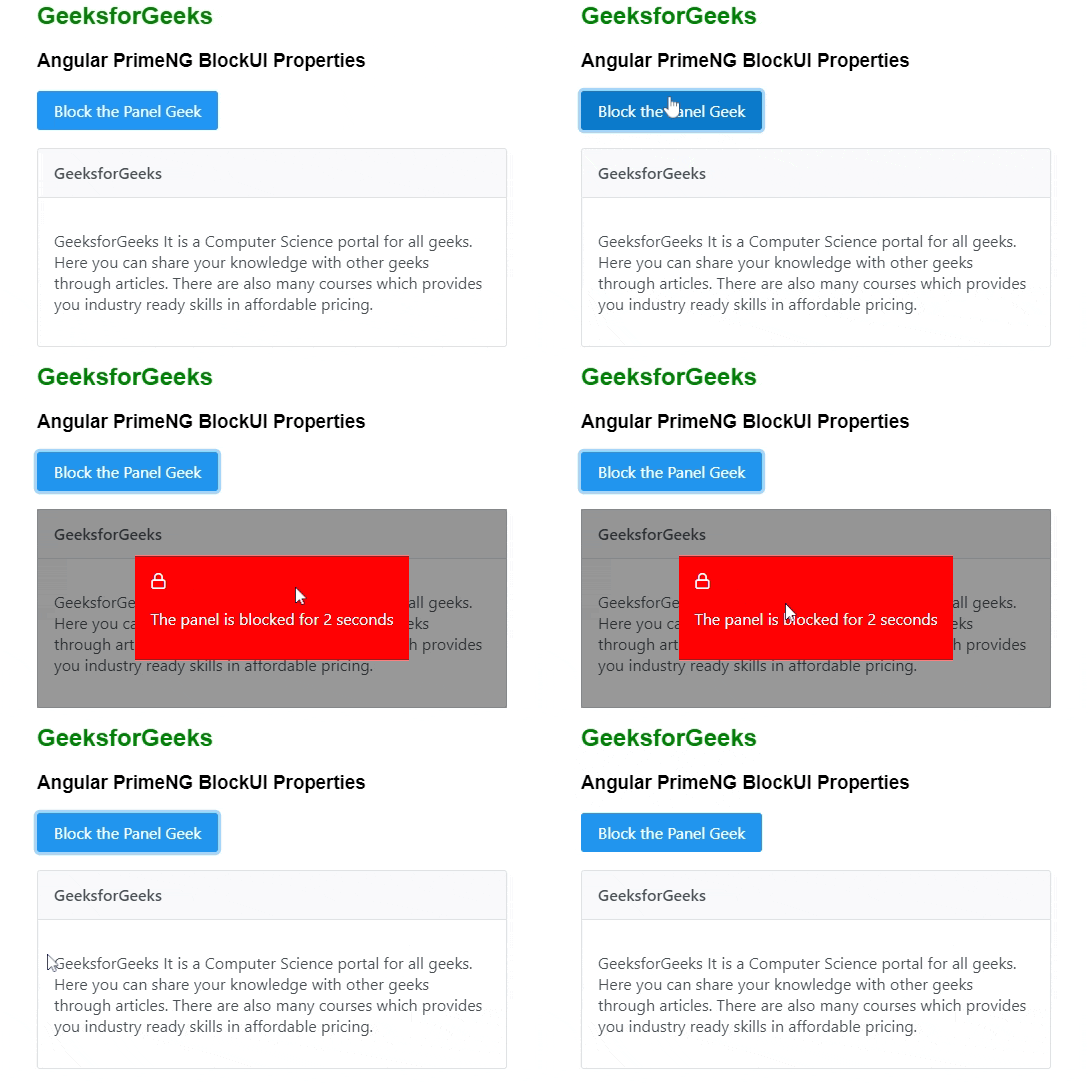
例子2:这是另一个基本的例子,展示了如何使用**Angular PrimeNG BlockUI Properties。
- app.component.html:
<h2 style="color: green">GeeksforGeeks</h2>
<h3>Angular PrimeNG BlockUI Properties</h3>

<button pButton
        class="mb-4"
        label="Block the Panel Geek"
        (click)="tempBlock()">
</button>
<br/><br/>
<p-panel #blockTarget header="GeeksforGeeks">
    <p>
        GeeksforGeeks It is a Computer
        Science portal for all geeks.
        Here you can share your knowledge
        with other geeks through articles.
        There are also many courses which
        provides you industry ready skills
        in affordable pricing.
    </p>
</p-panel>

<p-blockUI [target]="blockTarget"
           [blocked]="blocked">
    <div class="text-center custom-content">
        <i class="pi pi-lock"></i>
        <p>The panel is blocked for {{time}} seconds</p>
    </div>
</p-blockUI>
- app.component.ts:
import { Component } from '@angular/core';

@Component({
    selector: 'app-root',
    templateUrl: './app.component.html',
    styles: [
        `.custom-content{
            color: white;
            background-color: red;
            padding: 15px;
        }`
    ]
})

export class AppComponent {
    blocked: boolean = false;
    time = 2;

    tempBlock() {
        this.blocked = true;
        setTimeout(() => {
            this.blocked = false;
        }, this.time * 1000);
    }
}
- app.module.ts:
import { NgModule } from '@angular/core';
import { BrowserModule }
    from '@angular/platform-browser';
import { BrowserAnimationsModule }
    from '@angular/platform-browser/animations';
import { AppComponent } from './app.component';
import { BlockUIModule } from 'primeng/blockui';
import { PanelModule } from 'primeng/panel';
import { ButtonModule } from 'primeng/button';

@NgModule({
    imports: [
        BrowserModule,
        BrowserAnimationsModule,
        BlockUIModule,
        ButtonModule,
        PanelModule
    ],
    declarations: [AppComponent],
    bootstrap: [AppComponent],
})
export class AppModule { }
输出:

 极客教程
极客教程