如何使用Python的Matplotlib绘制3D立方体
参考:How to Draw 3D Cube using Matplotlib in Python
Matplotlib是Python中强大的数据可视化库,它不仅可以绘制2D图形,还能创建复杂的3D图形。本文将详细介绍如何使用Matplotlib绘制3D立方体,包括基本的立方体绘制、自定义颜色和透明度、添加标签和标题、旋转和缩放视图等高级技巧。通过学习这些技巧,你将能够创建出令人印象深刻的3D立方体可视化效果。
1. 基础环境设置
在开始绘制3D立方体之前,我们需要确保已经安装了必要的库并正确导入它们。首先,确保你已经安装了Matplotlib库。如果没有,可以使用以下命令安装:
pip install matplotlib
安装完成后,我们需要导入必要的模块:
import matplotlib.pyplot as plt
from mpl_toolkits.mplot3d import Axes3D
import numpy as np

print("Welcome to how2matplotlib.com")

# 创建一个新的图形
fig = plt.figure()
# 添加一个3D子图
ax = fig.add_subplot(111, projection='3d')

# 后续的绘图代码将在这里添加

plt.show()
Output:
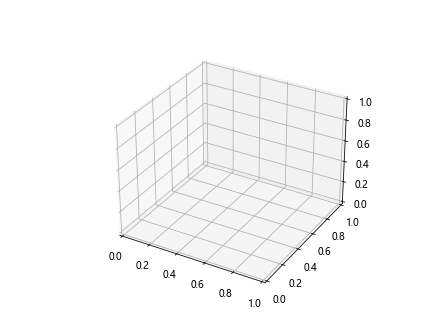
这段代码设置了基本的绘图环境。我们创建了一个新的图形对象,并添加了一个3D子图。projection='3d'参数告诉Matplotlib我们要创建一个3D图形。
2. 绘制基本的3D立方体
现在我们已经设置好了环境,让我们开始绘制一个基本的3D立方体:
import matplotlib.pyplot as plt
from mpl_toolkits.mplot3d import Axes3D
import numpy as np

print("Welcome to how2matplotlib.com")

fig = plt.figure()
ax = fig.add_subplot(111, projection='3d')

# 定义立方体的顶点
vertices = np.array([[0, 0, 0],
                     [1, 0, 0],
                     [1, 1, 0],
                     [0, 1, 0],
                     [0, 0, 1],
                     [1, 0, 1],
                     [1, 1, 1],
                     [0, 1, 1]])

# 定义立方体的边
edges = [
    [vertices[0], vertices[1], vertices[2], vertices[3]],
    [vertices[4], vertices[5], vertices[6], vertices[7]],
    [vertices[0], vertices[4]],
    [vertices[1], vertices[5]],
    [vertices[2], vertices[6]],
    [vertices[3], vertices[7]]
]

# 绘制立方体的边
for edge in edges:
    ax.plot(*zip(*edge), color='b')

ax.set_xlabel('X axis')
ax.set_ylabel('Y axis')
ax.set_zlabel('Z axis')

plt.title('Basic 3D Cube - how2matplotlib.com')
plt.show()
Output:
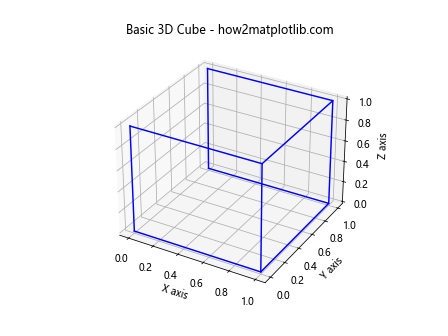
这段代码首先定义了立方体的8个顶点,然后定义了连接这些顶点的边。我们使用ax.plot()函数来绘制每条边。*zip(*edge)语法用于解包边的坐标,使其可以直接传递给plot()函数。
3. 自定义立方体颜色
我们可以通过修改边的颜色来自定义立方体的外观:
import matplotlib.pyplot as plt
from mpl_toolkits.mplot3d import Axes3D
import numpy as np

print("Welcome to how2matplotlib.com")

fig = plt.figure()
ax = fig.add_subplot(111, projection='3d')

vertices = np.array([[0, 0, 0],
                     [1, 0, 0],
                     [1, 1, 0],
                     [0, 1, 0],
                     [0, 0, 1],
                     [1, 0, 1],
                     [1, 1, 1],
                     [0, 1, 1]])

edges = [
    [vertices[0], vertices[1], vertices[2], vertices[3]],
    [vertices[4], vertices[5], vertices[6], vertices[7]],
    [vertices[0], vertices[4]],
    [vertices[1], vertices[5]],
    [vertices[2], vertices[6]],
    [vertices[3], vertices[7]]
]

colors = ['r', 'g', 'b', 'y', 'c', 'm']

for i, edge in enumerate(edges):
    ax.plot(*zip(*edge), color=colors[i % len(colors)])

ax.set_xlabel('X axis')
ax.set_ylabel('Y axis')
ax.set_zlabel('Z axis')

plt.title('Colorful 3D Cube - how2matplotlib.com')
plt.show()
Output:
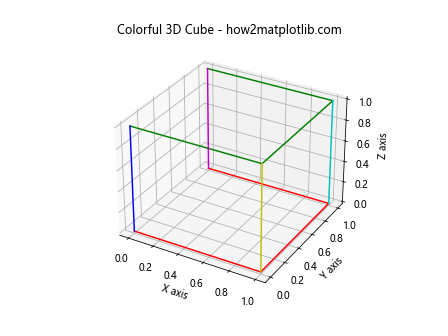
在这个例子中,我们定义了一个颜色列表,并在绘制每条边时循环使用这些颜色。这样可以创建一个更加丰富多彩的立方体。
4. 添加透明度
为了使立方体看起来更加立体,我们可以添加透明度:
import matplotlib.pyplot as plt
from mpl_toolkits.mplot3d import Axes3D
import numpy as np

print("Welcome to how2matplotlib.com")

fig = plt.figure()
ax = fig.add_subplot(111, projection='3d')

vertices = np.array([[0, 0, 0],
                     [1, 0, 0],
                     [1, 1, 0],
                     [0, 1, 0],
                     [0, 0, 1],
                     [1, 0, 1],
                     [1, 1, 1],
                     [0, 1, 1]])

# 定义立方体的面
faces = [
    [vertices[0], vertices[1], vertices[5], vertices[4]],
    [vertices[7], vertices[6], vertices[2], vertices[3]],
    [vertices[0], vertices[3], vertices[7], vertices[4]],
    [vertices[1], vertices[2], vertices[6], vertices[5]],
    [vertices[0], vertices[1], vertices[2], vertices[3]],
    [vertices[4], vertices[5], vertices[6], vertices[7]]
]

# 绘制立方体的面
for face in faces:
    x, y, z = zip(*face)
    ax.plot_surface(np.array([x]), np.array([y]), np.array([z]), alpha=0.5)

ax.set_xlabel('X axis')
ax.set_ylabel('Y axis')
ax.set_zlabel('Z axis')

plt.title('Transparent 3D Cube - how2matplotlib.com')
plt.show()
Output:
在这个例子中,我们使用ax.plot_surface()函数来绘制立方体的每个面。alpha=0.5参数设置了面的透明度,使得我们可以看到立方体的内部结构。
5. 添加纹理
我们可以通过添加纹理来增加立方体的视觉效果:
import matplotlib.pyplot as plt
from mpl_toolkits.mplot3d import Axes3D
import numpy as np

print("Welcome to how2matplotlib.com")

fig = plt.figure()
ax = fig.add_subplot(111, projection='3d')

vertices = np.array([[0, 0, 0],
                     [1, 0, 0],
                     [1, 1, 0],
                     [0, 1, 0],
                     [0, 0, 1],
                     [1, 0, 1],
                     [1, 1, 1],
                     [0, 1, 1]])

faces = [
    [vertices[0], vertices[1], vertices[5], vertices[4]],
    [vertices[7], vertices[6], vertices[2], vertices[3]],
    [vertices[0], vertices[3], vertices[7], vertices[4]],
    [vertices[1], vertices[2], vertices[6], vertices[5]],
    [vertices[0], vertices[1], vertices[2], vertices[3]],
    [vertices[4], vertices[5], vertices[6], vertices[7]]
]

colors = ['r', 'g', 'b', 'y', 'c', 'm']

for i, face in enumerate(faces):
    x, y, z = zip(*face)
    ax.plot_surface(np.array([x]), np.array([y]), np.array([z]),
                    color=colors[i], alpha=0.8,
                    rstride=1, cstride=1,
                    linewidth=1, edgecolors='k')

ax.set_xlabel('X axis')
ax.set_ylabel('Y axis')
ax.set_zlabel('Z axis')

plt.title('Textured 3D Cube - how2matplotlib.com')
plt.show()
在这个例子中,我们为每个面设置了不同的颜色,并添加了边框(edgecolors='k')来增加纹理效果。rstride和cstride参数控制了面的网格密度。
6. 旋转立方体
为了更好地展示3D效果,我们可以让立方体旋转:
import matplotlib.pyplot as plt
from mpl_toolkits.mplot3d import Axes3D
import numpy as np

print("Welcome to how2matplotlib.com")

fig = plt.figure()
ax = fig.add_subplot(111, projection='3d')

vertices = np.array([[0, 0, 0],
                     [1, 0, 0],
                     [1, 1, 0],
                     [0, 1, 0],
                     [0, 0, 1],
                     [1, 0, 1],
                     [1, 1, 1],
                     [0, 1, 1]])

edges = [
    [vertices[0], vertices[1], vertices[2], vertices[3], vertices[0]],
    [vertices[4], vertices[5], vertices[6], vertices[7], vertices[4]],
    [vertices[0], vertices[4]],
    [vertices[1], vertices[5]],
    [vertices[2], vertices[6]],
    [vertices[3], vertices[7]]
]

def rotate_cube(angle):
    ax.clear()
    rotation_matrix = np.array([
        [np.cos(angle), -np.sin(angle), 0],
        [np.sin(angle), np.cos(angle), 0],
        [0, 0, 1]
    ])
    rotated_vertices = np.dot(vertices, rotation_matrix)

    for edge in edges:
        x, y, z = zip(*[rotated_vertices[list(vertices).index(v)] for v in edge])
        ax.plot(x, y, z, color='b')

    ax.set_xlabel('X axis')
    ax.set_ylabel('Y axis')
    ax.set_zlabel('Z axis')
    ax.set_title('Rotating 3D Cube - how2matplotlib.com')

for angle in np.linspace(0, 2*np.pi, 100):
    rotate_cube(angle)
    plt.pause(0.01)

plt.show()
这个例子创建了一个旋转的立方体动画。我们定义了一个rotate_cube函数,它根据给定的角度旋转立方体并重新绘制。然后,我们使用一个循环来不断更新旋转角度,创建旋转效果。
7. 添加标签和标题
为了使图形更加信息丰富,我们可以添加标签和标题:
import matplotlib.pyplot as plt
from mpl_toolkits.mplot3d import Axes3D
import numpy as np

print("Welcome to how2matplotlib.com")

fig = plt.figure(figsize=(10, 8))
ax = fig.add_subplot(111, projection='3d')

vertices = np.array([[0, 0, 0],
                     [1, 0, 0],
                     [1, 1, 0],
                     [0, 1, 0],
                     [0, 0, 1],
                     [1, 0, 1],
                     [1, 1, 1],
                     [0, 1, 1]])

edges = [
    [vertices[0], vertices[1], vertices[2], vertices[3], vertices[0]],
    [vertices[4], vertices[5], vertices[6], vertices[7], vertices[4]],
    [vertices[0], vertices[4]],
    [vertices[1], vertices[5]],
    [vertices[2], vertices[6]],
    [vertices[3], vertices[7]]
]

for edge in edges:
    ax.plot(*zip(*edge), color='b')

ax.set_xlabel('X axis', fontsize=12, labelpad=10)
ax.set_ylabel('Y axis', fontsize=12, labelpad=10)
ax.set_zlabel('Z axis', fontsize=12, labelpad=10)

ax.set_title('3D Cube with Labels - how2matplotlib.com', fontsize=16, pad=20)

# 添加顶点标签
for i, v in enumerate(vertices):
    ax.text(v[0], v[1], v[2], f'V{i}', fontsize=10)

plt.show()
Output:
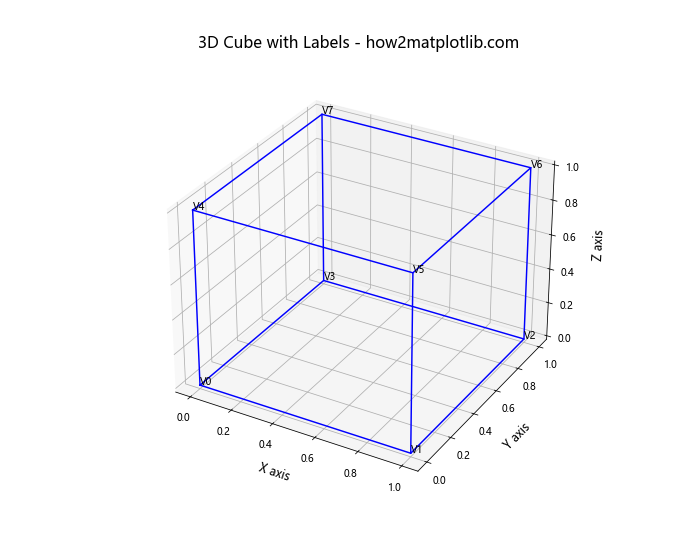
在这个例子中,我们为坐标轴添加了标签,设置了图形标题,并为立方体的每个顶点添加了标签。fontsize参数控制文本大小,labelpad和pad参数调整标签和标题的位置。
8. 绘制多个立方体
我们可以在同一个图形中绘制多个立方体:
import matplotlib.pyplot as plt
from mpl_toolkits.mplot3d import Axes3D
import numpy as np

print("Welcome to how2matplotlib.com")

fig = plt.figure(figsize=(12, 8))
ax = fig.add_subplot(111, projection='3d')

def create_cube(offset):
    return np.array([[0, 0, 0],
                     [1, 0, 0],
                     [1, 1, 0],
                     [0, 1, 0],
                     [0, 0, 1],
                     [1, 0, 1],
                     [1, 1, 1],
                     [0, 1, 1]]) + offset

def plot_cube(vertices, color):
    edges = [
        [vertices[0], vertices[1], vertices[2], vertices[3], vertices[0]],
        [vertices[4], vertices[5], vertices[6], vertices[7], vertices[4]],
        [vertices[0], vertices[4]],
        [vertices[1], vertices[5]],
        [vertices[2], vertices[6]],
        [vertices[3], vertices[7]]
    ]
    for edge in edges:
        ax.plot(*zip(*edge), color=color)

# 创建并绘制三个立方体
cube1 = create_cube([0, 0, 0])
cube2 = create_cube([2, 0, 0])
cube3 = create_cube([1, 1, 1])

plot_cube(cube1, 'r')
plot_cube(cube2, 'g')
plot_cube(cube3, 'b')

ax.set_xlabel('X axis')
ax.set_ylabel('Y axis')
ax.set_zlabel('Z axis')

plt.title('Multiple 3D Cubes - how2matplotlib.com')
plt.show()
Output:
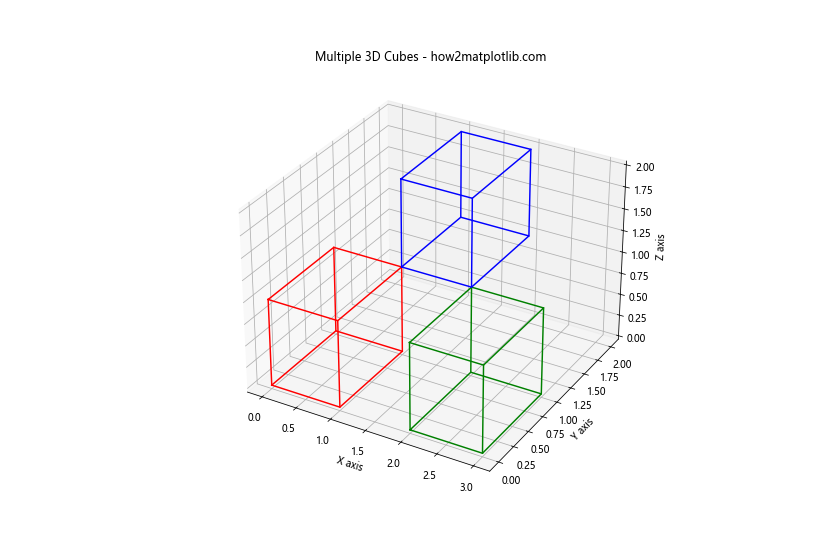
这个例子定义了两个辅助函数:create_cube用于创建带偏移的立方体顶点,plot_cube用于绘制立方体。我们使用这些函数创建并绘制了三个不同位置和颜色的立方体。
9. 添加阴影效果
为了增强3D效果,我们可以为立方体添加阴影:
import matplotlib.pyplot as plt
from mpl_toolkits.mplot3d import Axes3D
import numpy as np

print("Welcome to how2matplotlib.com")

fig = plt.figure(figsize=(10, 8))
ax = fig.add_subplot(111, projection='3d')

vertices = np.array([[0, 0, 0],
                     [1, 0, 0],
                     [1, 1, 0],
                     [0, 1, 0],
                     [0, 0, 1],
                     [1, 0, 1],
                     [1, 1, 1],
                     [0, 1, 1]])

faces = [
    [vertices[0], vertices[1], vertices[5], vertices[4]],
    [vertices[7], vertices[6], vertices[2], vertices[3]],
    [vertices[0], vertices[3], vertices[7], vertices[4]],
    [vertices[1], vertices[2], vertices[6], vertices[5]],
    [vertices[0], vertices[1], vertices[2], vertices[3]],
    [vertices[4], vertices[5], vertices[6], vertices[7]]
]

# 绘制立方体的面
for face in faces:
    x, y, z = zip(*face)
    ax.plot_surface(np.array([x]), np.array([y]), np.array([z]),
                    color='b', alpha=0.6, shade=True)

# 添加阴影
ax.plot_surface([[0, 0], [1, 1]], [[0, 1], [0, 1]], [[-0.1, -0.1], [-0.1, -0.1]],
                color='gray', alpha=0.3)

ax.set_xlabel('X axis')
ax.set_ylabel('Y axis')
ax.set_zlabel('Z axis')

plt.title('3D Cube with Shadow - how2matplotlib.com')
ax.set_zlim(-0.5, 1.5)  # 调整Z轴范围以显示阴影
plt.show()
在这个例子中,我们使用plot_surface函数绘制了立方体的面,并设置shade=True来添加简单的阴影效果。此外,我们在立方体下方绘制了一个灰色的平面作为阴影。
10. 创建交互式3D立方体
我们可以创建一个交互式的3D立方体,允许用户通过鼠标旋转和缩放:
import matplotlib.pyplot as plt
from mpl_toolkits.mplot3d import Axes3D
import numpy as np

print("Welcome to how2matplotlib.com")

fig = plt.figure(figsize=(8, 6))
ax = fig.add_subplot(111, projection='3d')

vertices = np.array([[0, 0, 0],
                     [1, 0, 0],
                     [1, 1, 0],
                     [0, 1, 0],
                     [0, 0, 1],
                     [1, 0, 1],
                     [1, 1, 1],
                     [0, 1, 1]])

edges = [
    [vertices[0], vertices[1], vertices[2], vertices[3], vertices[0]],
    [vertices[4], vertices[5], vertices[6], vertices[7], vertices[4]],
    [vertices[0], vertices[4]],
    [vertices[1], vertices[5]],
    [vertices[2], vertices[6]],
    [vertices[3], vertices[7]]
]

for edge in edges:
    ax.plot(*zip(*edge), color='b')

ax.set_xlabel('X axis')
ax.set_ylabel('Y axis')
ax.set_zlabel('Z axis')

plt.title('Interactive 3D Cube - how2matplotlib.com')

# 设置视角
ax.view_init(elev=20, azim=45)

# 添加交互性
def on_move(event):
    if event.inaxes == ax:
        ax.view_init(elev=ax.elev, azim=ax.azim)
        fig.canvas.draw_idle()

fig.canvas.mpl_connect('motion_notify_event', on_move)

plt.show()
Output:
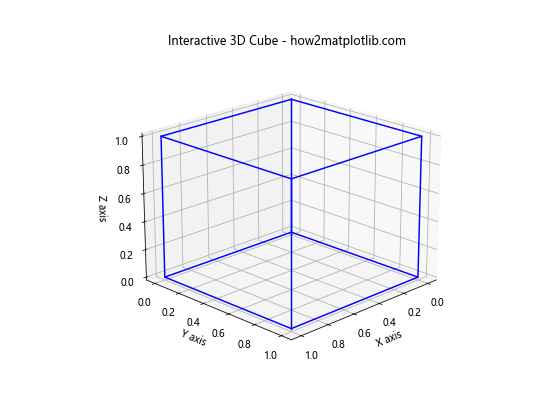
这个例子创建了一个可以通过鼠标交互的3D立方体。用户可以通过移动鼠标来旋转立方体,从不同角度查看它。
11. 绘制带有纹理的立方体
我们可以为立方体的每个面添加不同的纹理:
import matplotlib.pyplot as plt
from mpl_toolkits.mplot3d import Axes3D
import numpy as np

print("Welcome to how2matplotlib.com")

fig = plt.figure(figsize=(10, 8))
ax = fig.add_subplot(111, projection='3d')

vertices = np.array([[0, 0, 0],
                     [1, 0, 0],
                     [1, 1, 0],
                     [0, 1, 0],
                     [0, 0, 1],
                     [1, 0, 1],
                     [1, 1, 1],
                     [0, 1, 1]])

faces = [
    [vertices[0], vertices[1], vertices[5], vertices[4]],
    [vertices[7], vertices[6], vertices[2], vertices[3]],
    [vertices[0], vertices[3], vertices[7], vertices[4]],
    [vertices[1], vertices[2], vertices[6], vertices[5]],
    [vertices[0], vertices[1], vertices[2], vertices[3]],
    [vertices[4], vertices[5], vertices[6], vertices[7]]
]

# 创建纹理
textures = [plt.cm.viridis, plt.cm.plasma, plt.cm.inferno,
            plt.cm.magma, plt.cm.cividis, plt.cm.twilight]

for face, texture in zip(faces, textures):
    x, y, z = zip(*face)
    xx, yy = np.meshgrid(np.linspace(min(x), max(x), 10),
                         np.linspace(min(y), max(y), 10))
    zz = np.full_like(xx, np.mean(z))

    ax.plot_surface(xx, yy, zz, facecolors=texture(zz), shade=True)

ax.set_xlabel('X axis')
ax.set_ylabel('Y axis')
ax.set_zlabel('Z axis')

plt.title('Textured 3D Cube - how2matplotlib.com')
ax.set_box_aspect((1,1,1))  # 设置纵横比为1:1:1
plt.show()
Output:
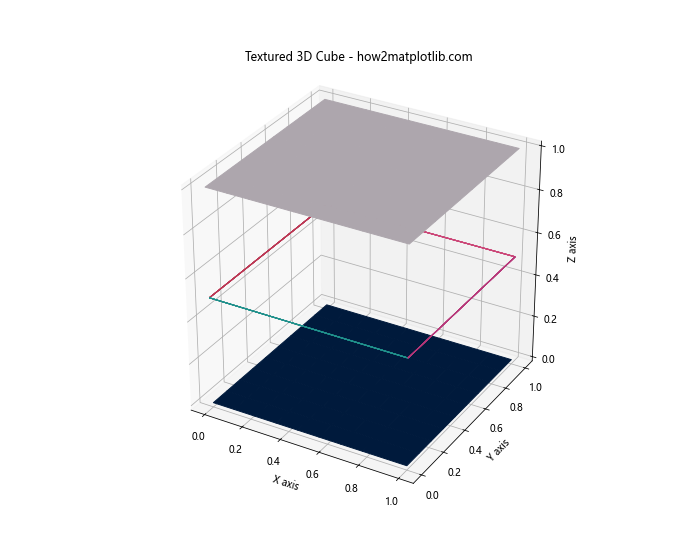
这个例子为立方体的每个面使用了不同的颜色映射作为纹理。我们使用plot_surface函数绘制每个面,并使用facecolors参数应用颜色映射。
12. 绘制透明立方体
我们可以创建一个透明的立方体,让内部结构可见:
import matplotlib.pyplot as plt
from mpl_toolkits.mplot3d import Axes3D
import numpy as np

print("Welcome to how2matplotlib.com")

fig = plt.figure(figsize=(10, 8))
ax = fig.add_subplot(111, projection='3d')

vertices = np.array([[0, 0, 0],
                     [1, 0, 0],
                     [1, 1, 0],
                     [0, 1, 0],
                     [0, 0, 1],
                     [1, 0, 1],
                     [1, 1, 1],
                     [0, 1, 1]])

faces = [
    [vertices[0], vertices[1], vertices[5], vertices[4]],
    [vertices[7], vertices[6], vertices[2], vertices[3]],
    [vertices[0], vertices[3], vertices[7], vertices[4]],
    [vertices[1], vertices[2], vertices[6], vertices[5]],
    [vertices[0], vertices[1], vertices[2], vertices[3]],
    [vertices[4], vertices[5], vertices[6], vertices[7]]
]

colors = ['r', 'g', 'b', 'y', 'c', 'm']

for face, color in zip(faces, colors):
    x, y, z = zip(*face)
    ax.add_collection3d(plt.fill_polygon(list(zip(x, y)), color=color, alpha=0.3), zs=z, zdir='z')

# 绘制边框
edges = [
    [vertices[0], vertices[1]],
    [vertices[1], vertices[2]],
    [vertices[2], vertices[3]],
    [vertices[3], vertices[0]],
    [vertices[4], vertices[5]],
    [vertices[5], vertices[6]],
    [vertices[6], vertices[7]],
    [vertices[7], vertices[4]],
    [vertices[0], vertices[4]],
    [vertices[1], vertices[5]],
    [vertices[2], vertices[6]],
    [vertices[3], vertices[7]]
]

for edge in edges:
    ax.plot(*zip(*edge), color='black')

ax.set_xlabel('X axis')
ax.set_ylabel('Y axis')
ax.set_zlabel('Z axis')

plt.title('Transparent 3D Cube - how2matplotlib.com')
ax.set_box_aspect((1,1,1))  # 设置纵横比为1:1:1
plt.show()
这个例子创建了一个透明的立方体,每个面都有不同的颜色。我们使用fill_polygon函数绘制每个面,并设置alpha值来控制透明度。边框使用黑色线条绘制,以突出立方体的结构。
13. 绘制带有内部结构的立方体
我们可以在立方体内部添加一些结构,以展示更复杂的3D效果:
import matplotlib.pyplot as plt
from mpl_toolkits.mplot3d import Axes3D
import numpy as np

print("Welcome to how2matplotlib.com")

fig = plt.figure(figsize=(10, 8))
ax = fig.add_subplot(111, projection='3d')

vertices = np.array([[0, 0, 0],
                     [1, 0, 0],
                     [1, 1, 0],
                     [0, 1, 0],
                     [0, 0, 1],
                     [1, 0, 1],
                     [1, 1, 1],
                     [0, 1, 1]])

edges = [
    [vertices[0], vertices[1]],
    [vertices[1], vertices[2]],
    [vertices[2], vertices[3]],
    [vertices[3], vertices[0]],
    [vertices[4], vertices[5]],
    [vertices[5], vertices[6]],
    [vertices[6], vertices[7]],
    [vertices[7], vertices[4]],
    [vertices[0], vertices[4]],
    [vertices[1], vertices[5]],
    [vertices[2], vertices[6]],
    [vertices[3], vertices[7]]
]

# 绘制立方体边框
for edge in edges:
    ax.plot(*zip(*edge), color='black')

# 添加内部结构
internal_points = np.random.rand(20, 3)
ax.scatter(internal_points[:, 0], internal_points[:, 1], internal_points[:, 2], c='r', s=50)

for i in range(len(internal_points)):
    for j in range(i+1, len(internal_points)):
        if np.linalg.norm(internal_points[i] - internal_points[j]) < 0.3:
            ax.plot(*zip(internal_points[i], internal_points[j]), color='b', alpha=0.5)

ax.set_xlabel('X axis')
ax.set_ylabel('Y axis')
ax.set_zlabel('Z axis')

plt.title('3D Cube with Internal Structure - how2matplotlib.com')
ax.set_box_aspect((1,1,1))  # 设置纵横比为1:1:1
plt.show()
Output:
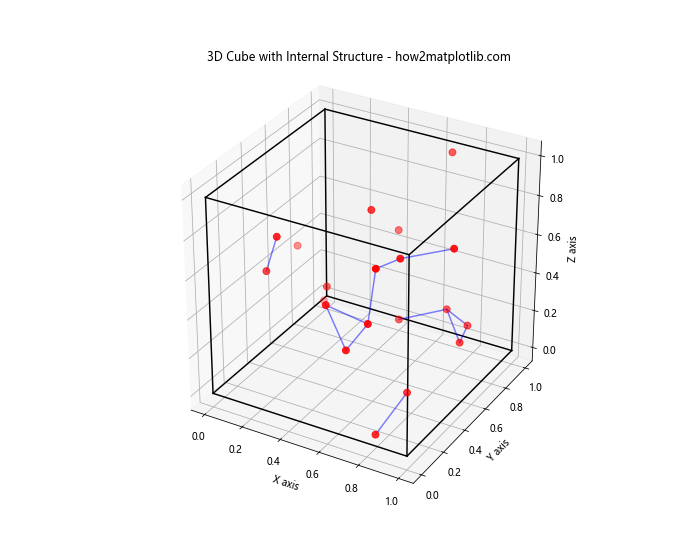
这个例子在立方体内部添加了随机点和连接线,创造了一个复杂的内部结构。我们使用scatter函数绘制点,并用线条连接距离较近的点。
14. 创建动画效果
我们可以创建一个动画,展示立方体的旋转和内部结构的变化:
import matplotlib.pyplot as plt
from mpl_toolkits.mplot3d import Axes3D
import numpy as np
from matplotlib.animation import FuncAnimation

print("Welcome to how2matplotlib.com")

fig = plt.figure(figsize=(10, 8))
ax = fig.add_subplot(111, projection='3d')

vertices = np.array([[0, 0, 0],
                     [1, 0, 0],
                     [1, 1, 0],
                     [0, 1, 0],
                     [0, 0, 1],
                     [1, 0, 1],
                     [1, 1, 1],
                     [0, 1, 1]])

edges = [
    [vertices[0], vertices[1]],
    [vertices[1], vertices[2]],
    [vertices[2], vertices[3]],
    [vertices[3], vertices[0]],
    [vertices[4], vertices[5]],
    [vertices[5], vertices[6]],
    [vertices[6], vertices[7]],
    [vertices[7], vertices[4]],
    [vertices[0], vertices[4]],
    [vertices[1], vertices[5]],
    [vertices[2], vertices[6]],
    [vertices[3], vertices[7]]
]

def update(frame):
    ax.clear()

    # 旋转立方体
    rotation_matrix = np.array([
        [np.cos(frame/10), -np.sin(frame/10), 0],
        [np.sin(frame/10), np.cos(frame/10), 0],
        [0, 0, 1]
    ])
    rotated_vertices = np.dot(vertices, rotation_matrix)

    # 绘制立方体边框
    for edge in edges:
        start, end = edge
        start_rotated = np.dot(start, rotation_matrix)
        end_rotated = np.dot(end, rotation_matrix)
        ax.plot(*zip(start_rotated, end_rotated), color='black')

    # 添加内部结构
    internal_points = np.random.rand(20, 3)
    ax.scatter(internal_points[:, 0], internal_points[:, 1], internal_points[:, 2], c='r', s=50)

    for i in range(len(internal_points)):
        for j in range(i+1, len(internal_points)):
            if np.linalg.norm(internal_points[i] - internal_points[j]) < 0.3:
                ax.plot(*zip(internal_points[i], internal_points[j]), color='b', alpha=0.5)

    ax.set_xlabel('X axis')
    ax.set_ylabel('Y axis')
    ax.set_zlabel('Z axis')
    ax.set_title('Animated 3D Cube - how2matplotlib.com')
    ax.set_xlim(-1, 2)
    ax.set_ylim(-1, 2)
    ax.set_zlim(-1, 2)

ani = FuncAnimation(fig, update, frames=np.linspace(0, 2*np.pi, 100), interval=50)
plt.show()
Output:
这个例子创建了一个动画,展示了旋转的立方体和不断变化的内部结构。我们使用FuncAnimation函数来创建动画,update函数在每一帧更新立方体的旋转和内部结构。
15. 绘制多个嵌套的立方体
我们可以创建多个嵌套的立方体,展示更复杂的3D结构:
import matplotlib.pyplot as plt
from mpl_toolkits.mplot3d import Axes3D
import numpy as np

print("Welcome to how2matplotlib.com")

fig = plt.figure(figsize=(10, 8))
ax = fig.add_subplot(111, projection='3d')

def create_cube(size, offset):
    vertices = np.array([
        [0, 0, 0],
        [size, 0, 0],
        [size, size, 0],
        [0, size, 0],
        [0, 0, size],
        [size, 0, size],
        [size, size, size],
        [0, size, size]
    ]) + offset

    edges = [
        [vertices[0], vertices[1]],
        [vertices[1], vertices[2]],
        [vertices[2], vertices[3]],
        [vertices[3], vertices[0]],
        [vertices[4], vertices[5]],
        [vertices[5], vertices[6]],
        [vertices[6], vertices[7]],
        [vertices[7], vertices[4]],
        [vertices[0], vertices[4]],
        [vertices[1], vertices[5]],
        [vertices[2], vertices[6]],
        [vertices[3], vertices[7]]
    ]

    return edges

# 创建三个嵌套的立方体
cubes = [
    create_cube(1, [0, 0, 0]),
    create_cube(0.6, [0.2, 0.2, 0.2]),
    create_cube(0.3, [0.35, 0.35, 0.35])
]

colors = ['r', 'g', 'b']

for cube, color in zip(cubes, colors):
    for edge in cube:
        ax.plot(*zip(*edge), color=color)

ax.set_xlabel('X axis')
ax.set_ylabel('Y axis')
ax.set_zlabel('Z axis')

plt.title('Nested 3D Cubes - how2matplotlib.com')
ax.set_box_aspect((1,1,1))  # 设置纵横比为1:1:1
plt.show()
Output:
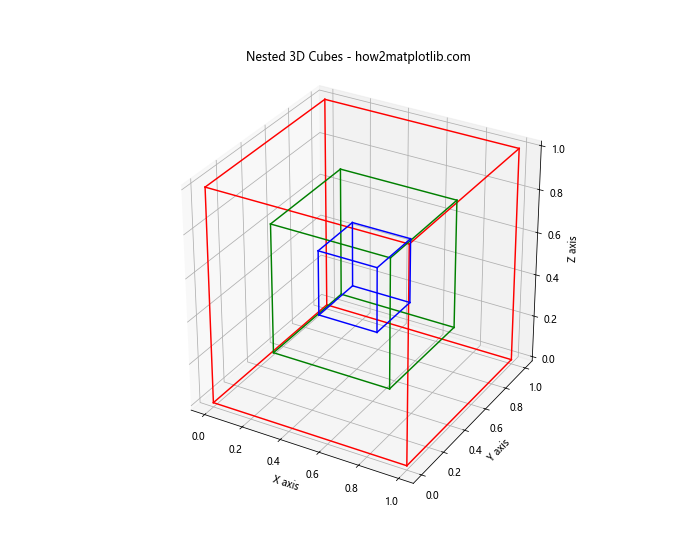
这个例子创建了三个不同大小的嵌套立方体,每个立方体使用不同的颜色。我们定义了一个create_cube函数来生成不同大小和位置的立方体。
结论
通过这些示例,我们展示了使用Matplotlib绘制3D立方体的多种方法和技巧。从基本的立方体绘制到添加复杂的纹理、透明度和动画效果,Matplotlib提供了丰富的工具来创建引人注目的3D可视化。这些技术不仅可以用于绘制立方体,还可以扩展到其他3D形状和结构的可视化。
在实际应用中,这些3D可视化技术可以用于科学数据的展示、建筑设计的预览、游戏开发中的物体建模等多个领域。通过掌握这些技巧,你可以创建出更加生动、直观的数据可视化,帮助观众更好地理解复杂的3D结构和数据关系。
记住,3D可视化虽然吸引人,但也要注意不要过度使用。在某些情况下,简单的2D图表可能更有效地传达信息。选择合适的可视化方法应该基于你的数据特性和目标受众。
最后,Matplotlib的3D绘图功能还有很多我们没有涉及的高级特性,如复杂的光照效果、材质渲染等。如果你对这些感兴趣,可以进一步探索Matplotlib的文档和其他高级3D绘图库,如Mayavi或VTK。继续实践和探索,你将能够创建出更加令人印象深刻的3D可视化效果。
 极客教程
极客教程