jQuery UI Tooltip
jQuery UI中的tooltip widget与传统的tooltip不同,主要是使其更具有主题性,并使其更具有可定制性。一些可用的自定义功能是。
- 额外的内容如脚注等也可以通过Ajax检索来显示。
- 定制警告和错误字段的字段。
- 自定义位置,即把工具提示放在元素的中心。
默认情况下,使用渐变动画来显示工具提示。
语法:
$( "#div_tooltip" ).tooltip({
});
属性值:
- content。这个属性表示工具提示的内容。默认情况下,它的值是一个返回标题属性的函数。
- disabled:这个属性被设置为 “true “时,将禁用工具提示。默认情况下,其值为false。
- hide。这个属性表示隐藏工具提示时的动画效果。默认情况下,其值为真。
- items。这个选项表示哪些项目可以显示工具提示。默认情况下,它的值是[标题]。
- position。这个属性决定了工具提示相对于相关目标元素的位置。默认情况下,它的值是返回标题属性的函数。可能的值是:我的、在、的、碰撞、使用、内。
- show。这个属性表示如何对工具提示的显示进行动画处理。默认情况下,其值为真。
- tooltipClass。这个属性是一个类,可以添加到tooltip widget,用于警告或错误等工具提示。默认情况下,其值为空。
- track。这个属性设置为 “true “时,工具提示会跟随/跟踪鼠标。默认情况下,它的值是假的。
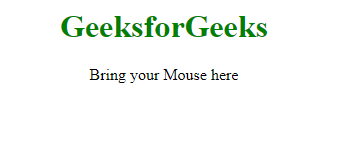
工具提示是可添加的,它将覆盖用标题属性编写的父字符串。这给了我们一个优势,因为我们可以通过使用脚本来改变工具提示,这就像同一个元素可以在不同的要求下显示不同的工具提示字符串。让我们来试试。在这里,我们将标题定义为 “Welcome to geeksforgeeks”,它被覆盖在javascript代码中。
示例1
<html>

<head>
    <link href=
'https://ajax.googleapis.com/ajax/libs/jqueryui/1.12.1/themes/ui-lightness/jquery-ui.css'
          rel='stylesheet'>
</head>

<body>
    <center>
        <h1 style="color:green">
          GeeksforGeeks
      </h1>
        <div id=div_tooltip
             title='Welcome to geeksforgeeks'>
            Bring your Mouse here
        </div>

        <script src=
"https://ajax.googleapis.com/ajax/libs/jquery/3.1.1/jquery.min.js">
        </script>
        <script src=
"https://ajax.googleapis.com/ajax/libs/jqueryui/1.12.1/jquery-ui.min.js">
        </script>

        <script>
            (document).ready(function() {

                ("#div_tooltip").tooltip({});
            })
        </script>
    </center>
</body>

</html>
输出:

覆盖Tooltip的标题:jQuery UI中的Tooltip widget的另一个主要优势是,标题可以在定义元素的时候被覆盖。这可以通过在我们的JavaScript代码中的内容选项中指定信息来实现。
示例2
<html>

<head>
    <link href=
'https://ajax.googleapis.com/ajax/libs/jqueryui/1.12.1/themes/ui-lightness/jquery-ui.css'
          rel='stylesheet'>
</head>

<body>
    <center>
        <h1 style="color:green">GeeksforGeeks</h1>
        <div id=div_tooltip
             title='Welcome to geeksforgeeks'>
          Bring your Mouse here
      </div>

        <script src=
"https://ajax.googleapis.com/ajax/libs/jquery/3.1.1/jquery.min.js">
      </script>
        <script src=
"https://ajax.googleapis.com/ajax/libs/jqueryui/1.12.1/jquery-ui.min.js">
      </script>

        <script>
            (document).ready(function() {
                ("#div_tooltip").tooltip({
                    content: "This is my content"
                });
            })
        </script>
    </center>
</body>

</html>
输出:

禁用工具提示:当设置为 “true “时,该属性将禁用工具提示。默认情况下,它的值是假的。
示例3
<html>

<head>
    <link href=
'https://ajax.googleapis.com/ajax/libs/jqueryui/1.12.1/themes/ui-lightness/jquery-ui.css'
          rel='stylesheet'>
</head>

<body>
    <center>
        <h1 style="color:green">GeeksforGeeks</h1>
        <div id=div_tooltip
             title='Welcome to geeksforgeeks'>
          Bring your Mouse here
      </div>

        <script src=
"https://ajax.googleapis.com/ajax/libs/jquery/3.1.1/jquery.min.js">
      </script>
        <script src=
"https://ajax.googleapis.com/ajax/libs/jqueryui/1.12.1/jquery-ui.min.js">
      </script>

        <script>
            (document).ready(function() {

                ("#div_tooltip").tooltip({
                    disabled: true
                });

            })
        </script>
    </center>
</body>

</html>
输出:

项目。items属性用于设置不同的元素信息,作为工具提示显示。在下面的例子中,一个文本框被保存在div标签内。默认情况下,写在文本框内的信息将被显示为工具提示,但通过将items设置为div标签,并将写在div标签标题属性内的信息显示为工具提示。
示例4
<html>

<head>
    <link href=
'https://ajax.googleapis.com/ajax/libs/jqueryui/1.12.1/themes/ui-lightness/jquery-ui.css'
          rel='stylesheet'>
</head>

<body>
    <center>
        <h1 style="color:green">GeeksforGeeks</h1>
        <div id=div_tooltip title='I am inside a Div tag'>
            <input type=textbox
                   name=my_text
                   id=my_text
                   title='I am the input box'>
        </div>

        <script src=
"https://ajax.googleapis.com/ajax/libs/jquery/3.1.1/jquery.min.js">
      </script>
        <script src=
"https://ajax.googleapis.com/ajax/libs/jqueryui/1.12.1/jquery-ui.min.js">
      </script>

        <script>
            (document).ready(function() {

                ("#my_text").tooltip({
                    items: 'div'
                });

            })
        </script>
    </center>
</body>

</html>
输出:

Position。这个属性用于在相对于主元素的任何位置显示工具提示。
可能的值是。
- my。这就是工具提示框。
- at。显示工具提示的元素。
还要注意的是。
- 所有的水平排列可以采取三个位置:左边或右边或中间。
- 所有的垂直对齐可以采取三个位置:顶部或底部或中心。
检查这一行
position: { my: "left center", at: "right top" }
这里,工具提示的左侧中心位置(my: “left center”)将与主元素的右侧顶部位置(at: “right top”)对齐。
示例5
<html>

<head>
    <link href=
'https://ajax.googleapis.com/ajax/libs/jqueryui/1.12.1/themes/ui-lightness/jquery-ui.css'
          rel='stylesheet'>
</head>

<body>
    <center>
        <h1 style="color:green">GeeksforGeeks</h1>

        <div align=center>
            <input type=textbox
                   name=my_text
                   id=my_text
                   title=''>
        </div>

        <script src=
"https://ajax.googleapis.com/ajax/libs/jquery/3.1.1/jquery.min.js">
        </script>
        <script src=
"https://ajax.googleapis.com/ajax/libs/jqueryui/1.12.1/jquery-ui.min.js">
        </script>

        <script>
            (document).ready(function() {

                ("#my_text").tooltip({
                    content: "I am the textbox",
                    position: {
                        my: "left center",
                        at: "right top"
                    }
                });
            })
        </script>
    </center>
</body>

</html>
输出:

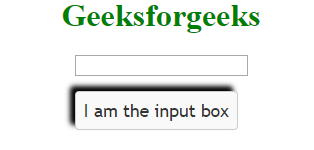
显示-隐藏工具提示:显示和隐藏是两个独立的选项,但我们可以一起学习。show属性是用来添加效果来管理工具提示的外观。这是在显示工具提示时产生的动画。hide属性用于添加效果来管理工具提示的消失。这是在隐藏工具提示时创建的动画。
对于显示和隐藏选项,在下面的例子中使用几种效果。
示例 6
<html>

<head>
    <link href=
'https://ajax.googleapis.com/ajax/libs/jqueryui/1.12.1/themes/ui-lightness/jquery-ui.css'
          rel='stylesheet'>
</head>

<body>
    <center>
        <h1 style="color:green">Geeksforgeeks</h1>

        <input type=textbox
               name=my_text
               id=my_text
               title='I am the input box'>

        <script src=
"https://ajax.googleapis.com/ajax/libs/jquery/3.1.1/jquery.min.js">
      </script>
        <script src=
"https://ajax.googleapis.com/ajax/libs/jqueryui/1.12.1/jquery-ui.min.js">
      </script>

        <script>
            (document).ready(function() {

                ("#my_text").tooltip({
                    show: {
                        effect: "slide",
                        duration: 400
                    },
                    hide: {
                        effect: "pulsate",
                        duration: 400
                    }
                });
            })
        </script>
    </center>
</body>

</html>
输出:

 极客教程
极客教程