如何使用jQuery Simone Plugin设计窗口管理器
在这篇文章中,我们将学习使用Simone插件来设计窗口管理器,它完全基于HTML、JavaScript和jQuery。它给单网页应用程序提供了简单的类似桌面的功能。
在进行以下代码实现之前,请从官方网站下载预编译文件。请在你的项目目录中注意正确的文件路径。
例子1:下面的代码演示了带有默认选项的窗口的基本任务栏。
<!DOCTYPE html>
<html>

<head>
    <meta charset="UTF-8">
    <script src="../common/libs.js"></script>
    <style>
        p {
            padding: 20px 20px;
        }
    </style>
</head>

<body class="no-top-bar">
    <script class="demo-js">
        (document).ready(function () {
            "use strict";

            // Taskbar has to be created first
            (".taskbar").taskbar();

            // Window is binded to taskbar widget,
            // so it has to be created second
            $(".window").window();
        });
    </script>

    <div class="demo-html">
        <div class="taskbar"></div>
        <div class="window"></div>

        <div class="demo">
            <div class="description">
                <p style="text-align:center">
                    This demonstrates the basic
                    taskbar and one window,
                    both with default options.
                </p>

            </div>
        </div>
    </div>
</body>

</html>
输出:
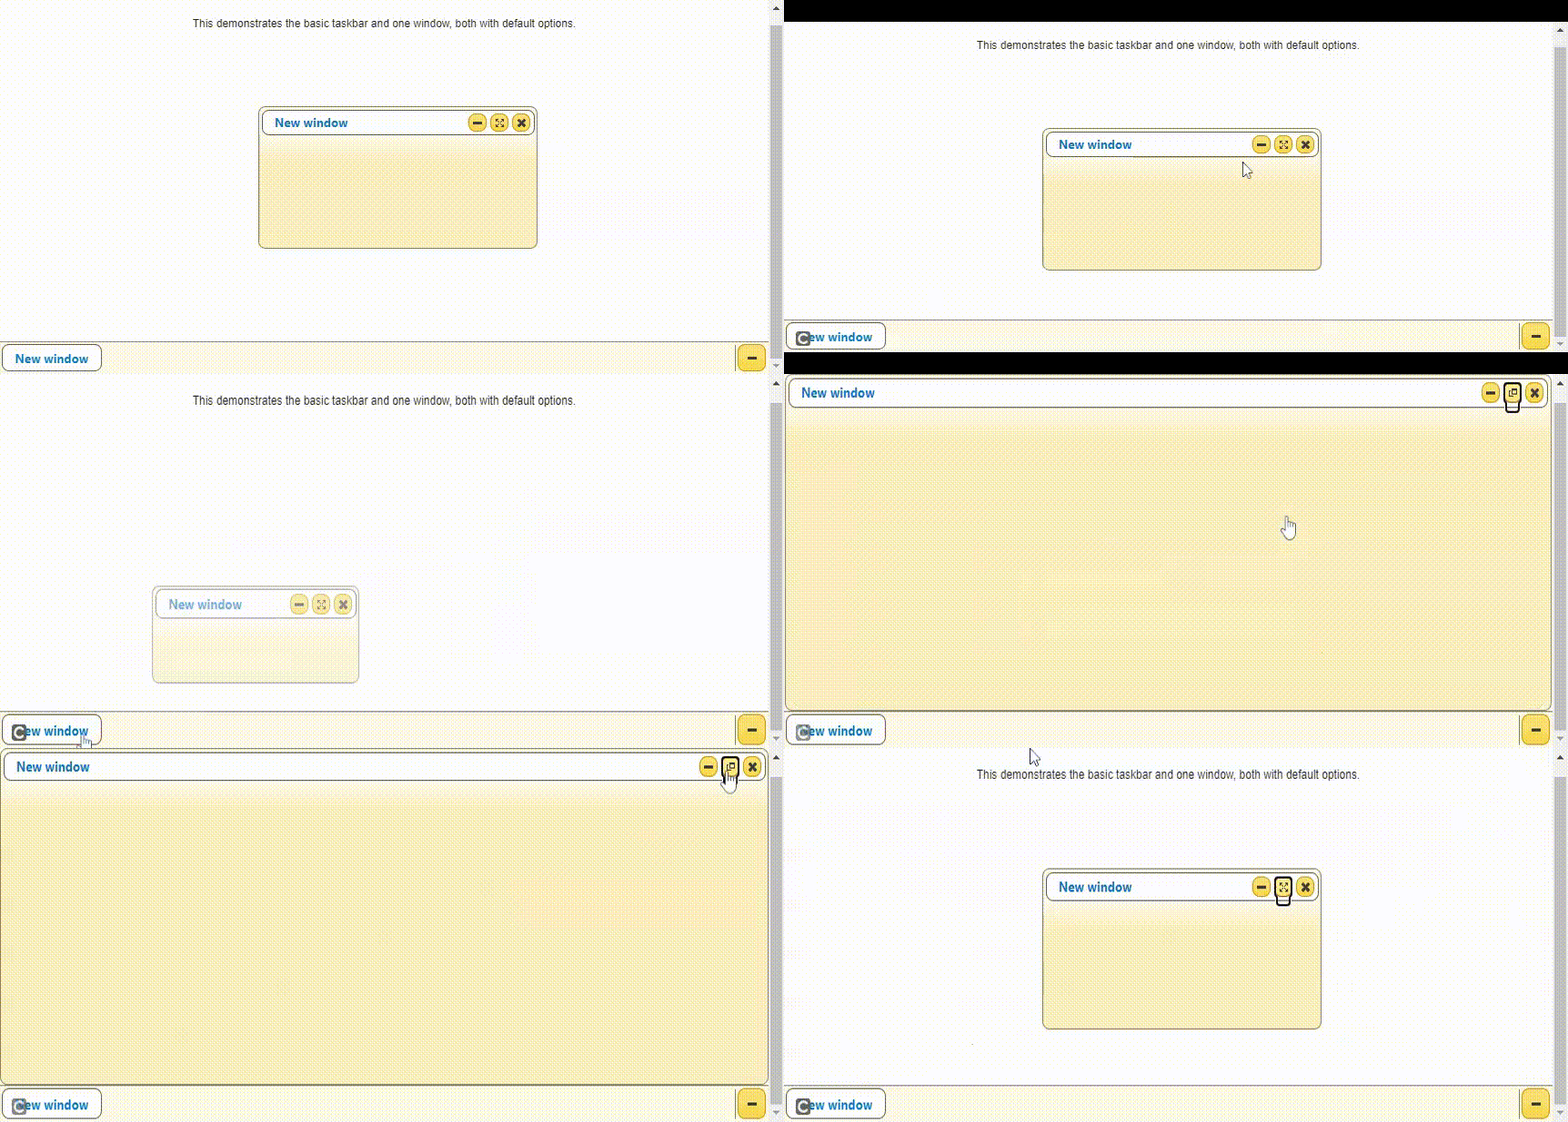
例子2:下面的代码演示了将窗口包含设置为 “视口 “和 “可见”。请参考调整大小和拖动窗口的输出。
<!DOCTYPE html>
<html>

<head>
    <meta charset="UTF-8">
    <script src="../common/libs.js"></script>
</head>

<body class="no-top-bar">
    <script class="demo-js">
        (document).ready(function () {

            "use strict";

            // Create first taskbar
            vartaskbar = (".taskbar").taskbar({
                windowsContainment: "viewport",
                buttons: {
                    openWindow: {
                        label: "Open window (viewport)"
                    }
                },
                buttonsOrder: ["openWindow"]
            });

            // Bind events to taskbar window opener
            vartaskbarOpen = (".taskbar")
                .taskbar("option", "buttons.openWindow")

                // Get jQuery object of the button created
                .element

                .on("click", function () {
                    ("<div></div>")
                        .window({
                            taskbar:taskbar,
                            title: "Viewport"
                        });
                });

            // Create second taskbar
            var taskbar2 =(".taskbar2").taskbar({
                windowsContainment: "visible",
                horizontalStick: "top left",
                buttons: {
                    openWindow: {
                        label: "Open window (visible)"
                    }
                },
                buttonsOrder: ["openWindow"]
            });

            // Bind events to second taskbar window opener
            var taskbarOpen =taskbar2
                .taskbar("option", "buttons.openWindow")

                // Get jQuery object of the button created
                .element

                .on("click", function () {
                    ("<div></div>")
                        .window({
                            taskbar: $taskbar2,
                            title: "Visible"
                        });
                });
        });
    </script>

    <div class="demo-html">
        <div class="taskbar"></div>
        <div class="taskbar2"></div>

        <div class="demo">
            <div class="description">
                Window containment describe
                boundaries in which window
                exists. There are
                windowsContainment and
                containment. Windows on the
                top taskbar has "containment"
                set to "viewport", and the
                bottom taskbar has
                "containment" set to "visible".
            </div>
        </div>
    </div>
</body>

</html>
输出:
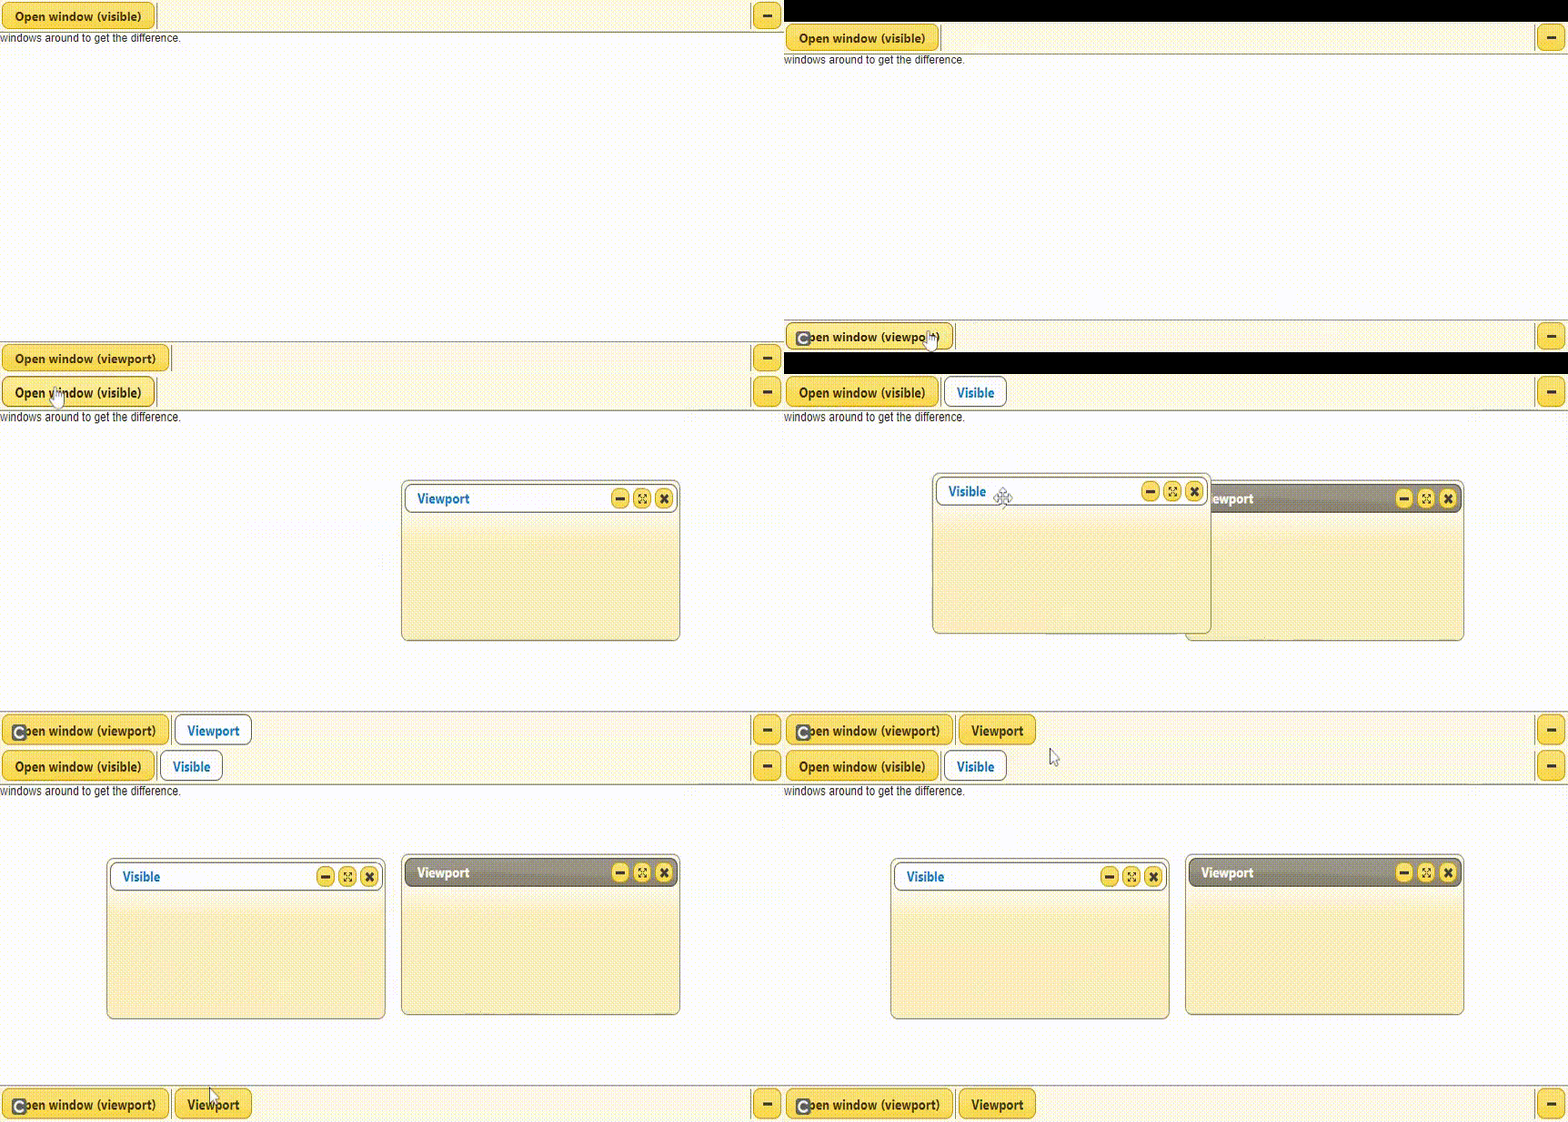
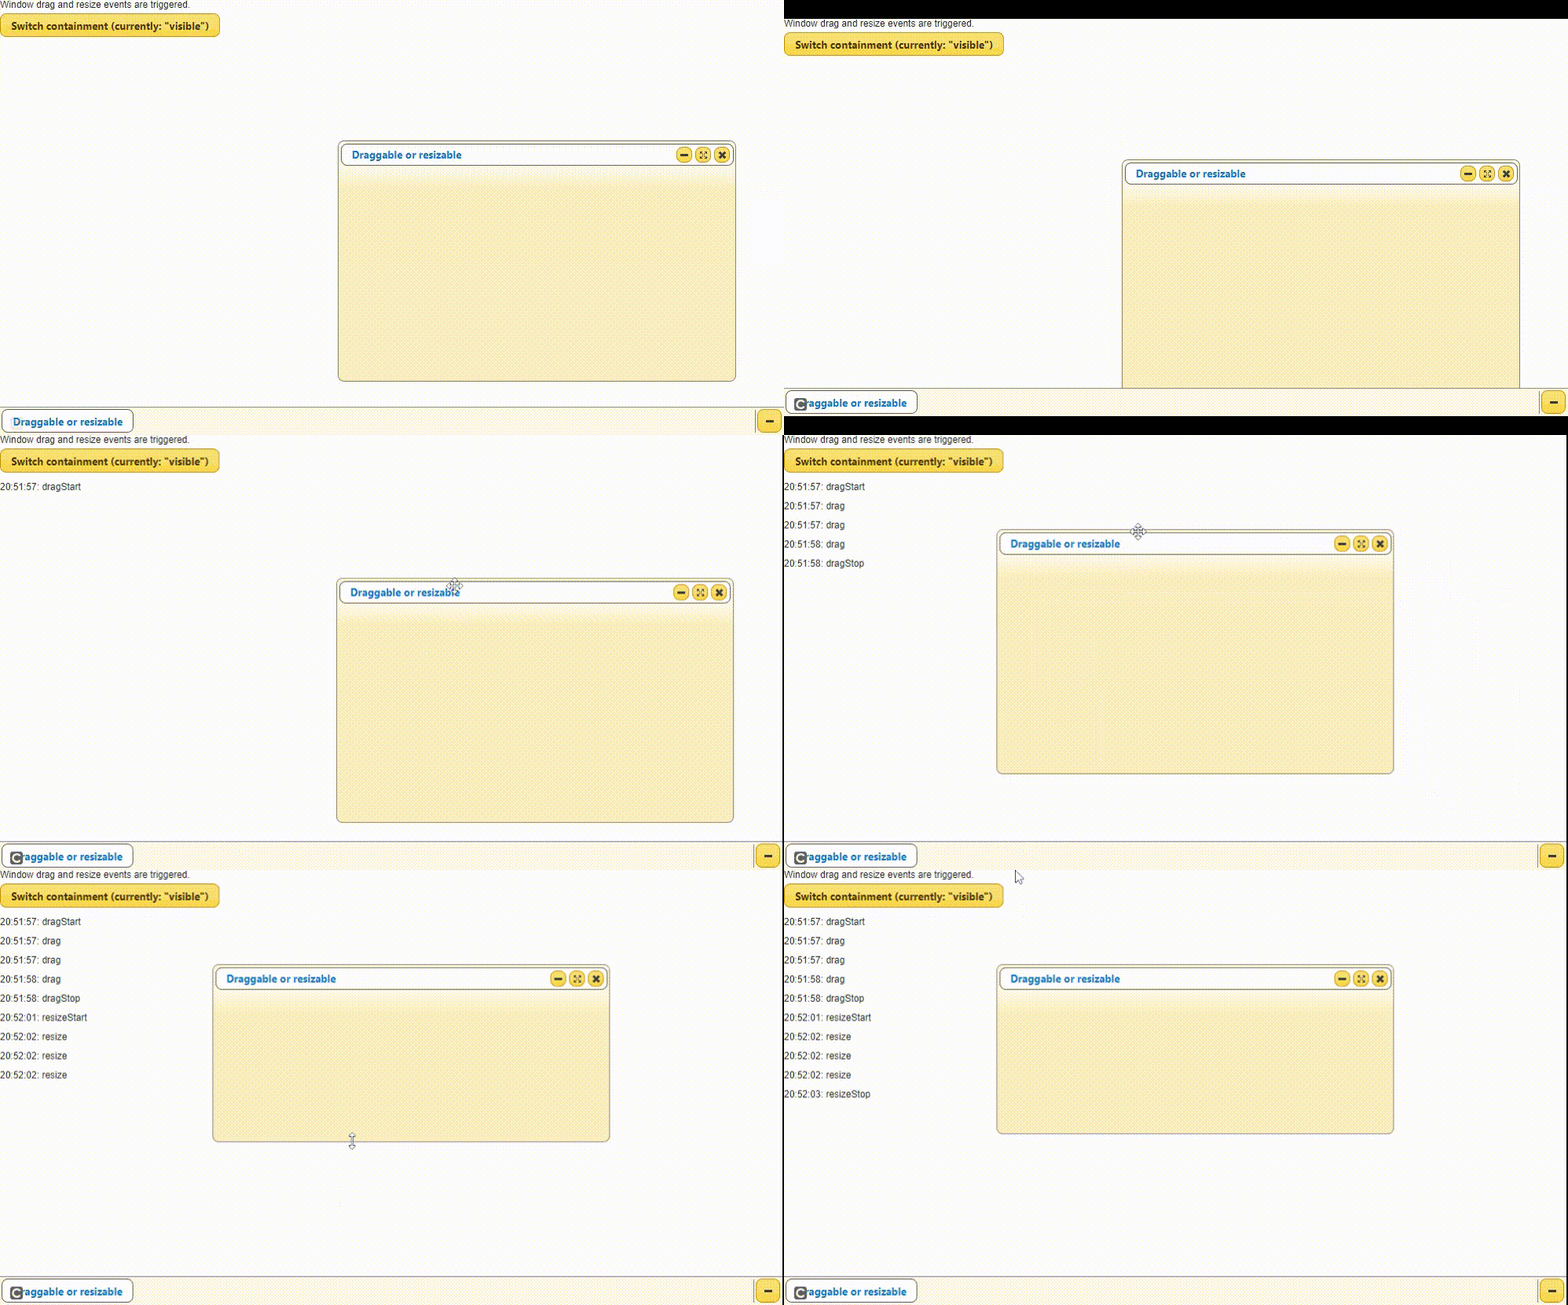
例子3:下面的代码演示了窗口互动,如 “拖动 “和 “调整大小 “事件的发生。
<!DOCTYPE html>
<html>

<head>
    <meta charset="UTF-8">
    <script src="../common/libs.js"></script>
</head>

<body class="no-top-bar">

    <script class="demo-js">
        (document).ready(function () {
            "use strict";

            // Tnitialize taskbar and
            (".taskbar").taskbar();

            // Initialize window
            (".window").window({
                title: "Draggable or resizable",
                containment: "visible",
                width: 500,
                height: 300,

                // Logs all events
                dragStart: function (event, ui) {
                    demo.log("dragStart");
                },
                drag: function (event, ui) {

                    // Log drag event
                    if (Math.random()<0.05) {
                        demo.log("drag");
                    }
                },
                dragStop: function (event, ui) {

                    // Logs event when the drag is stopped
                    demo.log("dragStop");
                },
                resizeStart: function (event, ui) {
                    demo.log("resizeStart");
                },
                resize: function (event, ui) {

                    // Log resize event
                    if (Math.random()<0.05) {
                        demo.log("resize");
                    }
                },
                resizeStop: function (event, ui) {
                    demo.log("resizeStop");
                },
            });

            // Containment change value is saved
            (".switch-containment").on("click", function () {

                var containment = (".window")
                    .window("option", "containment");

                // When the value is toggled
                containment = containment ===
                    "viewport" ? "visible" : "viewport";

                // Setting the new value
                (".window").window("option",
                    "containment", containment);

                // Button click value is set
                $(this).find("span.state")
                    .text("\"" + containment + "\"");
            }).button();
        });
    </script>


    <div class="demo-html">
        <div class="taskbar"></div>

        <div class="window"></div>

        <div class="demo">
            <div class="description">
                Window drag and resize
                events are triggered.
            </div>

            <button class="switch-containment">
                Switch containment (currently:
                <span class="state">"visible"</span>)
            </button>

            <div class="log"></div>
        </div>
    </div>
</body>

</html>
输出:
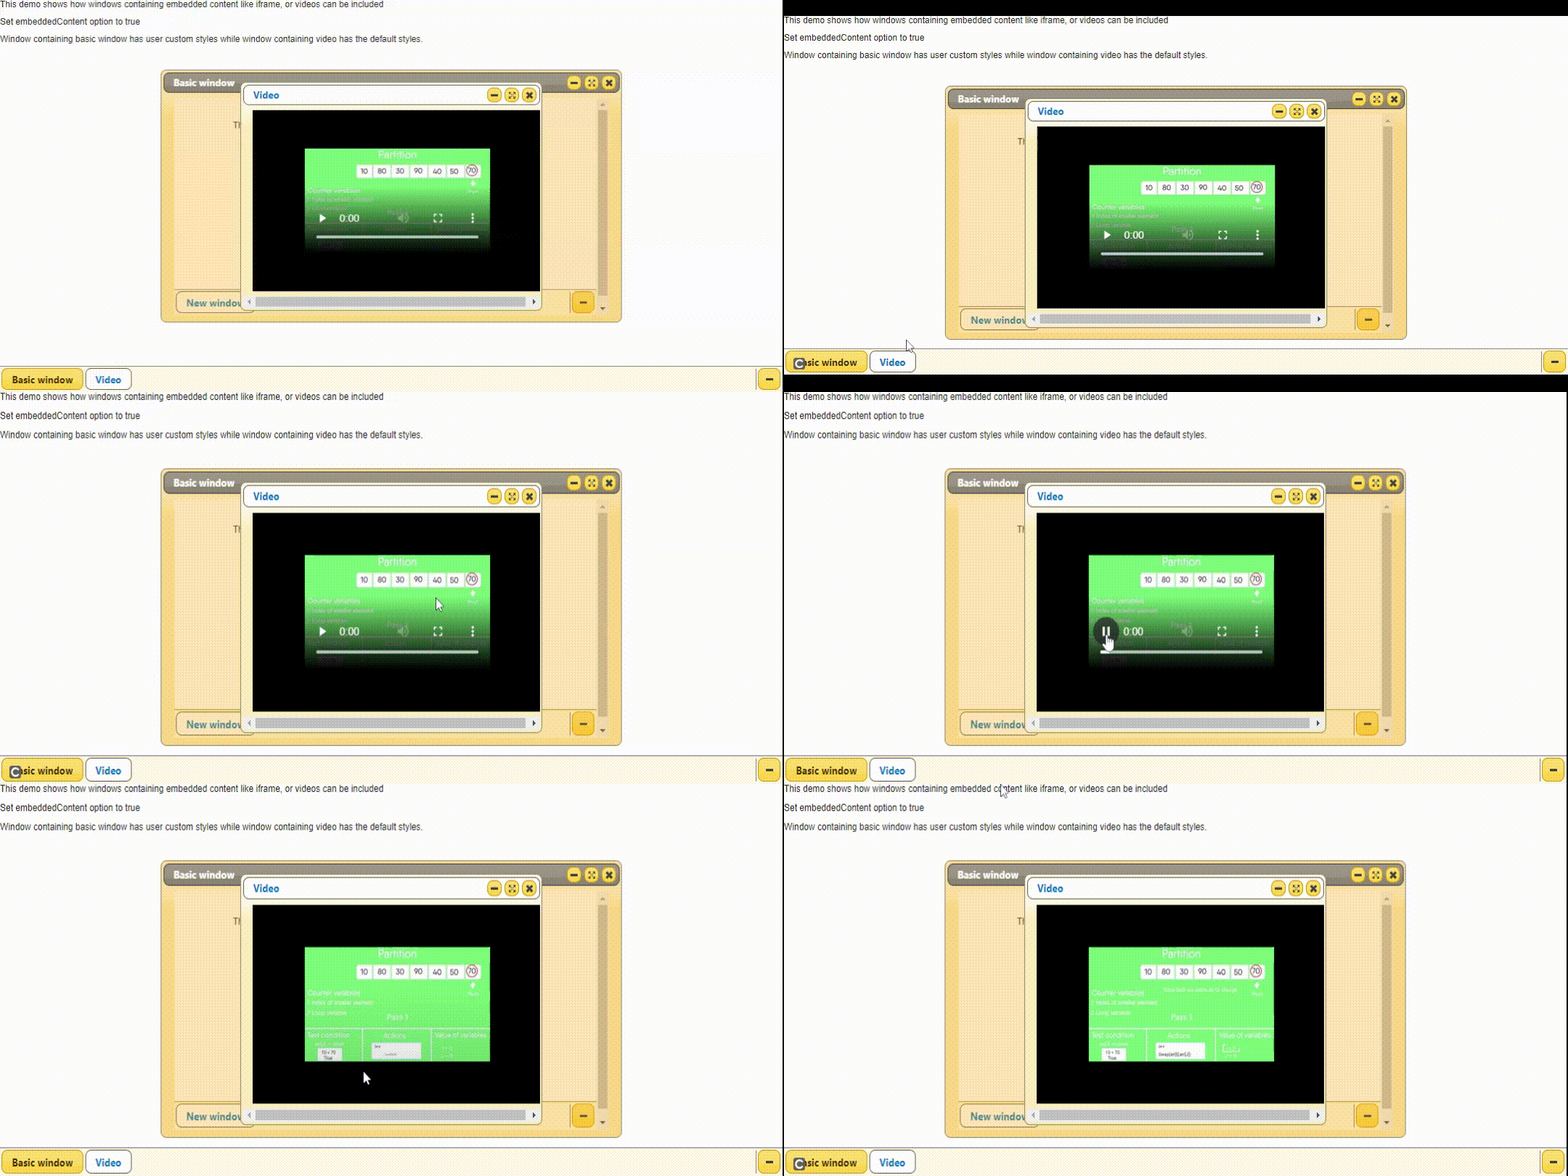
实例4:以下代码演示了在窗口的 “iframe “中嵌入视频内容。
<!DOCTYPE html>
<html>

<head>

    <meta charset="UTF-8">
    <script src="../common/libs.js"></script>
</head>

<body class="no-top-bar">
    <script class="demo-js">
        (document).ready(function () {
            "use strict";

            // Initialize taskbar
            (".taskbar").taskbar();

            // Initialize window with iframe
            // with the basic one
            (".window-demo").window({
                embeddedContent: true,

                // Widget class is needed for
                // applying styles to overlay
                widgetClass: "window-demo-widget",
                title: "Basic window",
                minWidth: 630,
                minHeight: 340
            });

            // Initialize window containing
            // desired video
            (".window-youtube").window({
                embeddedContent: true,
                title: "Video",
                minWidth: 410,
                minHeight: 250
            });
        });
    </script>

    <style class="demo-css">

        /* center the iframe and remove
           borders */
        .simone-window-content iframe {
            display: block;
            margin: 0px auto;
            border: none;
        }

        /* Apply custom styles to
           overlay of window */
        .window-demo-widget
        .simone-window-content-overlay {
            opacity: 0.3;
            background: orange;
        }
    </style>

    <div class="demo-html">
        <div class="taskbar"></div>
        <div class="window-demo">

            <!-- Embed the very first
                window in an iframe -->
            <iframe src="mybasic.html"
                width="600" height="300">
            </iframe>
        </div>

        <div class="window-youtube">

            <!-- Embed some mp4 or
                YouTube video -->
            <iframe src="sampleVideo.mp4"
                width="400" height="250">
            </iframe>
        </div>

        <div class="demo">
            <div class="description">
                This demo shows how windows
                containing embedded content
                like iframe, or videos can
                be included. <br>Set
                embeddedContent option to
                true<br>Window containing basic
                window has user custom styles
                while window containing video
                has the default styles.
            </div>
        </div>
    </div>
</body>

</html>
输出:
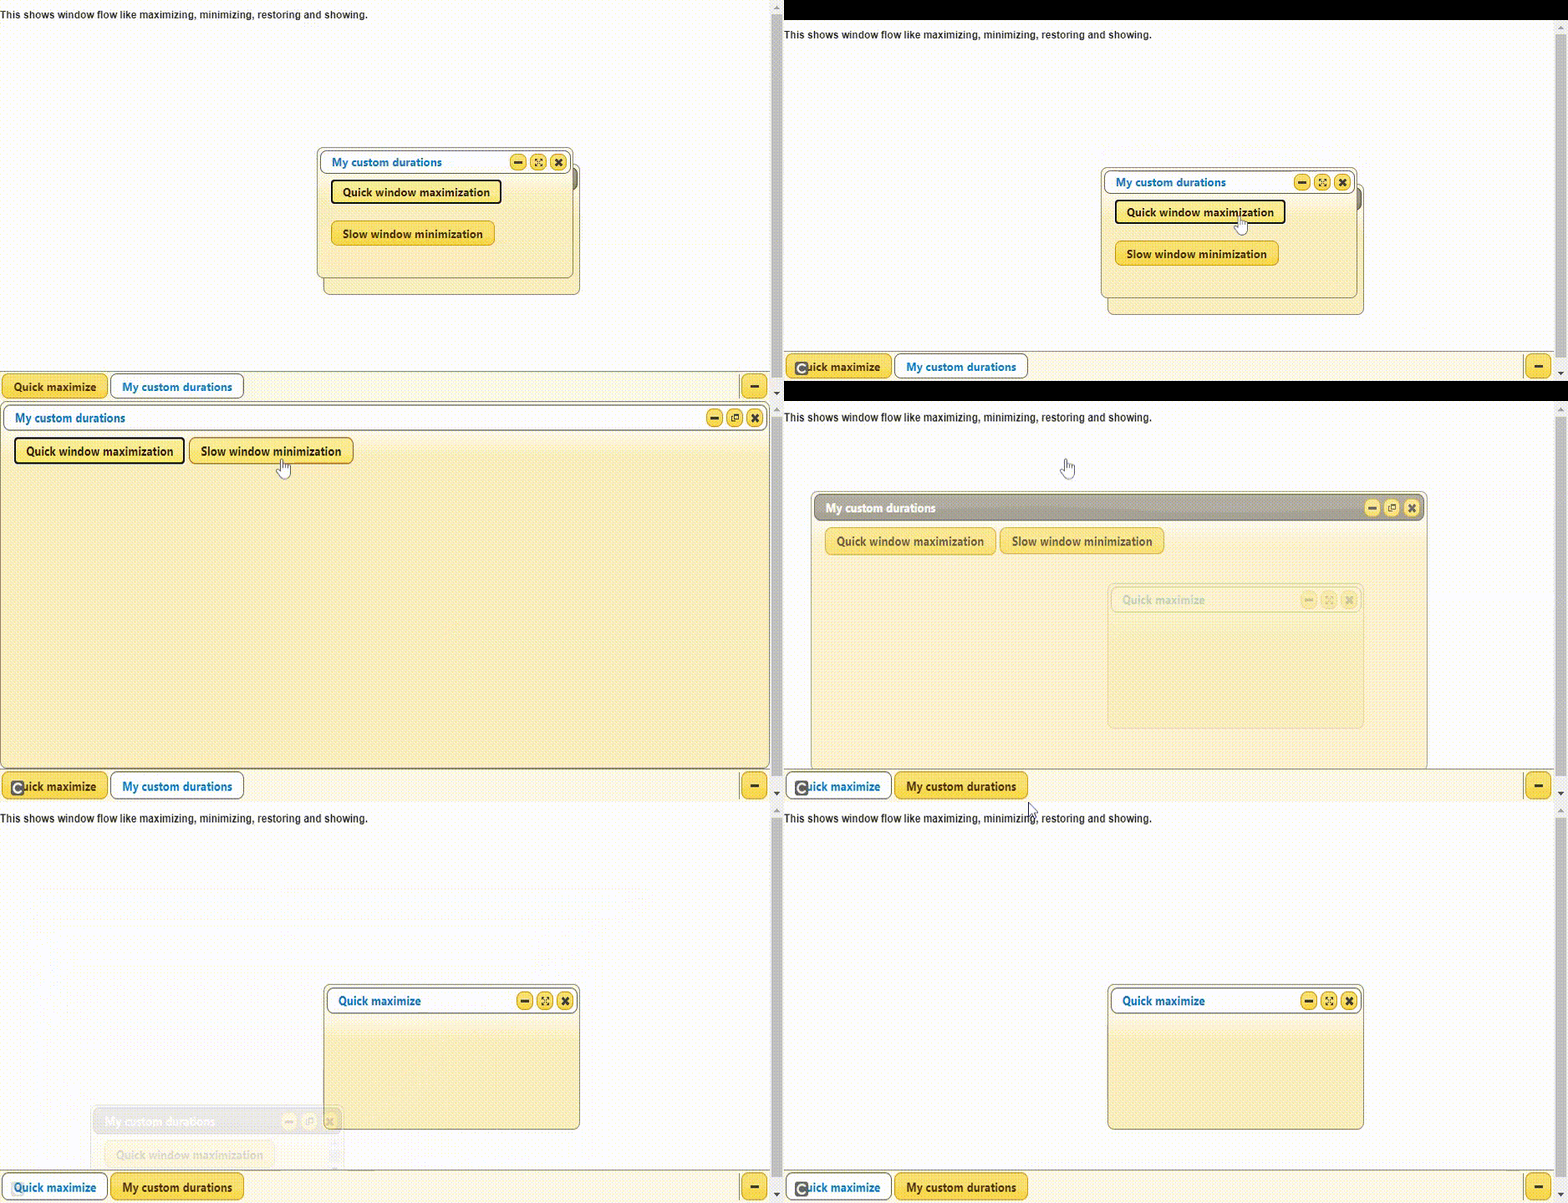
例子5:下面的代码演示了快速窗口最大化和缓慢窗口最小化。
<!DOCTYPE html>
<html>

<head>
    <meta charset="UTF-8">
    <script src="../common/libs.js"></script>
</head>

<body class="no-top-bar">

    <script class="demo-js">
        (document).ready(function () {
            "use strict";

            // Initialize taskbar
            (".taskbar").taskbar();

            // Window with default options
            // initialized
            (".window-default").window({
                title: "Quick maximize"
            });

            // Custom durations for animation
            (".window-custom").window({
                title: "My custom durations",
                durations: {
                    maximize: 1100,
                    minimize: 400,
                    restore: false,
                    show: "fast"
                }
            });

            //  "maximize" method with my
            // custom time duration
            (".quick-maximize").on("click",
                                function () {

                // 70 ms approx time is enough
                // for user to notice
                (".window-custom")
                    .window("maximize", 70);
            }).button();

            // "minimize" method with my
            // custom time duration
            (".slow-minimize").on("click",
                                function () {

                // Slow for example like
                // 3.5 seconds
                (".window-custom")
                    .window("minimize", 3500);
            }).button();
        });
    </script>

    <div class="demo-html">
        <div class="taskbar"></div>

        <div class="window-default"></div>
        <div class="window-custom">
            <button class="quick-maximize">
                Quick window maximization
            </button>

            <button class="slow-minimize">
                Slow window minimization
            </button>
        </div>

        <div class="demo">
            <div class="description">

<p><b>
                    This shows window flow like
                    maximizing, minimizing,
                    restoring and showing.
                </b></p>

            </div>
        </div>
    </div>

</body>

</html>
输出:
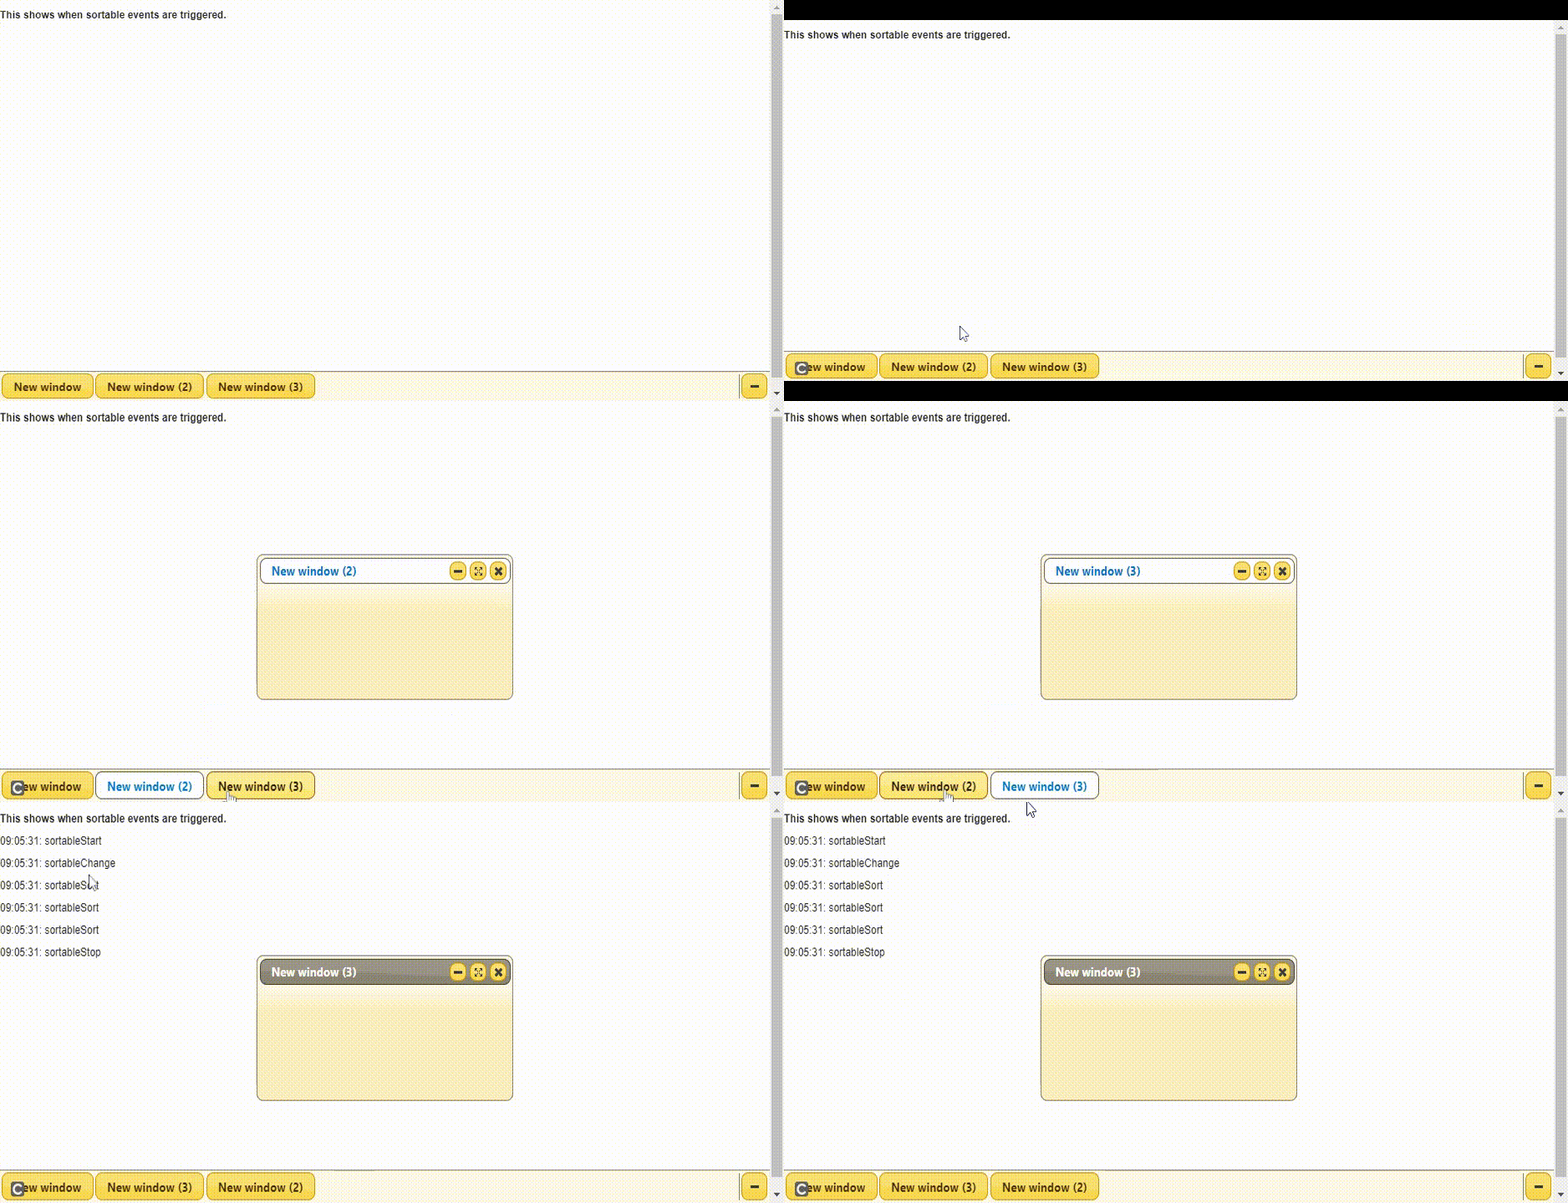
例子6:下面的代码演示了可排序的事件触发器。
<!DOCTYPE html>
<html>

<head>
    <meta charset="UTF-8">
    <script src="../common/libs.js"></script>
</head>

<body class="no-top-bar">
    <script class="demo-js">
        (document).ready(function () {
            "use strict";

            (".taskbar").taskbar({

                // Log events
                sortableStart: function () {
                    demo.log("sortableStart");
                },
                sortableSort: function () {

                    // Log sortableSort
                    if (Math.random() < 0.05) {
                        demo.log("sortableSort");
                    }
                },
                sortableChange: function () {
                    demo.log("sortableChange");
                },
                sortableStop: function () {
                    demo.log("sortableStop");
                }
            });

            // Initialize 3 windows and minimize them
            $(".window")
                .window()
                .window("minimize", false);
        });
    </script>

    <div class="demo-html">
        <div class="taskbar"></div>

        <div class="window"></div>
        <div class="window"></div>
        <div class="window"></div>

        <div class="demo">
            <div class="description">

<p><b>This shows when sortable
                    events are triggered.
                    </b><br>
                </p>

            </div>

            <div class="log"></div>
        </div>
    </div>

</body>

</html>
输出:
 极客教程
极客教程