jQuery UI按钮
通过jQuery UI框架,让我们学习如何使用jQuery UI button()方法来设计可主题的直观按钮,以及管理与之相关的选项、动作、事件和鼠标运动。这些按钮在网页设计项目中是非常有用的,在这些项目中,用户界面被期望是高度互动的。
语法:
$(selector, context).button(options)
参数options负责按钮的设计或外观,以及它的行为。
如果有一个以上的选项需要提供,那么你可以用逗号来分隔它们,如下所示。
$(selector, context).button ({option1: value1,
       option2: value2, option3: value3...})
button()方法也可以处理按钮上的动作,如下所示。
$(selector, context).button ("action", [parameters]);
- jQuery UI库的链接。
<link rel=’stylesheet’
href=”http://ajax.googleapis.com/ajax/libs/jqueryui/1.8.16/themes/ui-lightness/jquery-ui.css”>
<script src=”https://ajax.googleapis.com/ajax/libs/jquery/1.7.1/jquery.js”>
</script>
<script src=”https://ajax.googleapis.com/ajax/libs/jqueryui/1.8.16/jquery-ui.js”> </script>
或者
<link rel=’stylesheet’
href=”https://code.jquery.com/ui/1.10.4/themes/ui-lightness/jquery-ui.css”>
<script src=”https://code.jquery.com/jquery-1.10.2.js”> </script>
<script src=”https://code.jquery.com/ui/1.10.4/jquery-ui.js”> </script>
例子1:下面的例子演示了创建基本按钮。
<!DOCTYPE html>
<html>

<head>
    <meta charset="utf-8">
    <meta name="viewport" content=
        "width=device-width, initial-scale=1">
    <title>jQueryUI Button</title>

    <script src=
"https://ajax.googleapis.com/ajax/libs/jquery/1.7.1/jquery.js">
    </script>

    <script src=
"https://ajax.googleapis.com/ajax/libs/jqueryui/1.8.16/jquery-ui.js">
    </script>

    <link href=
"http://ajax.googleapis.com/ajax/libs/jqueryui/1.8.16/themes/ui-lightness/jquery-ui.css"
        rel="stylesheet" type="text/css" />

    <style>
        .height {
            height: 10px;
        }
    </style>

    <script>
        (function () {
            ("#buttonId, #submitId, #anchorId").button();
        });
    </script>
</head>

<body>
    <h1 style="color:green">GeeksforGeeks</h1>
    <b>jQueryUI | Button </b>
    <div class="height"> </div><br>
    <div class="buttons-div">
        <button id="buttonId">Button element</button>
        <input id="submitId" type="submit" value="Submit button">
        <a id="anchorId" href="">Anchor</a>
    </div>

</body>

</html>
上述示例程序的脚本部分也可以写成如下形式
<script>
    (function () {
        ("#buttonId, #submitId, #anchorId")
            .button().click(function (event) {
                event.preventDefault();
            });
    });
</script>
输出:
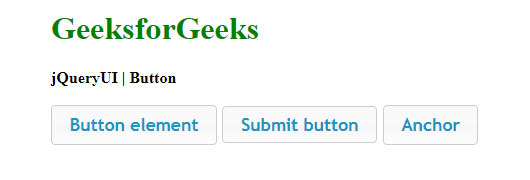
例子2:按钮的视觉分组是通过jQuery UI buttonset()方法来处理的。
<!DOCTYPE html>
<html>

<head>
    <meta charset="utf-8">
    <meta name="viewport" content=
        "width=device-width, initial-scale=1">

    <title>jQueryUI | Checkboxradio buttons</title>

    <script src=
"https://ajax.googleapis.com/ajax/libs/jquery/1.7.1/jquery.js">
    </script>

    <script src=
"https://ajax.googleapis.com/ajax/libs/jqueryui/1.8.16/jquery-ui.js">
    </script>

    <link href=
"http://ajax.googleapis.com/ajax/libs/jqueryui/1.8.16/themes/ui-lightness/jquery-ui.css"
        rel="stylesheet type=" text/css" />

    <script>
        (function () {
            ("input").checkboxradio();
            $("#buttonsetId").buttonset();
        });
    </script>
</head>

<body>
    <h1 style="color:green">GeeksforGeeks</h1>
    <b>jQueryUI | Checkboxradio buttons </b>

    <h2>Radio buttons Group</h2>
    <div id="buttonsetId">
        <fieldset style="width:300px">
            <legend>Select a Location: </legend>
            <label for="radioId1">Delhi</label>
            <input type="radio" name="radioId1" id="radioId1">
            <label for="radioId2">Pune</label>
            <input type="radio" name="radioId2" id="radioId2">
            <label for="radioId3">Hyderabad</label>
            <input type="radio" name="radioId3" id="radioId3">
        </fieldset>
    </div>
</body>

</html>
输出:
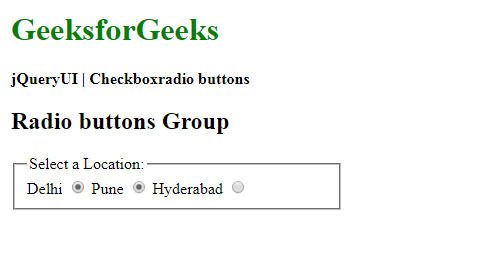
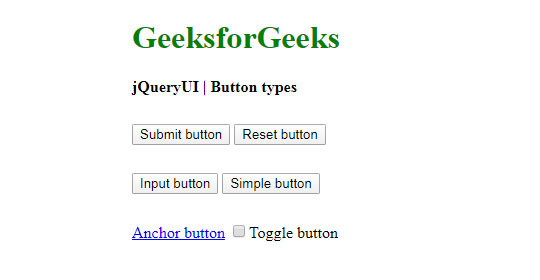
例子3:下面的例子演示了不同类型的jQuery UI按钮的使用。
<!DOCTYPE html>
<html>

<head>
    <title>jQueryUI Button types</title>

    <script src=
"https://ajax.googleapis.com/ajax/libs/jquery/1.7.1/jquery.js">
    </script>

    <script src=
"https://ajax.googleapis.com/ajax/libs/jqueryui/1.8.16/jquery-ui.js">
    </script>

    <link href=
"http://ajax.googleapis.com/ajax/libs/jqueryui/1.8.16/themes/ui-lightness/jquery-ui.css"
        rel="stylesheet" type="text/css" />

    <style>
        .height {
            height: 10px;
        }
    </style>

    <script>
        (function () {
            ('.btnClass').click(function (event) {
                event.preventDefault();
                $(this).button();
            });
        });
    </script>
</head>

<body>
    <h1 style="color:green">GeeksforGeeks</h1>
    <b>jQueryUI | Button types</b>
    <div class="height"></div><br>
    <input class="btnClass" type="submit" value="Submit button">
    <input class="btnClass" type="reset" value="Reset button">
    <div class="height"></div><br />
    <input class="btnClass" type="button" value="Input button">
    <button class="btnClass">Simple button </button>
    <div class="height"></div><br />
    <a class="btnClass" href="#">Anchor button</a>
    <input class="btnClass" type="checkbox" id="checkboxID">
    <label for="checkboxID">Toggle button</label><br>
</body>

</html>
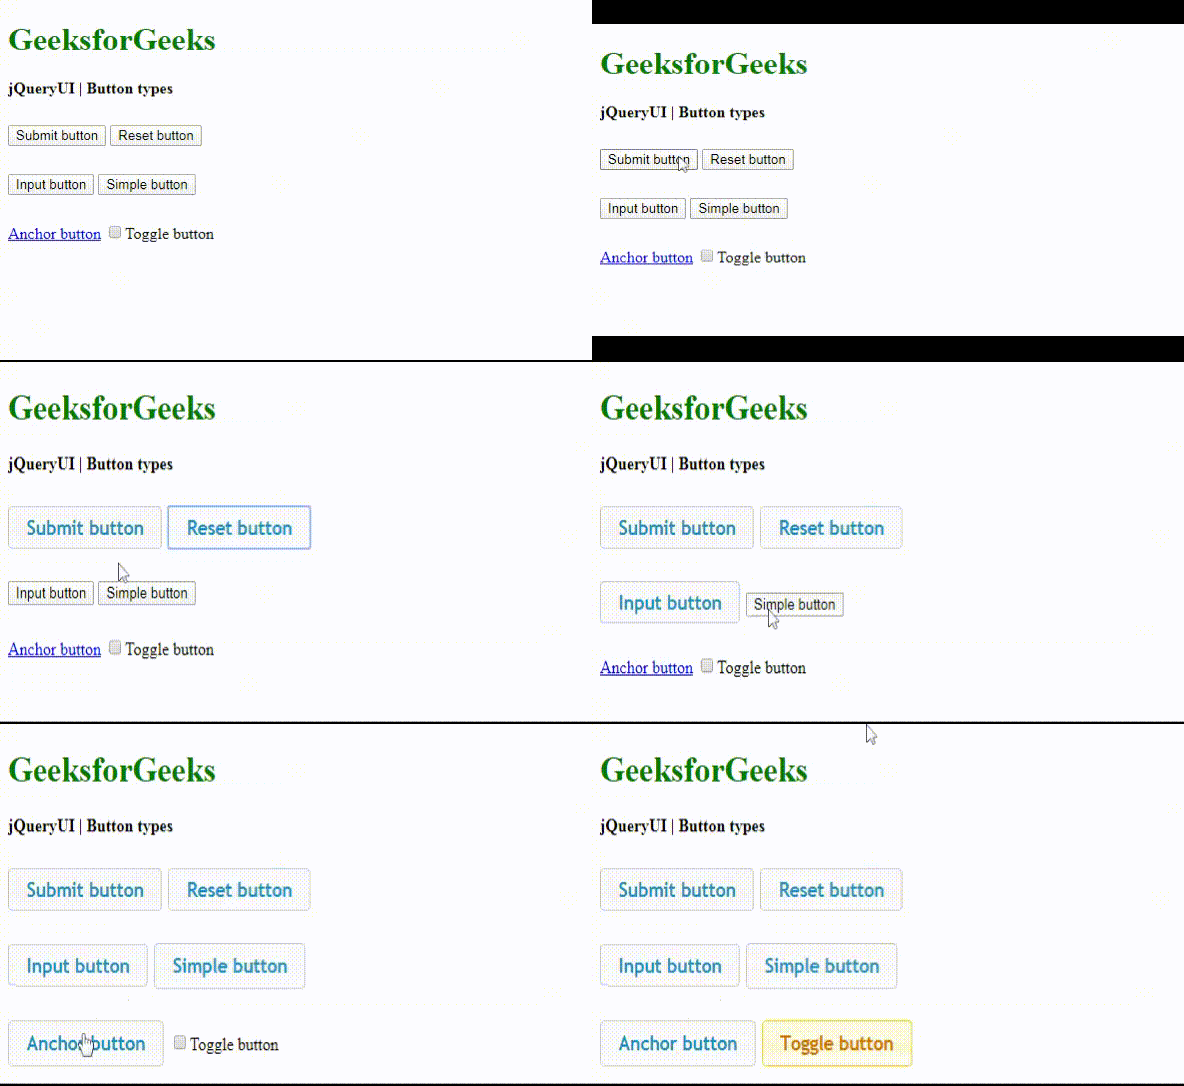
输出:
- 点击按钮之前:
-
点击按钮后:
$(selector, context).button (options)方法:
例子4:下面的例子演示了jQuery UI button()方法的使用,其中有text和icons选项。其他选项也被处理,例如通过iconPosition选项设置图标位置为”开始”或”结束”。在按钮上可以设置一个或两个图标。主要的图标被设置在左边,次要的图标被设置在右边,如下图所示。jQuery UI button()库中有很多选项,程序员可以根据项目要求选择或定制其他选项。
<!DOCTYPE html>
<html>

<head>
    <title>jQueryUI | Setting icons, text options</title>

    <meta charset="utf-8">
    <meta name="viewport" content=
        "width=device-width, initial-scale=1">

    <script src=
"https://ajax.googleapis.com/ajax/libs/jquery/1.7.1/jquery.js">
    </script>

    <script src=
"https://ajax.googleapis.com/ajax/libs/jqueryui/1.8.16/jquery-ui.js">
    </script>

    <link href=
"http://ajax.googleapis.com/ajax/libs/jqueryui/1.8.16/themes/ui-lightness/jquery-ui.css"
        rel="stylesheet" type="text/css" />

    <script>
        (function () {
            ("#iconBtnId").button({
                iconPosition: "end",

                // text shown on the button
                label: "Label given by coder",
                icons: {
                    primary: "ui-icon-locked"
                },

                text: true // text to be shown or not
            });
            $("#buttonId").button({
                icons: {
                    primary: "ui-icon-gear",
                    secondary: "ui-icon-triangle-1-s"
                }
            });
        });
    </script>
</head>

<body>
    <h1 style="color:green">GeeksforGeeks</h1>
    <b>jQueryUI | Setting icons, text options </b>

    <h2>Other functionalities of jQuery UI buttons</h2>
    <button id="iconBtnId">
        Button with icon
    </button>
    <button id="buttonId">
        Button with two icons
    </button>
</body>

</html>
输出:
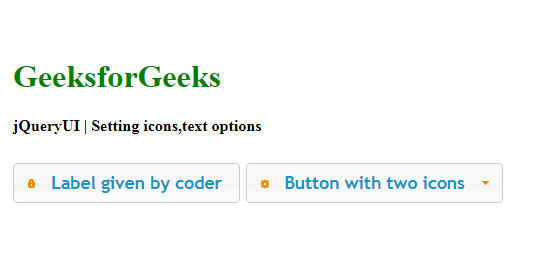
例子5: jQuery UI button()提供了许多方法和选项,可以用来控制主题小部件。程序员可以根据需要使用其中任何一个。这个例子只演示了其中的一些作为指导。
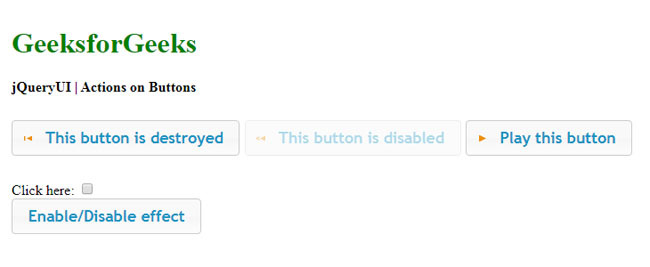
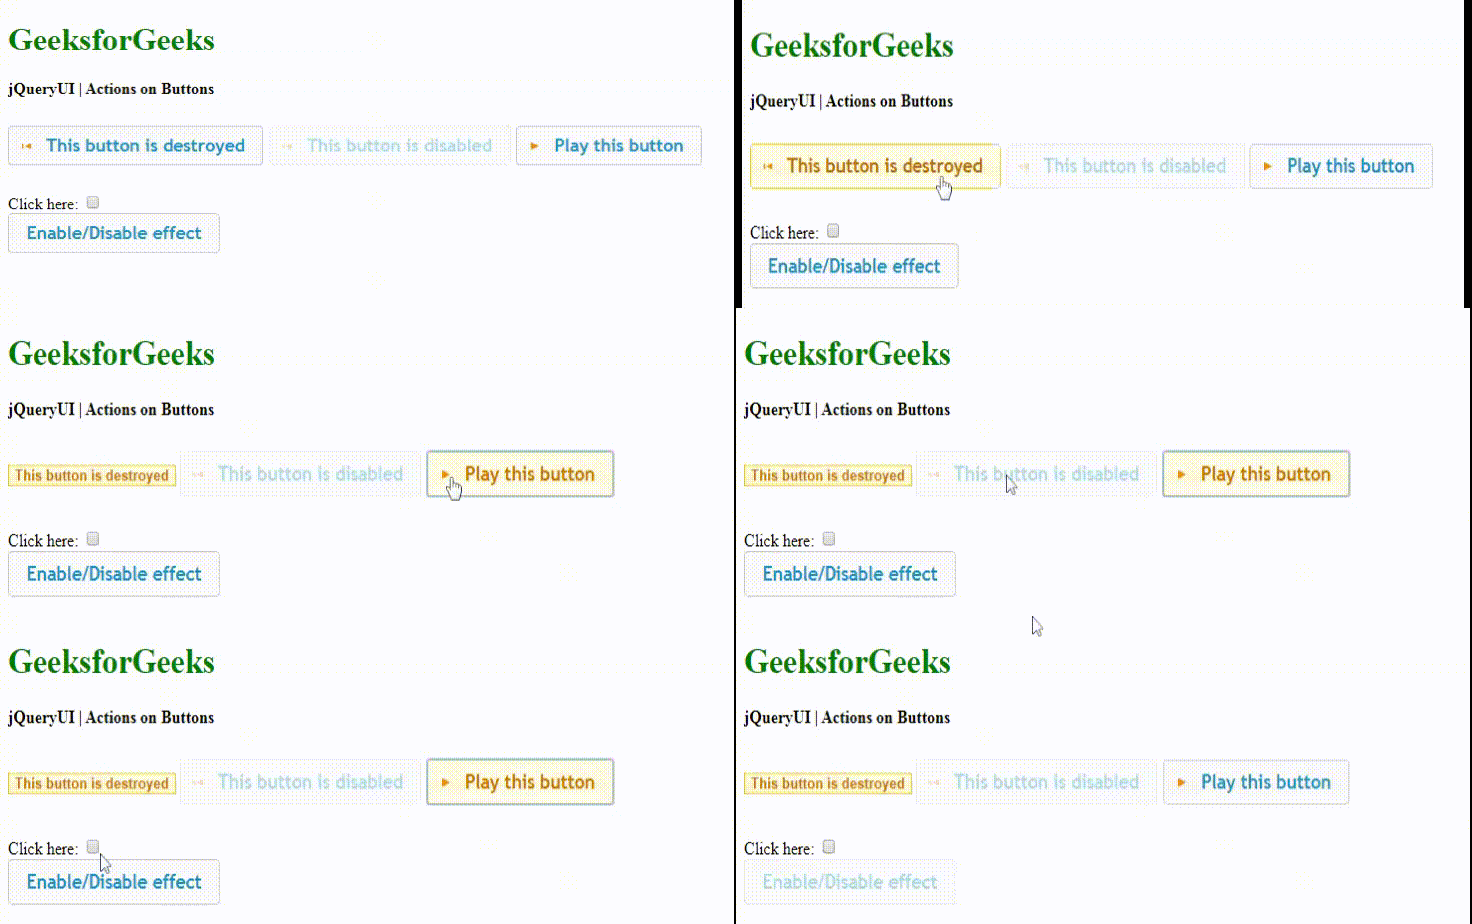
下面的代码演示了由按钮触发的点击和变化事件,以及像图标、销毁和禁用等选项的使用。 jQuery UI button()方法也支持事件管理的实现。它还支持jQuery UI按钮的启用和禁用状态。
<!DOCTYPE html>
<html>

<head>
    <meta charset="utf-8">
    <meta name="viewport" content=
        "width=device-width, initial-scale=1">

    <title>jQueryUI | Actions on Buttons </title>

    <script src=
"https://ajax.googleapis.com/ajax/libs/jquery/1.7.1/jquery.js">
    </script>

    <script src=
"https://ajax.googleapis.com/ajax/libs/jqueryui/1.8.16/jquery-ui.js">
    </script>

    <link href=
"http://ajax.googleapis.com/ajax/libs/jqueryui/1.8.16/themes/ui-lightness/jquery-ui.css"
        rel="stylesheet" type="text/css" />

    <style>
        .height {
            height: 10px;
        }
    </style>

    <script>
        (function () {
            ('#destroyedBtnId').button().click(function (e) {

                /* This option removes and returns
                   the element to its original state */
                ('#destroyedBtnId').button("destroy");
                e.preventDefault();
            })
            ("#destroyedBtnId").button({

                // It is set to true, so that the
                // text is visible
                text: true,
                icons: {
                    primary: "ui-icon-seek-start"
                }
            });
            ("#disabledBtnId").button({
                icons: {
                    primary: "ui-icon-seek-prev"
                }
            });

            // It disables the themeable button
            ("#disabledBtnId").button('disable');

            ("#btnToPlay").button({
                text: true,
                icons: {
                    primary: "ui-icon-play"
                }
            });

            // 'change' event management
            ('#checkboxId').change(function (e) {
                ('#btnToEnable').button(

                    // Handles status of the button
                    // through 'enable' or 'disable'
                    (':checked').length == 1 ? "enable" : "disable"
                )
            });
            $("#btnToEnable").button();
        });
    </script>
</head>

<body>
    <h1 style="color:green">GeeksforGeeks</h1>
    <b>jQueryUI | Actions on Buttons </b>
    <div class="height"> </div><br>
    <div class="buttons-div">
        <button id="destroyedBtnId">This button is destroyed</button>
        <button id="disabledBtnId">This button is disabled</button>
        <button id="btnToPlay">Play this button </button>
        <div class="height"> </div><br>
        <div>Click here: <input type=checkbox id="checkboxId" /></div>
        <button id="btnToEnable">Enable/Disable effect </button>
    </div>
</body>

</html>
输出:
- 在点击按钮之前。
-
点击按钮后。
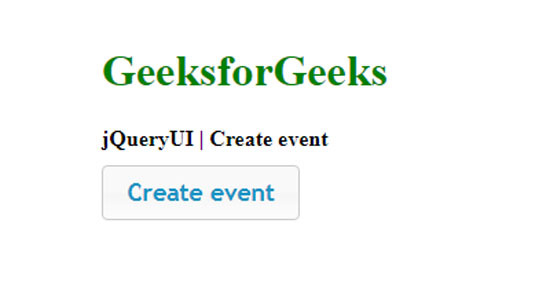
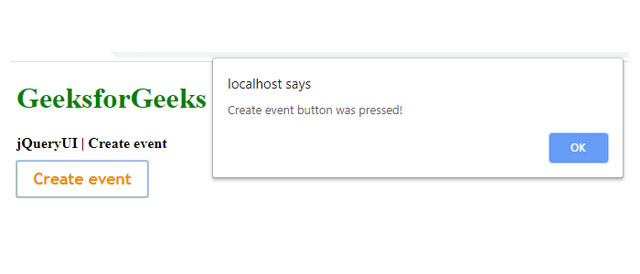
例子6:当一个按钮被创建时,事件被触发,如以下代码实现。
<!DOCTYPE html>
<html>

<head>
    <title>jQueryUI | Create event </title>

    <script src=
"https://ajax.googleapis.com/ajax/libs/jquery/1.7.1/jquery.js">
    </script>

    <script src=
"https://ajax.googleapis.com/ajax/libs/jqueryui/1.8.16/jquery-ui.js">
    </script>

    <link href=
"http://ajax.googleapis.com/ajax/libs/jqueryui/1.8.16/themes/ui-lightness/jquery-ui.css"
        rel="stylesheet" type="text/css" />

    <style>
        .height {
            height: 10px;
        }
    </style>

    <script>

        // When the button is created, event is triggered
        (function () {
            ("#btnCreateId").button({
                    create: function (event) {
                        $(event.target).click(function (event) {
                            event.preventDefault();
                            alert("Create event button was pressed!");
                        })
                    }
            });
        });
    </script>
</head>

<body>
    <h1 style="color:green">GeeksforGeeks</h1>
    <b>jQueryUI | Create event </b><br />
    <div class="height"></div>
    <button id="btnCreateId">Create event</button>
</body>

</html>
输出:
-
在点击按钮之前。
-
点击按钮后。
 极客教程
极客教程