CSS中inset属性
在CSS中,inset属性是一个用于设置元素的上、右、下、左边距的简写属性。它可以同时设置top、right、bottom和left属性,使得我们可以更加方便地控制元素的位置。在本文中,我们将详细介绍inset属性的用法,并提供一些示例代码来帮助读者更好地理解。
1. 基本用法
inset属性可以同时设置元素的上、右、下、左边距,其语法如下:
.element {
  inset: top right bottom left;
}
其中,top、right、bottom和left分别表示元素的上、右、下、左边距的数值。如果只设置一个值,则表示四个边距均相等;如果设置两个值,则第一个值表示上下边距,第二个值表示左右边距;如果设置三个值,则第一个值表示上边距,第二个值表示左右边距,第三个值表示下边距;如果设置四个值,则分别表示上、右、下、左边距。
下面是一个示例代码:
<!DOCTYPE html>
<html lang="en">
<head>
  <meta charset="UTF-8">
  <meta http-equiv="X-UA-Compatible" content="IE=edge">
  <meta name="viewport" content="width=device-width, initial-scale=1.0">
  <title>Inset Property Example</title>
  <style>
    .box {
      width: 100px;
      height: 100px;
      background-color: #f0f0f0;
      inset: 20px 30px 40px 50px;
    }
  </style>
</head>
<body>
  <div class="box"></div>
</body>
</html>
Output:

在上面的示例中,我们设置了一个宽高为100px的盒子,通过inset: 20px 30px 40px 50px;来设置上、右、下、左边距分别为20px、30px、40px、50px。运行代码后,可以看到盒子相应地移动了位置。
2. 使用auto关键字
除了使用具体的数值来设置边距外,inset属性还可以使用auto关键字来实现自动布局。当某个方向的边距设置为auto时,浏览器会自动计算该方向的边距,使得元素在该方向上居中或自适应宽度。
下面是一个示例代码:
<!DOCTYPE html>
<html lang="en">
<head>
  <meta charset="UTF-8">
  <meta http-equiv="X-UA-Compatible" content="IE=edge">
  <meta name="viewport" content="width=device-width, initial-scale=1.0">
  <title>Inset Property Example</title>
  <style>
    .box {
      width: 200px;
      height: 100px;
      background-color: #f0f0f0;
      inset: auto 30px auto 30px;
    }
  </style>
</head>
<body>
  <div class="box"></div>
</body>
</html>
Output:

在上面的示例中,我们设置了一个宽度为200px的盒子,通过inset: auto 30px auto 30px;来设置上、下边距为自适应,左、右边距为30px。运行代码后,可以看到盒子在垂直方向上自适应宽度,水平方向上居中显示。
3. 使用calc()函数
inset属性还支持使用calc()函数来计算边距的数值。calc()函数可以进行数学运算,使得我们可以更加灵活地设置元素的位置。
下面是一个示例代码:
<!DOCTYPE html>
<html lang="en">
<head>
  <meta charset="UTF-8">
  <meta http-equiv="X-UA-Compatible" content="IE=edge">
  <meta name="viewport" content="width=device-width, initial-scale=1.0">
  <title>Inset Property Example</title>
  <style>
    .box {
      width: 100px;
      height: 100px;
      background-color: #f0f0f0;
      inset: calc(50% - 50px) calc(50% - 50px);
    }
  </style>
</head>
<body>
  <div class="box"></div>
</body>
</html>
Output:

在上面的示例中,我们使用calc(50% - 50px)来计算上、左边距的数值,使得盒子在垂直和水平方向上居中显示。运行代码后,可以看到盒子被居中显示。
4. 使用百分比
inset属性还支持使用百分比来设置边距的数值。当使用百分比时,元素的边距会相对于其包含块的尺寸进行计算,使得元素可以根据包含块的大小进行自适应布局。
下面是一个示例代码:
<!DOCTYPE html>
<html lang="en">
<head>
  <meta charset="UTF-8">
  <meta http-equiv="X-UA-Compatible" content="IE=edge">
  <meta name="viewport" content="width=device-width, initial-scale=1.0">
  <title>Inset Property Example</title>
  <style>
    .container {
      width: 300px;
      height: 300px;
      background-color: #f0f0f0;
      position: relative;
    }
    .box {
      width: 100px;
      height: 100px;
      background-color: #ccc;
      inset: 10% 20% 30% 40%;
      position: absolute;
    }
  </style>
</head>
<body>
  <div class="container">
    <div class="box"></div>
  </div>
</body>
</html>
Output:

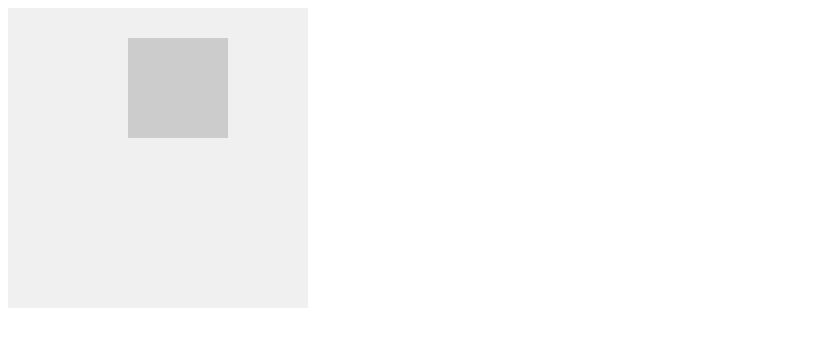
在上面的示例中,我们设置了一个宽高为300px的容器,内部包含一个宽高为100px的盒子。通过inset: 10% 20% 30% 40%;来设置盒子的上、右、下、左边距分别为容器宽高的10%、20%、30%、40%。运行代码后,可以看到盒子相对于容器进行了自适应布局。
5. 使用关键字
除了数值、auto、calc()和百分比外,inset属性还支持一些关键字来设置边距,如initial、inherit、unset等。这些关键字可以帮助我们更好地控制元素的位置。
下面是一个示例代码:
<!DOCTYPE html>
<html lang="en">
<head>
  <meta charset="UTF-8">
  <meta http-equiv="X-UA-Compatible" content="IE=edge">
  <meta name="viewport" content="width=device-width, initial-scale=1.0">
  <title>Inset Property Example</title>
  <style>
    .box {
      width: 100px;
      height: 100px;
      background-color: #f0f0f0;
      inset: initial;
    }
  </style>
</head>
<body>
  <div class="box"></div>
</body>
</html>
Output:

在上面的示例中,我们使用inset: initial;来将盒子的边距重置为初始值。运行代码后,可以看到盒子的位置恢复到默认值。
6. 使用多个值
除了设置上、右、下、左边距外,inset属性还支持同时设置多个值来实现更加灵活的布局。可以通过逗号分隔多个值来设置不同方向的边距。
下面是一个示例代码:
<!DOCTYPE html>
<html lang="en">
<head>
  <meta charset="UTF-8">
  <meta http-equiv="X-UA-Compatible" content="IE=edge">
  <meta name="viewport" content="width=device-width, initial-scale=1.0">
  <title>Inset Property Example</title>
  <style>
    .box {
      width: 100px;
      height: 100px;
      background-color: #f0f0f0;
      inset: 10px 20px, 30px 40px;
    }
  </style>
</head>
<body>
  <div class="box"></div>
</body>
</html>
Output:

在上面的示例中,我们使用inset: 10px 20px, 30px 40px;来同时设置两组边距,第一组表示上、右边距为10px、20px,第二组表示下、左边距为30px、40px。运行代码后,可以看到盒子的位置被分别设置。
7. 使用全局值
inset属性还支持使用全局值来设置边距,如inherit、initial、unset等。这些全局值可以帮助我们更好地控制元素的位置,使得样式更加灵活。
下面是一个示例代码:
<!DOCTYPE html>
<html lang="en">
<head>
  <meta charset="UTF-8">
  <meta http-equiv="X-UA-Compatible" content="IE=edge">
  <meta name="viewport" content="width=device-width, initial-scale=1.0">
  <title>Inset Property Example</title>
  <style>
    .box {
      width: 100px;
      height: 100px;
      background-color: #f0f0f0;
      inset: inherit;
    }
  </style>
</head>
<body>
  <div class="box"></div>
</body>
</html>
Output:

在上面的示例中,我们使用inset: inherit;来将盒子的边距设置为继承自父元素的值。运行代码后,可以看到盒子的位置继承了父元素的边距。
8. 使用变量
在CSS中,我们还可以使用变量来设置inset属性的值。通过定义变量并在inset属性中引用变量,可以实现样式的复用和统一管理。
下面是一个示例代码:
<!DOCTYPE html>
<html lang="en">
<head>
  <meta charset="UTF-8">
  <meta http-equiv="X-UA-Compatible" content="IE=edge">
  <meta name="viewport" content="width=device-width, initial-scale=1.0">
  <title>Inset Property Example</title>
  <style>
    :root {
      --inset-value: 20px;
    }
    .box {
      width: 100px;
      height: 100px;
      background-color: #f0f0f0;
      inset: var(--inset-value);
    }
  </style>
</head>
<body>
  <div class="box"></div>
</body>
</html>
Output:

在上面的示例中,我们通过:root伪类定义了一个名为--inset-value的变量,并在.box类中使用inset: var(--inset-value);来引用该变量。运行代码后,可以看到盒子的边距被设置为20px。
9. 使用媒体查询
在响应式设计中,我们经常需要根据不同的屏幕尺寸来设置元素的位置。inset属性可以与媒体查询结合使用,实现在不同屏幕尺寸下的布局调整。
下面是一个示例代码:
<!DOCTYPE html>
<html lang="en">
<head>
  <meta charset="UTF-8">
  <meta http-equiv="X-UA-Compatible" content="IE=edge">
  <meta name="viewport" content="width=device-width, initial-scale=1.0">
  <title>Inset Property Example</title>
  <style>
    .box {
      width: 100px;
      height: 100px;
      background-color: #f0f0f0;
      inset: 20px;
    }
    @media screen and (max-width: 600px) {
      .box {
        inset: 10px;
      }
    }
  </style>
</head>
<body>
  <div class="box"></div>
</body>
</html>
Output:

在上面的示例中,我们通过媒体查询@media screen and (max-width: 600px)来设置在屏幕宽度小于600px时,盒子的边距为10px。运行代码后,可以在不同屏幕尺寸下看到盒子位置的变化。
10. 使用动画效果
最后,我们可以结合CSS动画效果来实现元素位置的动态变化。通过设置inset属性的关键帧动画,可以让元素在页面中产生平滑的移动效果。
下面是一个示例代码:
<!DOCTYPE html>
<html lang="en">
<head>
  <meta charset="UTF-8">
  <meta http-equiv="X-UA-Compatible" content="IE=edge">
  <meta name="viewport" content="width=device-width, initial-scale=1.0">
  <title>Inset Property Example</title>
  <style>
    .box {
      width: 100px;
      height: 100px;
      background-color: #f0f0f0;
      position: absolute;
      animation: moveBox 2s infinite alternate;
    }
    @keyframes moveBox {
      0% {
        inset: 0;
      }
      100% {
        inset: 200px 200px;
      }
    }
  </style>
</head>
<body>
  <div class="box"></div>
</body>
</html>
在上面的示例中,我们定义了一个名为moveBox的关键帧动画,通过设置inset属性在动画的起始和结束状态,实现盒子在页面中来回移动的效果。运行代码后,可以看到盒子产生了动画效果。
通过以上示例代码,我们详细介绍了CSS中inset属性的用法,包括基本用法、设置单个值、设置多个值、使用全局值、使用变量、使用媒体查询、使用动画效果等方面。希望这些示例能帮助您更好地理解和应用inset属性,实现更加灵活和多样化的布局效果。
 极客教程
极客教程