Angular PrimeNG Form Chips Properties组件
Angular PrimeNG是一个开源的框架,有丰富的原生Angular UI组件,用来做很好的造型,这个框架用来做响应式的网站,非常方便。这篇文章将告诉我们如何在Angular ngx bootstrap中使用日历组件。
Chips组件:它用于在一个输入字段上输入多个数值。
属性:
- field。此属性用于定义要在芯片上显示的属性名称。
- max:此属性用于定义条目的最大数量。
- disabled:此属性用于定义指定该元素应被禁用。
- style。此属性用于定义元素的内联样式。
- styleClass。此属性用于定义元素的风格类。
- placeholder。此属性用于定义要在输入时显示的咨询信息。
- tabindex。该属性用于定义元素在标签顺序中的索引。
- inputId。该属性用于定义焦点输入的标识符,以匹配为该组件定义的标签。
- ariaLabelledBy。该属性用于建立组件和标签之间的关系,其值应该是一个或多个元素ID。
- allowDuplicate:此属性用于定义允许重复的值。
- inputStyle。该属性用于定义输入字段的内联风格。
- inputStyleClass。此属性用于定义输入字段的风格类。
- addOnTab:该属性用于在按下tab键时添加一个项目。
- addOnBlur: 这个属性用来定义当输入失去焦点时添加一个项目。
- separator。此属性用于在按下回车键的同时增加一个项目。
- showClear:该属性用于显示清除值。
创建Angular应用程序和模块安装。
第1步:使用以下命令创建一个Angular应用程序。
ng new appname
第2步:创建你的项目文件夹即appname后,使用以下命令移动到它。
cd appname
第3步:在你给定的目录中安装PrimeNG。
npm install primeng --save
npm install primeicons --save
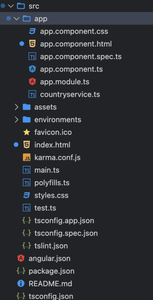
Project Structure:

实例1:在下面的代码中,我们将使用上述变量来演示表格芯片属性组件的使用。
<div style="text-align:center;">
    <h1 style="color:green;">GeeksforGeeks</h1>
    <h3>A computer science portal for geeks</h3>
    <h4>Angular PrimeNG Form Chips Properties Component</h4>
    <div class="p-fluid">
        <h5>Template</h5>
        <p-chips [(ngModel)]="values3">
            <ng-template let-item pTemplate="item">
                {{ item }} - (Offline)
                <i class="pi pi-user p-ml-2"></i>
            </ng-template>
        </p-chips>
    </div>
</div>
import { Component } from '@angular/core';
import { MenuItem } from 'primeng/api';

@Component({
    selector: 'app-root',
    templateUrl: './app.component.html'
})
export class AppComponent {
    values1: string[];

    values2: string[];

    values3: string[];
}
import { NgModule } from '@angular/core';
import { BrowserModule } from '@angular/platform-browser';
import { FormsModule } from '@angular/forms';
import { HttpClientModule } from '@angular/common/http';
import { BrowserAnimationsModule } from
    '@angular/platform-browser/animations';

import { AppComponent } from './app.component';

import { ChipsModule } from 'primeng/chips';
import { ButtonModule } from 'primeng/button';

@NgModule({
    imports: [
        BrowserModule,
        BrowserAnimationsModule,
        ChipsModule,
        ButtonModule,
        FormsModule
    ],
    declarations: [AppComponent],
    bootstrap: [AppComponent]
})

export class AppModule { }
输出:

示例2:在下面的代码中,我们将使用上述变量来演示表格芯片属性组件的使用。
<div style="text-align:center;">
    <h1 style="color:green;">GeeksforGeeks</h1>
    <h3>A computer science portal for geeks</h3>
    <h4>Angular PrimeNG Form Chips Properties Component</h4>
    <div class="p-fluid">
        <h5>Basic</h5>
        <p-chips [(ngModel)]="values1"></p-chips>
    </div>
</div>
import { Component } from '@angular/core';
import { MenuItem } from 'primeng/api';

@Component({
    selector: 'app-root',
    templateUrl: './app.component.html'
})
export class AppComponent {
    values1: string[];

    values2: string[];

    values3: string[];
}
import { NgModule } from '@angular/core';
import { BrowserModule } from '@angular/platform-browser';
import { FormsModule } from '@angular/forms';
import { HttpClientModule } from '@angular/common/http';
import { BrowserAnimationsModule } from
    '@angular/platform-browser/animations';

import { AppComponent } from './app.component';

import { ChipsModule } from 'primeng/chips';
import { ButtonModule } from 'primeng/button';

@NgModule({
    imports: [
        BrowserModule,
        BrowserAnimationsModule,
        ChipsModule,
        ButtonModule,
        FormsModule
    ],
    declarations: [AppComponent],
    bootstrap: [AppComponent]
})

export class AppModule { }
输出:

 极客教程
极客教程