Angular PrimeNG Form Chips事件组件
Angular PrimeNG是一个开源的库,由原生的Angular UI组件组成,用来做很好的造型,这个框架用来做响应式的网站,非常方便。在这篇文章中,我们将Angular PrimeNG窗体筹码事件组件。
PrimeNG中的Form Chips组件可以在一个字段中输入许多数值。芯片的使用可以在大多数电子商务网站上看到,如Flipkart、Amazon等。
Angular PrimeNG Form Chips 活动:
- onAdd:这个事件接受当一个值被添加到Chips组件时调用的回调。
- onRemove。当一个值被移除时,传递给该事件的回调被调用。
- onChipClick。这个事件接受一个回调,当一个芯片被点击时调用。
- onFocus。这个事件接受一个回调,当芯片输入成为焦点时,回调会被调用。
- onBlur:该事件接受一个回调,当芯片输入失去焦点时,回调将被调用。
- onClear:当芯片输入字段被清除时,传递给该事件的回调被调用。
语法:
<p-chips
    [showClear]="..."
    (event-name)="CallbackFunc()"
    [(ngModel)]="...">
</p-chips>
创建Angular应用程序并安装模块:。
第1步:使用以下命令创建一个Angular应用程序。
ng new appname
第2步:创建你的项目文件夹即appname后,使用以下命令移动到它。
cd appname
第3步:最后,在你给定的目录中安装PrimeNG。
npm install primeng --save
npm install primeicons --save
项目结构:在完成上述步骤后,项目结构将看起来像这样。

Project Structure
例子1:这个例子说明了芯片输入的onFocus、onBlur和onClear事件的使用。
- app.component.html:
<h2 style="color: green;">
    GeeksforGeeks
</h2>

<h3>Angular PrimeNG Form Chips Events Component</h3>

<p-chips
    (onFocus)="handleFocus()"
    (onBlur)="handleBlur()"
    (onClear)="handleClear()"
    [(ngModel)]="chipsValues">
</p-chips>
<p-toast></p-toast>
- app.component.ts:
import { Component } from "@angular/core";
import { MessageService } from "primeng/api";

@Component({
    selector: "app-root",
    templateUrl: "./app.component.html",
    providers: [MessageService]
})
export class AppComponent {
    constructor(private ms: MessageService) { }
    chipsValues: string[] = [];

    handleFocus() {
        this.ms.add({
            severity: 'success',
            summary: 'Chips Input Focused',
            detail: 'GeeksforGeeks'
        })
    }

    handleBlur() {
        this.ms.add({
            severity: 'info',
            summary: 'Chips Input Out of Focus',
            detail: 'GeeksforGeeks'
        })
    }

    handleClear() {
        this.ms.add({
            severity: 'error',
            summary: 'Chips Input Cleared',
            detail: 'GeeksforGeeks'
        })
    }
}
- app.module.ts:
import { NgModule } from '@angular/core';
import { BrowserModule } from '@angular/platform-browser';
import { BrowserAnimationsModule }
    from '@angular/platform-browser/animations';
import { AppComponent } from './app.component';
import { FormsModule } from '@angular/forms';
import { ToastModule } from 'primeng/toast';
import { ChipsModule } from 'primeng/chips';

@NgModule({
    imports: [
        BrowserModule,
        BrowserAnimationsModule,
        ChipsModule,
        ToastModule,
        FormsModule
    ],
    declarations: [AppComponent],
    bootstrap: [AppComponent],
})
export class AppModule { }
输出:

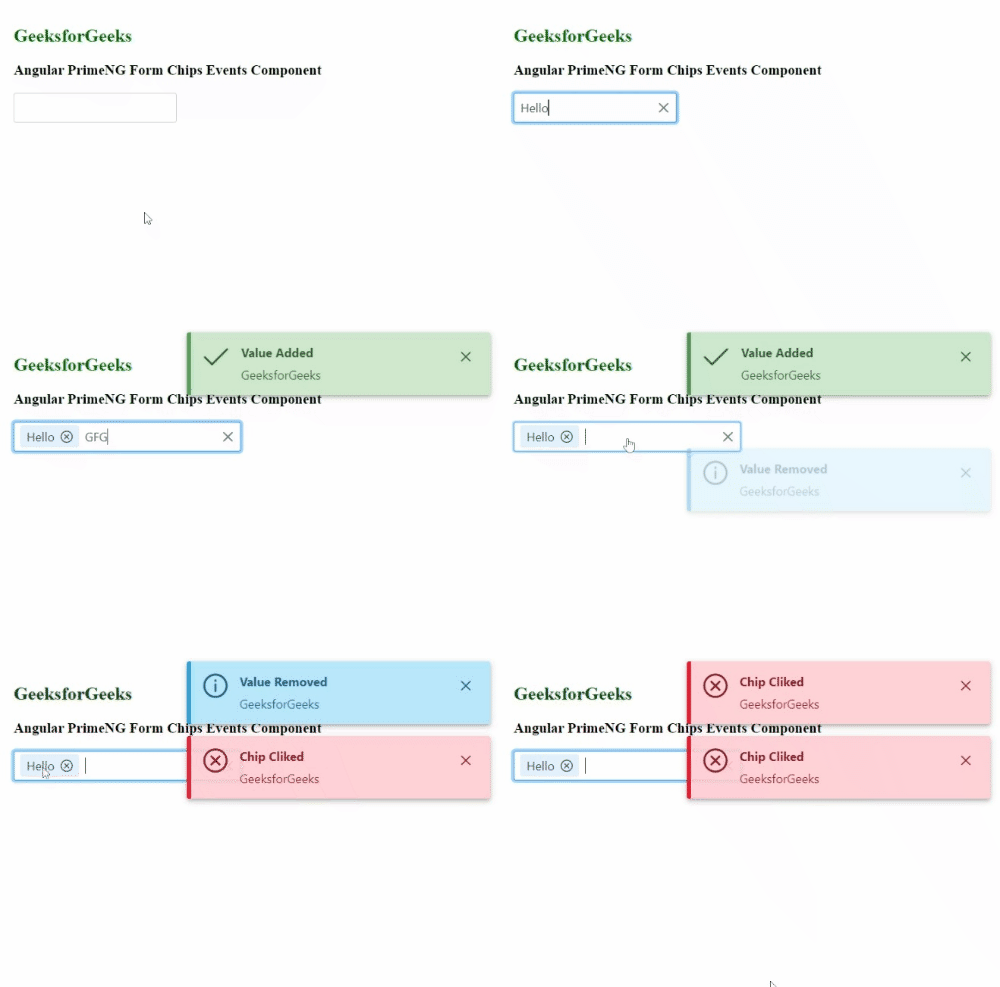
实例2:本实例演示了芯片输入的onAdd、onRemove和onChipClick事件的使用。
- app.component.html:
<h2 style="color: green;">
    GeeksforGeeks
</h2>
<h3>Angular PrimeNG Form Chips Events Component</h3>

<p-chips [showClear]="true"
    (onAdd)="handleAdd()"
    (onRemove)="handleRemove()"
    (onChipClick)="handleChipClick()"
    [(ngModel)]="chipsValues">
</p-chips>
<p-toast></p-toast>
- app.component.ts:
import { Component } from "@angular/core";
import { MessageService } from "primeng/api";

@Component({
    selector: "app-root",
    templateUrl: "./app.component.html",
    providers: [MessageService]
})
export class AppComponent {
    constructor(private ms: MessageService) { }
    chipsValues: string[] = [];

    handleAdd() {
        this.ms.add({
            severity: 'success',
            summary: 'Value Added',
            detail: 'GeeksforGeeks'
        })
    }

    handleRemove() {
        this.ms.add({
            severity: 'info',
            summary: 'Value Removed',
            detail: 'GeeksforGeeks'
        })
    }

    handleChipClick() {
        this.ms.add({
            severity: 'error',
            summary: 'Chip Cliked',
            detail: 'GeeksforGeeks'
        })
    }
}
- app.module.ts:
import { NgModule } from '@angular/core';
import { BrowserModule } from '@angular/platform-browser';
import { BrowserAnimationsModule }
    from '@angular/platform-browser/animations';
import { AppComponent } from './app.component';
import { FormsModule } from '@angular/forms';
import { ToastModule } from 'primeng/toast';
import { ChipsModule } from 'primeng/chips';

@NgModule({
    imports: [
        BrowserModule,
        BrowserAnimationsModule,
        ChipsModule,
        ToastModule,
        FormsModule
    ],
    declarations: [AppComponent],
    bootstrap: [AppComponent],
})
export class AppModule { }
输出:

 极客教程
极客教程