Angular PrimeNG对话框定位
Angular PrimeNG是一个开源框架,拥有丰富的原生Angular UI组件,可用于出色的造型,这个框架用于制作响应式网站,非常容易。在这篇文章中,我们将了解如何在Angular PrimeNG中使用对话框定位。我们还将了解在代码中使用的属性及其语法。
Dialog组件用于制作一个包含一些内容的组件,在一个覆盖窗口中显示。
位置属性,默认值为center,控制对话出现的位置。顶部、底部、左侧、右侧、左上角、右上角、左下角,以及右下角_是额外的可接受值。如果对话的内容或位置发生变化,你也可以通过使用Dialog的resetPosition()函数来重新定位它。
Angular PrimeNG对话框的定位属性:
- header。它是对话框的标题文本。它是字符串数据类型,默认值为空。
- position。它用于设置对话框的位置。它是字符串数据类型,默认值为中心。
- visible。它指定了对话框的可见性。它是布尔数据类型,默认值为false。
- styleClass。它用于设置组件的风格类。它是字符串数据类型,默认值为空。
语法:
<p-dialog
      position="..."
      header="...."
      [(visible)]="...">
      ......
</p-dialog>

<p-button
      (click)="..."
      label="....">
</p-button>
创建Angular应用程序和模块安装。
第1步:使用以下命令创建一个Angular应用程序。
ng new appname
第2步:创建你的项目文件夹即appname后,使用以下命令移动到它。
cd appname
第3步:在你给定的目录中安装PrimeNG。
npm install primeng --save
npm install primeicons --save
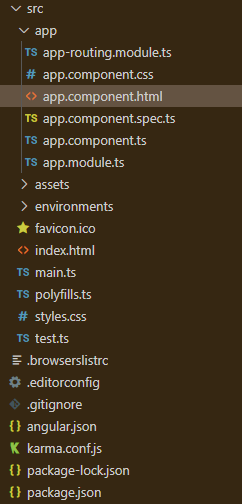
项目结构:它将看起来像如下。
- 运行下面的命令可以看到输出。
ng serve --open
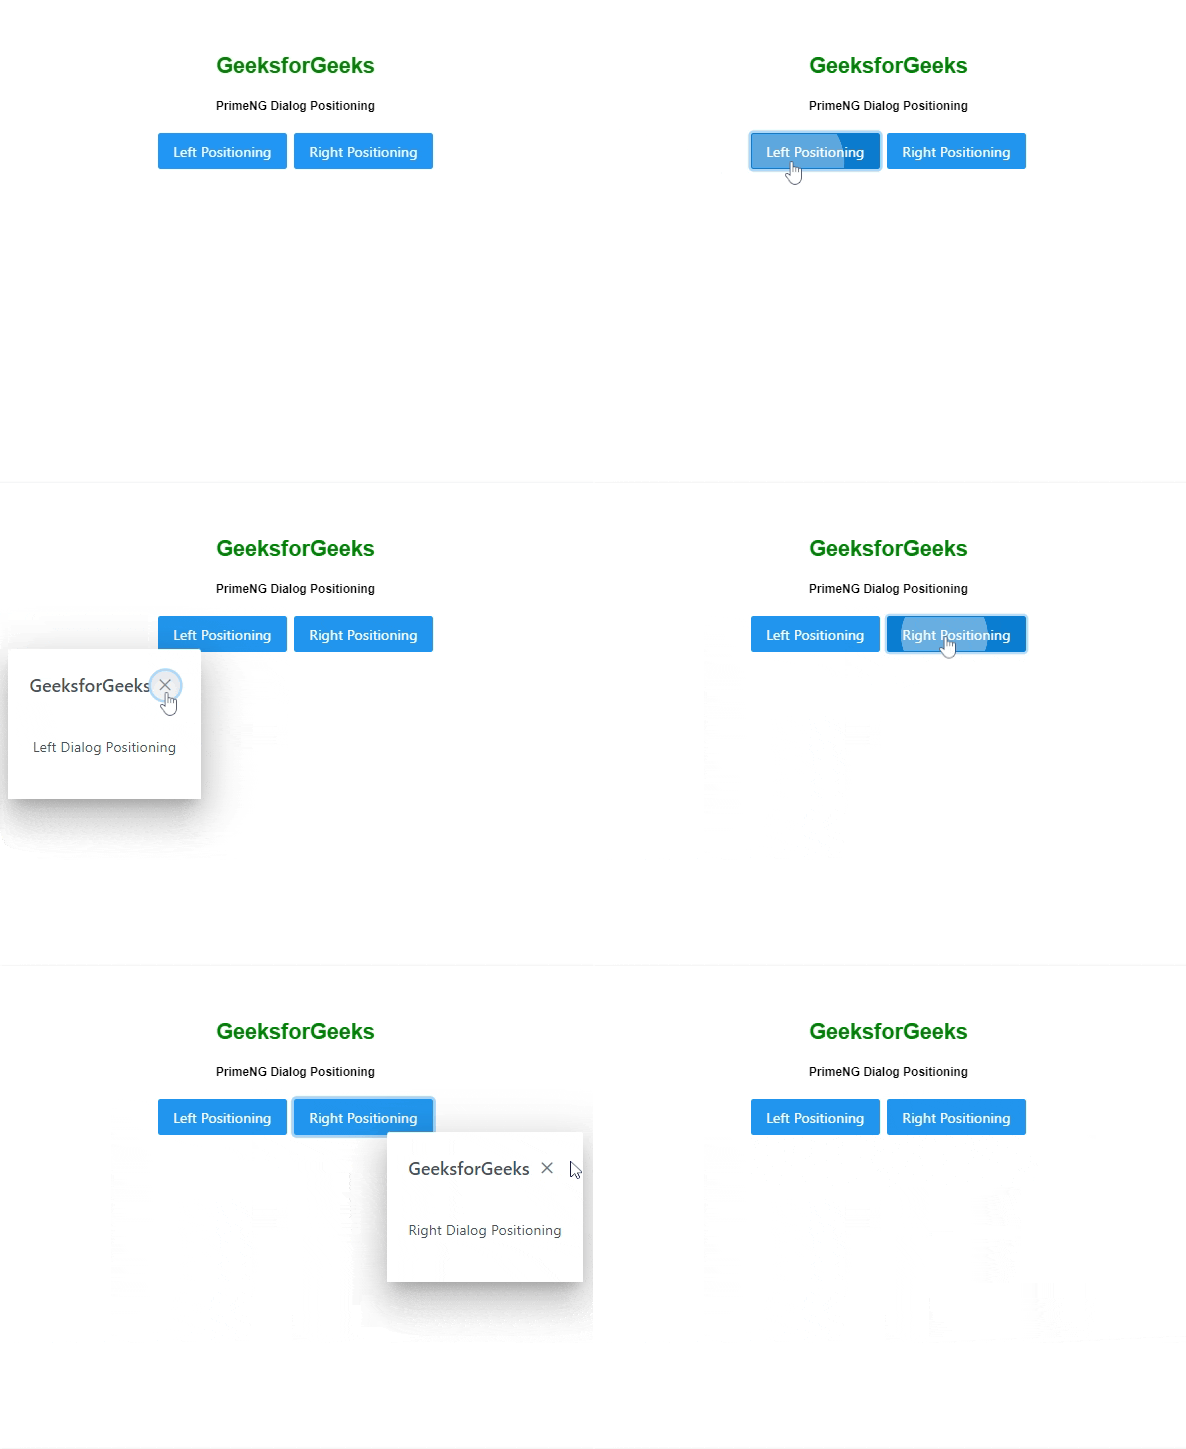
例子1:下面的代码例子说明了Angular PrimeNG Dialog Positioning使用left和right定位的用法。
<div style="text-align: center">
    <h2 style="color: green">GeeksforGeeks</h2>
    <h5>PrimeNG Dialog Positioning</h5>

    <p-dialog position="left"
              header="GeeksforGeeks"
              [(visible)]="geeks1">
        <p>Left Dialog Positioning</p>
    </p-dialog>

    <p-dialog position="right"
              header="GeeksforGeeks"
              [(visible)]="geeks2">
        <p>Right Dialog Positioning</p>
    </p-dialog>

    <p-button (click)="gfg1()"
              label="Left Positioning"
              styleClass="p-mr-2">
    </p-button>

    <p-button (click)="gfg2()"
              label="Right Positioning">
    </p-button>
</div>
import { Component } from "@angular/core";
import { PrimeNGConfig } from "primeng/api";

@Component({
  selector: "app-root",
  templateUrl: "./app.component.html",
})
export class AppComponent {
  constructor(private primengConfig: PrimeNGConfig) {}

  ngOnInit() {
    this.primengConfig.ripple = true;
  }
  geeks1: boolean;
  geeks2: boolean;

  gfg1() {
    this.geeks1 = true;
  }

  gfg2() {
    this.geeks2 = true;
  }
}
import { NgModule } from "@angular/core";
import { BrowserModule } from "@angular/platform-browser";
import { BrowserAnimationsModule }
    from "@angular/platform-browser/animations";
import { AppComponent } from "./app.component";
import { DialogModule } from "primeng/dialog";
import { ButtonModule } from "primeng/button";

@NgModule({
  imports: [BrowserModule,
              BrowserAnimationsModule,
              DialogModule,
              ButtonModule],
  declarations: [AppComponent],
  bootstrap: [AppComponent],
})
export class AppModule {}
输出:

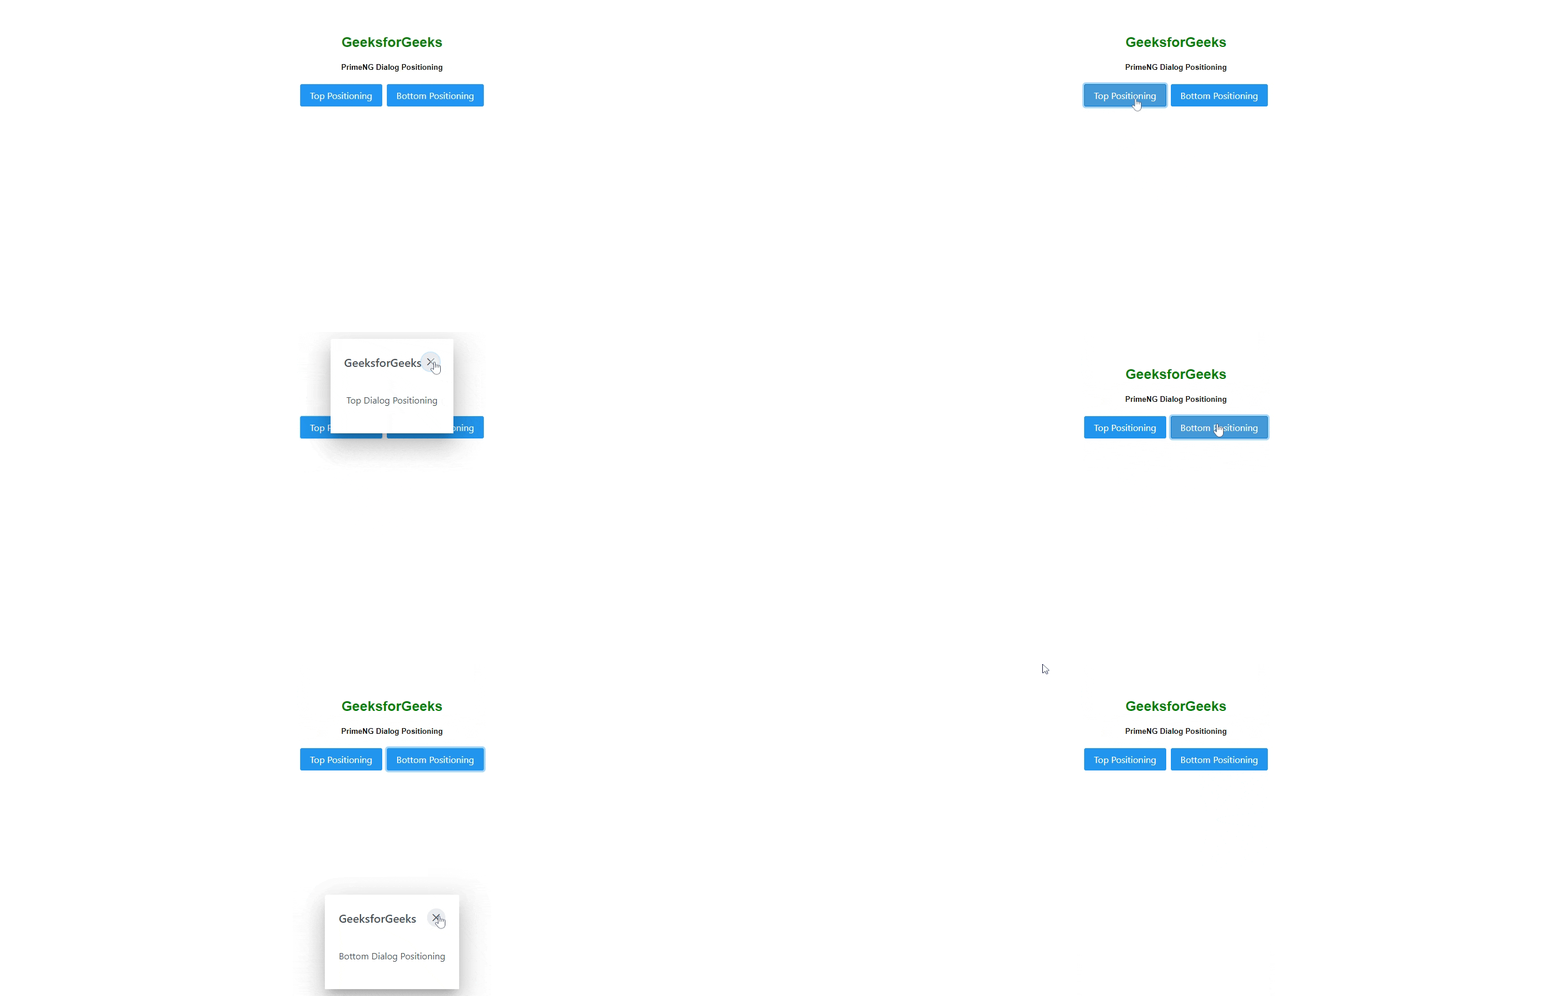
例子2:下面是另一个代码例子,说明了Angular PrimeNG对话定位使用top和bottom定位的用法。
<div style="text-align: center">
    <h2 style="color: green">GeeksforGeeks</h2>
    <h5>PrimeNG Dialog Positioning</h5>

    <p-dialog position="top"
              header="GeeksforGeeks"
              [(visible)]="geeks1">
        <p>Top Dialog Positioning </p>
    </p-dialog>

    <p-dialog position="bottom"
              header="GeeksforGeeks"
              [(visible)]="geeks2">
        <p>Bottom Dialog Positioning</p>
    </p-dialog>

    <p-button (click)="gfg1()"
              label="Top Positioning"
              styleClass="p-mr-2">
    </p-button>

    <p-button (click)="gfg2()"
              label="Bottom Positioning">
    </p-button>
</div>
import { Component } from "@angular/core";
import { PrimeNGConfig } from "primeng/api";

@Component({
  selector: "app-root",
  templateUrl: "./app.component.html",
})
export class AppComponent {
  constructor(private primengConfig: PrimeNGConfig) {}

  ngOnInit() {
    this.primengConfig.ripple = true;
  }
  geeks1: boolean;
  geeks2: boolean;

  gfg1() {
    this.geeks1 = true;
  }

  gfg2() {
    this.geeks2 = true;
  }
}
import { NgModule } from "@angular/core";
import { BrowserModule } from "@angular/platform-browser";
import { BrowserAnimationsModule }
    from "@angular/platform-browser/animations";
import { AppComponent } from "./app.component";
import { DialogModule } from "primeng/dialog";
import { ButtonModule } from "primeng/button";

@NgModule({
  imports: [BrowserModule,
              BrowserAnimationsModule,
              DialogModule,
              ButtonModule],
  declarations: [AppComponent],
  bootstrap: [AppComponent],
})
export class AppModule {}
输出:

 极客教程
极客教程