CSS 子元素不超出父元素范围
在网页开发中,经常会遇到子元素超出父元素范围的情况,这可能会导致页面布局混乱或者内容被遮挡。为了解决这个问题,我们可以使用一些CSS技巧来确保子元素不会超出父元素的范围。本文将介绍一些常用的方法来实现这个效果。
1. 使用 overflow: hidden
overflow: hidden 是一种常见的方法,可以让父元素的内容超出部分被隐藏,从而确保子元素不会超出父元素的范围。下面是一个示例代码:
<!DOCTYPE html>
<html lang="en">
<head>
<meta charset="UTF-8">
<meta name="viewport" content="width=device-width, initial-scale=1.0">
<title>Overflow Hidden Example</title>
<style>
    .parent {
        width: 200px;
        height: 200px;
        border: 1px solid #000;
        overflow: hidden;
    }
    .child {
        width: 300px;
        height: 300px;
        background-color: #f00;
    }
</style>
</head>
<body>
    <div class="parent">
        <div class="child"></div>
    </div>
</body>
</html>
Output:

在上面的示例中,父元素 .parent 设置了 overflow: hidden,子元素 .child 的宽度和高度都超出了父元素的范围,但是由于父元素设置了 overflow: hidden,子元素不会超出父元素的范围。
2. 使用 overflow: auto
除了 overflow: hidden,我们还可以使用 overflow: auto 来实现类似的效果。overflow: auto 会在需要时显示滚动条,以便用户可以滚动查看超出范围的内容。下面是一个示例代码:
<!DOCTYPE html>
<html lang="en">
<head>
<meta charset="UTF-8">
<meta name="viewport" content="width=device-width, initial-scale=1.0">
<title>Overflow Auto Example</title>
<style>
    .parent {
        width: 200px;
        height: 200px;
        border: 1px solid #000;
        overflow: auto;
    }
    .child {
        width: 300px;
        height: 300px;
        background-color: #0f0;
    }
</style>
</head>
<body>
    <div class="parent">
        <div class="child"></div>
    </div>
</body>
</html>
Output:

在上面的示例中,父元素 .parent 设置了 overflow: auto,子元素 .child 的宽度和高度都超出了父元素的范围,但是由于父元素设置了 overflow: auto,会显示滚动条,用户可以滚动查看超出范围的内容。
3. 使用 position: absolute
另一种常见的方法是使用 position: absolute 来确保子元素不会超出父元素的范围。通过设置子元素的定位属性,可以让子元素相对于父元素进行定位,从而避免超出范围。下面是一个示例代码:
<!DOCTYPE html>
<html lang="en">
<head>
<meta charset="UTF-8">
<meta name="viewport" content="width=device-width, initial-scale=1.0">
<title>Position Absolute Example</title>
<style>
    .parent {
        position: relative;
        width: 200px;
        height: 200px;
        border: 1px solid #000;
    }
    .child {
        position: absolute;
        top: 0;
        left: 0;
        width: 300px;
        height: 300px;
        background-color: #00f;
    }
</style>
</head>
<body>
    <div class="parent">
        <div class="child"></div>
    </div>
</body>
</html>
Output:

在上面的示例中,父元素 .parent 设置了 position: relative,子元素 .child 设置了 position: absolute,并且通过 top: 0 和 left: 0 让子元素相对于父元素的左上角进行定位,从而确保子元素不会超出父元素的范围。
4. 使用 display: flex
display: flex 是一种强大的布局方式,可以很方便地实现子元素不超出父元素范围的效果。通过设置 flex 属性,可以让子元素自动适应父元素的大小,从而确保不会超出范围。下面是一个示例代码:
<!DOCTYPE html>
<html lang="en">
<head>
<meta charset="UTF-8">
<meta name="viewport" content="width=device-width, initial-scale=1.0">
<title>Display Flex Example</title>
<style>
    .parent {
        display: flex;
        width: 200px;
        height: 200px;
        border: 1px solid #000;
    }
    .child {
        flex: 1;
        background-color: #ff0;
    }
</style>
</head>
<body>
    <div class="parent">
        <div class="child"></div>
    </div>
</body>
</html>
Output:

在上面的示例中,父元素 .parent 设置了 display: flex,子元素 .child 设置了 flex: 1,这样子元素会自动适应父元素的大小,从而确保不会超出范围。
5. 使用 white-space: nowrap
有时候,文本内容超出父元素范围也会导致布局混乱。为了确保文本内容不会超出父元素的范围,可以使用 white-space: nowrap 来强制文本在一行内显示,不换行。下面是一个示例代码:
<!DOCTYPE html>
<html lang="en">
<head>
<meta charset="UTF-8">
<meta name="viewport" content="width=device-width, initial-scale=1.0">
<title>White Space Nowrap Example</title>
<style>
    .parent {
        width: 200px;
        height: 200px;
        border: 1px solid #000;
        overflow: hidden;
    }
    .child {
        white-space: nowrap;
    }
</style>
</head>
<body>
    <div class="parent">
        <div class="child">This is a long text that should not wrap inside the parent element.</div>
    </div>
</body>
</html>
Output:

在上面的示例中,子元素 .child 设置了 white-space: nowrap,这样文本内容不会换行,从而确保不会超出父元素的范围。
6. 使用 max-width 和 max-height
另一种常见的方法是使用 max-width 和 max-height 来限制子元素的最大宽度和最大高度,从而确保不会超出父元素的范围。下面是一个示例代码:
<!DOCTYPE html>
<html lang="en">
<head>
<meta charset="UTF-8">
<meta name="viewport" content="width=device-width, initial-scale=1.0">
<title>Max Width and Max Height Example</title>
<style>
    .parent {
        width: 200px;
        height: 200px;
        border: 1px solid #000;
        overflow: hidden;
    }
    .child {
        max-width: 100%;
        max-height: 100%;
    }
</style>
</head>
<body>
    <div class="parent">
        <img class="child" src="https://www.geek-docs.com/image.jpg" alt="Geek Docs Image">
    </div>
</body>
</html>
Output:

在上面的示例中,子元素 .child 设置了 max-width: 100% 和 max-height: 100%,这样子元素的宽度和高度不会超过父元素的宽度和高度,从而确保不会超出父元素的范围。
7. 使用 clip-path
clip-path 是一种CSS属性,可以裁剪元素的可见部分,从而确保不会超出父元素的范围。下面是一个示例代码:
<!DOCTYPE html>
<html lang="en">
<head>
<meta charset="UTF-8">
<meta name="viewport" content="width=device-width, initial-scale=1.0">
<title>Clip Path Example</title>
<style>
    .parent {
        width: 200px;
        height: 200px;
        border: 1px solid #000;
        overflow: hidden;
    }
    .child {
        clip-path: inset(0 0 0 0);
    }
</style>
</head>
<body>
    <div class="parent">
        <div class="child">This text will be clipped by the parent element.</div>
    </div>
</body>
</html>
Output:

在上面的示例中,子元素 .child 设置了 clip-path: inset(0 0 0 0),这样子元素的内容会被裁剪,确保不会超出父元素的范围。
8. 使用 z-index
有时候,子元素的层叠顺序可能会导致子元素超出父元素的范围。通过设置 z-index 属性,可以控制子元素的层叠顺序,确保不会超出父元素的范围。下面是一个示例代码:
<!DOCTYPE html>
<html lang="en">
<head>
<meta charset="UTF-8">
<meta name="viewport" content="width=device-width, initial-scale=1.0">
<title>Z-Index Example</title>
<style>
    .parent {
        position: relative;
        width: 200px;
        height: 200px;
        border: 1px solid #000;
    }
    .child {
        position: absolute;
        top: 0;
        left: 0;
        width: 300px;
        height: 300px;
        background-color: #f0f;
        z-index: -1;
    }
</style>
</head>
<body>
    <div class="parent">
        <div class="child"></div>
    </div>
</body>
</html>
Output:

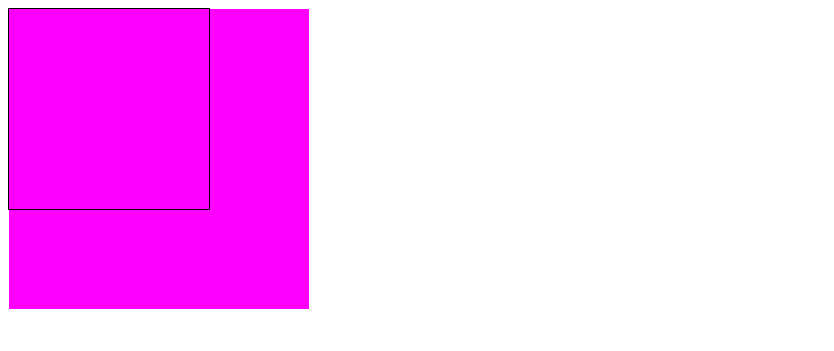
在上面的示例中,子元素 .child 设置了 z-index: -1,这样子元素会在父元素的下方,确保不会超出父元素的范围。
9. 使用 calc()
calc() 函数可以在CSS中进行数学运算,可以很方便地计算子元素的宽度或高度,确保不会超出父元素的范围。下面是一个示例代码:
<!DOCTYPE html>
<html lang="en">
<head>
<meta charset="UTF-8">
<meta name="viewport" content="width=device-width, initial-scale=1.0">
<title>Calc Function Example</title>
<style>
    .parent {
        width: 200px;
        height: 200px;
        border: 1px solid #000;
    }
    .child {
        width: calc(100% + 20px);
        height: calc(100% + 20px);
        background-color: #0ff;
    }
</style>
</head>
<body>
    <div class="parent">
        <div class="child"></div>
    </div>
</body>
</html>
Output:

在上面的示例中,子元素 .child 设置了 width: calc(100% + 20px) 和 height: calc(100% + 20px),这样子元素的宽度和高度会超出父元素的范围,但是由于使用了 calc() 函数,可以确保不会超出父元素的范围。
10. 使用 flex-wrap
如果父元素是一个flex容器,可以使用 flex-wrap 属性来控制子元素的换行方式,确保不会超出父元素的范围。下面是一个示例代码:
<!DOCTYPE html>
<html lang="en">
<head>
<meta charset="UTF-8">
<meta name="viewport" content="width=device-width, initial-scale=1.0">
<title>Flex Wrap Example</title>
<style>
    .parent {
        display: flex;
        flex-wrap: wrap;
        width: 200px;
        height: 200px;
        border: 1px solid #000;
    }
    .child {
        width: 150px;
        height: 150px;
        background-color: #f0f;
    }
</style>
</head>
<body>
    <div class="parent">
        <div class="child"></div>
        <div class="child"></div>
    </div>
</body>
</html>
Output:

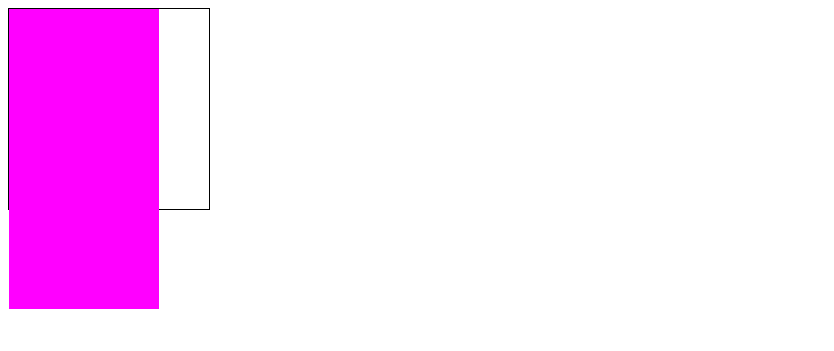
在上面的示例中,父元素 .parent 设置了 display: flex 和 flex-wrap: wrap,子元素 .child 的宽度和高度超出了父元素的范围,但是由于父元素设置了 flex-wrap: wrap,子元素会自动换行,确保不会超出父元素的范围。
通过以上示例代码,我们介绍了一些常用的方法来确保子元素不会超出父元素的范围。在实际开发中,可以根据具体情况选择合适的方法来实现页面布局,确保页面显示效果符合设计要求。
 极客教程
极客教程