如何使用ngx-webcam在Angular 10中启用网络摄像头
ngx-webcam组件通过Angular 10中的动作和事件绑定,提供了对网络摄像头的访问,以拍摄快照。这个组件给了我们完全的控制权和权限,使我们能够以一种简单的方式捕捉图像。
在你的应用程序中添加网络摄像头的步骤:
- 安装Angular 10
- 创建一个Angular CLI项目
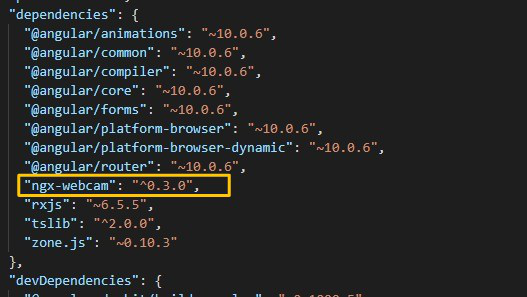
- 通过标准的npm命令安装软件包。
npm i ngx-webcam

-
添加WebcamModule组件导入到app.module.ts文件,如下所示。

-
现在在app.component.ts文件中添加ngx-webcam包库中的WebcamImage组件,并在AppComponent类中使用它来处理网络摄像头的功能。
    import { Component } from '@angular/core';
    import {WebcamImage} from 'ngx-webcam';
    import {Subject, Observable} from 'rxjs';

    @Component({
      selector: 'app-root',
      templateUrl: './app.component.html',
      styleUrls: ['./app.component.scss']
    })
    export class AppComponent {
      title = 'gfgangularwebcam';

      public webcamImage: WebcamImage = null;
      private trigger: Subject<void> = new Subject<void>();
      triggerSnapshot(): void {
       this.trigger.next();
      }
      handleImage(webcamImage: WebcamImage): void {
       console.info('Saved webcam image', webcamImage);
       this.webcamImage = webcamImage;
      }

      public get triggerObservable(): Observable<void> {
       return this.trigger.asObservable();
      }
    }
- 下面是app.component.html代码。
    <div>
    <webcam [height]="400"
            [width]="1000"
            [trigger]="triggerObservable"
                (imageCapture)="handleImage($event)">
     </webcam>

    <button class="actionBtn" (click)="triggerSnapshot();">
        Click Here and take the Shot</button>

    <div class="snapshot" *ngIf="webcamImage">
      <h2>Here is your image!</h2>
      <img [src]="webcamImage.imageAsDataUrl"/>
    </div>
- 要运行这个应用程序,在终端运行以下命令。
ng serve --open
-
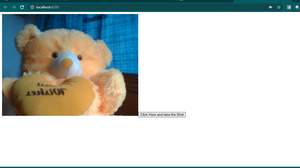
进入浏览器,打开Localhost:4200:

-
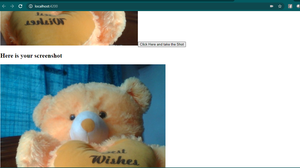
按下按钮,看到输出快照。

 极客教程
极客教程