Angular PrimeNG TabView程序化控制
Angular PrimeNG是一个开源框架,它有丰富的原生Angular UI组件,可以用来做很好的造型,这个框架用来做响应式网站,非常方便。在这篇文章中,我们将看到如何在Angular PrimeNG中使用TabView程序化控件。
TabView程序化控制用于使用定义活动标签索引的activeIndex属性,以程序化方式控制标签。
Angular PrimeNG TabView程序性控制属性:
- activeIndex。它是当前活动标签的索引,可以用程序控制标签视图。
Angular PrimeNG TabView程序化控制p-tabPanel属性:
- header。它用于指定标签面板元素的页眉。
语法:
// In app.component.ts
toggle() {
    return index;
}

// In app.component.html
<p-button (click)="index = toggle()" label="Toggle"></p-button>
  <br />
</div>
<p-tabView [(activeIndex)]="index">
</p-tabView>
创建Angular应用程序和模块安装。
第1步:使用以下命令创建一个Angular应用程序。
ng new appname
第2步:创建你的项目文件夹即appname后,使用以下命令移动到它。
cd appname
第3步在你给定的目录中安装PrimeNG。
npm install primeng --save
npm install primeicons --save
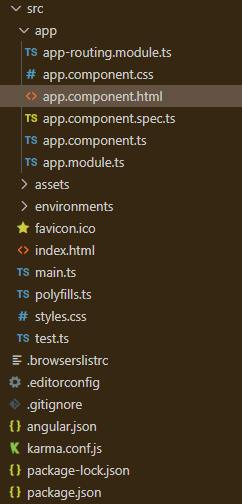
项目结构:它将看起来像如下。
Project Structure
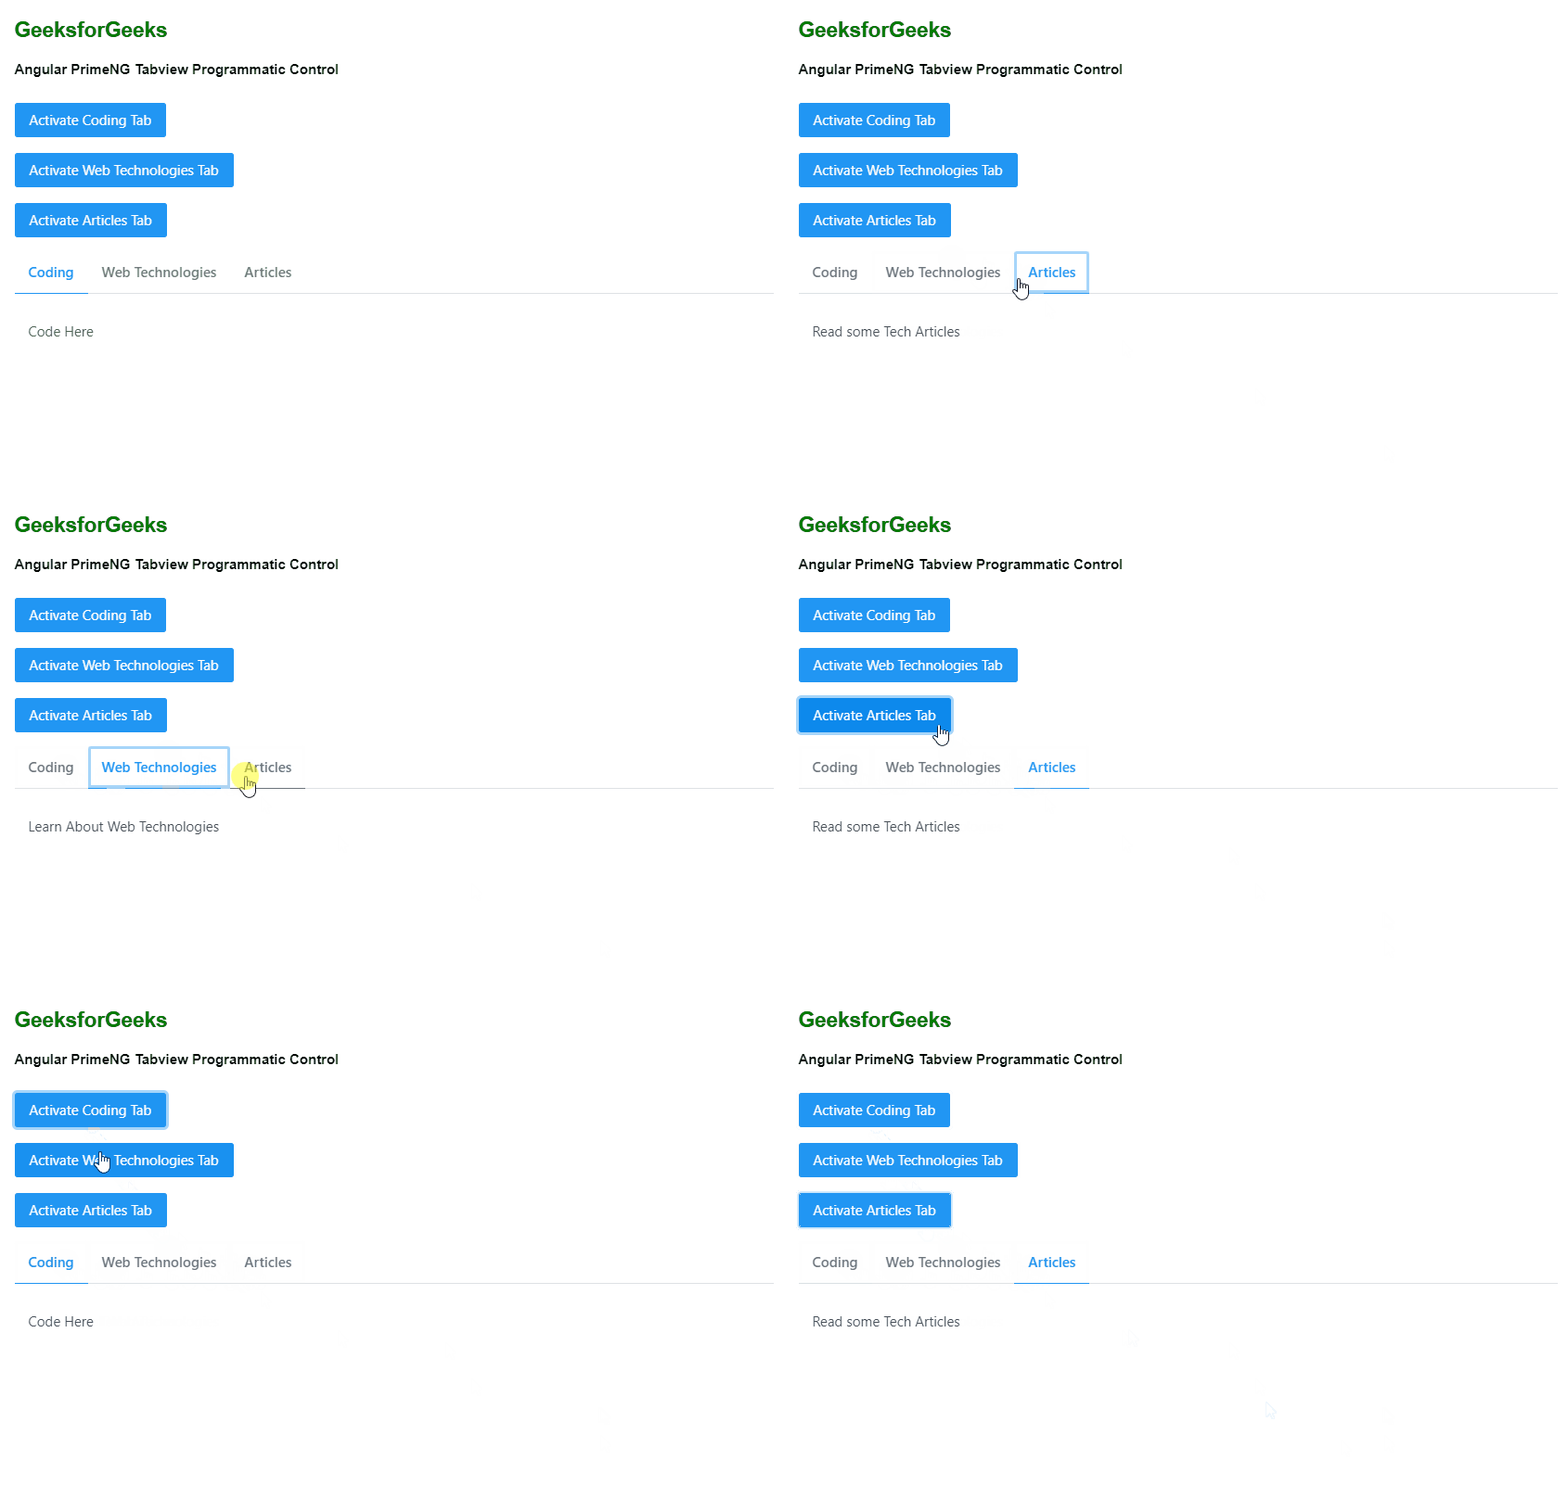
例子1:下面是一个简单的例子,演示Angular PrimeNG TabView程序化控制的使用。
- app.component.html:
<h2 style="color: green">GeeksforGeeks</h2>
<h4>Angular PrimeNG Tabview Programmatic Control</h4>
<div style="padding: .5em 0 1em 0">
    <p-button (click)="index = 0"
              label="Activate Coding Tab">
    </p-button>
    <br /><br />

    <p-button (click)="index = 1"
              label="Activate Web Technologies Tab">
    </p-button>
    <br /><br />

    <p-button (click)="index = 2"
              label="Activate Articles Tab">
    </p-button>
</div>
<p-tabView [(activeIndex)]="index">
    <p-tabPanel header="Coding">
        <p>Code Here</p>
    </p-tabPanel>
    <p-tabPanel header="Web Technologies">
        <p>Learn About Web Technologies</p>
    </p-tabPanel>
    <p-tabPanel header="Articles">
        <p>Read some Tech Articles</p>
    </p-tabPanel>
</p-tabView>
- app.component.ts
import { Component, OnInit } from '@angular/core';

@Component({
    selector: 'app-root',
    templateUrl: './app.component.html',
    providers: [],
})
export class AppComponent {
    constructor() { }

    ngOnInit() { }
}
- app.module.ts
import { NgModule } from '@angular/core';
import { BrowserModule }
    from '@angular/platform-browser';
import { RouterModule } from '@angular/router';
import { BrowserAnimationsModule }
    from '@angular/platform-browser/animations';
import { AppComponent } from './app.component';
import { TabViewModule } from 'primeng/tabview';
import { ButtonModule } from 'primeng/button';

@NgModule({
    imports: [
        BrowserModule,
        BrowserAnimationsModule,
        TabViewModule,
        ButtonModule,
        RouterModule.forRoot([
            { path: '', component: AppComponent }
        ])
    ],
    declarations: [AppComponent],
    bootstrap: [AppComponent]
})
export class AppModule { }
输出:

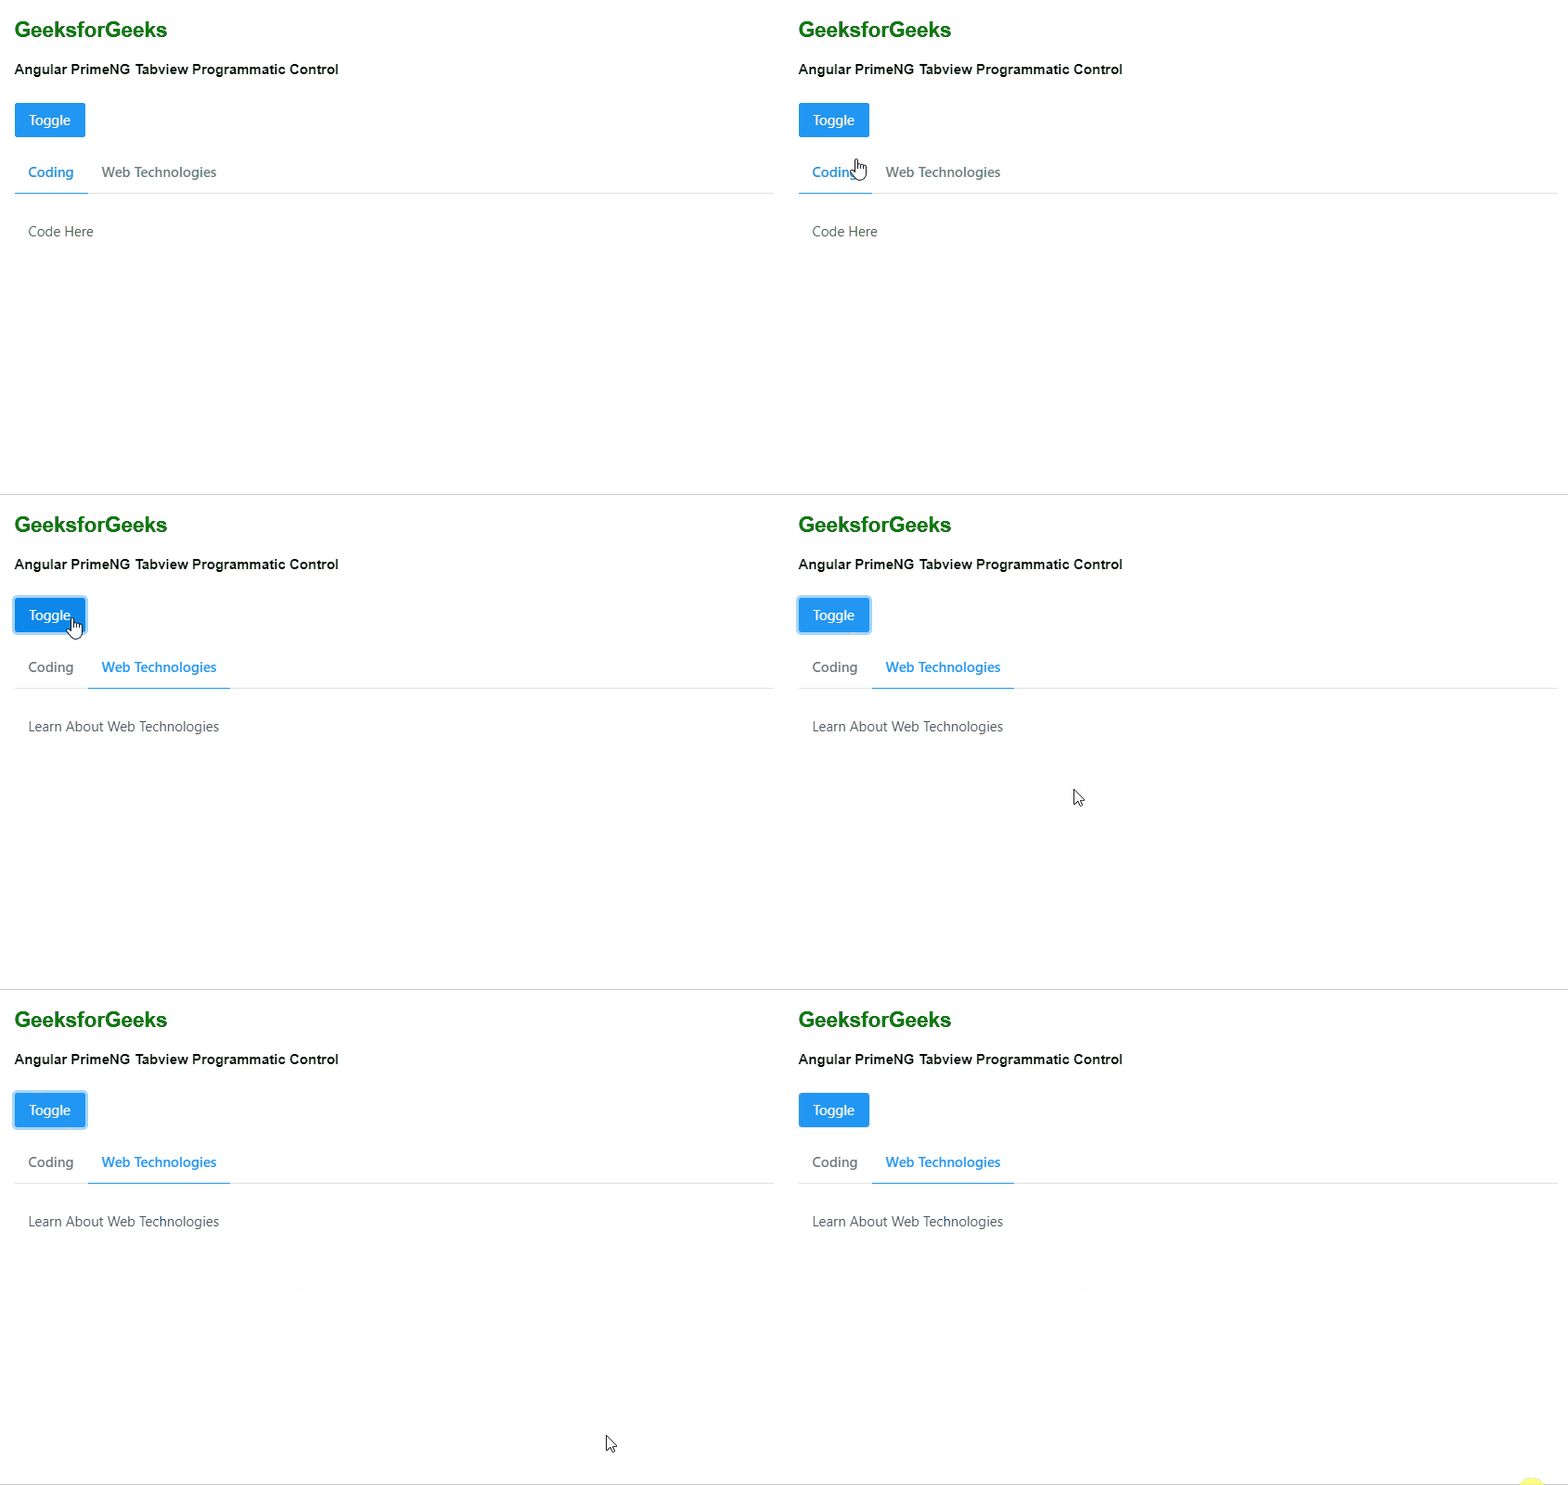
例子2:下面是另一个例子,演示Angular PrimeNG TabView程序化控制的使用,我们使用typescript函数来切换标签。
- app.component.html
<h2 style="color: green">
  GeeksforGeeks
</h2>
<h4>
    Angular PrimeNG Tabview
    Programmatic Control
</h4>
<div style="padding: .5em 0 1em 0">
    <p-button (click)="index = toggle()"
              label="Toggle">
    </p-button><br />
</div>
<p-tabView [(activeIndex)]="index">
    <p-tabPanel header="Coding">
        <p>Code Here</p>
    </p-tabPanel>
    <p-tabPanel header="Web Technologies">
        <p>Learn About Web Technologies</p>
    </p-tabPanel>
</p-tabView>
- app.component.ts
import { Component, OnInit } from '@angular/core';

@Component({
    selector: 'app-root',
    templateUrl: './app.component.html',
    providers: [],
})
export class AppComponent {
    toggle() {
        return 1;
    }
    constructor() { }
    ngOnInit() { }
}
- app.module.ts
import { NgModule } from '@angular/core';
import { BrowserModule }
    from '@angular/platform-browser';
import { RouterModule } from '@angular/router';
import { BrowserAnimationsModule }
    from '@angular/platform-browser/animations';
import { AppComponent } from './app.component';
import { TabViewModule } from 'primeng/tabview';
import { ButtonModule } from 'primeng/button';

@NgModule({
    imports: [
        BrowserModule,
        BrowserAnimationsModule,
        TabViewModule,
        ButtonModule,
        RouterModule.forRoot([
            { path: '', component: AppComponent }
        ])
    ],
    declarations: [AppComponent],
    bootstrap: [AppComponent]
})
export class AppModule { }
输出:

 极客教程
极客教程