Angular PrimeNG Form Checkbox Label Component
Angular PrimeNG是一个开源的库,由原生的Angular UI组件组成,用来做伟大的造型,这个框架被用来做响应式网站,非常容易。在这篇文章中,我们将看到**Angular PrimeNG表格检查框标签组件。
PrimeNG提供的复选框组件是HTML复选框的扩展,具有主题性。复选框组件的label 属性用于设置复选框的标签文本。复选框的标签是可点击的,当点击时它会切换复选框的值。
Angular PrimeNG Form Checkbox Label组件属性:
- label。标签属性用于为复选框设置标签文本。
- binary。这是一个布尔属性,用于以布尔形式保存复选框的值。
- ngModel。该属性将一个布尔变量与复选框的值绑定。
Angular PrimeNG表格复选框标签组件样式:
- p-disabled。当复选框被禁用时,该类由PrimeNG应用到标签上。
- p-checkbox-label-focus。当复选框处于焦点时,该类由PrimeNG应用到标签上。
- p-checkbox-label-active:当复选框处于活动状态时,该类由PrimeNG应用到标签上。
语法:
<p-checkbox label="..."></p-checkbox>
创建Angular应用程序并安装PrimeNG模块:。
第1步:使用以下命令创建一个Angular应用程序。
ng new appname
第2步:在创建你的项目文件夹即appname后,使用以下命令移动到它。
cd appname
第3步:最后,在你给定的目录中安装PrimeNG。
npm install primeng --save
npm install primeicons --save
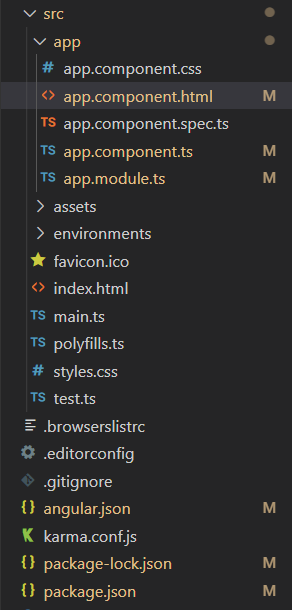
项目结构:在完成上述步骤后,项目结构将看起来像这样。

Project Structure
- 运行下面的命令可以看到输出。
ng serve --open
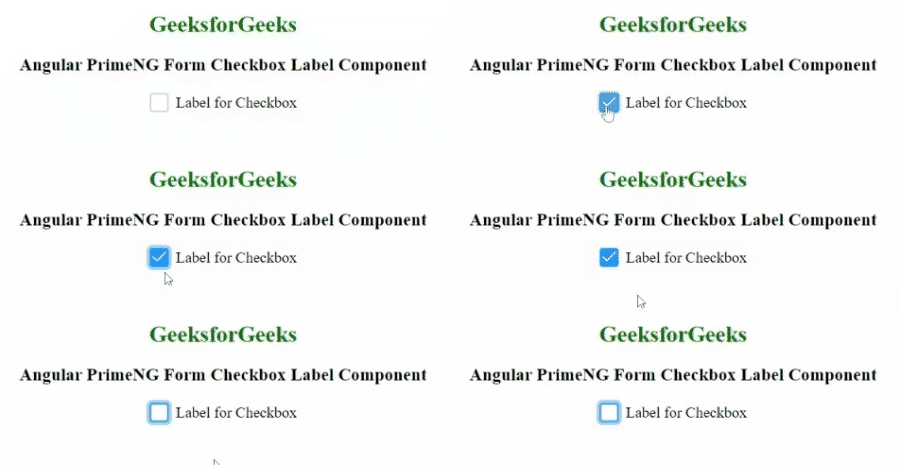
示例1:本示例通过创建一个带有标签的简单复选框,说明了Angular PrimeNG中**表格复选框标签组件的实现。
<div class="header">
    <h2>GeeksforGeeks</h2>
    <h3>
        Angular PrimeNG Form Checkbox
        Label Component
    </h3>
</div>
<div class="example-container">
    <div class="checkbox">
        <p-checkbox [binary]="true"
                    [(ngModel)]="checked1"
                    label="Label for Checkbox">
        </p-checkbox>
    </div>
</div>
div {
  display: flex;
  align-items: center;
  justify-content: center;
  flex-direction: column;
}

div.checkbox {
  flex-direction: row;
}

.header h2 {
  margin-bottom: 0;
  color: green;
}

label {
  margin-left: 10px;
}
import { Component } from "@angular/core";

@Component({
  selector: "app-root",
  templateUrl: "./app.component.html",
  styleUrls: ["./app.component.css"],
})
export class AppComponent {
  checked1: boolean = false;
}
import { NgModule } from "@angular/core";
import { BrowserModule }
    from "@angular/platform-browser";
import { BrowserAnimationsModule }
    from "@angular/platform-browser/animations";

import { AppComponent } from "./app.component";
import { FormsModule } from "@angular/forms";
import { CheckboxModule } from "primeng/checkbox";

@NgModule({
  declarations: [AppComponent],
  imports: [
    FormsModule,
    BrowserModule,
    CheckboxModule,
    BrowserAnimationsModule,
  ],
  providers: [],
  bootstrap: [AppComponent],
})
export class AppModule {}
输出:

例子2:在这个例子中,我们使用标签元素的结构类来定制它在焦点、活动或禁用状态下的样式。
<div class="header">
    <h2>GeeksforGeeks</h2>
    <h3>
        Angular PrimeNG Form Checkbox
        Label Component
    </h3>
</div>
<div class="example-container">
    <div class="checkbox">
        <p-checkbox [binary]="true"
                    [(ngModel)]="checked1"
                    label="Label for Checkbox">
        </p-checkbox>
    </div>
    <div class="checkbox">
        <p-checkbox [disabled]="true"
                    [binary]="true"
                    [(ngModel)]="checked2"
                    label="Label for Disabled Checkbox">
        </p-checkbox>
    </div>
</div>
div {
  display: flex;
  align-items: center;
  justify-content: center;
  flex-direction: column;
}

div.checkbox {
  flex-direction: row;
  margin-bottom: 20px;
}

.header h2 {
  margin-bottom: 0;
  color: green;
}

label {
  margin-left: 10px;
}
import { Component } from "@angular/core";

@Component({
  selector: "app-root",
  templateUrl: "./app.component.html",
  styleUrls: ["./app.component.css"],
})
export class AppComponent {
  checked1: boolean = false;
  checked2: boolean = false;
}
import { NgModule } from "@angular/core";
import { BrowserModule }
    from "@angular/platform-browser";
import { BrowserAnimationsModule }
    from "@angular/platform-browser/animations";

import { AppComponent } from "./app.component";
import { FormsModule } from "@angular/forms";
import { CheckboxModule } from "primeng/checkbox";

@NgModule({
  declarations: [AppComponent],
  imports: [
    FormsModule,
    BrowserModule,
    CheckboxModule,
    BrowserAnimationsModule,
  ],
  providers: [],
  bootstrap: [AppComponent],
})
export class AppModule {}
.p-checkbox-label-focus {
  color: green;
}

.p-checkbox-label-active {
  color: blue;
}

label.p-disabled {
  color: red;
}
输出:

 极客教程
极客教程