Angular PrimeNG Chip Basic
Angular PrimeNG是一个开源框架,拥有丰富的原生Angular UI组件,可以用来做很好的造型,这个框架用来制作响应式网站非常方便。本文将告诉我们如何在Angular PrimeNG中使用Chips Basic。
筹码组件为一个输入字段设置多个输入值。它一般用于实现大多数电子商务网站的过滤输入。
语法:
<p-chip
    label="...."
    [removable]="true">
</p-chip>
Angular PrimeNG芯片基本属性:
- label。它用于显示芯片内的文字。
- removable。它用于指定是否应该显示可移动的图标。它是布尔型的。默认值为false。
创建Angular应用程序和模块安装。
第1步:使用以下命令创建一个Angular应用程序。
ng new appname
第2步:创建你的项目文件夹即appname后,使用以下命令移动到它。
cd appname
第3步:在你给定的目录中安装PrimeNG。
npm install primeng --save
npm install primeicons --save
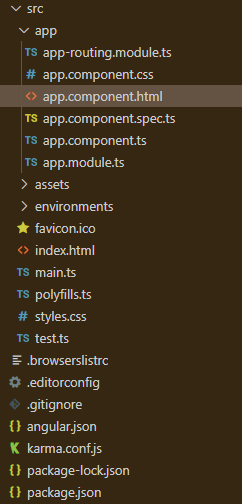
项目结构:它将看起来像如下。
- 运行下面的命令可以看到输出。
ng serve --open
例子1:下面是说明使用**Angular PrimeNG Chip Basic的例子代码。
<h2 style="color: green">GeeksforGeeks</h2>
<h5>Angular PrimeNG Chips Basic</h5>
<div class="d-flex ai-center">
    <p-chip
            label="HTML"
            styleClass="mr-3">
    </p-chip>
    <p-chip
            label="CSS"
            styleClass="mr-3">
    </p-chip>
    <p-chip
            label="JavaScript"
            styleClass="mr-3">
    </p-chip>
    <p-chip
            label="ReactJS"
            styleClass="mr-3">
    </p-chip>
    <p-chip
            label="AngularJS"
            styleClass="mr-3">
    </p-chip>
    <p-chip
            label="PrimeNG"
            styleClass="mr-3">
    </p-chip>
</div>
import { Component } from "@angular/core";

@Component({
    selector: "app-root",
    templateUrl: "./app.component.html",
    styleUrls: ["./app.component.css"]
})
export class AppComponent { }
import { NgModule } from "@angular/core";
import { BrowserModule }
    from "@angular/platform-browser";
import { BrowserAnimationsModule }
    from "@angular/platform-browser/animations";
import { AppComponent } from "./app.component";
import { ButtonModule } from "primeng/button";
import { BadgeModule } from "primeng/badge";
import { ChipModule } from "primeng/chip";

@NgModule({
    imports: [
        BrowserModule,
        BrowserAnimationsModule,
        ChipModule,
        ButtonModule,
        BadgeModule
    ],
    declarations: [AppComponent],
    bootstrap: [AppComponent]
})
export class AppModule { }
输出:
示例2:下面是另一个示例代码,说明了Angular PrimeNG Chip Basic使用[可移除]=”true”属性。
<h2 style="color: green">GeeksforGeeks</h2>
<h5>Angular PrimeNG Chips Basic</h5>
<div class="d-flex ai-center">
    <p-chip
            label="HTML"
            styleClass="mr-3"
            [removable]="true">
    </p-chip>
    <p-chip
            label="CSS"
            styleClass="mr-3"
            [removable]="true">
    </p-chip>
    <p-chip
            label="JavaScript"
            styleClass="mr-3"
            [removable]="true">
    </p-chip>
    <p-chip
            label="ReactJS"
            styleClass="mr-3"
            [removable]="true">
    </p-chip>
    <p-chip
            label="AngularJS"
            styleClass="mr-3"
            [removable]="true">
    </p-chip>
    <p-chip
            label="PrimeNG"
            [removable]="true">
    </p-chip>
</div>
import { Component } from "@angular/core";

@Component({
    selector: "app-root",
    templateUrl: "./app.component.html",
    styleUrls: ["./app.component.css"]
})
export class AppComponent { }
import { NgModule } from "@angular/core";
import { BrowserModule }
    from "@angular/platform-browser";
import { BrowserAnimationsModule }
    from "@angular/platform-browser/animations";
import { AppComponent } from "./app.component";
import { ButtonModule } from "primeng/button";
import { BadgeModule } from "primeng/badge";
import { ChipModule } from "primeng/chip";

@NgModule({
    imports: [
        BrowserModule,
        BrowserAnimationsModule,
        ChipModule,
        ButtonModule,
        BadgeModule
    ],
    declarations: [AppComponent],
    bootstrap: [AppComponent]
})
export class AppModule { }
输出:

 极客教程
极客教程
