React.js 蓝图Popover2门户渲染
蓝图 是一个基于React的Web UI工具包。该库非常优化,并且在构建复杂和数据密集的桌面应用程序接口方面非常流行。
在本文中,我们将讨论React.js蓝图Popover2门户渲染。Popover可以帮助在目标元素旁边显示浮动内容。通过使用usePortal属性进行门户渲染,并指定值为true或false,可以将Popover渲染到门户内部或外部,门户连接到portalContainer。
蓝图Popover2门户渲染类:
- usePortal: 这是一个布尔属性,用于控制Popover是否应在连接到portalContainer属性的门户内部渲染,或者反之。
React.js蓝图Popover2属性:
- autoFocus :它指示当打开时覆盖层是否应获取应用程序焦点。
- backdropProps :它表示背景元素的HTML属性。
- boundary :它表示提供给flip和preventOverflow修改器的边界元素。
- canEscapeKeyClose :它指示按ESC键是否应调用onClose。
- captureDismiss :当用户单击一个Classes.POPOVER_DISMISS元素时,只有在启用此属性时,当前气泡窗口才会关闭,而不会关闭外部气泡窗口。
- children :它表示触发气泡窗口的交互元素。
- className :它表示要传递给子元素的一组以空格分隔的类名。
- content :它表示将显示在弹出窗口内的内容。
- defaultIsOpen :它表示未受控时的初始打开状态。
- disabled :为true时阻止弹出窗口出现。
- enforceFocus :它表示覆盖层是否应该阻止焦点离开自身。
- fill :它表示包装器和目标是否应占据其容器的全部宽度。
- hasBackdrop :启用弹出窗口下方的无形覆盖层,捕获点击事件,并在弹出窗口关闭之前阻止与文档其余部分的交互。
- hoverCloseDelay : 它表示用户在离开触发器后,弹出框应保持打开状态的时间,单位为毫秒。
- hoverOpenDelay : 它表示在用户悬停在触发器上后,弹出框应等待打开的时间,单位为毫秒。
- inheritDarkTheme : 它指示使用 Portal 的弹出框是否应自动继承其父级的暗主题。
- interactionKind : 它表示触发显示弹出框的悬停交互类型。
- isOpen : 它指示弹出框是否可见。
- lazy : 当 usePortal 设置为 true 且将其设置为 true 时,它是一个包含在第一次打开时创建和附加到 DOM 的子元素的 Portal。
- matchTargetWidth :它指示弹出框内容是否应该被调整为与目标的宽度相匹配。
- minimal :它指示是否对此弹出框应用最小样式。
- modifiers :它覆盖了Popper.js内置的修饰符。
- modifiersCustom :它表示要添加到弹出框实例的自定义修饰符。
- onClose :这是一个在用户交互引起覆盖层关闭时触发的回调函数。
- onClosed :它表示在CSS关闭过渡结束之后但在子元素从DOM中被移除之前调用的生命周期方法。
- onClosing :
- 生命周期方法,在子元素的CSS关闭转换开始之前调用。
- onInteraction : 当弹出窗口的打开状态因用户交互而发生改变时,它是一个在受控模式下触发的回调函数。
- 生命周期方法,在CSS打开转换结束后调用。
- 生命周期方法,在将子元素挂载到DOM中后但在CSS打开转换开始之前调用。
- openOnTargetFocus : 它指示当目标元素获得焦点时弹出窗口是否应该打开。
- placement : 它指定了弹出窗口应该出现的位置。
- popoverClassName : 它表示应用于popover元素的一组以空格分隔的类名字符串。
- popoverRef : 它将ref传递给Classes.POPOVER元素。
- popupKind : 它表示popover显示的弹出框的类型。
- portalClassName : 如果usePortal为true,则它表示应用于Portal元素的一组以空格分隔的类名字符串。
- portalContainer : 如果usePortal为true,则它表示覆盖层在其内容渲染到的容器元素。
- position : 它表示popover应该出现的位置。与placement属性互斥。
- positioningStrategy : 它用于Popper.js的定位策略。
- renderTarget : 它表示接收由Popover2注入的props的目标渲染器,这些props应该扩展到渲染的元素上。
- rootBoundary : 它表示提供给flip和preventOverflow修饰器的根边界元素。
- shouldReturnFocusOnClose : 它表示在这个弹出框关闭后,应用程序是否应该将焦点返回到文档中的最后一个活动元素。
- targetTagName : 它表示目标元素的HTML标记名称。
- transitionDuration : 它指示弹出框出现/消失过渡所需的时间,以毫秒为单位。
- usePortal :它指示气泡框是否应该在与 portalContainer prop 关联的 Portal 中渲染。
语法:
<Popover2
    usePortal={true || false}
    ...
/>
创建React应用程序并安装模块:
步骤1 :使用以下命令创建一个React应用程序:
npm create-react-app appname
步骤2: 创建您的项目文件夹(例如appname),然后使用以下命令进入:
cd appname
步骤3: 创建ReactJS应用之后,使用以下命令安装所需模块:
npm install @blueprintjs/core
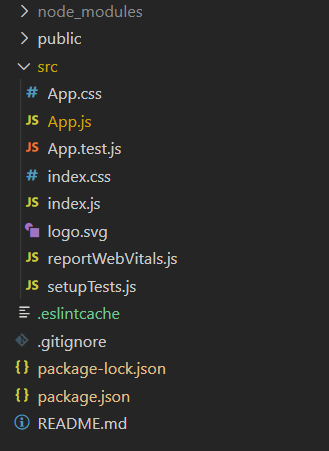
项目结构:

步骤4: 按照以下方式运行项目:
npm start
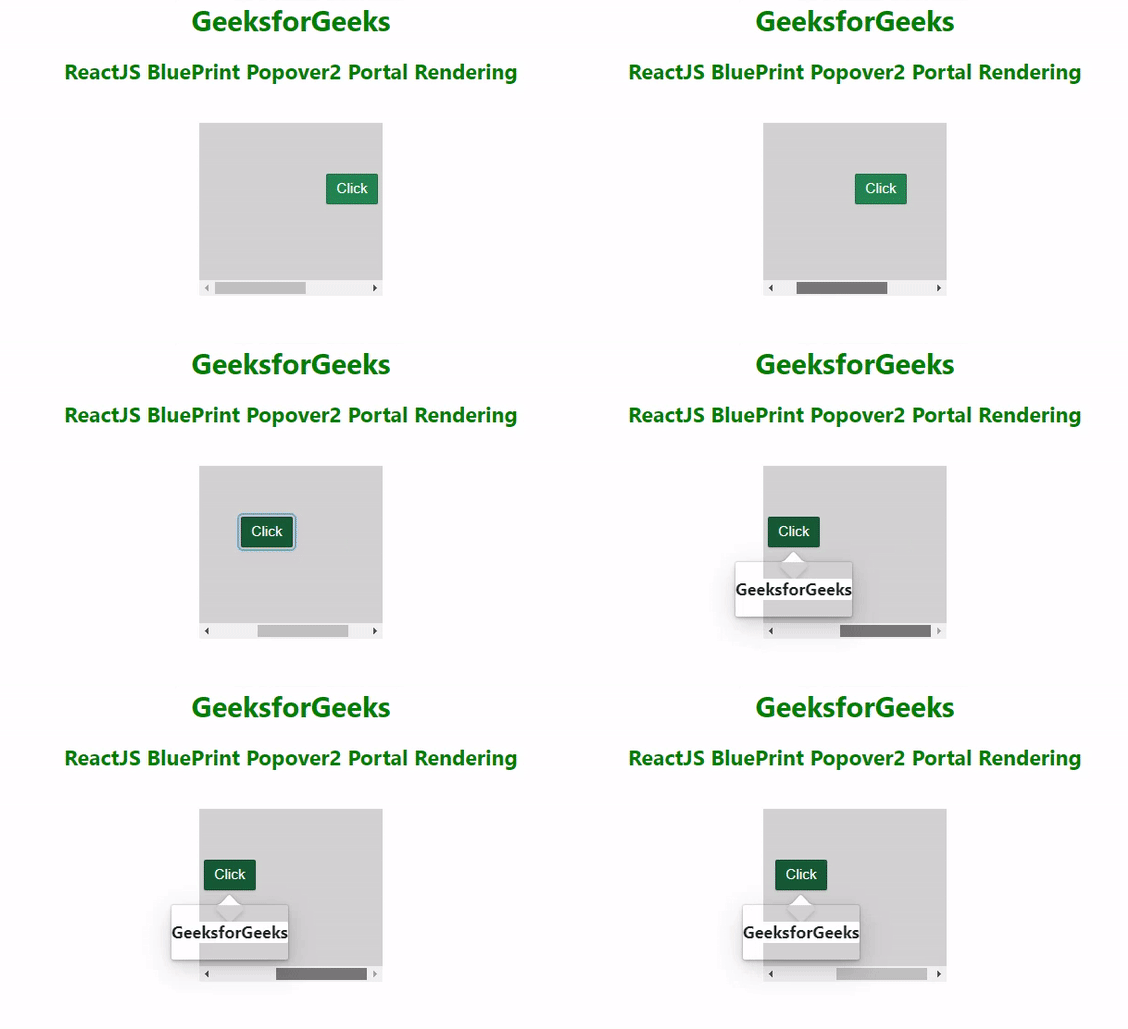
示例1: 下面的示例演示了在popover2中使用usePortal为“True”的用法。
import React from "react";
import "@blueprintjs/core/lib/css/blueprint.css";
import { Button } from "@blueprintjs/core";
import { Popover2, Classes } from "@blueprintjs/popover2";
import "@blueprintjs/popover2/lib/css/blueprint-popover2.css";

function App() {
    return (
        <center>
            <div style={{ padding: 20,
                 textAlign: "center", color: "green" }}>
                <h1>GeeksforGeeks</h1>
                <h2>ReactJS BluePrint Popover2 Portal Rendering</h2>
            </div>
            <div
                className="custom"
                style={{ backgroundColor: "lightgray"
                 , padding: 50 }}
            >
                <Popover2
                    usePortal={true}
                    position="bottom"
                    interactionKind="click-target"
                    content={
                        <div>
                            <h3>GeeksforGeeks</h3>
                        </div>
                    }
                    renderTarget={({ isOpen, ref, ...targetProps })
                       => (
                        <div style={{ width: 200 }}>
                            <Button
                                {...targetProps}
                                elementRef={ref}
                                text="Click"
                                intent="success"
                            />
                        </div>
                    )}
                />
            </div>
        </center>
    );
}

export default App;
Style.css
/* Write CSS Here */
.custom {
      height: 170px;
      max-width: 180px;
      flex: 1 1 auto;
      overflow-x: scroll;
      overflow-y: hidden;
      position: relative;
}
输出:

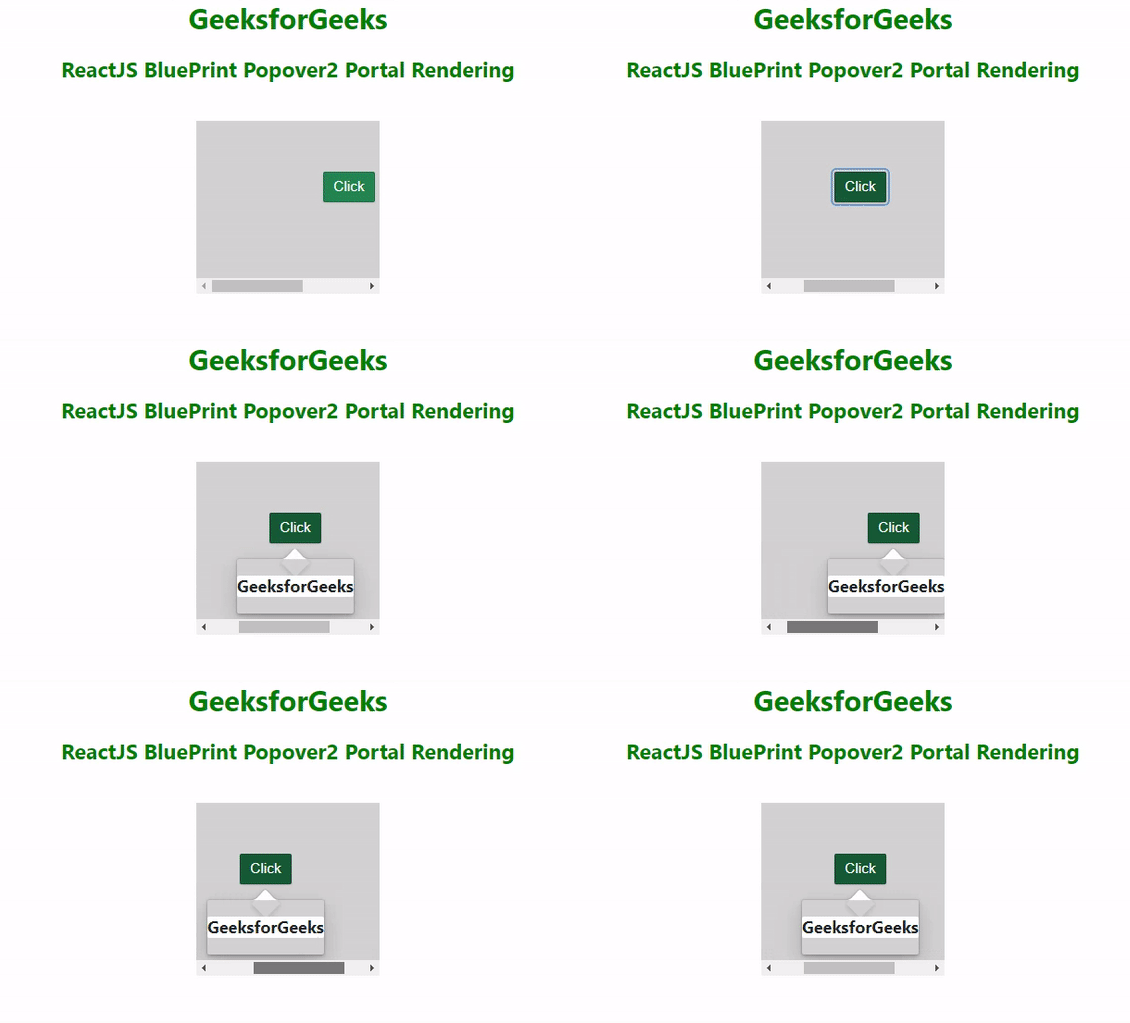
示例2: 下面的示例演示了在popover2中使用usePortal为”False”的用法。
import React from "react";
import "@blueprintjs/core/lib/css/blueprint.css";
import { Button } from "@blueprintjs/core";
import { Popover2, Classes } from "@blueprintjs/popover2";
import "@blueprintjs/popover2/lib/css/blueprint-popover2.css";

function App() {
    return (
        <center>
            <div style={{ padding: 20,
                 textAlign: "center", color: "green" }}>
                <h1>GeeksforGeeks</h1>
                <h2>
                   ReactJS BluePrint Popover2 Portal Rendering
                </h2>
            </div>
            <div
                className="custom"
                style={{ backgroundColor: "lightgray", padding: 50 }}
            >
                <Popover2
                    usePortal={false}
                    position="bottom"
                    interactionKind="click-target"
                    content={
                        <div>
                            <h3>GeeksforGeeks</h3>
                        </div>
                    }
                    renderTarget={({ isOpen, ref, ...targetProps })
                    => (
                        <div style={{ width: 200 }}>
                            <Button
                                {...targetProps}
                                elementRef={ref}
                                text="Click"
                                intent="success"
                            />
                        </div>
                    )}
                />
            </div>
        </center>
    );
}

export default App;
Style.css
/* Write CSS Here */
.custom {
      height: 170px;
      max-width: 180px;
      flex: 1 1 auto;
      overflow-x: scroll;
      overflow-y: hidden;
      position: relative;
}
输出:

参考: https://blueprintjs.com/docs/#popover2-package/popover2.portal-rendering
 极客教程
极客教程