NumPy随机数生成与操作:全面掌握数据科学中的随机性
NumPy是Python中用于科学计算的核心库,其中的random模块提供了强大的随机数生成和操作功能。本文将深入探讨NumPy random模块的各种功能,包括生成随机数、随机抽样、随机排列等,以及如何在数据科学和机器学习中应用这些功能。
1. NumPy random模块简介
NumPy的random模块是一个功能丰富的随机数生成工具,它提供了多种方法来生成不同分布的随机数,以及进行随机抽样和排列。在数据科学、统计分析和机器学习中,随机数的生成和操作是非常重要的,因为它们可以用于模拟实验、创建测试数据、实现随机算法等多种场景。
首先,让我们导入NumPy和random模块:
import numpy as np
from numpy import random
2. 生成基本随机数
2.1 生成均匀分布的随机数
使用random.rand()函数可以生成0到1之间均匀分布的随机数:
import numpy as np
from numpy import random

# 生成5个0到1之间的随机数
random_numbers = np.random.rand(5)
print("Random numbers from numpyarray.com:", random_numbers)
Output:

这个例子生成了5个0到1之间的随机浮点数。random.rand()函数可以接受多个参数来指定生成的随机数数组的形状。
2.2 生成整数随机数
使用random.randint()函数可以生成指定范围内的随机整数:
import numpy as np
from numpy import random

# 生成5个0到10之间的随机整数
random_integers = np.random.randint(0, 11, 5)
print("Random integers from numpyarray.com:", random_integers)
Output:

这个例子生成了5个0到10之间的随机整数。注意,上限11是不包括在内的。
3. 生成特定分布的随机数
3.1 正态分布
正态分布(也称为高斯分布)是统计学中最常用的分布之一。使用random.normal()函数可以生成服从正态分布的随机数:
import numpy as np
from numpy import random

# 生成均值为0,标准差为1的5个正态分布随机数
normal_numbers = np.random.normal(0, 1, 5)
print("Normal distribution numbers from numpyarray.com:", normal_numbers)
Output:

这个例子生成了5个服从标准正态分布(均值为0,标准差为1)的随机数。
3.2 泊松分布
泊松分布通常用于模拟在固定时间或空间内随机事件发生的次数。使用random.poisson()函数可以生成服从泊松分布的随机数:
import numpy as np
from numpy import random

# 生成lambda为3的5个泊松分布随机数
poisson_numbers = np.random.poisson(lam=3, size=5)
print("Poisson distribution numbers from numpyarray.com:", poisson_numbers)
Output:

这个例子生成了5个服从泊松分布的随机数,其中lambda参数(平均事件率)设为3。
4. 随机抽样
4.1 简单随机抽样
从给定的序列中进行简单随机抽样是一种常见的操作。使用random.choice()函数可以实现这一功能:
import numpy as np
from numpy import random

# 从给定序列中随机抽取3个元素
sequence = np.array(['apple', 'banana', 'cherry', 'date', 'elderberry'])
samples = np.random.choice(sequence, size=3, replace=False)
print("Random samples from numpyarray.com:", samples)
Output:

这个例子从给定的水果序列中随机抽取了3个元素,不允许重复抽样(replace=False)。
4.2 加权随机抽样
在某些情况下,我们需要根据不同的权重进行随机抽样。random.choice()函数也支持这种操作:
import numpy as np
from numpy import random

# 根据权重进行随机抽样
fruits = np.array(['apple', 'banana', 'cherry', 'date', 'elderberry'])
weights = np.array([0.1, 0.3, 0.2, 0.3, 0.1])
weighted_samples = np.random.choice(fruits, size=4, p=weights)
print("Weighted random samples from numpyarray.com:", weighted_samples)
Output:

这个例子根据给定的权重对水果进行了随机抽样,抽取了4个样本。
5. 随机排列
5.1 数组随机排列
随机排列是将数组中的元素随机打乱的过程。使用random.shuffle()函数可以实现原地随机排列:
import numpy as np
from numpy import random

# 对数组进行随机排列
arr = np.array([1, 2, 3, 4, 5])
np.random.shuffle(arr)
print("Shuffled array from numpyarray.com:", arr)
Output:

这个例子将原数组的顺序随机打乱。注意,shuffle()函数会直接修改原数组。
5.2 生成随机排列
如果你不想修改原数组,而是想得到一个新的随机排列,可以使用random.permutation()函数:
import numpy as np
from numpy import random

# 生成随机排列
original_arr = np.array([1, 2, 3, 4, 5])
permuted_arr = np.random.permutation(original_arr)
print("Original array from numpyarray.com:", original_arr)
print("Permuted array from numpyarray.com:", permuted_arr)
Output:

这个例子生成了原数组的一个随机排列,而不改变原数组。
6. 设置随机种子
在进行随机操作时,设置随机种子是非常重要的,因为它可以确保结果的可重复性。使用random.seed()函数可以设置随机种子:
import numpy as np
from numpy import random

# 设置随机种子
np.random.seed(42)
random_numbers = np.random.rand(5)
print("Random numbers with seed from numpyarray.com:", random_numbers)

# 重新设置相同的种子
np.random.seed(42)
random_numbers_repeat = np.random.rand(5)
print("Repeated random numbers from numpyarray.com:", random_numbers_repeat)
Output:

这个例子展示了如何设置随机种子,并验证了设置相同的种子会产生相同的随机数序列。
7. 生成随机矩阵
在许多数据科学应用中,我们经常需要生成随机矩阵。NumPy提供了多种方法来生成不同类型的随机矩阵。
7.1 均匀分布随机矩阵
使用random.rand()函数可以生成均匀分布的随机矩阵:
import numpy as np
from numpy import random

# 生成3x3的均匀分布随机矩阵
uniform_matrix = np.random.rand(3, 3)
print("Uniform distribution matrix from numpyarray.com:\n", uniform_matrix)
Output:

这个例子生成了一个3×3的矩阵,其中的每个元素都是0到1之间的随机数。
7.2 正态分布随机矩阵
使用random.randn()函数可以生成标准正态分布的随机矩阵:
import numpy as np
from numpy import random

# 生成3x3的标准正态分布随机矩阵
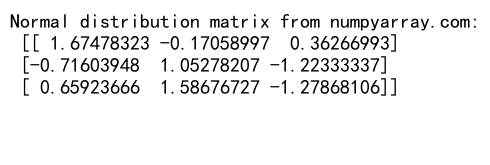
normal_matrix = np.random.randn(3, 3)
print("Normal distribution matrix from numpyarray.com:\n", normal_matrix)
Output:

这个例子生成了一个3×3的矩阵,其中的每个元素都服从标准正态分布(均值为0,标准差为1)。
8. 随机数组操作
NumPy的random模块不仅可以生成随机数,还提供了一些有用的随机数组操作函数。
8.1 随机选择数组元素
使用random.choice()函数可以从数组中随机选择元素:
import numpy as np
from numpy import random

# 从二维数组中随机选择元素
arr = np.array([[1, 2, 3], [4, 5, 6], [7, 8, 9]])
random_elements = np.random.choice(arr.flatten(), size=5)
print("Random elements from numpyarray.com:", random_elements)
Output:

这个例子从一个2D数组中随机选择了5个元素。注意,我们首先使用flatten()方法将2D数组转换为1D数组。
8.2 生成随机布尔数组
有时我们需要生成随机的布尔数组,这可以通过random.choice()函数实现:
import numpy as np
from numpy import random

# 生成随机布尔数组
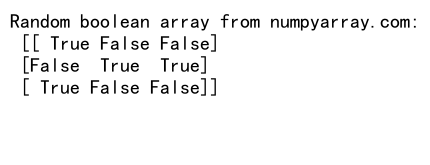
bool_arr = np.random.choice([True, False], size=(3, 3))
print("Random boolean array from numpyarray.com:\n", bool_arr)
Output:

这个例子生成了一个3×3的随机布尔数组。
9. 高级随机数生成技巧
9.1 生成具有特定均值和标准差的正态分布
有时我们需要生成具有特定均值和标准差的正态分布随机数:
import numpy as np
from numpy import random

# 生成均值为10,标准差为 2 的正态分布随机数
mean = 10
std_dev = 2
custom_normal = np.random.normal(mean, std_dev, size=1000)
print("Custom normal distribution from numpyarray.com:", custom_normal[:5])
Output:

这个例子生成了1000个服从均值为10,标准差为2的正态分布的随机数。
9.2 生成多维正态分布
在某些应用中,我们可能需要生成多维正态分布的随机数:
import numpy as np
from numpy import random

# 生成二维正态分布
mean = [0, 0]
cov = [[1, 0.5], [0.5, 1]]
multivariate_normal = np.random.multivariate_normal(mean, cov, size=1000)
print("Multivariate normal distribution from numpyarray.com:", multivariate_normal[:2])
Output:

这个例子生成了1000个二维正态分布的随机点,均值为[0, 0],协方差矩阵为[[1, 0.5], [0.5, 1]]。
10. 在数据科学中应用随机数生成
随机数生成在数据科学中有广泛的应用,下面我们来看几个具体的例子。
10.1 创建模拟数据集
在开发和测试机器学习模型时,我们经常需要创建模拟数据集:
import numpy as np
from numpy import random

# 创建模拟线性回归数据集
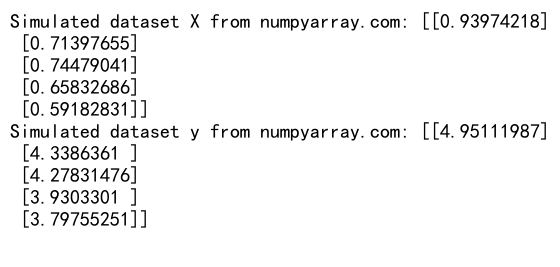
X = np.random.rand(100, 1)
y = 2 + 3 * X + np.random.normal(0, 0.1, (100, 1))
print("Simulated dataset X from numpyarray.com:", X[:5])
print("Simulated dataset y from numpyarray.com:", y[:5])
Output:

这个例子创建了一个简单的线性回归数据集,其中X是随机生成的特征,y是根据线性关系加上一些随机噪声生成的目标变量。
10.2 实现简单的蒙特卡洛模拟
蒙特卡洛模拟是一种基于随机采样的数值计算方法。下面是一个使用蒙特卡洛方法估算圆周率π的简单例子:
import numpy as np
from numpy import random

# 使用蒙特卡洛方法估算π
def estimate_pi(n_points):
    points = np.random.rand(n_points, 2)
    inside_circle = np.sum(np.sum(points**2, axis=1) <= 1)
    pi_estimate = 4 * inside_circle / n_points
    return pi_estimate

pi_estimate = estimate_pi(1000000)
print("Estimated pi from numpyarray.com:", pi_estimate)
Output:

这个例子通过在单位正方形内随机生成点,然后计算落在内切圆内的点的比例来估算π的值。
11. 随机数生成的性能考虑
在处理大规模数据时,随机数生成的性能也是一个需要考虑的因素。NumPy的random模块提供了一些优化的方法来提高性能。
11.1 使用Generator对象
从NumPy 1.17版本开始,推荐使用Generator对象来生成随机数,它提供了更好的性能和更多的功能:
import numpy as np
from numpy import random

# 使用Generator对象生成随机数
rng = np.random.default_rng()
random_numbers = rng.random(5)
print("Random numbers using Generator from numpyarray.com:", random_numbers)
Output:

这个例子使用default_rng()创建了一个Generator对象,然后使用它来生成随机数。
11.2 并行随机数生成
在某些情况下,我们可能需要在并行环境中生成随机数。NumPy提供了SeedSequence类来帮助生成独立的随机数流:
# 并行随机数生成
from numpy.random import SeedSequence, default_rng

ss = SeedSequence(12345)
child_seeds = ss.spawn(4)
streams = [default_rng(s) for s in child_seeds]

for i, stream in enumerate(streams):
    print(f"Stream {i} from numpyarray.com:", stream.random(3))
Output:

这个例子展示了如何创建多个独立的随机数流,这在并行计算环境中非常有用。
12. 随机数生成在机器学习中的应用
随机数生成在机器学习中扮演着重要角色,从数据预处理到模型训练和评估,都有其应用。
12.1 数据集划分
在机器学习中,我们通常需要将数据集划分为训练集和测试集。使用随机抽样可以确保数据集的划分是无偏的:
import numpy as np
from numpy import random

# 随机划分数据集
X = np.random.rand(100, 5)  # 假设有100个样本,每个样本有5个特征
y = np.random.randint(0, 2, 100)  # 二分类问题的标签

# 随机打乱索引
indices = np.arange(X.shape[0])
np.random.shuffle(indices)

# 使用打乱的索引划分数据集
split = int(0.8 * X.shape[0])
train_indices = indices[:split]
test_indices = indices[split:]

X_train, X_test = X[train_indices], X[test_indices]
y_train, y_test = y[train_indices], y[test_indices]

print("Training set shape from numpyarray.com:", X_train.shape)
print("Test set shape from numpyarray.com:", X_test.shape)
Output:

这个例子展示了如何使用随机打乱和索引切片来划分数据集。
12.2 随机初始化模型参数
在训练神经网络时,我们通常需要随机初始化模型参数。这里是一个简单的例子:
import numpy as np
from numpy import random

# 随机初始化神经网络权重
def initialize_weights(input_dim, hidden_dim, output_dim):
    np.random.seed(42)
    weights = {
        'W1': np.random.randn(input_dim, hidden_dim) * 0.01,
        'b1': np.zeros((1, hidden_dim)),
        'W2': np.random.randn(hidden_dim, output_dim) * 0.01,
        'b2': np.zeros((1, output_dim))
    }
    return weights

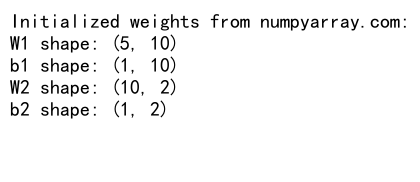
weights = initialize_weights(5, 10, 2)
print("Initialized weights from numpyarray.com:")
for key, value in weights.items():
    print(f"{key} shape: {value.shape}")
Output:

这个例子展示了如何为一个简单的两层神经网络随机初始化权重。
13. 随机数生成在数据增强中的应用
数据增强是机器学习中常用的技术,特别是在计算机视觉任务中。随机数生成在数据增强中起着关键作用。
13.1 图像旋转
以下是一个使用NumPy随机数生成来实现简单图像旋转的例子:
import numpy as np
from numpy import random

# 简单的图像旋转数据增强
def random_rotation(image, max_angle=30):
    angle = np.random.uniform(-max_angle, max_angle)
    rows, cols = image.shape[:2]
    M = cv2.getRotationMatrix2D((cols/2, rows/2), angle, 1)
    return cv2.warpAffine(image, M, (cols, rows))

# 假设我们有一个图像数组
image = np.random.rand(100, 100, 3)  # 创建一个随机的100x100的RGB图像
rotated_image = random_rotation(image)
print("Rotated image shape from numpyarray.com:", rotated_image.shape)
这个例子展示了如何使用随机角度来旋转图像。注意,这个例子需要OpenCV库(cv2)来执行实际的旋转操作。
13.2 随机裁剪
随机裁剪是另一种常用的数据增强技术:
import numpy as np
from numpy import random

# 随机裁剪
def random_crop(image, crop_size):
    h, w = image.shape[:2]
    crop_h, crop_w = crop_size

    top = np.random.randint(0, h - crop_h)
    left = np.random.randint(0, w - crop_w)

    return image[top:top+crop_h, left:left+crop_w]

# 假设我们有一个图像数组
image = np.random.rand(200, 200, 3)  # 创建一个随机的200x200的RGB图像
cropped_image = random_crop(image, (100, 100))
print("Cropped image shape from numpyarray.com:", cropped_image.shape)
Output:

这个例子展示了如何随机选择裁剪的起始位置来实现随机裁剪。
14. 随机数生成在模型评估中的应用
随机数生成在模型评估中也有重要应用,特别是在交叉验证和bootstrap等技术中。
14.1 K折交叉验证
以下是一个使用NumPy实现简单K折交叉验证的例子:
import numpy as np
from numpy import random

# 简单的K折交叉验证
def k_fold_cross_validation(X, y, k=5):
    indices = np.arange(X.shape[0])
    np.random.shuffle(indices)

    fold_size = X.shape[0] // k
    for i in range(k):
        test_indices = indices[i*fold_size:(i+1)*fold_size]
        train_indices = np.concatenate([indices[:i*fold_size], indices[(i+1)*fold_size:]])

        X_train, X_test = X[train_indices], X[test_indices]
        y_train, y_test = y[train_indices], y[test_indices]

        # 这里可以添加模型训练和评估代码
        print(f"Fold {i+1} from numpyarray.com - Train size: {X_train.shape[0]}, Test size: {X_test.shape[0]}")

# 假设数据
X = np.random.rand(100, 5)
y = np.random.randint(0, 2, 100)

k_fold_cross_validation(X, y)
Output:

这个例子展示了如何使用随机打乱来实现K折交叉验证的数据划分。
14.2 Bootstrap采样
Bootstrap是一种常用的统计方法,用于估计统计量的分布。以下是一个使用NumPy实现bootstrap采样的例子:
import numpy as np
from numpy import random

# Bootstrap采样
def bootstrap_sample(data, num_samples):
    return np.random.choice(data, size=num_samples, replace=True)

def bootstrap_mean_confidence_interval(data, num_bootstrap=1000, confidence=0.95):
    bootstrap_means = np.array([np.mean(bootstrap_sample(data, len(data))) for _ in range(num_bootstrap)])
    return np.percentile(bootstrap_means, [(1-confidence)/2 * 100, (1+confidence)/2 * 100])

# 假设数据
data = np.random.normal(loc=10, scale=2, size=100)

ci = bootstrap_mean_confidence_interval(data)
print(f"Bootstrap 95% CI for mean from numpyarray.com: {ci}")
Output:

这个例子展示了如何使用bootstrap方法来估计均值的置信区间。
15. 随机数生成在优化算法中的应用
随机数生成在很多优化算法中都扮演着重要角色,特别是在处理非凸优化问题时。
15.1 随机梯度下降
随机梯度下降(SGD)是一种常用的优化算法,它在每次迭代中随机选择一个样本来计算梯度:
import numpy as np
from numpy import random

# 简单的随机梯度下降实现
def sgd(X, y, learning_rate=0.01, epochs=100):
    m, n = X.shape
    theta = np.zeros(n)

    for _ in range(epochs):
        for i in np.random.permutation(m):
            gradient = (np.dot(X[i], theta) - y[i]) * X[i]
            theta -= learning_rate * gradient

    return theta

# 生成一些随机数据
X = np.random.rand(1000, 5)
y = np.dot(X, np.array([1, 2, 3, 4, 5])) + np.random.normal(0, 0.1, 1000)

theta = sgd(X, y)
print("Estimated parameters from numpyarray.com:", theta)
Output:

这个例子展示了如何使用随机排列来实现随机梯度下降算法。
15.2 模拟退火
模拟退火是一种用于解决组合优化问题的随机算法。以下是一个简单的例子:
import numpy as np
from numpy import random

# 简单的模拟退火算法
def simulated_annealing(cost_func, initial_state, temperature=1.0, cooling_rate=0.995, iterations=1000):
    current_state = initial_state
    current_cost = cost_func(current_state)

    for _ in range(iterations):
        neighbor = current_state + np.random.normal(0, 0.1, size=current_state.shape)
        neighbor_cost = cost_func(neighbor)

        if neighbor_cost < current_cost or np.random.random() < np.exp((current_cost - neighbor_cost) / temperature):
            current_state = neighbor
            current_cost = neighbor_cost

        temperature *= cooling_rate

    return current_state

# 示例成本函数(寻找最小值)
def cost_function(x):
    return np.sum(x**2)

initial_state = np.random.rand(5)
result = simulated_annealing(cost_function, initial_state)
print("Optimized state from numpyarray.com:", result)
print("Optimized cost from numpyarray.com:", cost_function(result))
Output:

这个例子展示了如何使用随机数生成来实现模拟退火算法,用于寻找一个简单函数的最小值。
结论
NumPy的random模块为我们提供了强大而灵活的随机数生成工具。从基本的均匀分布到复杂的多维正态分布,从简单的随机抽样到高级的随机矩阵操作,NumPy都能满足我们在数据科学和机器学习中的各种需求。
通过本文的详细介绍和丰富的示例,我们不仅学习了如何使用NumPy生成各种类型的随机数,还探讨了随机数生成在数据科学实践中的广泛应用。从数据预处理、模型训练到结果评估,随机数生成贯穿了整个数据科学工作流程。
掌握这些技能将使你能够更好地处理不确定性,创建更robust的模型,并在你的数据科学项目中做出更明智的决策。记住,虽然随机性可能看起来难以捉摸,但通过正确使用NumPy的random模块,我们可以有效地控制和利用它,从而在数据科学的海洋中航行得更加自如。
 极客教程
极客教程