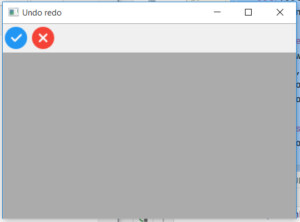
wxPython Python中按钮上的图像
在这篇文章中,我们将学习如何使用wxPython将图像添加到GUI中的一个按钮。这可以通过wx.BitmapButton类的BitmapButton()构造函数来实现。以下是支持的窗口样式。
- wx.BU_LEFT:左对齐位图标签。
- wx.BU_TOP。将位图标签对齐到按钮的顶部。
- wx.BU_RIGHT。向右调整位图标签。
- wx.BU_BOTTOM:将位图标签对齐到按钮的底部。
语法。
wx.StaticText(self, parent, id=ID_ANY, bitmap=NullBitmap,
              pos=DefaultPosition, size=DefaultSize, style=0,
           validator= DefaultVadator, name=StaticTextNameStr)
参数:
| 参数 | 输入类型 | 描述 |
|---|---|---|
| parent | wx.Window | 父窗口。不应该是无。 |
| id | wx.WindowID | 控件标识符。值为-1表示默认值。 |
| bitmap | wx.Bitmap | 要显示的位。 |
| pos | wx.Point | 窗口的位置。 |
| size | wx.Window | 窗口的大小。 |
| style | 长 | 窗口风格。 |
| validator | wx.validator | 窗口验证器。 |
| name | 字符串 | 窗口名称。 |
示例代码 。
# import wxPython
import wx

# event function for button
def onButton(event):
    print("Button pressed.")

app = wx.App()
frame = wx.Frame(None, -1, 'win.py')
frame.SetDimensions(0, 0, 200, 70)
panel = wx.Panel(frame, wx.ID_ANY)

# open image from disk
bmp = wx.Bitmap("/home/rahul101/Desktop/wxPython/images.png", wx.BITMAP_TYPE_ANY)
# create image button using BitMapButton constructor
button = wx.BitmapButton(panel, id = wx.ID_ANY, bitmap = bmp,
                          size =(bmp.GetWidth()+10, bmp.GetHeight()+10))

button.Bind(wx.EVT_BUTTON, onButton)
button.SetPosition((10, 10))

frame.Show()
frame.Centre()
app.MainLoop()
输出 :

 极客教程
极客教程