Python Pillow – 与图像打交道
在这篇文章中,我们将看到如何在Python中使用Pillow处理图像。我们将讨论基本的操作,如创建、保存、旋转图像。所以让我们开始详细讨论,但首先,让我们看看如何安装Pillow。
安装
要安装这个软件包,在终端键入以下命令。
pip install pillow
创建新图像
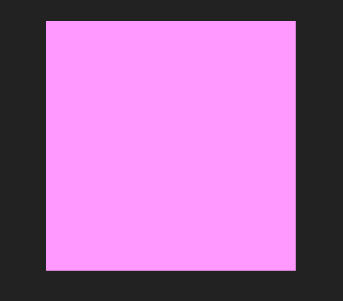
你可以使用PIL.Image.new()方法创建一个新图像。这个方法以给定的模式和尺寸创建一个新的图像。尺寸是以像素为单位的(宽,高)的四元组。
语法: PIL.Image.new(mode, size, color)
代码:
import PIL
image = PIL.Image.new(mode = "RGB",
                      size = (200, 200),
                      color = (255, 153, 255))
image.show()
输出:

打开图像
你可以使用PIL.Image.open()方法打开任何图像。
语法: PIL.Image.open(fp, mode=’r’)
代码:
from PIL import Image

image = Image.open('nature.jpg')
image.show()
输出:

获得有关图像的信息
- 获取图像的格式:obj.format方法返回图像文件的格式。
from PIL import Image

img = Image.open("test.png")

print(img.format)
输出:
PNG
- 获取图像的大小:obj.size属性提供了图像的大小。它返回一个包含宽度和高度的元组。
from PIL import Image

img = Image.open("test.png")

print(img.size)
输出:
(180, 263)
重命名和保存图像
我们可以改变图片的名称、格式,还可以使用image.save()方法重命名。
语法: Image.save(fp, format=None, **params)
代码:
from PIL import Image
image = Image.open('nature.jpg')
image.show()

image.save('nature1.bmp')
image1 = Image.open('nature1.bmp')
image1.show()
输出:

Before change

After change
裁剪图像
PIL是Python图像库,它为Python解释器提供了图像编辑功能。PIL.Image.crop()方法用于裁剪任何图像的矩形部分。
语法: PIL.Image.crop(box = None)
代码:
from PIL import Image

# Open image
im = Image.open("nature.jpg")

# Show actual Image
im.show()

# Show cropped Image
im = im.crop((0,0,50,50)
im.show()
输出:

Before rotation
Cropped Image
旋转图像
PIL.Image.Image.rotate()方法用于将给定的图像围绕其中心逆时针旋转一定的度数。
语法: new_object = PIL.Image.Image.rotate(image_object, angle, resample=0, expand=0) OR new_object = image_object.rotate(angle, resample=0, expand=0)
代码:
from PIL import Image

# Open image
im = Image.open("nature.jpg")

# Show actual Image
im.show()

# Show rotated Image
im = im.rotate(45)
im.show()
输出:

Before rotation

After rotation
对图像进行过滤
当前版本的Pillow库提供了下面提到的一组预定义的图像增强过滤器。
- BLUR
- CONTOUR
- DETAIL
- EDGE_ENHANCE
- EDGE_ENHANCE_MORE
- EMBOSS
- FIND_EDGES
- SHARPEN
- SMOOTH
- SMOOTH_MORE
ImageFilter模块包含了一组预定义的过滤器的定义,它们可以与Image.filter()方法一起使用。
语法: Filter(Kernel)
摄取一个内核(预定义或自定义),并通过它摄取图像的每个像素(内核卷积)。
代码:
# Import required image modules
from PIL import Image, ImageFilter

# Import all the enhancement filter from pillow
from PIL.ImageFilter import (
   BLUR, CONTOUR, DETAIL, EDGE_ENHANCE, EDGE_ENHANCE_MORE,
   EMBOSS, FIND_EDGES, SMOOTH, SMOOTH_MORE, SHARPEN
)

# Create image object
img = Image.open('nature.jpg')

# Applying the sharpen filter
# You can change the value in filter function
# to see the deifferences
img1 = img.filter(SHARPEN)
img1.show()
输出:

Before filter

经过SHARPEN过滤后
在图像上创建一个水印
在这里,你可以通过使用ImageDraw.Draw.text()创建一个水印,该方法在给定的位置绘制字符串。
语法: ImageDraw.Draw.text(xy, text, fill=None, font=None, anchor=None, spacing=0, align=”left”)
代码:
# Import required Image library
from PIL import Image, ImageDraw, ImageFont

# Create an Image Object from an Image
im = Image.open('nature.jpg')
width, height = im.size

draw = ImageDraw.Draw(im)
text = "lovely nature"

font = ImageFont.truetype('arial.ttf', 36)
textwidth, textheight = draw.textsize(text, font)

# calculate the x,y coordinates of
# the text
x = 100
y = 50

# draw watermark in the bottom right
# corner
draw.text((x, y), text, font=font)
im.show()

# Save watermarked image
im.save('watermark.jpg')
输出:

Before Watermark/text

After Watermark/text
 极客教程
极客教程