如何在Node.js中使用OpenCV
OpenCV 是一个免费的跨平台编程库,主要用于计算机视觉。它是用C/C++编写的。计算机视觉广泛应用于面部检测、自动驾驶等应用。为了在Node.js中使用它,我们将使用 opencv4nodejs 库。Opencv4nodejs允许我们在Node.js应用程序中使用原生OpenCV库。这是在现有网站上实现计算机视觉的好方法,也是实现项目的好方法。
使用OpenCV与Node.js的优势
- OpenCV是用C/C++编写的,因此非常高效,不会减慢网站的速度。
- 对于已经有Node.js后端的Web应用程序,实施起来非常简单,因此任何项目都可以具备面部识别和计算机视觉等功能。
- 轻松使用预先构建的分类器,使实现变得简单。
- 它是一个开源库,这意味着不断进行改进和更新以提高性能。
安装所需的模块 :
- 安装Express模块:
npm install express
- 安装 Windows Build Tools 以及VS Code所需的构建工具:
npm install --global windows-build-tools
- 安装 socket.io模块 :
npm install socket.io
- 安装 opencv4nodejs模块 :
npm install --save opencv4nodejs
首先,我们将创建一个使用Express托管整个应用程序的web服务器,然后使用socket.io更新图像,并使用OpenCV读取该图像。
示例 :这个HTML文件将用于显示图像。
index.html
<!DOCTYPE html>
<html>
<body>
  <img id="image">

  <! --Connecting html page to socket.io -->
  <script src=
"https://cdnjs.cloudflare.com/ajax/libs/socket.io/2.1.1/socket.io.js">
  </script>
  <script>
    // Connecting socket.io to localhost
       const socket = io.connect('http://localhost:3000');

    // listening to the image event in index.js
    socket.on('image', (data)=>{
        console.log('data', data);

      // Now we are getting the image and
      // displaying it via img tag
      const imageEle = document.getElementById('image');

      // Also we are decoding the base64 encoding
      // set in javascript file.
      imageEle.src = data:image/jpeg;base64,${image};
    });
  </script>
</body>
</html>
这是Node.js的入口文件,将使用express、socket.io和OpenCV来显示图像。
文件名:
index.js
// importing OpenCv library
const cv = require('opencv4nodejs');
const path = require('path')
const express = require('express');
const app = express();
const server = require('http').Server(app);
const io = require('socket.io')(server);

// We will now create a video capture object.
const wCap = new cv.VideoCapture(0);

//Setting the height and width of object
wCap.set(cv.CAP_PROP_FRAME_WIDTH, 300);
wCap.set(cv.CAP_PROP_FRAME_HEIGHT, 300);

// Creating get request simple route
app.get('/', (req, res)=>{
    res.sendFile(path.join(__dirname, 'index.html'));
});

// Using setInterval to read the image every one second.
setInterval(()=>{

    // Reading image from video capture device
    const frame = wCap.read();

    // Encoding the image with base64.
    const image = cv.imencode('.jpg', frame).toString('base64');
    io.emit('image', image);
}, 1000)

server.listen(3000);
使用以下命令运行 index.js 文件:
node index.js
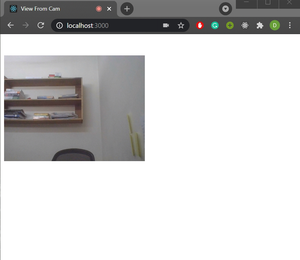
输出: 在我们的计算机上打开任何浏览器并输入localhost:3000。

 极客教程
极客教程