Laravel Facades门面
门面为应用程序服务容器中可用的类提供了一个静态接口。Laravel门面充当服务容器中底层类的静态代理,提供了简洁、表达性强的语法,同时保持了比传统静态方法更高的可测试性和灵活性。
如何创建门面
在Laravel中创建门面的步骤如下:
- 步骤1 - 创建PHP类文件。
-
步骤2 - 将该类绑定到服务提供者。
-
步骤3 - 将该服务提供者注册到Config\app.php中的providers中。
-
步骤4 - 创建一个类,该类扩展自lluminate\Support\Facades\Facade。
-
步骤5 - 将步骤4注册到Config\app.php中的aliases中。
门面类参考
Laravel附带了许多门面。下表显示了内置的门面类参考。
| 外观 | 类 | 服务容器绑定 |
|---|---|---|
| App | Illuminate\Foundation\Application | app |
| Artisan | Illuminate\Contracts\Console\Kernel | artisan |
| Auth | Illuminate\Auth\AuthManager | auth |
| Auth (实例) | Illuminate\Auth\Guard | |
| Blade | Illuminate\View\Compilers\BladeCompiler | blade.compiler |
| Bus | Illuminate\Contracts\Bus\Dispatcher | |
| Cache | Illuminate\Cache\Repository | cache |
| 配置 | Illuminate\Config\Repository | config |
| Cookie | Illuminate\Cookie\CookieJar | cookie |
| 加密 | Illuminate\Encryption\Encrypter | encrypter |
| 数据库 | Illuminate\Database\DatabaseManager | db |
| 数据库(实例) | Illuminate\Database\Connection | |
| 事件 | Illuminate\Events\Dispatcher | events |
| 文件 | Illuminate\Filesystem\Filesystem | files |
| 授权 | Illuminate\Contracts\Auth\Access\Gate | |
| queue | ||
| 队列(基类) | Illuminate\Queue\Queue | |
| 重定向 | Illuminate\Routing\Redirector | redirect |
| Redis | Illuminate\Redis\Database | redis |
| 请求 | Illuminate\Http\Request | request |
| 响应 | Illuminate\Contracts\Routing\ResponseFactory | |
| 路由 | Illuminate\Routing\Router | router |
| 架构 | Illuminate\Database\Schema\Blueprint | |
| 会话 | Illuminate\Session\SessionManager | session |
| 会话(实例) | Illuminate\Session\Store | |
| 存储 | Illuminate\Contracts\Filesystem\Factory | 文件系统 |
| URL | Illuminate\Routing\UrlGenerator | url |
| 验证器 | Illuminate\Validation\Factory | 验证器 |
| 验证器(实例) | Illuminate\Validation\Validator | |
| 视图 | Illuminate\View\Factory | 视图 |
| 视图(实例) | Illuminate\View\View |
示例
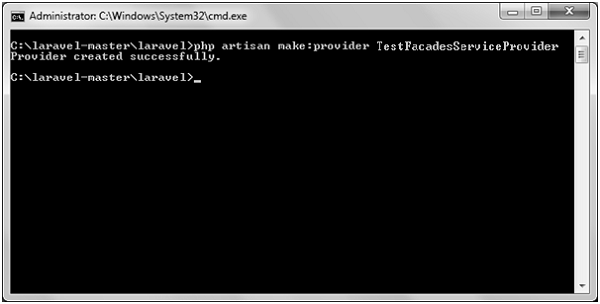
步骤1 − 通过执行以下命令创建一个名为 TestFacadesServiceProvider 的服务提供者。
php artisan make:provider TestFacadesServiceProvider
步骤2 - 执行成功后,您将收到以下输出 –

步骤3 - 在 App/Test 创建一个名为 TestFacades.php 的类。
App/Test/TestFacades.php
<?php
   namespace App\Test;
   class TestFacades{
      public function testingFacades() {
         echo "Testing the Facades in Laravel.";
      }
   }
?>
步骤4 - 在 “App/Test/Facades” 文件夹中创建一个名为 “TestFacades.php” 的外观类。
App/Test/Facades/TestFacades.php
<?php

namespace app\Test\Facades;

use Illuminate\Support\Facades\Facade;

class TestFacades extends Facade {
   protected static function getFacadeAccessor() { return 'test'; }
}
步骤5 - 在 App/Test/Facades 创建一个名为 TestFacadesServiceProviders.php 的Facade类。
App/Providers/TestFacadesServiceProviders.php
<?php

namespace App\Providers;

use App;
use Illuminate\Support\ServiceProvider;

class TestFacadesServiceProvider extends ServiceProvider {
   public function boot() {
      //
   }
   public function register() {
      App::bind('test',function() {
         return new \App\Test\TestFacades;
      });
   }
}
将下面的英文翻译成中文,不解释,保留HTML格式:
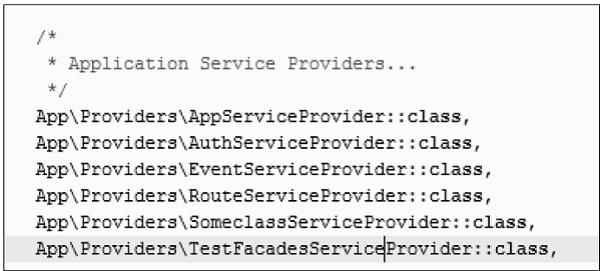
步骤6 − 在文件中添加一个服务提供者 config/app.php 步骤如下图所示。
config/app.php

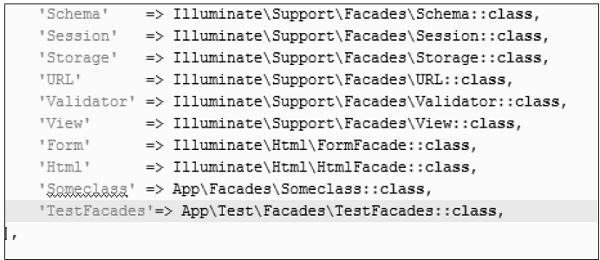
步骤7 ——在下方的图中,如示例所示,在文件 config/app.php 中添加一个别名。
config/app.php

步骤8 − 在 app/Http/routes.php 中添加以下行。
app/Http/routes.php
Route::get('/facadeex', function() {
   return TestFacades::testingFacades();
});
步骤9 − 访问以下URL以测试外观模式。
http://localhost:8000/facadeex
步骤10 − 访问URL后,您将收到以下输出 −

 极客教程
极客教程