Swift 如何以编程方式创建一个按钮
在这篇文章中,你将了解到如何在Swift语言中以编程方式创建一个按钮。在iOS中以编程方式创建一个按钮对象有不同的方法。让我们通过一个例子来探索其中的一些方法。
我们将看到以下几种创建按钮的方法
第1步 – 在这一步,我们将创建一个按钮对象,并在以后需要时对其进行自定义。
第2步 – 在这一步中,我们将使用一个懒惰的关键字创建一个按钮对象。
第3步 – 在这一步中,我们将创建一个按钮对象并在以后设置框架。
创建一个按钮并在以后自定义它
下面是一个例子,说明如何在iOS中使用Swift以编程方式创建一个按钮 —
例子
import UIKit
class TestController: UIViewController {
   private let loginButton = UIButton()
   override func viewDidLoad() {
      super.viewDidLoad()
      initialSetup()
   }
   private func initialSetup() {
      // basic setup
      view.backgroundColor = .white
      navigationItem.title = "UIButton"

      // login button customization
      loginButton.setTitle("Login", for: .normal)
      loginButton.setTitleColor(.white, for: .normal)
      loginButton.layer.cornerRadius = 10
      loginButton.layer.masksToBounds = true
      loginButton.backgroundColor = .darkGray
      loginButton.titleLabel?.font = UIFont.systemFont(ofSize: 18, weight: .semibold)
      loginButton.addTarget(self, action: #selector(handleLoginButtonTapped), for: .touchUpInside)

      // adding the constraints to login button
      view.addSubview(loginButton)
      loginButton.translatesAutoresizingMaskIntoConstraints = false
      loginButton.centerYAnchor.constraint(equalTo: view.centerYAnchor).isActive = true
      loginButton.centerXAnchor.constraint(equalTo: view.centerXAnchor).isActive = true
      loginButton.heightAnchor.constraint(equalToConstant: 50).isActive = true
      loginButton.widthAnchor.constraint(equalToConstant: 280).isActive = true
   }
   @objc private func handleLoginButtonTapped() {
      print("login button tapped...")
   }
}
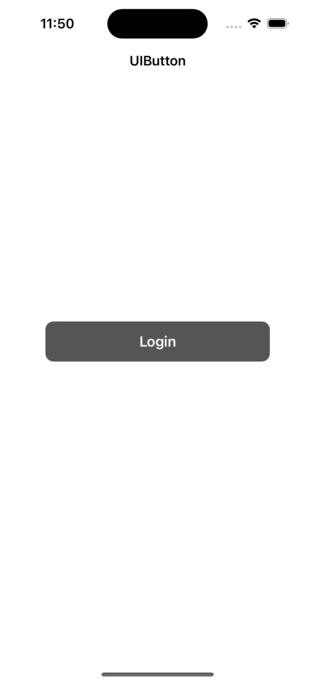
输出

在上面的步骤中,一个名为loginButton的按钮对象在控制器中被创建。该按钮的标题被设置为 “Login”,标题颜色被设置为白色。该按钮还被赋予一个目标-动作对,这样当按钮被点击时,函数 “handleLoginButtonTapped “将被调用。最后,该按钮被添加为当前视图的一个子视图。
你会看到,最初,我们创建了一个按钮对象。之后,我们将在viewDidLoad()方法中定制该按钮。最后,用一些必要的约束条件将其添加到超级视图中。
使用lazy关键字创建一个按钮
下面是一个例子,说明如何在iOS中使用UIKit中的lazy关键字以编程方式创建一个按钮 —
例子
import UIKit
class TestController: UIViewController {
   private lazy var loginButton: UIButton = {
      let button = UIButton()
      button.setTitle("Login", for: .normal)
      button.setTitleColor(.white, for: .normal)
      button.layer.cornerRadius = 10
      button.layer.masksToBounds = true
      button.backgroundColor = .darkGray
      button.titleLabel?.font = UIFont.systemFont(ofSize: 18, weight: .semibold)
      button.addTarget(self, action: #selector(handleLoginButtonTapped), for: .touchUpInside)
      button.translatesAutoresizingMaskIntoConstraints = false
      return button
   }()
   override func viewDidLoad() {
      super.viewDidLoad()
      initialSetup()
   }
   private func initialSetup() {
      // basic setup
      view.backgroundColor = .white
      navigationItem.title = "UIButton"

      // adding the constraints to login button
      view.addSubview(loginButton)
      loginButton.centerYAnchor.constraint(equalTo: view.centerYAnchor).isActive = true
      loginButton.centerXAnchor.constraint(equalTo: view.centerXAnchor).isActive = true
      loginButton.heightAnchor.constraint(equalToConstant: 50).isActive = true
      loginButton.widthAnchor.constraint(equalToConstant: 280).isActive = true
   }
   @objc private func handleLoginButtonTapped() {
      print("login button tapped...")
   }
}
输出

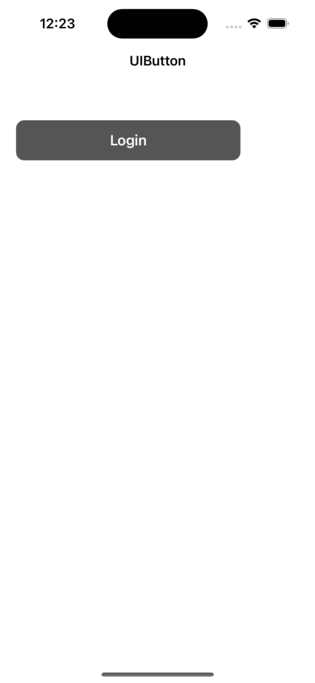
在上面的步骤中,一个名为loginButton的按钮对象在控制器中使用lazy关键字被创建。该按钮的标题被设置为 “Login”,标题颜色被设置为白色。该按钮还被赋予一个目标-动作对,这样当按钮被点击时,函数 “handleLoginButtonTapped “将被调用。最后,该按钮被添加为当前视图的一个子视图。
注意,有了lazy关键字,你就不需要在按钮的声明中把按钮添加为子视图,你可以在以后需要的时候这样做。
使用框架创建一个按钮
下面是一个例子,说明你如何在iOS中使用Swift以编程方式创建一个按钮 −
例子
import UIKit
class TestController: UIViewController {
   private let loginButton = UIButton(type: .system)
   override func viewDidLoad() {
      super.viewDidLoad()
      initialSetup()
   }
   private func initialSetup() {
      // basic setup
      view.backgroundColor = .white
      navigationItem.title = "UIButton"

      // login button customization
      loginButton.frame = CGRect(x: 20, y: 150, width: 280, height: 50)
      loginButton.setTitle("Login", for: .normal)
      loginButton.setTitleColor(.white, for: .normal)
      loginButton.layer.cornerRadius = 10
      loginButton.layer.masksToBounds = true
      loginButton.backgroundColor = .darkGray
      loginButton.titleLabel?.font = UIFont.systemFont(ofSize: 18, weight: .semibold)
      loginButton.addTarget(self, action: #selector(handleLoginButtonTapped), for: .touchUpInside)

      view.addSubview(loginButton)
   }
   @objc private func handleLoginButtonTapped() {
      print("login button tapped...")
   }
}
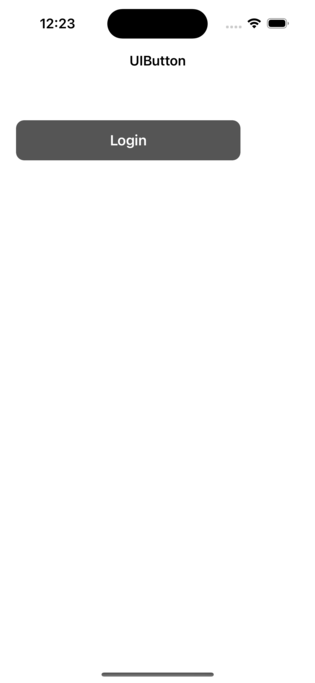
输出

你可以根据你的需要改变X、Y、宽度和高度,你也可以根据你的要求改变按钮的标题和动作。
总结
你可以通过各种方式来编程创建按钮。你可以创建一个按钮对象,然后在你需要的时候在代码中对其进行自定义。此外,还可以使用lazy关键字来创建一个按钮对象。UIButton类提供了在代码中后期设置框架的灵活性。你可以在上面的例子中看到如何设置一个按钮的框架。
使用懒惰关键字是最推荐的方式。你可以创建一个按钮对象,并在一个块中添加任何自定义的内容。此外,你还可以在同一个块中添加目标。
 极客教程
极客教程