Next.js next/head
在本文中,我们将学习关于NextJS中的Head组件,并了解head组件是如何对SEO友好的。
Head组件是NextJS提供的内置组件。我们可以添加任何元素,就像我们在HTML的head组件中添加元素一样。如果你很了解HTML和CSS,那学习NextJS将会很容易。为了保持简单,NextJS采用了一些类似HTML的组件。
为什么Head组件对SEO友好?
在SEO方面,Head组件起着重要的作用。Head组件添加诸如标题、元标签、字符集、作者、视口设置等元素。所有这些标签都有助于向Google提供有关网站的信息。Google通过使用这些信息对您的网站进行排名。这就是为什么Head组件被认为是SEO友好的。
运行NextJS及其Head组件需要的步骤:
步骤1: 在您的计算机上安装NodeJS。要了解如何安装NodeJS,请点击这里。
步骤2: 创建一个新文件并将目录更改为创建的文件。在终端中使用下面的命令。
cd file_name
步骤3: 使用以下命令创建Next应用程序。
npx create-next-app app_name
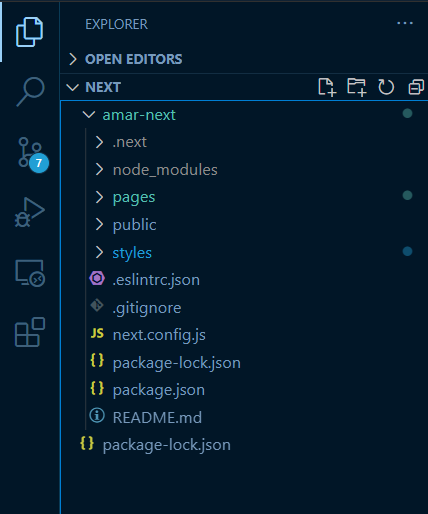
项目结构: 它应该是这样的。

步骤4: 在pages/index.js中引入head组件
import Head from "next/head";
示例1:首先,让我们看看如果我们不使用头部组件会发生什么: 如果在索引路由中不使用头部组件,我们无法为该路由添加标题或其他元数据。
//Without Head component
import Image from "next/image";
const index = () => {
    return (
        <>
            <h1 style={{ color: 'green' }}>GeeksForGeeks</h1>
            <Image src=
"https://media.geeksforgeeks.org/wp-content/uploads/20210915115837/gfg3.png"
                alt="Loading"
                width={600}
                height={450}
            />
        </>
    );
};

export default index;
输出:

注意: 默认情况下,NextJS中有一个头部组件,但是要添加标题和额外的元数据,我们需要自己定义它。我们可以像在HTML的头部组件中添加任何元素一样添加。下面的图片显示了默认的元数据:

使用 Head 组件: 通过示例来理解 Head 组件:
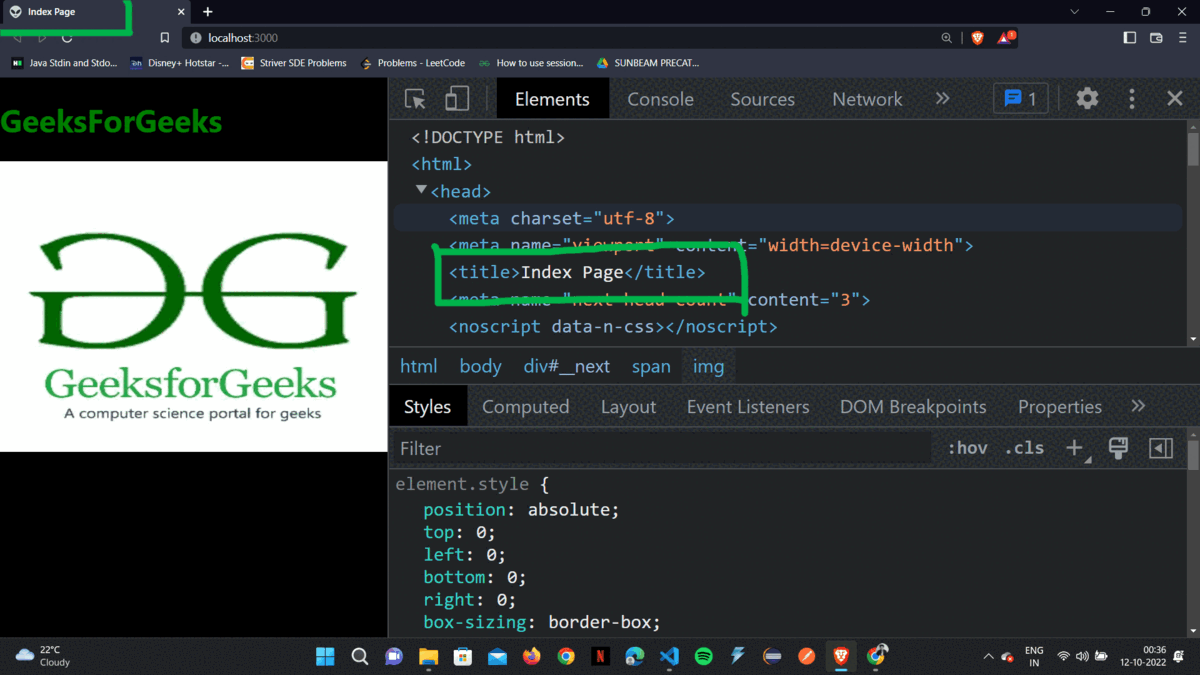
示例2:使用 Head 组件向网页添加标题: Head 组件中的标题标签会在浏览器的标题栏中显示。我们可以使用这个标签为网站添加自定义标签。如果我们只在主页中添加标题,则其他页面将无法显示该标题。我们必须为每个不同的页面定义不同的标题。
//Adding Title by using Head component
import Head from 'next/head'
import Image from "next/image";
const index = () => {
    return (
        <>
            <Head>
                <title>Index Page</title>
            </Head>
            <h1 style={{ color: 'green' }}>
                GeeksForGeeks</h1>
            <Image src=
"https://media.geeksforgeeks.org/wp-content/uploads/20210915115837/gfg3.png"
                alt="Loading"
                width={600}
                height={450}
            />
        </>
    );
};

export default index;
输出:

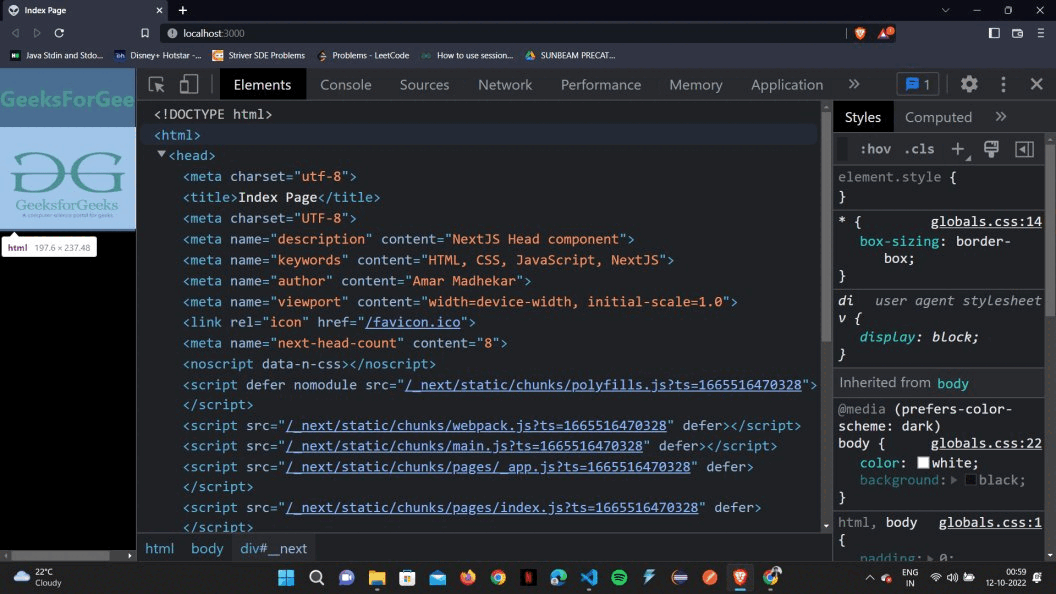
示例3:使用Head组件添加额外的元数据: 我们可以像在HTML的head组件中添加元素一样任意添加元素,例如标题、元标签、字符集、作者、视口设置、网站的图标等等。所有这些标签都有助于向Google提供有关网站的信息。为了更深入地说明,在下面的示例中我们添加了一些元素。
import Head from 'next/head'
import Image from "next/image";
const index = () => {
    return (
        <>
            <Head>
                  //Title Name
                <title>Index Page</title>

                  //Adding custom favicon
                <link rel="icon" href="/favicon.ico" />

                 //Adding additional information about website
                <meta charset="UTF-8" />
                <meta name="description"
                    content="NextJS Head component" />
                <meta name="keywords"
                    content="HTML, CSS, JavaScript, NextJS" />
                <meta name="author"
                    content="Amar Madhekar" />
                <meta name="viewport"
                    content="width=device-width, initial-scale=1.0" />
            </Head>

            <h1 style={{ color: 'green' }}>
                GeeksForGeeks</h1>
            <Image src=
"https://media.geeksforgeeks.org/wp-content/uploads/20210915115837/gfg3.png"
                alt="Loading"
                width={600}
                height={450}
            />
        </>
    );
};

export default index;
输出:

 极客教程
极客教程