React MUI Autocomplete Input
在React中,我们有一个MUI(Material UI)库,它是最著名的React库之一。在MUI中,我们有一个自动完成输入组件,它使输入框具有自动完成选项的功能。它还包含了不同定制选项的建议。
该组件根据两种不同的用例或变体而有所不同:
1. 组合框: 文本框中给定的值必须从预定义的一组允许的值中选择,这些预定义的值提供了输入始终有效的准确性。
语法:
<Autocomplete
   disablePortal
   id="combo-box-demo"
   options={top10Food()}
   sx={{ width: 300 }}
   renderInput={(params) => <TextField {...params} label="Movie" />}
/>
2. 自由独奏: 文本框中的值可以包含任意随机值,但它对于向用户提供可能的值非常有用。
语法:
<Autocomplete
   id="free-solo-demo"
   freeSolo
   options={top10Food().map((option) => option.title)}
   renderInput={(params) => <TextField {...params} label="freeSolo" />}
/>
创建React应用程序:
步骤1 :使用以下命令创建React应用程序:
npx create-react-app example
步骤2: 创建项目文件夹(即example)后,使用以下命令进入它:
cd example
步骤3 :安装MUI,现在在终端中从您项目的根目录运行以下命令
npm install @mui/material @emotion/react @emotion/styled
项目结构: 它将看起来像这样。

示例1:
在此示例中,我们将看到自动完成的下拉框类型,其中我们有一些预定义的值列表。在输入值时,它们会作为建议出现。我们只能选择预定义值列表中存在的值,不能选择其他任何值。
文件名:App.js
import logo from './logo.svg';
import './App.css';
import TextField from '@mui/material/TextField';
import Autocomplete from '@mui/material/Autocomplete';

const topFilms = () => [
    { label: 'The Shawshank Redemption', year: 1994 },
    { label: 'The Godfather', year: 1972 },
    { label: 'The Godfather: Part II', year: 1974 },
    { label: 'The Dark Knight', year: 2008 },
    { label: '12 Angry Men', year: 1957 },
    { label: "Schindler's List", year: 1993 },
    { label: 'Pulp Fiction', year: 1994 },
    {
        label: 'The Lord of the Rings: The Return of the King',
        year: 2003,
    },
    { label: 'The Good, the Bad and the Ugly', year: 1966 }
];
function App() {
    return (
        <div className="App">
            <p>The autocomplete example 1 :
                with predefined set of inputs</p>
            <Autocomplete
                disablePortal
                id="combo-box-demo"
                options={topFilms()}
                sx={{ width: 400 }}
                renderInput={(params) =>
                    <TextField {...params} label="Movie" />}
            />
        </div>
    );
}

export default App;
运行应用的步骤: 使用以下命令来运行应用。
npm start
输出:

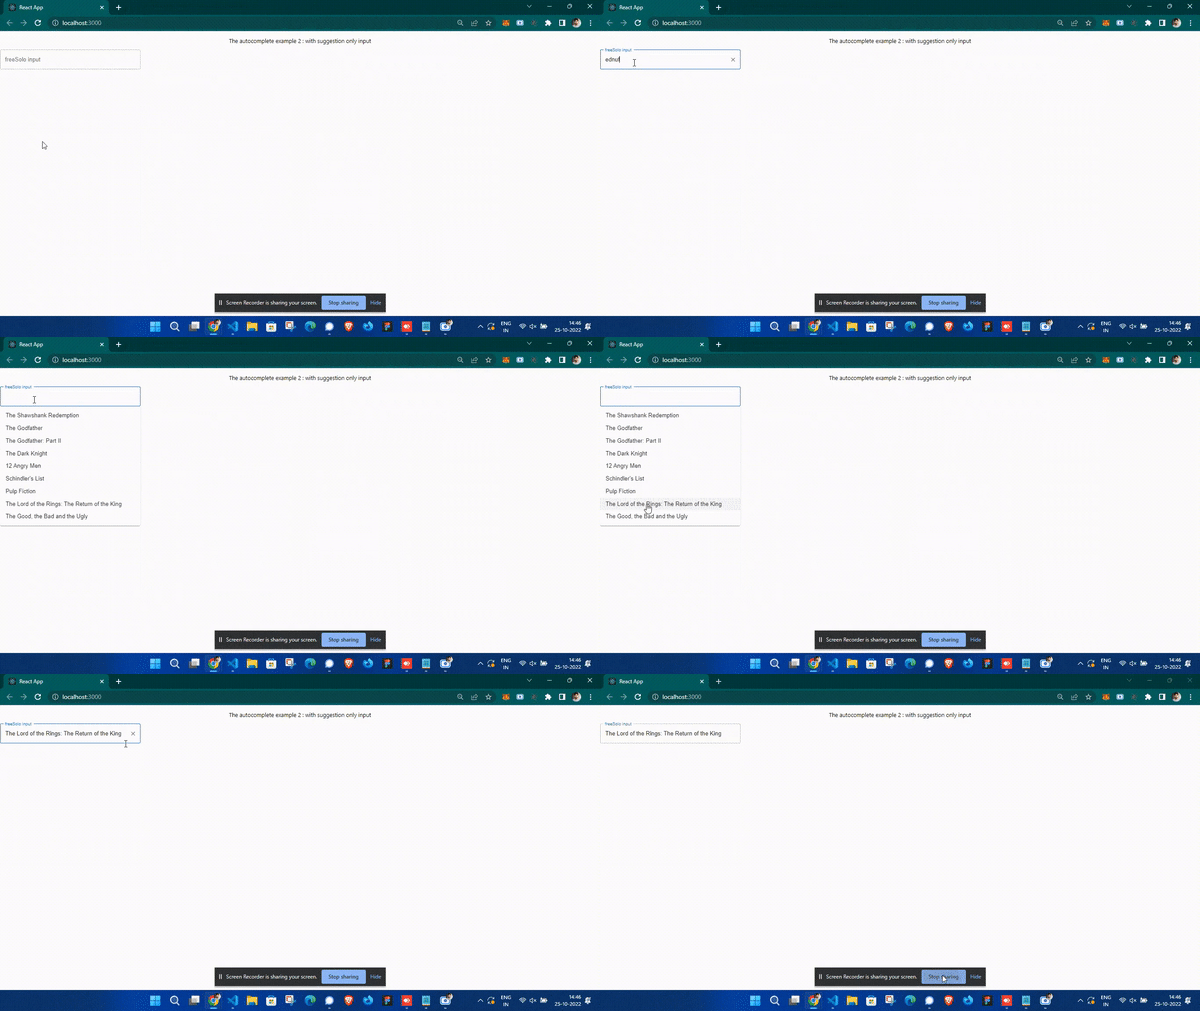
示例2: 在这个示例中,我们将看到自动完成的“solo”类型,其中我们有一系列预定义的建议值。在输入值时,这些值将作为建议出现。我们既可以选择其中一个,也可以选择我们自己的单词。
文件名:App.js
import logo from './logo.svg';
import './App.css';
import TextField from '@mui/material/TextField';
import Autocomplete from '@mui/material/Autocomplete';

const topFilms = () => [
    { label: 'The Shawshank Redemption', year: 1994 },
    { label: 'The Godfather', year: 1972 },
    { label: 'The Godfather: Part II', year: 1974 },
    { label: 'The Dark Knight', year: 2008 },
    { label: '12 Angry Men', year: 1957 },
    { label: "Schindler's List", year: 1993 },
    { label: 'Pulp Fiction', year: 1994 },
    {
        label: 'The Lord of the Rings: The Return of the King',
        year: 2003,
    },
    { label: 'The Good, the Bad and the Ugly', year: 1966 }
];
function App() {
    return (
        <div className="App">
            <p>The autocomplete example 2 :
                with suggestion only input</p>
               <Autocomplete
                id="free-solo-demo"
                freeSolo
                options={topFilms().map((option) => option.label)}
                sx={{ width: 400 }}
                renderInput={(params) => <TextField {...params}
                    label="freeSolo input" />}
            />
        </div>
    );
}

export default App;
输出:

参考链接: https://mui.com/material-ui/react-autocomplete/
 极客教程
极客教程