ReactJS 如何禁用文本选择
在本文中,我们将看到如何在ReactJS中禁用文本选择。Web应用程序经常提供一个称为文本选择的宝贵功能,使用户可以轻松地在网页上突出显示和复制内容。然而,有一些情况下禁用文本选择变得必要,以限制用户复制或与应用程序的特定部分进行交互。
语法
const noSelectElements =
    document.querySelectorAll(".no-select");

noSelectElements.forEach((element) => {
    element.style.webkitUserSelect = "none";
    element.style.mozUserSelect = "none";
    element.style.msUserSelect = "none";
    element.style.userSelect = "none";
});
先决条件
- React入门
- React Hooks
- NPM或NPX
创建React应用的步骤
步骤1:使用以下命令创建一个React应用
npx create-react-app <<My-Project>>
步骤2:创建项目文件夹,比如TextSelectionApp,使用以下命令进行导航:
cd <<My-Project>>
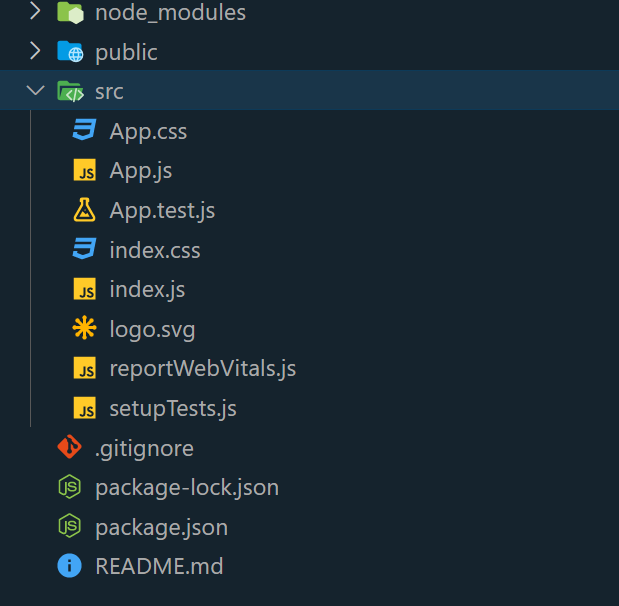
项目结构

使用ReactJS禁用文本选择的方法
有不同的方法可以使用ReactJS禁用文本选择。让我们逐一讨论每种方法。
- 禁用特定元素的文本选择
- 切换文本选择的开关
方法1:禁用特定元素的文本选择
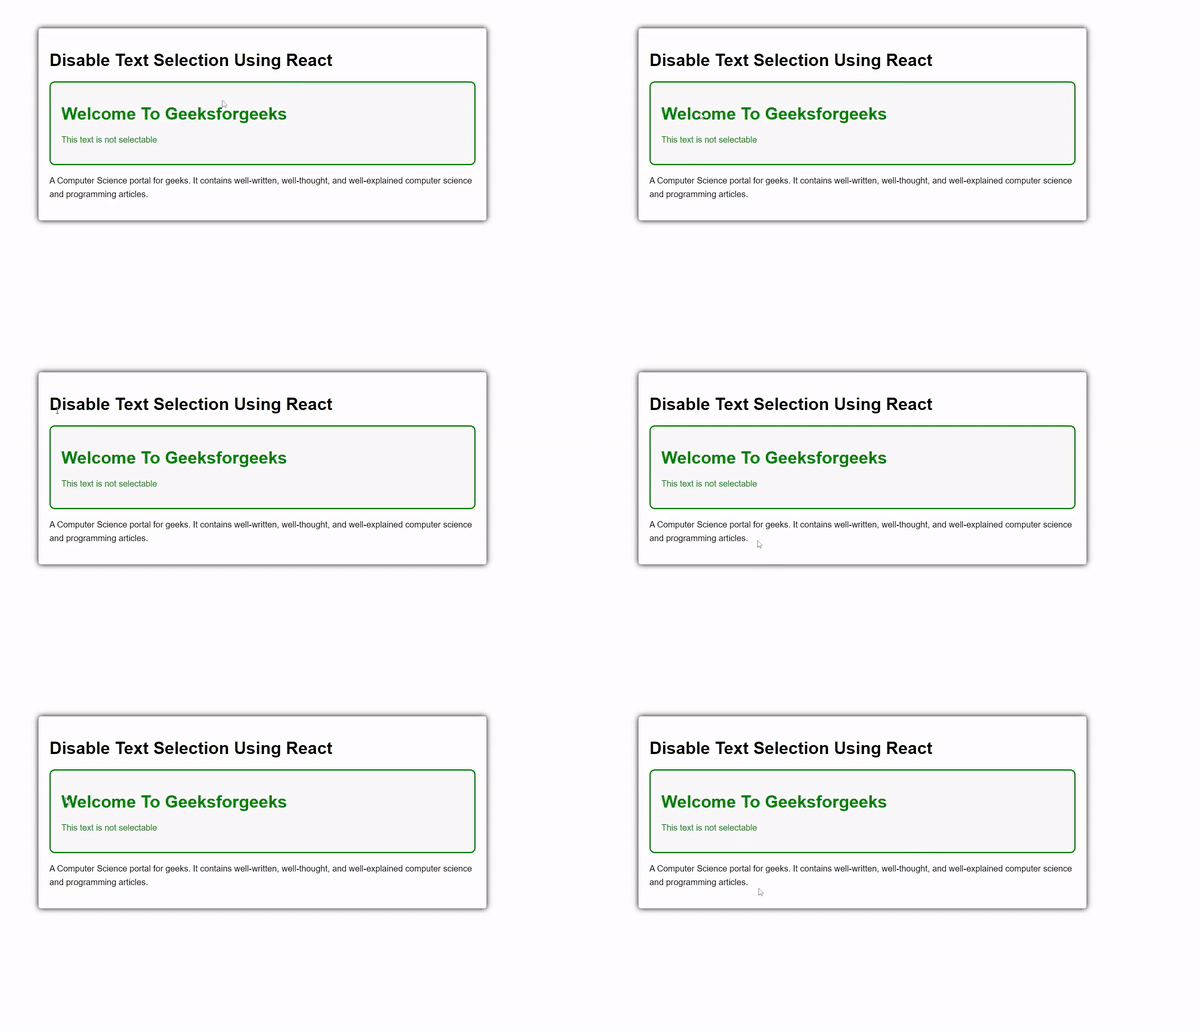
在这种方法中,我们将使用ReactJS仅禁用特定文本而不是所有文本。该功能通过使用useEffect钩子实现,该钩子在组件挂载后执行。执行时,它会定位所有带有“no-select”类的元素并对其应用样式,特别是操纵像webkitUserSelect、mozUserSelect、msUserSelect和userSelect之类的属性。通过将这些属性设置为“none”,用户有效地被阻止选择或突出显示这些元素中的任何文本。
示例: 在这个示例中,我们将使用上述解释的方法。
// App.js file

import React, { useEffect } from "react";

const App = () => {
    useEffect(() => {

        // Disable text selection for elements
        // with class "no-select"
        const noSelectElements =
            document.querySelectorAll(".no-select");
        noSelectElements.forEach((element) => {
            element.style.webkitUserSelect = "none";
            element.style.mozUserSelect = "none";
            element.style.msUserSelect = "none";
            element.style.userSelect = "none";
        });
    }, []);

    return (
        <div style={styles.body}>
            <div style={styles.container}>
                <h1>Disable Text Selection Using React</h1>
                <div
                    className="no-select"
                    style={styles.noSelect}
                >
                    <h1>Welcome To Geeksforgeeks</h1>
                    <p>This text is not selectable</p>
                </div>
                <p style={styles.p}>
                    A Computer Science portal for geeks. It
                    contains well-written, well-thought, and
                    well-explained computer science and
                    programming articles.
                </p>
            </div>
        </div>
    );
};

export default App;

const styles = {
    body: {
        fontFamily: "Arial, sans-serif",
        margin: 0,
        padding: 0,
    },
    container: {
        maxWidth: "800px",
        margin: "0 auto",
        padding: "20px",
        backgroundColor: "#fff",
        border: "1px solid #ccc",
        borderRadius: "5px",
        boxShadow: "0 0px 10px 0px black",
        margin: "4rem",
    },
    noSelect: {
        border: "3px solid green",
        padding: "20px",
        backgroundColor: "#f9f9f9",
        borderRadius: "10px",
        marginBottom: "10px",
        color: "green",
    },
    p: {
        lineHeight: "1.6",
    },
};
运行步骤:
要打开应用程序,请使用终端并输入下面列出的命令。
npm start
输出 :

方法2:开启和关闭文本选择
这个示例展示了一个React组件,它可以轻松地在两个状态之间切换。它使用户能够启用或禁用文本选择,并改变按钮的背景颜色。通过使用useState钩子,这个组件有效地管理这些状态。通过点击按钮,用户可以无缝地在迷人的蓝色和红色背景之间切换,同时控制在页面上选择文本的能力。
示例: 在这个示例中,我们使用了上面解释的方法。
// App.js file

import React, { useState } from "react";

const App = () => {
    const [allowTextSelection, setAllowTextSelection] =
        useState(true);
    const [isBlueBackground, setIsBlueBackground] =
        useState(true);

    const toggleTextSelection = () => {
        setAllowTextSelection(!allowTextSelection);
    };

    const handleButtonClick = () => {

        // Toggle between two colors
        setIsBlueBackground(!isBlueBackground);

        // Toggle text selection
        toggleTextSelection();
    };

    const bodyStyle = {
        fontFamily: "Arial, sans-serif",
        margin: 0,
        padding: 0,
        backgroundColor: "#f5f5f5",
        display: "flex",
        alignItems: "center",
        justifyContent: "center",
        height: "100vh",
    };

    const containerStyle = {
        maxWidth: "600px",
        padding: "20px",
        backgroundColor: "#fff",
        border: "1px solid #ccc",
        borderRadius: "8px",
        boxShadow: "0 4px 8px rgba(0, 0, 0, 0.1)",
        textAlign: "center",
    };

    const buttonStyle = {
        backgroundColor: isBlueBackground
            ? "#007bff"
            : "red", // Toggle between two colors
        color: "white",
        border: "none",
        padding: "10px 20px",
        borderRadius: "5px",
        cursor: "pointer",
        fontSize: "16px",
        transition: "background-color 0.3s ease",
    };

    if (!allowTextSelection) {
        bodyStyle.userSelect = "none";
    }

    return (
        <div style={bodyStyle}>
            <div style={containerStyle}>
                <h1>Welcome To GeeksforGeeks</h1>
                <p>
                    A Computer Science portal for geeks. It
                    contains well-written, well-thought, and
                    well-explained computer science and
                    programming articles.
                </p>
                <button
                    id="toggle-button"
                    style={buttonStyle}
                    onClick={handleButtonClick}
                >
                    Toggle Text Selection
                </button>
            </div>
        </div>
    );
};

export default App;
输出 :

 极客教程
极客教程