从头开始使用React创建的记忆游戏
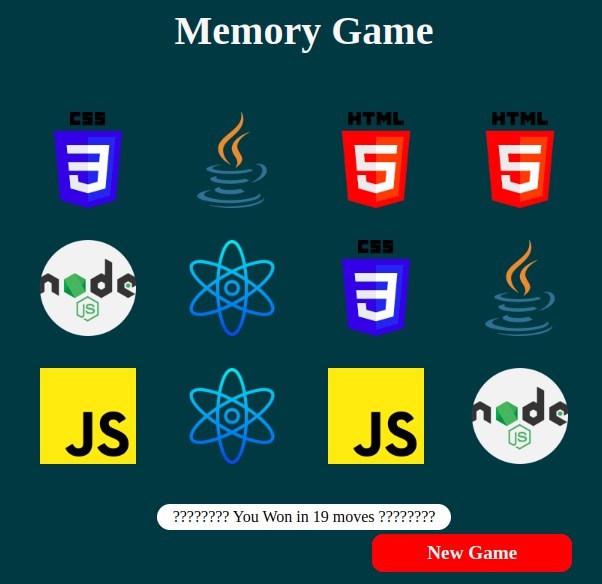
在本文中,我们将使用ReactJS创建一个记忆游戏。记忆游戏是一种著名的游戏,玩家面前会放置一对翻面朝下的卡片。每对卡片总是有相同的内容。玩家可以选择任意两张卡片,检查其正面是否匹配。如果正面内容匹配,玩家可以保持卡片翻面并继续游戏,否则玩家需要将卡片放回原位。当所有卡片都成功匹配时,游戏结束。
最终输出的预览:

使用的技术:
先决条件
- React中的功能组件
- 钩子
- DOM
方法:
由于大部分逻辑都包含在GameBoard.js组件中,我们主要关注它并将逻辑分解为步骤,但首先将GameBoard.js导入到App.js中并在那里渲染,因为App.js是GameBoard.js的父组件。在GamBoard功能组件内部,我们将创建另一个名为NewGame()的函数,它通过重新洗牌卡片和重置其他变量来重新启动整个游戏。仅当单击新游戏按钮时才执行此函数。现在,为了处理对图像卡片的点击,我们创建一个名为handleSelectedCards()的新函数,它将简单地检查选中的是哪张卡片,并将其值存储在firstCard和secondCard变量中以进行进一步的检查。
创建项目的步骤:
步骤1: 选择您喜欢的特定IDE(最好是VS Code)。
步骤2: 使用以下命令创建React项目文件夹。
npx create-react-app <<projectname>>
步骤3: 导航到项目文件夹。
cd <<projectname>>
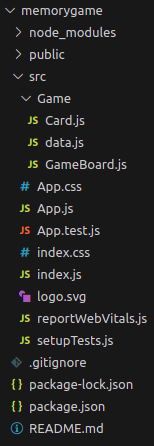
步骤4: 创建一个名为“Game”的文件夹,并添加五个新文件GameBoard.js,Card.js和Data.js。
项目结构:

示例: 在各自的文件中编写以下代码:
- App.js: 该文件导入GameBoard组件并进行渲染。
- GameBoard.js: 该文件包含从创建单个卡片到处理各种函数调用和以特定顺序表示卡片的大部分逻辑。
- Card.js: 该文件包含生成单个卡片的代码。
- Data.js: 该文件包含一个数组,其中包含有关图像的数据,如图像源、名称和单独的地址,它被GameBoard.js导入。
- App.css: 该文件包含每个组件的设计。
// App.js
// Renders the GameBoardComponent
import "./App.css";
import GameBoard from "./Game/GameBoard";
function App() {
    return (
        <div className="App">
            <GameBoard />
        </div>
    );
}

export default App;
//GameBoard.js

import React from "react";
import Data from "./data";
import Card from "./Card";
function GameBoard() {
    const [cardsArray, setCardsArray] = React.useState([]);
    const [moves, setMoves] = React.useState(0);
    const [firstCard, setFirstCard] = React.useState(null);
    const [secondCard, setSecondCard] = React.useState(null);
    const [stopFlip, setStopFlip] = React.useState(false);
    const [won, setWon] = React.useState(0);

    //this function start new Game
    function NewGame() {
        setTimeout(() => {
            const randomOrderArray = Data.sort(() => 0.5 - Math.random());
            setCardsArray(randomOrderArray);
            setMoves(0);
            setFirstCard(null);
            setSecondCard(null);
            setWon(0);
        }, 1200);
    }

    //this function helps in storing the firstCard and secondCard value
    function handleSelectedCards(item) {
        console.log(typeof item);
        if (firstCard !== null && firstCard.id !== item.id) {
            setSecondCard(item);
        } else {
            setFirstCard(item);
        }
    }

    // if two have been selected then we check if the images are same or not,
    //if they are same then we stop the flipping ability
    // else we turn them back
    React.useEffect(() => {
        if (firstCard && secondCard) {
            setStopFlip(true);
            if (firstCard.name === secondCard.name) {
                setCardsArray((prevArray) => {
                    return prevArray.map((unit) => {
                        if (unit.name === firstCard.name) {
                            return { ...unit, matched: true };
                        } else {
                            return unit;
                        }
                    });
                });
                setWon((preVal) => preVal + 1);
                removeSelection();
            } else {
                setTimeout(() => {
                    removeSelection();
                }, 1000);
            }
        }
    }, [firstCard, secondCard]);

    //after the slected images have been checked for
    //equivalency we empty the firstCard and secondCard component
    function removeSelection() {
        setFirstCard(null);
        setSecondCard(null);
        setStopFlip(false);
        setMoves((prevValue) => prevValue + 1);
    }

    //starts the game for the first time.
    React.useEffect(() => {
        NewGame();
    }, []);

    return (
        <div className="container">
            <div className="header">
                <h1>Memory Game</h1>
            </div>
            <div className="board">
                {
                    // cards component help in coverting the
                    // data from array to visible data for screen
                    cardsArray.map((item) => (
                        <Card
                            item={item}
                            key={item.id}
                            handleSelectedCards={handleSelectedCards}
                            toggled={
                                item === firstCard ||
                                item === secondCard ||
                                item.matched === true
                            }
                            stopflip={stopFlip}
                        />
                    ))
                }
            </div>

            {won !== 6 ? (
                <div className="comments">Moves : {moves}</div>
            ) : (
                <div className="comments">
                    ???????? You Won in {moves} moves ????????
                </div>
            )}
            <button className="button" onClick={NewGame}>
                New Game
            </button>
        </div>
    );
}

export default GameBoard;
// Card.js
//working of individual cards like the ability to toggle or flip and there design
//is carried out in this file
function Card({ item, handleSelectedCards, toggled, stopflip }) {
    return (
        <div className="item">
            <div className={toggled ? "toggled" : ""}>
                <img className="face" src={item.img} alt="face" />
                <div
                    className="back"
                    onClick={() => !stopflip && handleSelectedCards(item)}
                >
                    {" "}
                </div>
            </div>
        </div>
    );
}

export default Card;
// Data.js

const Data = [
    {
        id: 1,
        name: "react",
        img:
"https://media.geeksforgeeks.org/wp-content/uploads/20230927165802/atom-4.png",
        matched: false,
    },
    {
        id: 2,
        name: "java",
        img:
"https://media.geeksforgeeks.org/wp-content/uploads/20230927165803/java.png",
        matched: false,
    },
    {
        id: 3,
        name: "css",
        img:
"https://media.geeksforgeeks.org/wp-content/uploads/20230927165803/css-3-1.png",
        matched: false,
    },
    {
        id: 4,
        name: "node",
        img:
"https://media.geeksforgeeks.org/wp-content/uploads/20230927165805/nodejs-1.png",
        matched: false,
    },
    {
        id: 5,
        name: "html",
        img:
"https://media.geeksforgeeks.org/wp-content/uploads/20230927165806/html-5-1.png",
        matched: false,
    },
    {
        id: 6,
        name: "js",
        img:
"https://media.geeksforgeeks.org/wp-content/uploads/20230927165804/js-3.png",
        matched: false,
    },
    {
        id: 7,
        name: "react",
        img:
"https://media.geeksforgeeks.org/wp-content/uploads/20230927165802/atom-4.png",
        matched: false,
    },
    {
        id: 8,
        name: "java",
        img:
"https://media.geeksforgeeks.org/wp-content/uploads/20230927165803/java.png",
        matched: false,
    },
    {
        id: 9,
        name: "css",
        img:
"https://media.geeksforgeeks.org/wp-content/uploads/20230927165803/css-3-1.png",
        matched: false,
    },
    {
        id: 10,
        name: "node",
        img:
"https://media.geeksforgeeks.org/wp-content/uploads/20230927165805/nodejs-1.png",
        matched: false,
    },
    {
        id: 11,
        name: "html",
        img:
"https://media.geeksforgeeks.org/wp-content/uploads/20230927165806/html-5-1.png",
        matched: false,
    },
    {
        id: 12,
        name: "js",
        img:
"https://media.geeksforgeeks.org/wp-content/uploads/20230927165804/js-3.png",
        matched: false,
    },
];
export default Data;
CSS
/* App.css */
* {
    margin: 0;
    padding: 0;
    box-sizing: border-box;
}

.App {
    height: 100vh;
    width: 100vw;
    font-family: cursive;
    background-color: rgb(21, 56, 66);
}

/* CSS for GameBoard component */
.container {
    display: flex;
    flex-direction: column;
}

.header {
    display: flex;
    flex-direction: row;
    padding: 10px;
    display: flex;
    justify-content: center;
    align-items: center;
}

h1 {
    align-self: start;
    font-size: 2.5rem;
    color: rgb(247, 247, 247);

}

.button {
    display: flex;
    align-items: center;
    justify-content: center;
    padding: 0.5rem 0.8rem;
    font-family: cursive;
    width: 200px;
    font-size: 1.2rem;
    font-weight: bolder;
    border-radius: 0.7rem;
    border-style: none;
    background-color: red;
    color: white;
    margin-top: 4px;
    margin-left: 55%;
}

.button:hover {
    border: 2px solid black;
    cursor: pointer;
}


.board {
    display: grid;
    margin: auto;
    margin-top: 3rem;
    grid-template-columns: repeat(4, 9rem);
    place-items: center;
    row-gap: 2rem;
}

.comments {
    padding: 0.25rem 1rem;
    background-color: white;
    margin: auto;
    margin-top: 40px;
    text-align: center;
    border-radius: 2rem;
}

/* CSS for Card component */
.face {
    height: 6rem;
}

.back {
    height: 6rem;
    width: 6rem;
    background-color: rgb(253, 218, 175);
    color: rgb(61, 21, 21);
    border: 1px solid black;
    border-radius: 50%;
}

.item .face {
    position: absolute;
    transform: rotateY(90deg);
    transition: all ease-in 0.25s;

}

.toggled .face {
    transform: rotateY(0deg);
    transition-delay: 0.25s;
}

.item .back {
    transition: all ease-in 0.25s;
    transition-delay: 0.25s;
}

.toggled .back {
    transform: rotateY(90deg);
    transition-delay: 0s;
}
运行应用的步骤:
步骤1: 在终端中输入以下命令。
npm start
步骤2: 打开网络浏览器并输入以下网址。
http://localhost:3000/
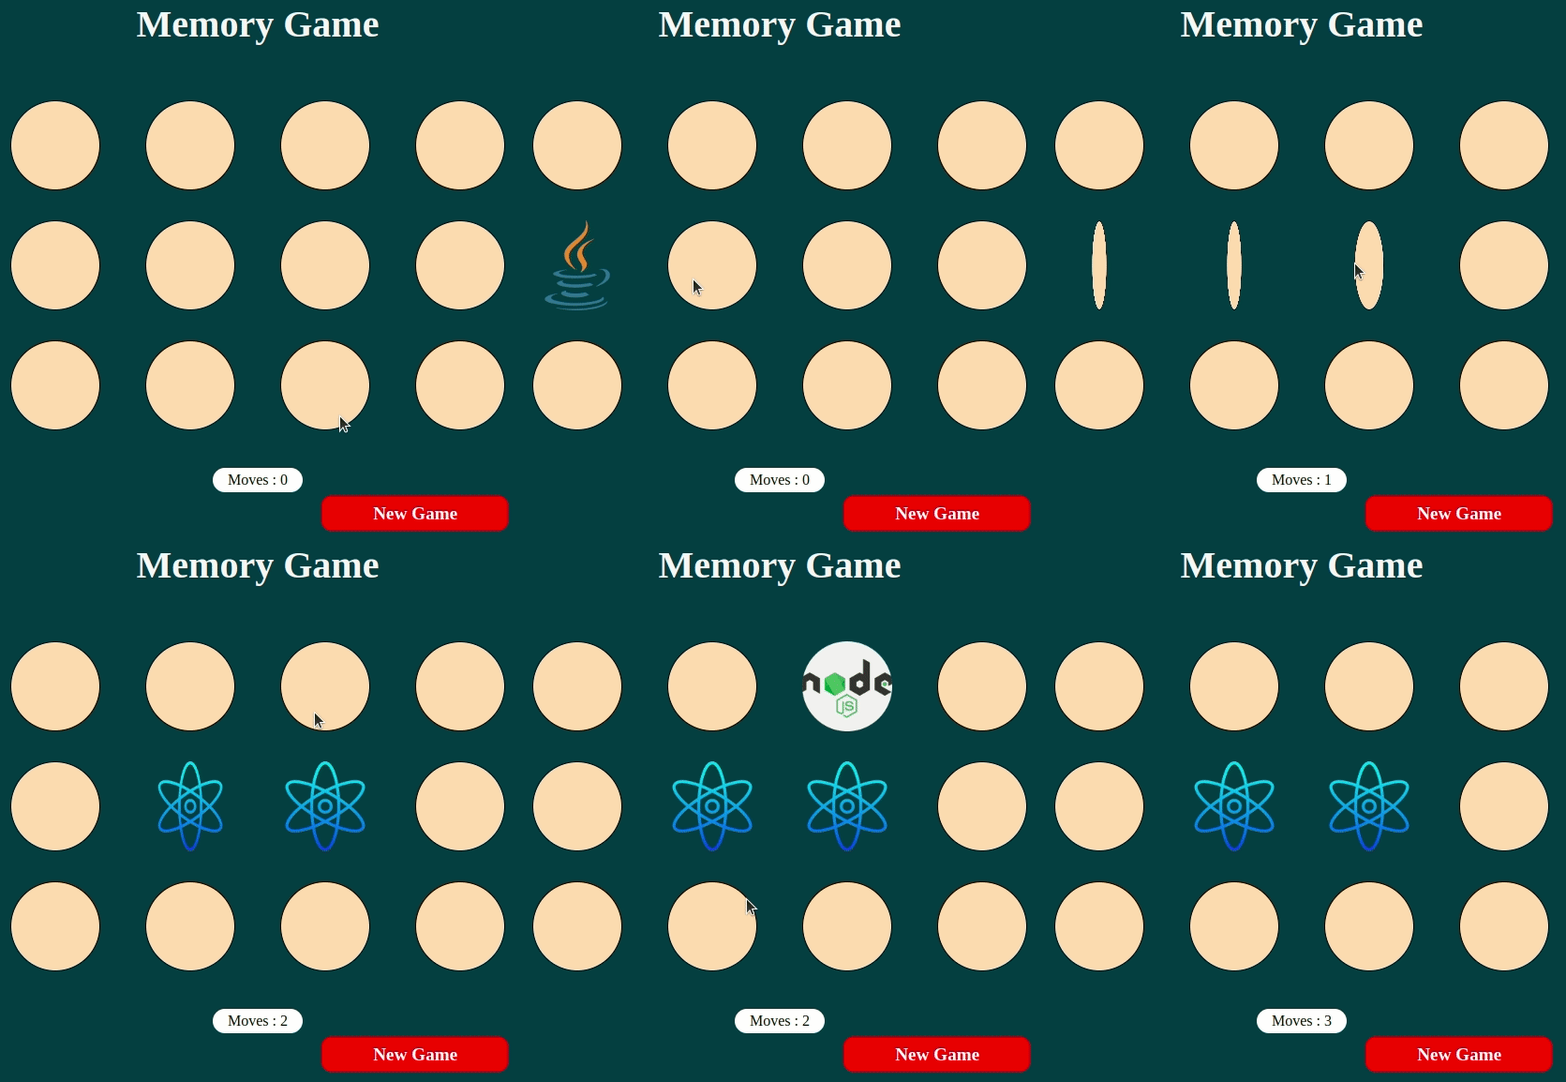
输出:

 极客教程
极客教程