React 如何实现单选按钮
在设计交互式用户界面时,实现单选按钮是一项基本任务。在本文中,我们将看看如何在React中创建单选按钮。单选按钮是一种图形用户界面元素,允许人们在多个选择中进行排他性选择。
前提条件
- React入门
- React组件
- React Hooks
- NPM或NPX
创建React应用的步骤
步骤1: 使用以下命令创建一个React应用
npx create-react-app radioButtonApp
步骤2:创建项目文件夹,例如radioButtonApp,使用以下命令进行导航:
cd radioButtonApp
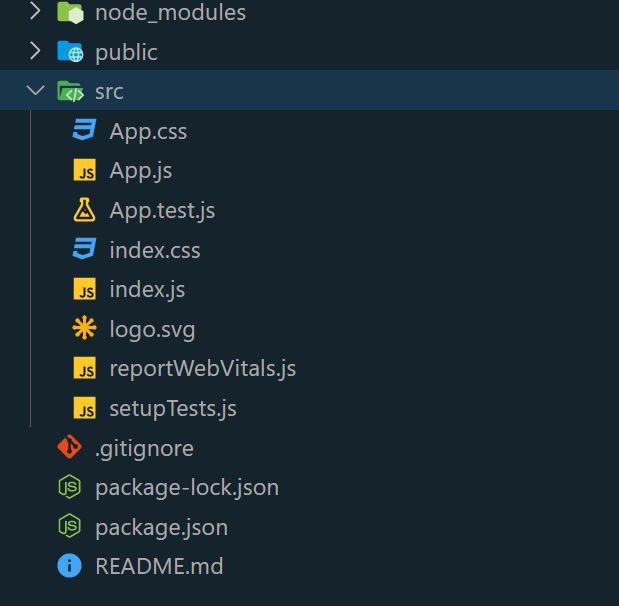
项目结构

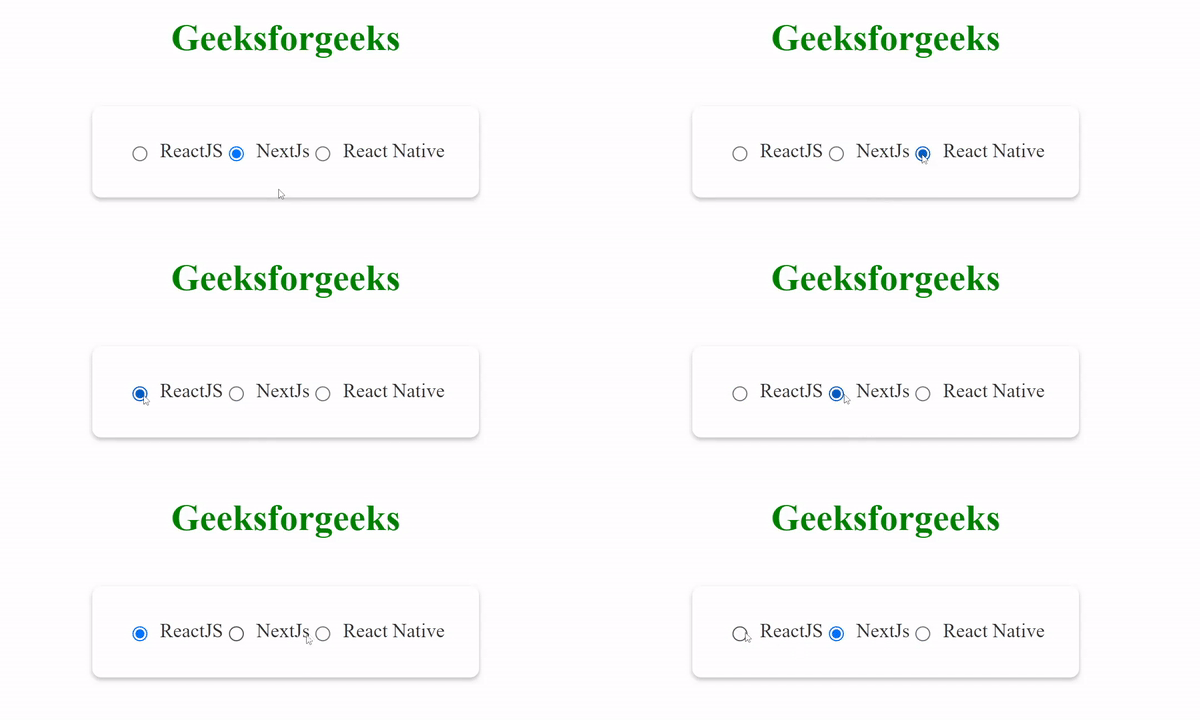
示例1: 这个React示例演示了如何使用useState hook进行状态管理,创建一个简单的单选按钮组。该组件能够高效地维护所选选项,并根据用户的输入进行更新。为了增强视觉吸引力和结构,内部使用CSS样式来使单选按钮和标签在容器中居中对齐。通过选择提供的选项之一——ReactJS、NextJs或React Native——用户可以进行单个选择,并相应地更新状态。
import React, { useState } from "react";

function App() {
    const [
        selectedValue,
        setSelectedValue,
    ] = useState("option1");

    const handleRadioChange = (
        value
    ) => {
        setSelectedValue(value);
    };

    const styles = {
        container: {
            display: "flex",
            flex: 1,
            justifyContent: "center",
            alignItems: "center",
        },
        heading: {
            color: "green",
            textAlign: "center",
        },
        radioGroup: {
            display: "flex",
            flexDirection: "row",
            alignItems: "center",
            justifyContent:
                "space-around",
            marginTop: "20px",
            borderRadius: "8px",
            backgroundColor: "white",
            padding: "30px",
            boxShadow:
                "0px 2px 3.84px rgba(0, 0, 0, 0.25)",
        },
        radioButton: {
            display: "flex",
            flexDirection: "row",
            alignItems: "center",
        },
        radioLabel: {
            marginLeft: "8px",
            fontSize: "17px",
            color: "#333",
        },
    };

    return (
        <div>
            <h1 style={styles.heading}>
                Geeksforgeeks
            </h1>
            <div
                style={styles.container}
            >
                <div
                    style={
                        styles.radioGroup
                    }
                >
                    <div
                        style={
                            styles.radioButton
                        }
                    >
                        <input
                            type="radio"
                            id="option1"
                            value="option1"
                            checked={
                                selectedValue ===
                                "option1"
                            }
                            onChange={() =>
                                handleRadioChange(
                                    "option1"
                                )
                            }
                        />
                        <label
                            htmlFor="option1"
                            style={
                                styles.radioLabel
                            }
                        >
                            ReactJS
                        </label>
                    </div>

                    <div
                        style={
                            styles.radioButton
                        }
                    >
                        <input
                            type="radio"
                            id="option2"
                            value="option2"
                            checked={
                                selectedValue ===
                                "option2"
                            }
                            onChange={() =>
                                handleRadioChange(
                                    "option2"
                                )
                            }
                        />
                        <label
                            htmlFor="option2"
                            style={
                                styles.radioLabel
                            }
                        >
                            NextJs
                        </label>
                    </div>

                    <div
                        style={
                            styles.radioButton
                        }
                    >
                        <input
                            type="radio"
                            id="option3"
                            value="option3"
                            checked={
                                selectedValue ===
                                "option3"
                            }
                            onChange={() =>
                                handleRadioChange(
                                    "option3"
                                )
                            }
                        />
                        <label
                            htmlFor="option3"
                            style={
                                styles.radioLabel
                            }
                        >
                            React Native
                        </label>
                    </div>
                </div>
            </div>
        </div>
    );
}

export default App;
运行步骤
要打开应用程序,请使用终端并输入下面列出的命令。
npm start
或者
npm run start
输出 :

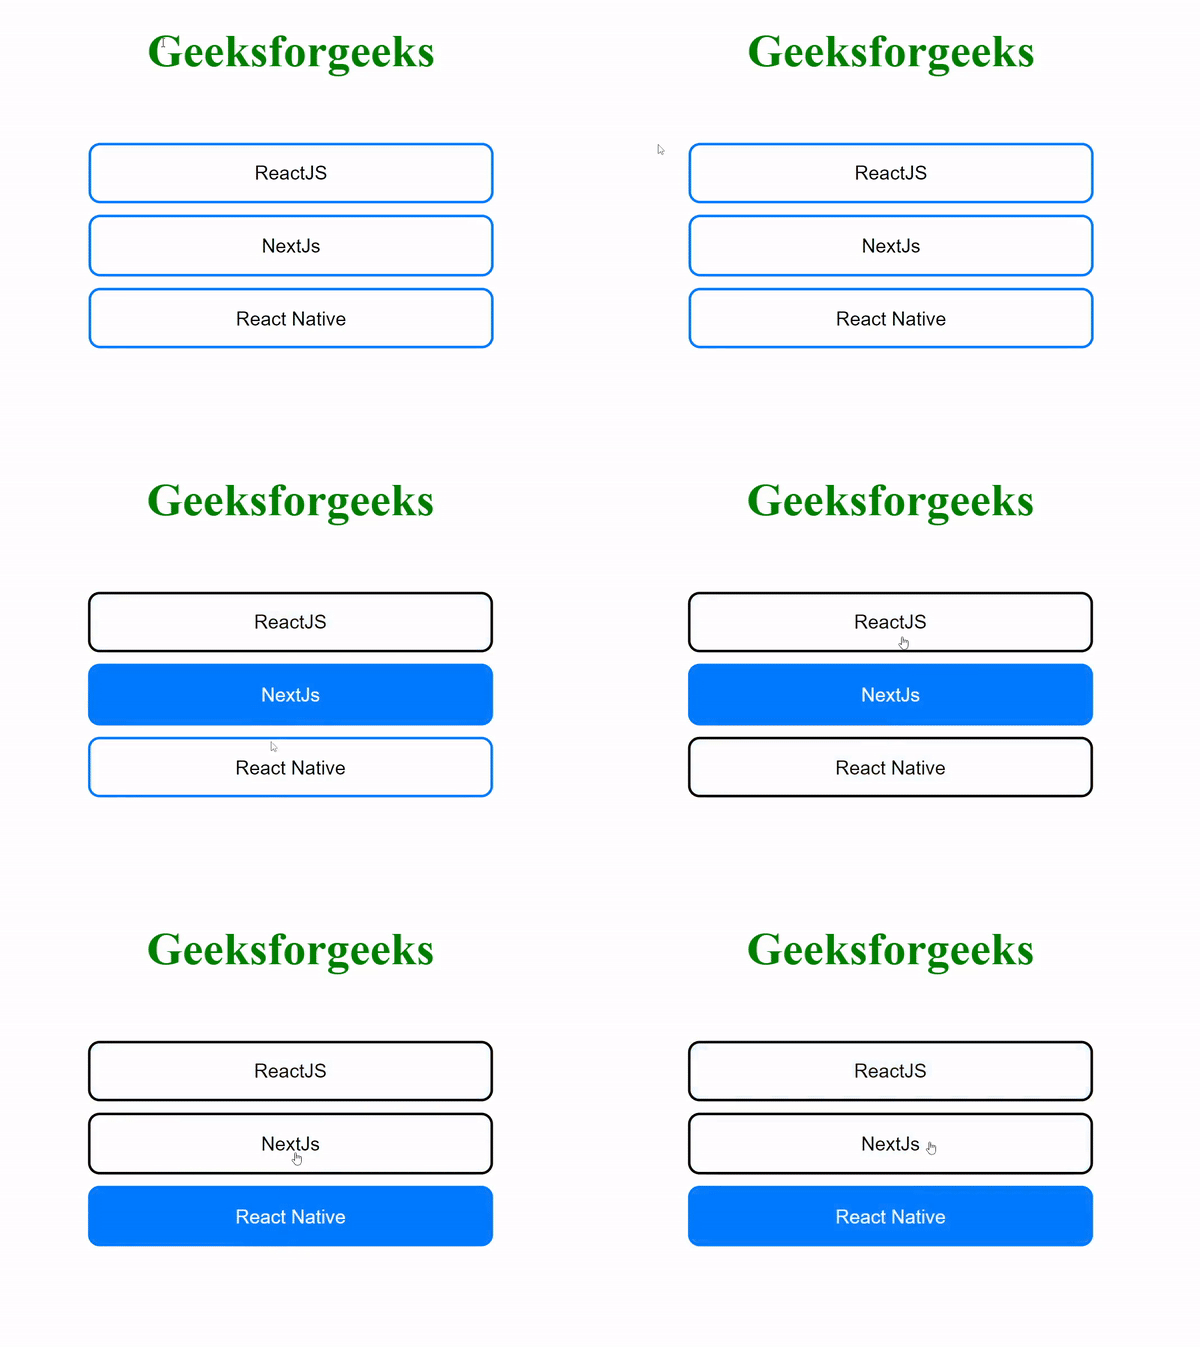
示例 2: 在这个示例中,单选按钮被巧妙地排列成列表格式,使用户能够轻松地从可用选项中选择一个选项。当选择被作出时,甚至会有视觉反馈,因为被点击的单选按钮会改变颜色以指示所选选项。为了增强用户交互,该应用程序利用了React的useState钩子来有效地管理和更新所选选项的状态。
import React, { useState } from "react";

const styles = {
    container: {
        display: "flex",
        justifyContent: "center",
        alignItems: "center",
    },
    heading: {
        color: "green",
        textAlign: "center",
    },
    radioButton: {
        padding: "12px 16px",
        borderRadius: "8px",
        margin: "8px",
        border: "2px solid #007BFF",
        background: "#fff",
        display: "flex",
        alignItems: "center",
        justifyContent: "center",
        width: "280px",
        cursor: "pointer",
        transition:
            "background-color 0.3s, color 0.3s",
    },
    selected: {
        background: "#007BFF",
        color: "#fff",
        borderColor: "#007BFF",
    },
    list: {
        listStyleType: "none",
        padding: 0,
        textAlign: "center",
    },
};

const CustomRadioButton = ({
    label,
    selected,
    onSelect,
}) => (
    <li>
        <button
            style={{
                ...styles.radioButton,
                ...(selected
                    ? styles.selected
                    : {}),
            }}
            onClick={onSelect}
        >
            {label}
        </button>
    </li>
);

function App() {
    const [
        selectedValue,
        setSelectedValue,
    ] = useState(null);

    return (
        <div>
            <h1 style={styles.heading}>
                Geeksforgeeks
            </h1>

            <div
                style={styles.container}
            >
                <ul style={styles.list}>
                    <CustomRadioButton
                        label="ReactJS"
                        selected={
                            selectedValue ===
                            "option1"
                        }
                        onSelect={() =>
                            setSelectedValue(
                                "option1"
                            )
                        }
                    />
                    <CustomRadioButton
                        label="NextJs"
                        selected={
                            selectedValue ===
                            "option2"
                        }
                        onSelect={() =>
                            setSelectedValue(
                                "option2"
                            )
                        }
                    />
                    <CustomRadioButton
                        label="React Native"
                        selected={
                            selectedValue ===
                            "option3"
                        }
                        onSelect={() =>
                            setSelectedValue(
                                "option3"
                            )
                        }
                    />
                </ul>
            </div>
        </div>
    );
}

export default App;
输出:

 极客教程
极客教程