任务调度器使用React
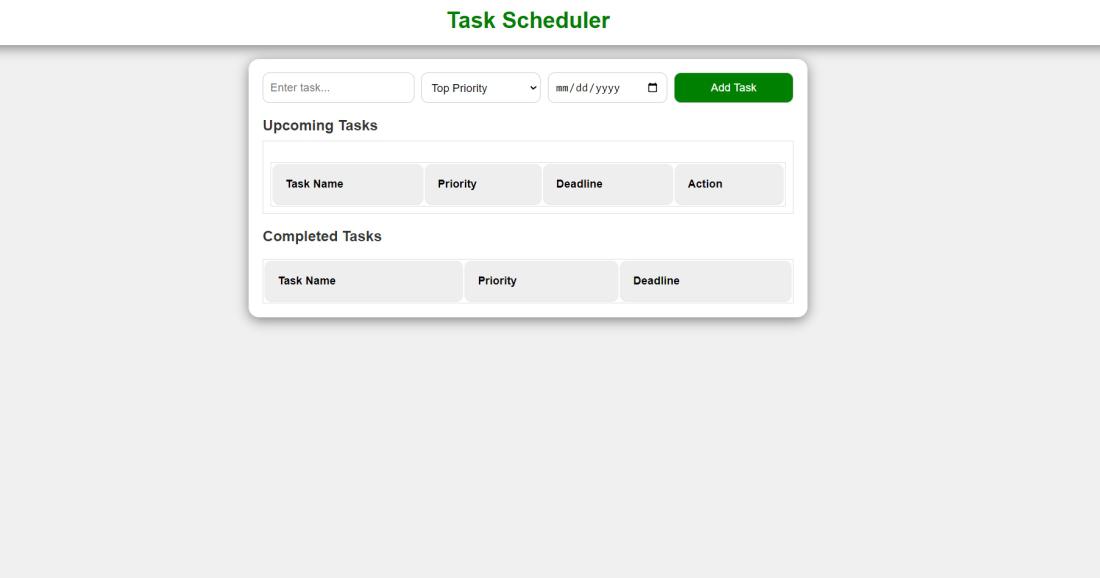
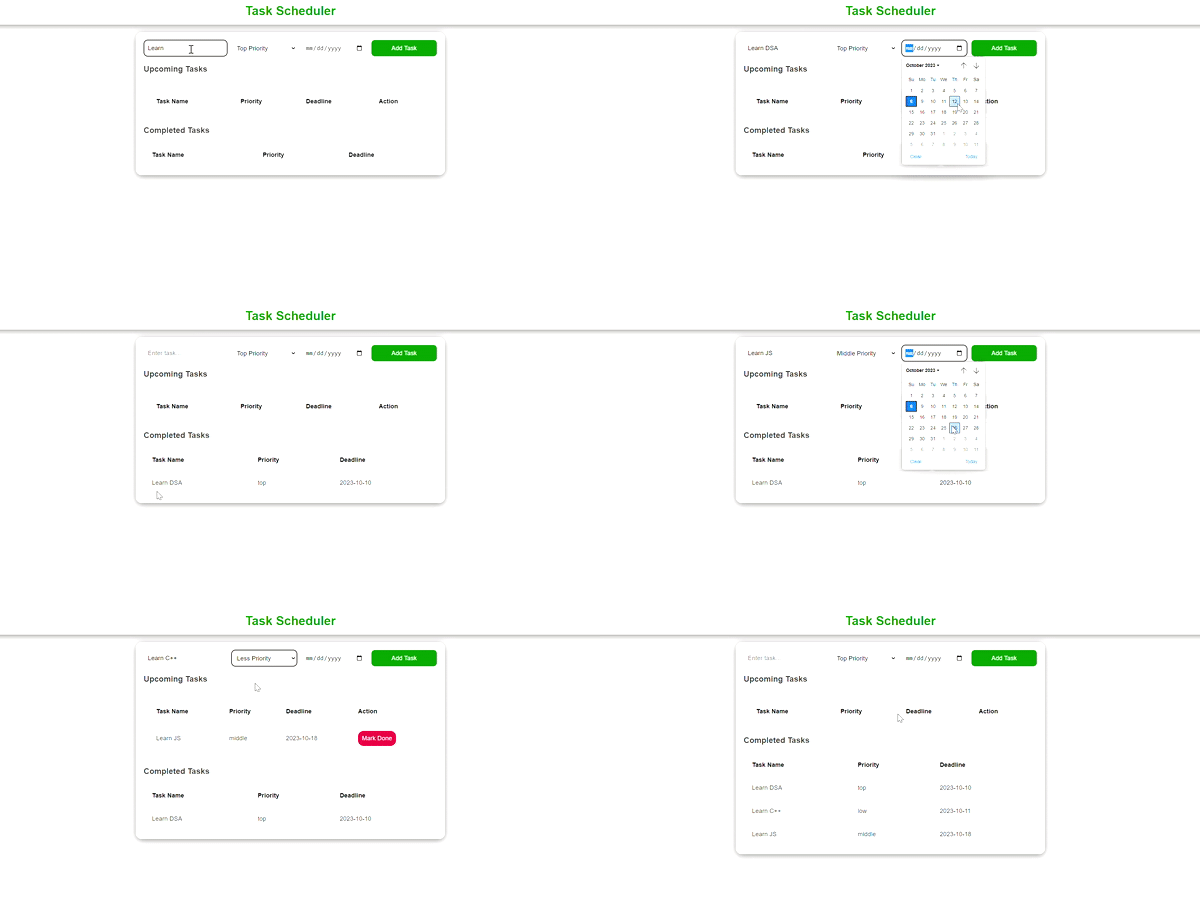
任务调度器是一个应用程序,用于保存用户提交的任务并将其分类为低、中或高优先级。用户还可以为任务提供截止日期。用户还可以通过点击按钮将任务标记为已完成,并将其添加到已完成任务区域。
最终输出预览: 让我们看一下最终应用程序的样子。

任务调度器的先决条件和使用的技术
- React
- CSS
- React中的类组件
- React Hooks
创建任务调度器的方法
- React的useState hook有效地管理与任务相关的多个关键状态变量。这些包括即将到来的任务、已完成的任务、任务名称、任务优先级和任务截止日期。
- 函数 handleTaskChange 、 handlePriorityChange 和 handleDeadlineChange 捕获用户提供的输入,并随后更新相关的状态变量。
- addTask 函数执行多个任务。首先,它验证任务和截止日期的输入。如果满足条件,它将继续创建一个新的任务对象,并将该对象附加到任务列表。
- 当用户点击“标记为已完成”时, markDone 会更新任务状态。此操作会更改任务的状态,并将完成的任务移动到名为 completedTasks 的类别中。
- upcomingTasks 过滤未完成的任务,并以表格形式呈现。显示包括任务名称、优先级、截止日期和“标记为已完成”按钮。
创建任务调度器的步骤
步骤1: 使用以下命令创建一个React应用
npx create-react-app task-scheduler-app
步骤2: 创建项目文件夹后,即task-scheduler-app,使用以下命令进行导航:
cd task-scheduler-app
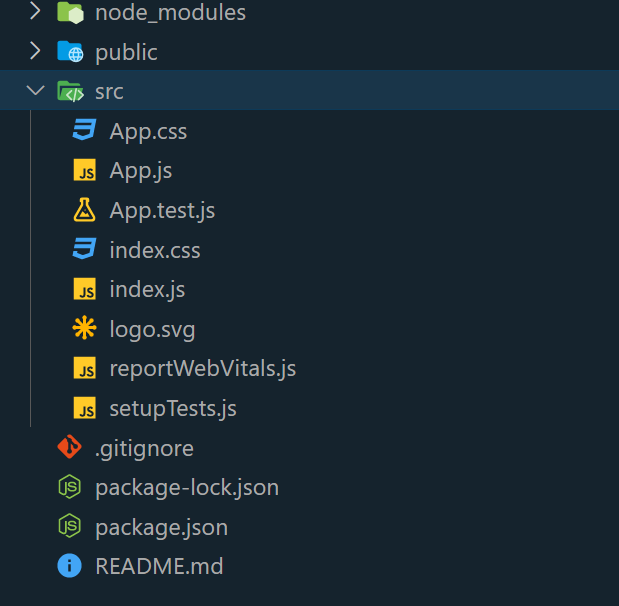
项目结构:

更新的依赖项在 package.json 文件中会像下面这样
"dependencies": {
    "@testing-library/jest-dom": "^5.17.0",
    "@testing-library/react": "^13.4.0",
    "@testing-library/user-event": "^13.5.0",
    "react": "^18.2.0",
    "react-dom": "^18.2.0",
    "react-scripts": "5.0.1",
    "web-vitals": "^2.1.4"
  }
示例: 在src目录下的App.js文件和App.css文件中编写以下代码
import React, { useState } from "react";
import "./App.css"; // Import your CSS file here

function App() {
    const [tasks, setTasks] = useState([]);
    const [completedTasks, setCompletedTasks] = useState([]);
    const [task, setTask] = useState("");
    const [priority, setPriority] = useState("top");
    const [deadline, setDeadline] = useState("");

    const handleTaskChange = (e) => {
        setTask(e.target.value);
    };

    const handlePriorityChange = (e) => {
        setPriority(e.target.value);
    };

    const handleDeadlineChange = (e) => {
        setDeadline(e.target.value);
    };

    const addTask = () => {
        if (task.trim() === "" || deadline === "") {
            alert("Please enter a task and select a valid deadline.");
            return;
        }

        const selectedDate = new Date(deadline);
        const currentDate = new Date();

        if (selectedDate <= currentDate) {
            alert("Please select a future date for the deadline.");
            return;
        }

        const newTask = {
            id: tasks.length + 1,
            task,
            priority,
            deadline,
            done: false,
        };

        setTasks([...tasks, newTask]);

        setTask("");
        setPriority("top");
        setDeadline("");
    };

    const markDone = (id) => {
        const updatedTasks = tasks.map((t) =>
            t.id === id ? { ...t, done: true } : t
        );
        setTasks(updatedTasks);

        const completedTask = tasks.find((t) => t.id === id);
        if (completedTask) {
            setCompletedTasks([...completedTasks, completedTask]);
        }
    };

    const upcomingTasks = tasks.filter((t) => !t.done);

    return (
        <div className="App">
            <header>
                <h1>Task Scheduler</h1>
            </header>
            <main>
                <div className="task-form">
                    <input
                        type="text"
                        id="task"
                        placeholder="Enter task..."
                        value={task}
                        onChange={handleTaskChange}
                    />
                    <select
                        id="priority"
                        value={priority}
                        onChange={handlePriorityChange}
                    >
                        <option value="top">Top Priority</option>
                        <option value="middle">Middle Priority</option>
                        <option value="low">Less Priority</option>
                    </select>
                    <input
                        type="date"
                        id="deadline"
                        value={deadline}
                        onChange={handleDeadlineChange}
                    />
                    <button id="add-task" onClick={addTask}>
                        Add Task
                    </button>
                </div>
                <h2 className="heading">Upcoming Tasks</h2>
                <div className="task-list" id="task-list">
                    <table>
                        <thead>
                            <tr>
                                <th>Task Name</th>
                                <th>Priority</th>
                                <th>Deadline</th>
                                <th>Action</th>
                            </tr>
                        </thead>
                        <tbody>
                            {upcomingTasks.map((t) => (
                                <tr key={t.id}>
                                    <td>{t.task}</td>
                                    <td>{t.priority}</td>
                                    <td>{t.deadline}</td>
                                    <td>
                                        {!t.done && (
                                            <button
                                                className="mark-done"
                                                onClick={() => markDone(t.id)}
                                            >
                                                Mark Done
                                            </button>
                                        )}
                                    </td>
                                </tr>
                            ))}
                        </tbody>
                    </table>
                </div>
                <div className="completed-task-list">
                    <h2 className="cheading">Completed Tasks</h2>
                    <table>
                        <thead>
                            <tr>
                                <th>Task Name</th>
                                <th>Priority</th>
                                <th>Deadline</th>
                            </tr>
                        </thead>
                        <tbody>
                            {completedTasks.map((ct) => (
                                <tr key={ct.id}>
                                    <td>{ct.task}</td>
                                    <td>{ct.priority}</td>
                                    <td>{ct.deadline}</td>
                                </tr>
                            ))}
                        </tbody>
                    </table>
                </div>
            </main>
        </div>
    );
}

export default App;
CSS
/* App.css */
* {
    margin: 0;
    padding: 0;
    box-sizing: border-box;
}

body {
    font-family: Arial, sans-serif;
    background-color: #f0f0f0;
    margin: 0;
    padding: 0;
    color: #333;
}

header {
    background-color: white;
    color: green;
    text-align: center;
    padding: 1rem 0;
    box-shadow: 0 4px 18px grey;
}

main {
    max-width: 800px;
    margin: 20px auto;
    padding: 20px;
    background-color: #fff;
    box-shadow: 0 4px 18px grey;
    border-radius: 15px;
}

.task-form {
    display: flex;
    flex-wrap: wrap;
    gap: 10px;
    margin-bottom: 20px;
}

.task-form input,
.task-form select,
.task-form button {
    padding: 10px;
    border: 1px solid #ccc;
    font-size: 16px;
    flex: 1;
    border-radius: 10px;
}

button {
    background-color: green;
    color: white;
    border: none;
    cursor: pointer;
}

.mark-done {
    padding: 10px;
    font-size: 16px;
    flex: 1;
    border-radius: 15px;
    background-color: crimson;
    color: white;
    border: none;
    cursor: pointer;
}

.task-list {
    border: 1px solid #ddd;
    padding: 10px;
}

table {
    width: 100%;
    margin-top: 20px;
    background-color: #fff;
    border: 1px solid #ddd;
}

table th,
table td {
    padding: 19px;
    border-bottom: 1px solid #ddd;
    text-align: left;
}

table th {
    background-color: #eee;
    color: black;
    border-radius: 10px;
}

.completed-task-list {
    margin-top: 20px;
}

.completed-task {
    padding: 10px;
    border: 1px solid crimson;
    border-radius: 5px;
    background-color: #eaffea;
}

.completed-task h2 {
    color: #28a745;
}

h2 {
    font-size: 1.3rem;
}

.heading {
    padding-bottom: 10px;
}

.cheading {
    color: rgb(54, 54, 54);
}
运行该应用程序的步骤:
步骤1: 在终端中输入以下命令:
npm start
步骤2: 在浏览器中输入以下URL:
http://localhost:3000/
输出:

 极客教程
极客教程