React-Native 创建一个图像裁剪工具
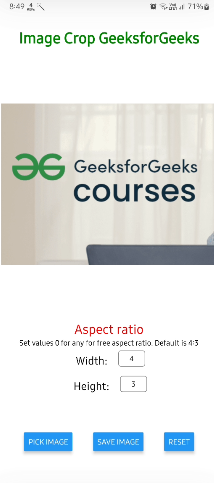
在本教程中,我们将使用React-Native构建一个 图像裁剪工具 。图像裁剪工具是一个非常重要的工具,用于裁剪图像。它将允许用户从存储中选择图像,裁剪图像,并将其保存到本地。
预览图像

先决条件
- React Native入门
- React Native组件
- React Native状态
- React Native属性
- Expo CLI
- Node.js和npm(Node包管理器)
项目设置
步骤1: 创建项目
npx create-expo-app image_crop
步骤2: 导航到项目
cd image_crop
步骤3: 安装所需的软件包。
npx expo install expo-file-system expo-image-picker
- expo-file-system :用于保存文件。
- expo-image-picker: 用于选择和裁剪图像。
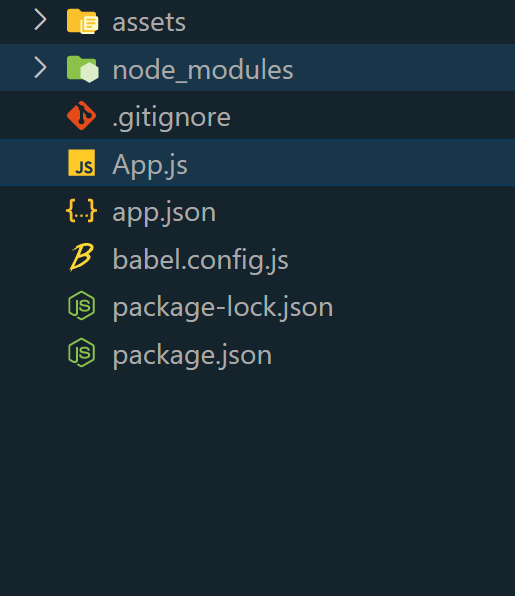
项目结构

package.json 用于存储项目依赖及其版本信息。
{
    "name": "image_crop",
    "version": "1.0.0",
    "main": "node_modules/expo/AppEntry.js",
    "scripts": {
        "start": "expo start",
        "android": "expo start --android",
        "ios": "expo start --ios",
        "web": "expo start --web"
    },
    "dependencies": {
        "expo": "~49.0.11",
        "expo-file-system": "~15.4.4",
        "expo-image-picker": "~14.3.2",
        "expo-status-bar": "~1.6.0",
        "react": "18.2.0",
        "react-native": "0.72.4"
    },
    "devDependencies": {
        "@babel/core": "^7.20.0"
    },
    "private": true
}
方法
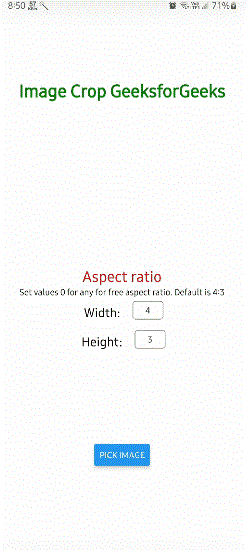
- 应用程序将有三个按钮,选择图像,重置图像和保存图像。
- 点击选择图像按钮后,图片选择器会打开,我们需要选择一张图片。
- 之后打开裁剪窗口,需要裁剪图片。
- 裁剪后,图片被显示出来。
- 如果满意,点击保存按钮。
- 完成后,可以重置应用。
示例: 此示例展示了使用React-Native创建图像裁剪工具的过程。
// App.js file

import {
    Button,
    StyleSheet,
    Text,
    View,
    Image,
    TextInput,
} from "react-native";
import * as ImagePicker from "expo-image-picker";
import * as FileSystem from "expo-file-system";
import { useRef, useState } from "react";
export default function App() {
    const [fileUri, setFileUri] = useState("");
    const [fileType, setFileType] = useState("");
    const [heightAspect, setHeightAspect] = useState("3");
    const [widthAspect, setWidthAspect] = useState("4");
    const handlePickFile = async () => {
        if (heightAspect == "0" || widthAspect == "0") {
            const res =
                await ImagePicker.launchImageLibraryAsync({
                    mediaTypes:
                        ImagePicker.MediaTypeOptions.Images,
                    quality: 1,
                    allowsEditing: true,
                    allowsMultipleSelection: false,
                });
            if (res.canceled) return;

            setFileUri(res.assets[0].uri);
            setFileType(res.assets[0].type);
        } else {
            const res =
                await ImagePicker.launchImageLibraryAsync({
                    mediaTypes:
                        ImagePicker.MediaTypeOptions.Images,
                    quality: 1,
                    aspect: [
                        parseInt(widthAspect),
                        parseInt(heightAspect),
                    ],
                    allowsEditing: true,
                    allowsMultipleSelection: false,
                });
            if (res.canceled) return;

            setFileUri(res.assets[0].uri);
            setFileType(res.assets[0].type);
        }
    };

    const saveFile = async (uri, mimetype) => {
        let fileName = Date.now() + ".jpg";
        const permissions =
            await
                FileSystem.StorageAccessFramework
                    .requestDirectoryPermissionsAsync();
        if (permissions.granted) {
            const base64 =
                await FileSystem.readAsStringAsync(uri, {
                    encoding:
                        FileSystem.EncodingType.Base64,
                });
            await FileSystem.StorageAccessFramework.createFileAsync(
                permissions.directoryUri,
                fileName,
                mimetype
            )
                .then(async (uri) => {
                    await FileSystem.writeAsStringAsync(
                        uri,
                        base64,
                        {
                            encoding:
                                FileSystem.EncodingType
                                    .Base64,
                        }
                    );
                })
                .catch((e) => console.log(e));
        } else {
            alert("Permission not granted");
        }
    };
    return (
        <View style={styles.container}>
            <Text style={styles.heading1}>
                Image Crop GeeksforGeeks
            </Text>
            {fileUri.length != 0 ? (
                <Image
                    source={{ uri: fileUri }}
                    style={{
                        width: 400,
                        height: 400,
                        objectFit: "contain",
                    }}
                />
            ) : (
                <View></View>
            )}
            <View
                style={{
                    flexDirection: "column",
                    alignItems: "center",
                }}>

                <Text
                    style={{ fontSize: 24, color: "red" }}>
                    Aspect ratio
                </Text>
                <Text>
                    Set values 0 for any for free aspect
                    ratio. Default is 4:3
                </Text>
                <View
                    style={{
                        display: "flex",
                        flexDirection: "row",
                        alignContent: "center",
                    }}>

                    <Text style={styles.inputLabel}>
                        Width:{" "}
                    </Text>
                    <TextInput
                        onChangeText={setWidthAspect}
                        value={widthAspect}
                        inputMode="numeric"
                        keyboardType="numeric"
                        style={styles.input}
                        maxLength={2}/>

                </View>
                <View
                    style={{
                        display: "flex",
                        flexDirection: "row",
                        alignContent: "center",
                    }}>

                    <Text style={styles.inputLabel}>
                        Height:{" "}
                    </Text>
                    <TextInput
                        onChangeText={setHeightAspect}
                        value={heightAspect}
                        inputMode="numeric"
                        keyboardType="numeric"
                        style={styles.input}
                        maxLength={2}/>
                </View>
            </View>
            <View
                style={{
                    display: "flex",
                    flexDirection: "row",
                    justifyContent: "space-evenly",
                    width: "100%",
                    padding: 10,
                }}>

                <Button
                    title="Pick Image"
                    onPress={handlePickFile}/>

                {fileUri.length != 0 ? (
                    <>
                        <Button
                            title="Save Image"
                            onPress={() =>
                                saveFile(fileUri, fileType)
                            }
                        />
                        <Button
                            title="reset"
                            onPress={() => setFileUri("")}
                        />
                    </>
                ) : (
                    <></>
                )}
            </View>
        </View>
    );
}

const styles = StyleSheet.create({
    container: {
        flex: 1,
        backgroundColor: "#fff",
        alignItems: "center",
        justifyContent: "space-evenly",
        height: "100%",
    },
    heading1: {
        fontSize: 28,
        fontWeight: "bold",
        color: "green",
        textAlign: "center",
    },
    input: {
        width: 50,
        height: 30,
        borderColor: "gray",
        borderWidth: 1,
        textAlign: "center",
        borderRadius: 5,
        padding: 5,
        margin: 5,
    },
    inputLabel: {
        fontSize: 20,
        margin: 5,
        padding: 5,
    },
});
步骤4: 运行应用程序
npx expo start
在Android上运行:
npx react-native run-android
在iOS上运行:
npx react-native run-ios
输出:

 极客教程
极客教程