R语言 如何创建多变量的散点图
在这篇文章中,我们将探讨如何在R编程语言中创建一个多变量的散点图。
在基础R语言中使用Plot()和Points()函数
在这种方法中,要创建一个多变量的散点图,用户需要调用plot()函数
- Plot()函数: 这是一个用于绘制R对象的通用函数。
语法 。
plot(x, y, …)
参数 。
- x:绘图中各点的x坐标。
- y: 绘图中各点的y坐标
Points()函数: 它是一个通用函数,用于在指定的坐标上绘制一连串的点
语法。
points(x,y = NULL, type = “p”, …)
参数。
- x, y:要绘制的点的坐标向量。
- type:表示绘图类型的字符;实际上是 plot.default 中的任何类型。
- …:其他图形参数也可以作为参数提供。
例1 :
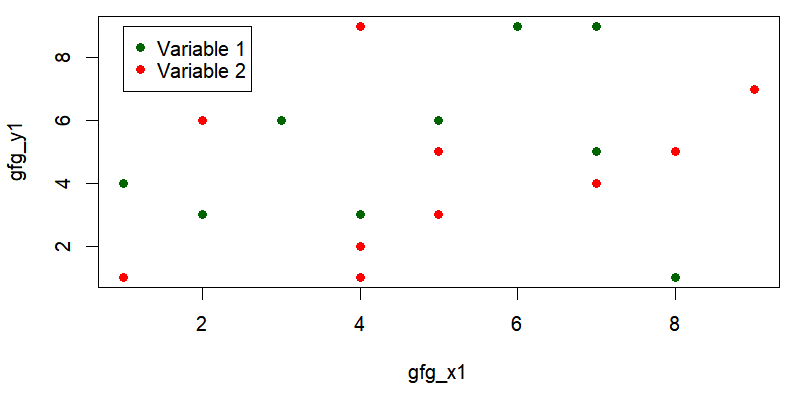
在这个例子中,我们将使用R编程语言中的plot()和point()函数创建一个2个不同变量的散点图。
# Creating First variable
gfg_x1 = c(9,1,8,7,7,3,2,4,5,6)
gfg_y1 = c(7,4,1,5,9,6,3,3,6,9)

# Creating Second variable
gfg_x2 = c(4,1,5,9,7,4,5,2,8,4)
gfg_y2 = c(9,1,5,7,4,1,3,6,5,2)

# creating scatterplot of gfg_x1 vs. gfg_y1
plot(gfg_x1,gfg_y1, col='darkgreen', pch=19)

# Adding scatterplot of gfg_x2 vs gfg_y2
points(gfg_x2, gfg_y2, col='red', pch=19)

legend(1,9,legend=c('Variable 1', 'Variable 2'),
       pch=c(19, 19), col=c('darkgreen', 'red'))
输出 。
例2 :
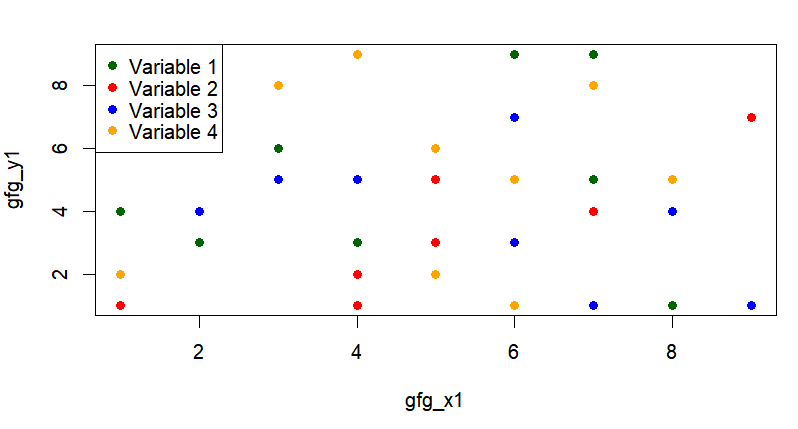
这里,我们将创建一个4个不同变量的散点图。
# Creating First variable
gfg_x1 = c(9,1,8,7,7,3,2,4,5,6)
gfg_y1 = c(7,4,1,5,9,6,3,3,6,9)

# Creating Second variable
gfg_x2 = c(4,1,5,9,7,4,5,2,8,4)
gfg_y2 = c(9,1,5,7,4,1,3,6,5,2)

# Creating Third variable
gfg_x3 = c(6,8,5,7,4,1,6,3,2,9)
gfg_y3 = c(7,4,6,1,5,6,3,5,4,1)

# Creating Forth variable
gfg_x4 = c(1,8,7,5,6,3,2,4,5,6)
gfg_y4 = c(2,5,8,6,5,8,6,9,2,1)


# creating scatterplot of gfg_x1 vs. gfg_y1
plot(gfg_x1,gfg_y1, col='darkgreen', pch=19)

# Adding scatterplot of gfg_x2 vs gfg_y2
points(gfg_x2, gfg_y2, col='red', pch=19)

# Adding scatterplot of gfg_x3 vs gfg_y3
points(gfg_x3, gfg_y3, col='blue', pch=19)

# Adding scatterplot of gfg_x4 vs gfg_y4
points(gfg_x4, gfg_y4, col='orange', pch=19)

legend('topleft',legend=c('Variable 1', 'Variable 2','Variable 3','Variable 4'),
       pch=c(19, 19), col=c('darkgreen', 'red','blue','orange'))
输出 。
例3 :
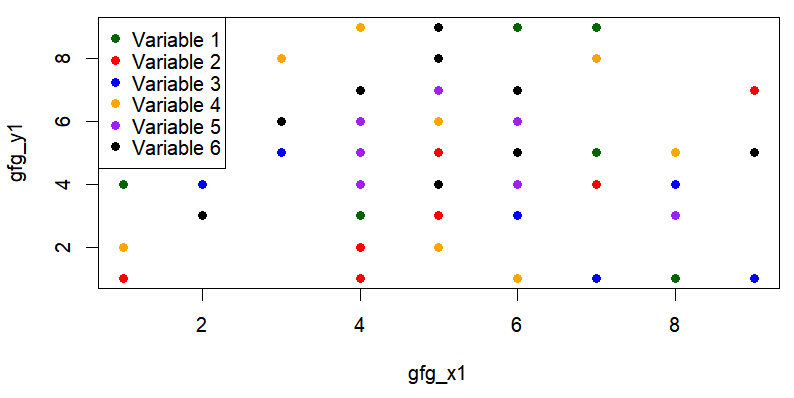
这里,我们将创建一个6个不同变量的散点图。
# Creating First variable
gfg_x1 = c(9,1,8,7,7,3,2,4,5,6)
gfg_y1 = c(7,4,1,5,9,6,3,3,6,9)

# Creating Second variable
gfg_x2 = c(4,1,5,9,7,4,5,2,8,4)
gfg_y2 = c(9,1,5,7,4,1,3,6,5,2)

# Creating Third variable
gfg_x3 = c(6,8,5,7,4,1,6,3,2,9)
gfg_y3 = c(7,4,6,1,5,6,3,5,4,1)

# Creating Forth variable
gfg_x4 = c(1,8,7,5,6,3,2,4,5,6)
gfg_y4 = c(2,5,8,6,5,8,6,9,2,1)

# Creating Fifth variable
gfg_x5 = c(8,9,5,6,2,4,4,6,4,1)
gfg_y5 = c(3,5,7,4,5,6,4,6,5,7)

# Creating Sixth variable
gfg_x6 = c(4,5,6,3,2,2,5,5,9,6)
gfg_y6 = c(7,8,5,6,3,5,9,4,5,7)

# creating scatterplot of gfg_x1 vs. gfg_y1
plot(gfg_x1,gfg_y1, col='darkgreen', pch=19)

# Adding scatterplot of gfg_x2 vs gfg_y2
points(gfg_x2, gfg_y2, col='red', pch=19)

# Adding scatterplot of gfg_x3 vs gfg_y3
points(gfg_x3, gfg_y3, col='blue', pch=19)

# Adding scatterplot of gfg_x4 vs gfg_y4
points(gfg_x4, gfg_y4, col='orange', pch=19)

# Adding scatterplot of gfg_x5 vs gfg_y5
points(gfg_x5, gfg_y5, col='purple', pch=19)

# Adding scatterplot of gfg_x6 vs gfg_y6
points(gfg_x6, gfg_y6, col='black', pch=19)

legend('topleft',legend=c('Variable 1', 'Variable 2','Variable 3','Variable 4',
                          'Variable 5','Variable 6'), pch=c(19, 19),
       col=c('darkgreen', 'red','blue','orange','purple','black'))
输出 。
 极客教程
极客教程

