R语言 如何在R中改变条形图的顺序
在这篇文章中,我们将讨论如何在R编程语言中改变条形图的顺序。我们可以通过使用ggplot和barplot两个图来改变条形图的顺序。
方法1:Ggplot的重新排序
首先创建一个样本数据集,并绘制图-手册。现在让我们对它们进行相应的重新排序。
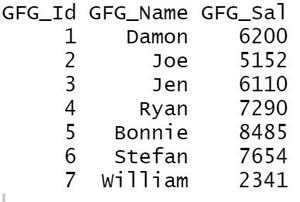
使用中的数据集
雇员工资详情
ggplot中的重新排序是通过theme()函数完成的。在这个函数中,我们使用axis.text.x的适当值来进行相应的重新排序。默认情况下,geom_bar使用stat=”bin”。如果你想让条形图的高度代表数据中的值,请使用stat=”identity “并将一个值映射到y审美。
- geom_bar() : 用于柱状图
语法 。
geom_bar( mapping = NULL, data = NULL, stat = “count”, color=’blue’; fill=’yellow’ width = NULL, na.rm = FALSE, orientation = NA, show.legend = NA, …,)
- 主题: 主题可以用来给绘图一个一致的自定义外观。
语法。
theme( line, rect, text, title, aspect.ratio, axis.text.x, axis.text.x.top, axis.text.x.bottom,)
参数。
- line :所有直线元素(element_line())
- rect :所有矩形元素(element_rect())
- text :所有文本元素(element_text())
- title :所有标题元素:plot, axes, legends (element_text(); 继承于text)
- aspect.ratio :面板的纵横比。
- axis.text.x :与坐标轴一起的标签(element_text())。指定所有的轴标签(axis.text),标签
手动排序
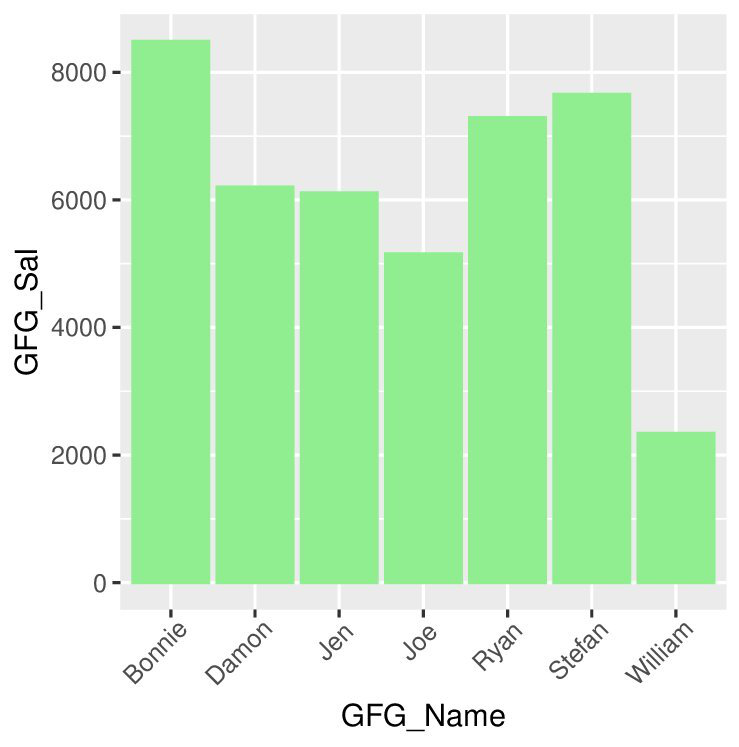
要手动重新排序条,你必须在geom_bar()函数中传递stat=”identity”。
例子 。
library(ggplot2)

# Create the data frame.
gfg.data <- data.frame(
  GFG_Id = c (1:7),
  GFG_Name = c("Damon","Joe","Jen","Ryan","Bonnie","Stefan","William"),
  GFG_Sal = c(6200,5152,6110,7290,8485,7654,2341))
print(gfg.data)

# GGPLOT
x <- ggplot(gfg.data, aes(x = GFG_Name, y = GFG_Sal))

x <- x + geom_bar(stat="identity", color='lightgreen',fill='lightgreen')

x <- x + theme(axis.text.x=element_text(angle=45, hjust=0.9))
x
输出 。
按升序和降序重新排序
这里使用 重新排序函数 来改变图形的顺序。
语法:
ggplot(dataframe name, aes(x=reorder(column1,±column2), y=column2)
这里,如果你想要升序,那么你将使用’+’加号,如果你想要降序,那么你应该使用’-‘减号。
注意: Column2必须是有数字数据的列。
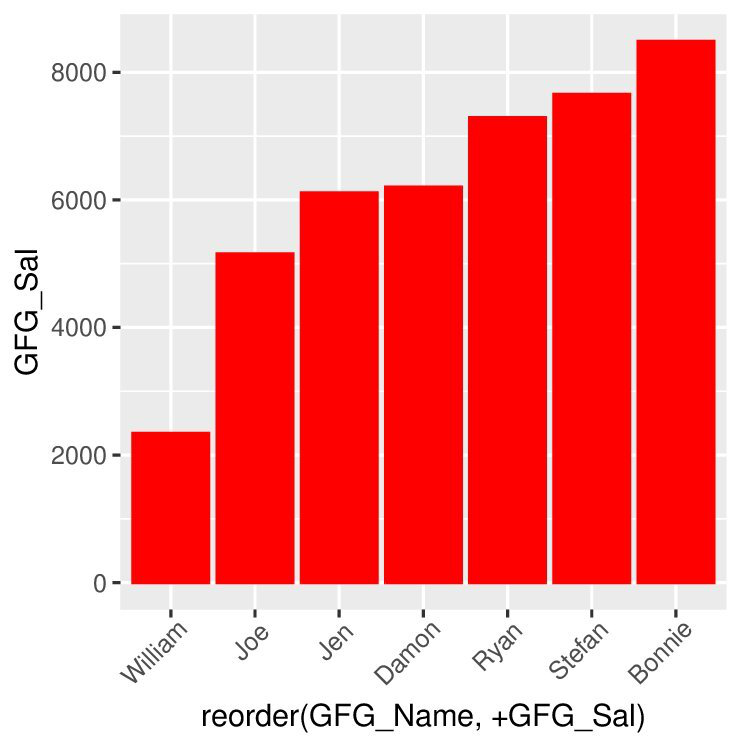
例子: 让我们首先以升序显示同一条形图。
library(ggplot2)

# Create the data frame.
gfg.data <- data.frame(
  GFG_Id = c (1:7),
  GFG_Name = c("Damon","Joe","Jen","Ryan","Bonnie","Stefan","William"),
  GFG_Sal = c(6200,5152,6110,7290,8485,7654,2341))

print(gfg.data)

# GGPLOT
x <- ggplot(gfg.data, aes(x = reorder(GFG_Name, +GFG_Sal), y = GFG_Sal))

x <- x + geom_bar(stat="identity", color='red',fill='red')

x <- x + theme(axis.text.x=element_text(angle=45, hjust=0.9))
x
输出 。
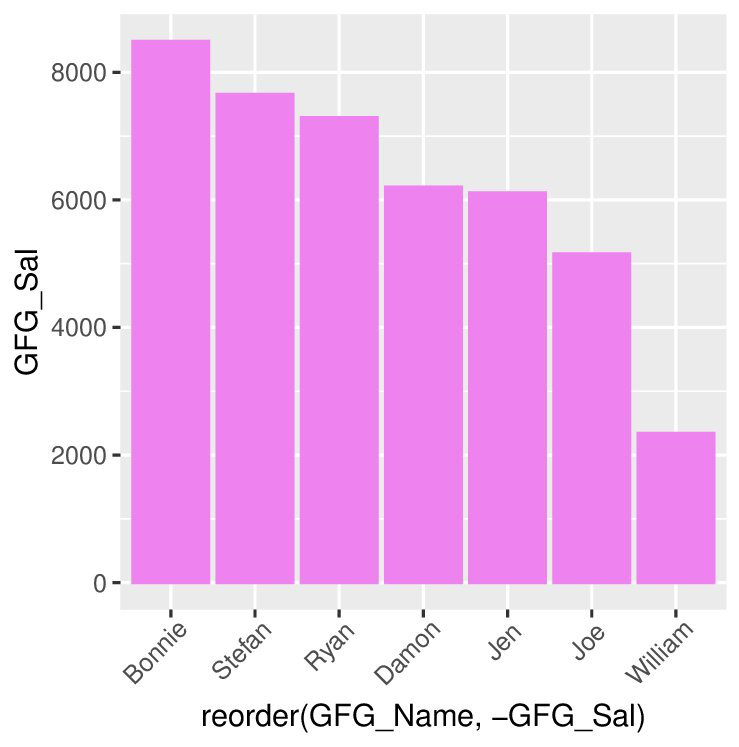
例子: 现在我们来看看降序图
library(ggplot2)

# Create the data frame.
gfg.data <- data.frame(
  GFG_Id = c (1:7),
  GFG_Name = c("Damon","Joe","Jen","Ryan","Bonnie","Stefan","William"),
  GFG_Sal = c(6200,5152,6110,7290,8485,7654,2341))

print(gfg.data)

# GGPLOT
x <- ggplot(gfg.data, aes(x = reorder(GFG_Name, -GFG_Sal), y = GFG_Sal))

x <- x + geom_bar(stat="identity", color='violet',fill='violet')

x <- x + theme(axis.text.x=element_text(angle=45, hjust=0.9))
x
输出 。
方法2:使用Barplot重新排序
首先创建一个样本数据集并绘制图表。现在让我们来看看条形图的重新排序。
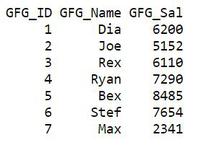
数据框架的使用 。
在R中,barplot()函数
语法。
barplot(height, name.args = NULL, col = NULL, main = NULL)
参数。
- height。你可以指定一个向量或一个矩阵的值。
- name.args :你想在R条形图的每个条形或条形组下面绘制的名字的向量。
手动排序
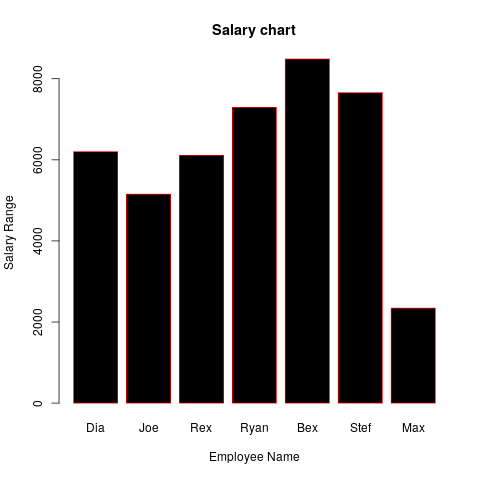
对于手动排序,在创建数据框架时将顺序传递给X轴。
例子 。
# Create the data for the chart
GFG_ID   <- c(1:7)
GFG_Sal  <- c(6200,5152,6110,7290,8485,7654,2341)
GFG_Name <- c("Dia","Joe","Rex","Ryan","Bex","Stef","Max")
X <- data.frame(GFG_ID,GFG_Name,GFG_Sal)
X

# Give the chart file a name
png(file = "barchart_months_salary.png")

# Plot the bar chart
barplot(GFG_Sal,names.arg=GFG_Name,xlab="Employee Name",
        ylab="Salary Range",col="black",
main="Salary chart",border="Red")

# Save the file
dev.off()
输出
将图形按升序和降序重新排序
这里使用的函数是 order (order返回一个将其第一个参数重新排列成升序或降序的排列方式
语法 –
order(…, na.last = TRUE, decreasing = FALSE)
参数。
na.last:用于控制对NA的处理。
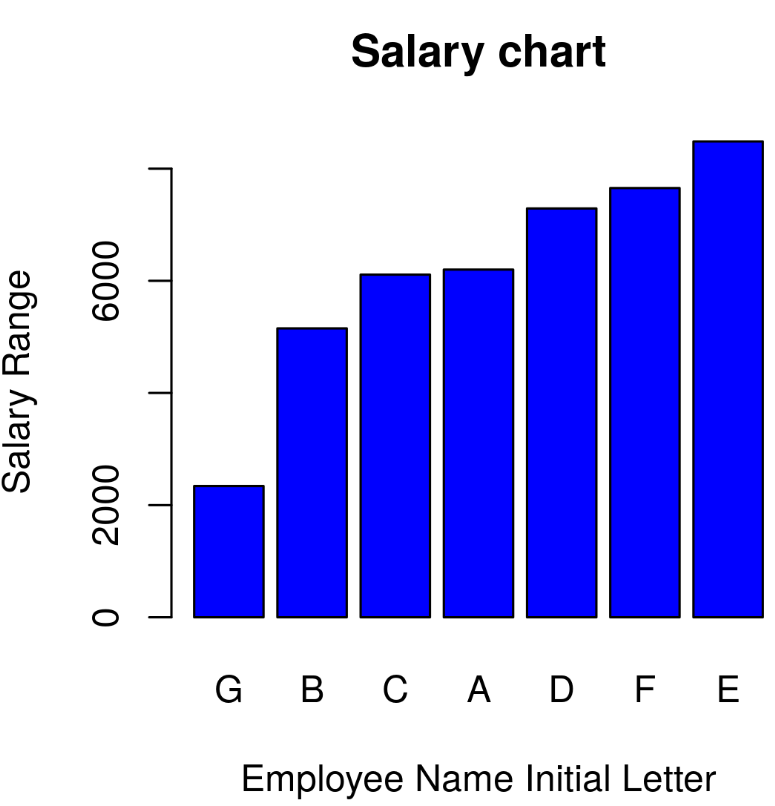
让我们先看一下升序排列的图。
例子 。
GFG_ID  <- (LETTERS[1:7])
GFG_Sal  <- c(6200,5152,6110,7290,8485,7654,2341)

data <- data.frame(GFG_Sal, GFG_ID)

barplot(data[order(data[,1],decreasing=FALSE),
        ][,1],names.arg=data[order(data[,1],decreasing=FALSE),]
        [,2],col="blue",xlab="Employee Name Initial Letter",
        ylab="Salary Range",main="Salary chart",border="black")
输出
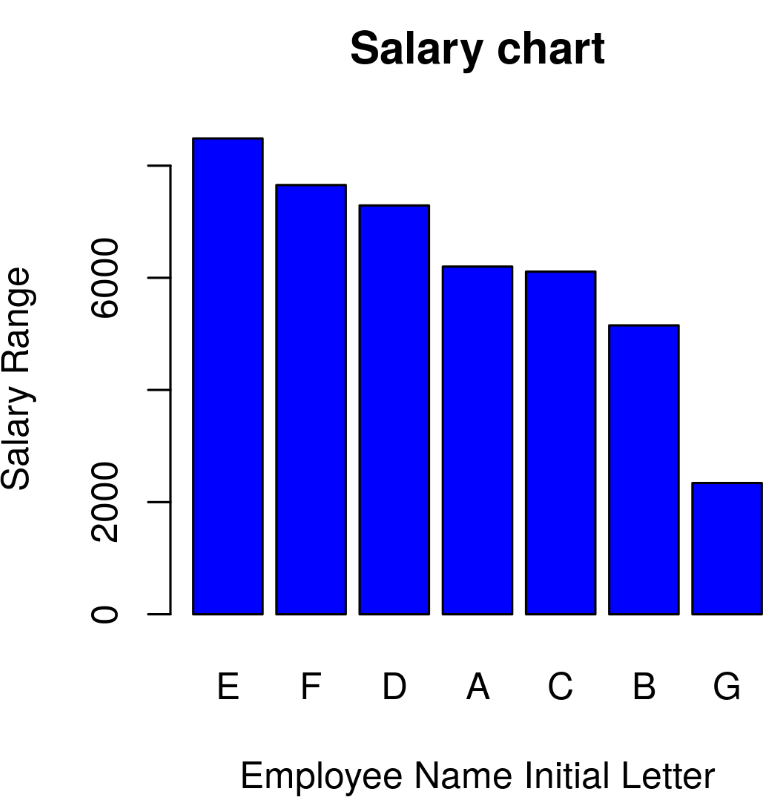
现在让我们来看看降序图。
例子 。
GFG_ID  <- (LETTERS[1:7])
GFG_Sal  <- c(6200,5152,6110,7290,8485,7654,2341)

data <- data.frame(GFG_Sal, GFG_ID)

barplot(data[order(data[,1],decreasing=TRUE),
        ][,1],names.arg=data[order(data[,1],decreasing=TRUE),
        ][,2],col="blue",xlab="Employee Name Initial Letter",
        ylab="Salary Range",main="Salary chart",border="black")
输出
 极客教程
极客教程