R语言 如何为ggvis的图例添加特定的点
在这篇文章中,我们将通过R编程语言中的ggvis包将一个特定的点添加到图例中的方法。
R语言中的ggvis包是用来提供数据可视化的。它被用来创建可视化的交互式图形工具,用于数据的绘制和表示。该包可以通过以下命令安装到工作空间。
install.packages("ggvis")
ggvis软件包中的ggvis方法用于启动ggvis图形窗口。ggvis方法的语法如下。
ggvis( data , mp1, mp2.,)
参数 :
- data – 要绘制的数据集
- mp1, mp2,… – 要绘制的地图变量
ggvis包中的layer_points()方法是用来以点的形式标记点的坐标的。可视化的点可以被添加到这个方法中,就像填充、描边和形状一样。layer_points()方法在R中的语法如下:
layer_points(vis, data, ...)
参数 :
- vis – ggvis对象
- data – 用来绘制点的数据框架
- … – 额外的属性,如填充。
scale_nominal()方法用于为ggvis绘图添加一个名义刻度。scale_nominal()方法提供了外部视觉属性,如填充和范围。范围属性提供了一个用于标记数据点的颜色向量。
scale_nominal (fill , range )
这进一步提供了add_legend方法,用于为ggvis绘图添加图例。title属性可用于为所制作的绘图添加一个标题。
add_legend ( fill , title)
参数 :
- fill – 视觉填充属性
- title – 给予图例的标题
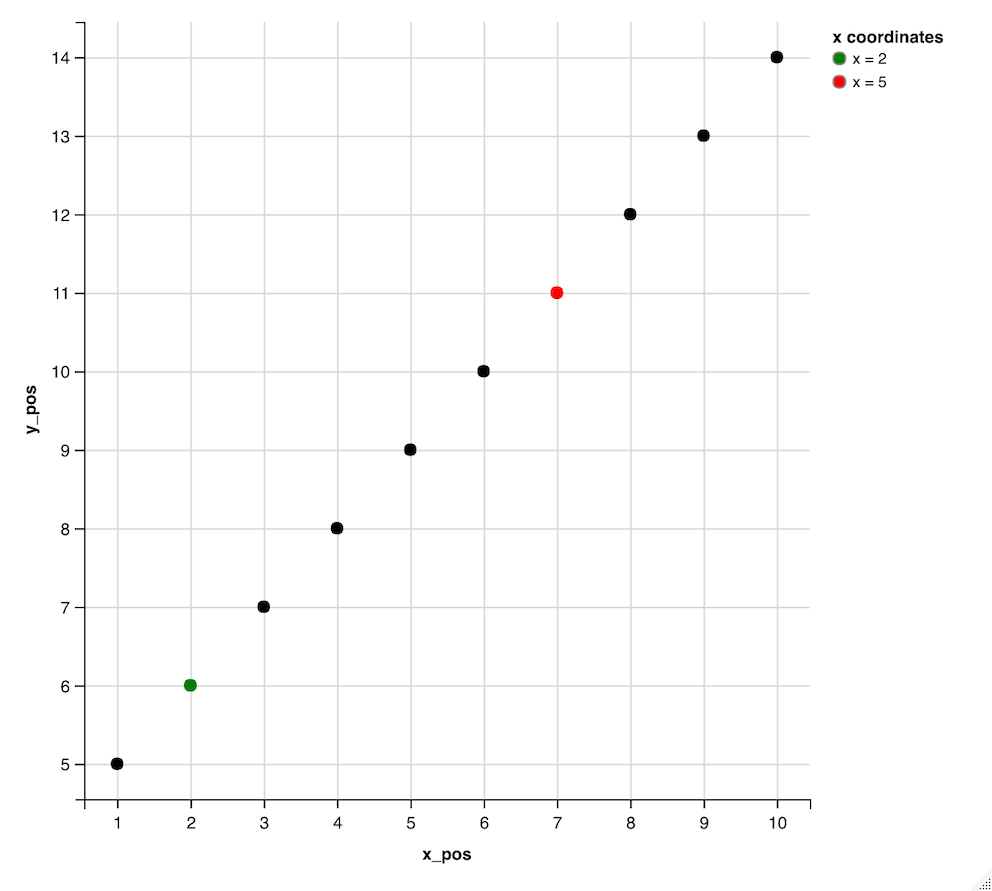
最初,在R中使用指定的数据点创建一个数据框。使用subset()方法创建数据框的两个子集。然后使用管道操作符对数据框进行ggvis方法处理。然后用点来绘制,然后用视觉填充属性来表示这些点。图例被添加了一个标题。
# installing the required libraries
library(ggplot2)
library(ggvis)

# creating the data frame by defining
# the x and y coordinates respectively
x_pos <- 1:10

# defining the y axis
y_pos = 5:14

# creating the data frame
data_frame = data.frame(x_pos, y_pos )
print("Data Frame")
print(data_frame)

 # creating a subset of the dataset
# where x_pos value is equivalent to 2
df1 <- subset(data_frame, x_pos == 2)

# creating a subset of the dataset
# where x_pos value is equivalent to 2
df2 <- subset(data_frame, x_pos == 7)

# plotting the tick marks on the axes
data_frame %>%
ggvis(~x_pos,~y_pos) %>%

# marking the point labels for
# the coordinates
layer_points() %>%

# marking x = 2 with green color
layer_points(data = df1, fill = ~"x = 2") %>%

# marking x = 5 with green color
layer_points(data = df2, fill = ~"x = 5") %>%
scale_nominal("fill", range = c("green", "red") ) %>%

# creating solid color dots
add_legend("fill", title = "x coordinates" )
输出
[1] "Data Frame"
> print(data_frame)
 x_pos y_pos
1      1     5
2      2     6
3      3     7
4      4     8
5      5     9
6      6    10
7      7    11
8      8    12
9      9    13
10    10    14

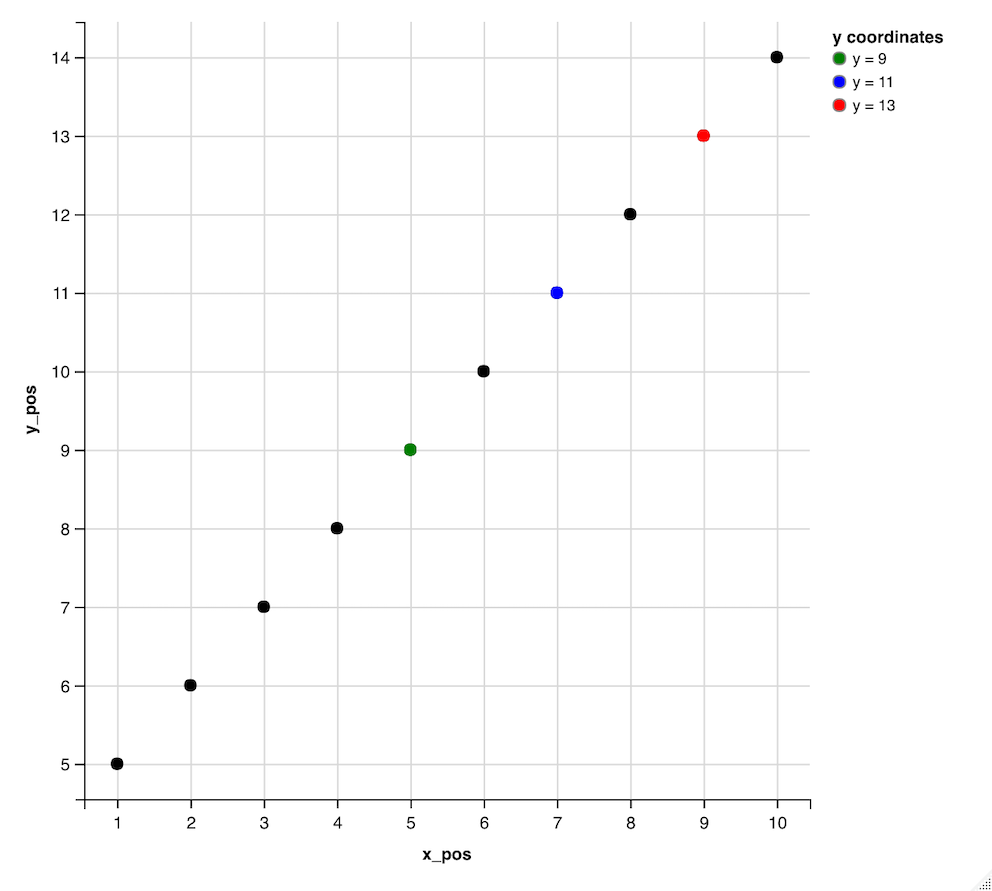
下面的代码片断说明了由y_pos数据点指示的数据帧y坐标的绘制。这些点分别用不同的颜色和填充属性值来标示。
# installing the required libraries
library(ggplot2)
library(ggvis)

# creating the data frame by defining
# the x and y coordinates respectively
x_pos < - 1: 10

# defining the y axis
y_pos = 5: 14

# creating the data frame
data_frame = data.frame(x_pos, y_pos)
print("Data Frame")
print(data_frame)

# creating a subset of the dataset where
# y_pos value is equivalent to 9
df1 < - subset(data_frame, y_pos == 9)

# creating a subset of the dataset where
# y_pos value is equivalent to 11
df2 < - subset(data_frame, y_pos == 11)

# creating a subset of the dataset where
# y_pos value is equivalent to 13
df3 < - subset(data_frame, y_pos == 13)

# plotting the tick marks on the axes
data_frame % >%
ggvis(~x_pos, ~y_pos) % >%

# marking the point labels for the
# coordinates
layer_points() % >%

# marking x = 2 with green color
layer_points(data=df1, fill=~"y = 9") % >%
layer_points(data=df2, fill=~"y = 11") % >%
layer_points(data=df3, fill=~"y = 13") % >%
scale_nominal("fill", range=c("green", "blue", "red")) % >%

# creating solid color dots
add_legend("fill", title="y coordinates")
输出
[1] "Data Frame"
> print(data_frame)
x_pos y_pos
1      1     5
2      2     6
3      3     7
4      4     8
5      5     9
6      6    10
7      7    11
8      8    12
9      9    13
10    10    14

 极客教程
极客教程