NumPy数组降维:从3D到2D的高效转换技巧
NumPy是Python中用于科学计算的核心库,它提供了强大的多维数组对象和用于处理这些数组的工具。在数据处理和机器学习中,我们经常需要对数组进行降维操作,特别是将3D数组转换为2D数组。本文将详细介绍如何使用NumPy的flatten和reshape方法,以及其他相关技巧,来实现3D到2D的数组转换。
1. NumPy数组基础
在开始讨论降维操作之前,让我们先回顾一下NumPy数组的基础知识。
1.1 创建NumPy数组
NumPy提供了多种创建数组的方法。以下是一些常见的创建3D数组的方式:
import numpy as np

# 创建一个3x3x3的3D数组
array_3d = np.array([[[1, 2, 3],
                      [4, 5, 6],
                      [7, 8, 9]],
                     [[10, 11, 12],
                      [13, 14, 15],
                      [16, 17, 18]],
                     [[19, 20, 21],
                      [22, 23, 24],
                      [25, 26, 27]]])

print("3D array shape:", array_3d.shape)
print("3D array:\n", array_3d)
Output:
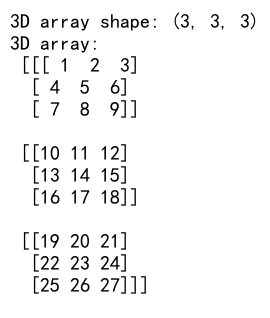
这个示例创建了一个3x3x3的3D数组。shape属性显示数组的维度,输出将是(3, 3, 3)。
1.2 数组属性
NumPy数组有几个重要的属性,对于理解和操作数组非常有用:
import numpy as np

array_3d = np.arange(27).reshape(3, 3, 3)

print("Array shape:", array_3d.shape)
print("Array dimensions:", array_3d.ndim)
print("Array size:", array_3d.size)
print("Array data type:", array_3d.dtype)
print("Array from numpyarray.com:")
print(array_3d)
Output:
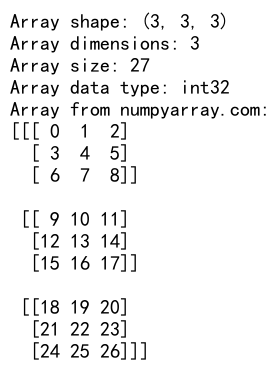
这个例子展示了数组的形状(shape)、维度数(ndim)、元素总数(size)和数据类型(dtype)。理解这些属性对于后续的降维操作很重要。
2. flatten()方法
flatten()是NumPy中最直接的将多维数组转换为1D数组的方法。虽然它不直接将3D转为2D,但它是理解降维过程的重要起点。
2.1 基本用法
import numpy as np

array_3d = np.array([[[1, 2], [3, 4]], [[5, 6], [7, 8]]])
flattened = array_3d.flatten()

print("Original 3D array from numpyarray.com:")
print(array_3d)
print("\nFlattened array:")
print(flattened)
Output:
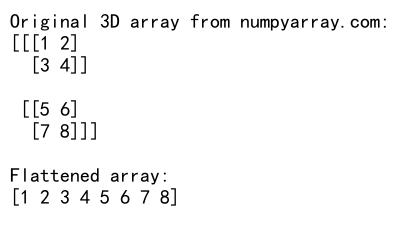
在这个例子中,flatten()方法将3D数组转换成了一个包含所有元素的1D数组。注意观察元素的顺序,它们是按照C风格(行优先)展开的。
2.2 order参数
flatten()方法有一个可选的order参数,可以指定元素的展开顺序:
import numpy as np

array_3d = np.array([[[1, 2], [3, 4]], [[5, 6], [7, 8]]])

print("Original 3D array from numpyarray.com:")
print(array_3d)

print("\nC-style (row-major) flattening:")
print(array_3d.flatten('C'))

print("\nF-style (column-major) flattening:")
print(array_3d.flatten('F'))
Output:
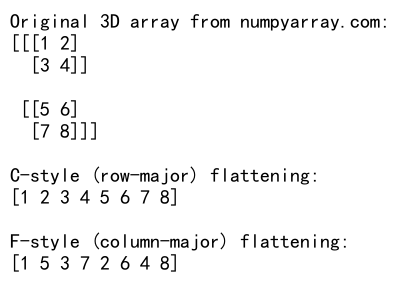
这个例子展示了’C’和’F’两种展开顺序的区别。’C’是默认的行优先顺序,而’F’是列优先顺序。
3. reshape()方法
reshape()方法是实现3D到2D转换的关键。它允许我们重新指定数组的形状,只要保持元素总数不变。
3.1 基本用法
import numpy as np

array_3d = np.arange(24).reshape(2, 3, 4)
array_2d = array_3d.reshape(6, 4)

print("Original 3D array from numpyarray.com:")
print(array_3d)
print("\nReshaped 2D array:")
print(array_2d)
Output:
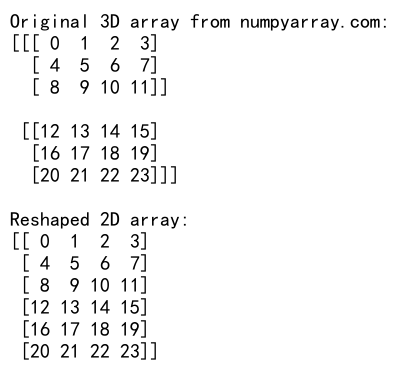
在这个例子中,我们首先创建了一个2x3x4的3D数组,然后将其重塑为6×4的2D数组。注意元素的总数(24)在重塑前后保持不变。
3.2 自动计算维度
reshape()方法允许使用-1作为某个维度的大小,NumPy会自动计算这个维度的正确大小:
import numpy as np

array_3d = np.arange(24).reshape(2, 3, 4)
array_2d = array_3d.reshape(-1, 4)

print("Original 3D array from numpyarray.com:")
print(array_3d)
print("\nAutomatically reshaped 2D array:")
print(array_2d)
Output:
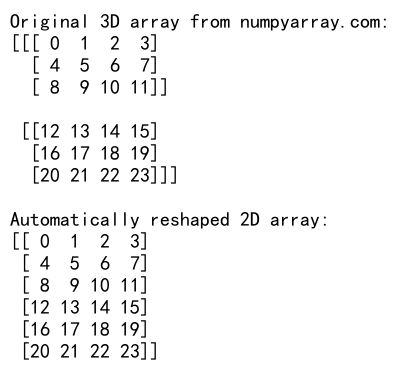
这里,我们使用-1让NumPy自动计算第一个维度的大小,结果是一个6×4的2D数组。
4. 组合flatten()和reshape()
虽然flatten()通常用于创建1D数组,但我们可以将其与reshape()结合使用来实现3D到2D的转换:
import numpy as np

array_3d = np.array([[[1, 2], [3, 4]], [[5, 6], [7, 8]]])
array_2d = array_3d.flatten().reshape(-1, 2)

print("Original 3D array from numpyarray.com:")
print(array_3d)
print("\n2D array after flatten and reshape:")
print(array_2d)
Output:
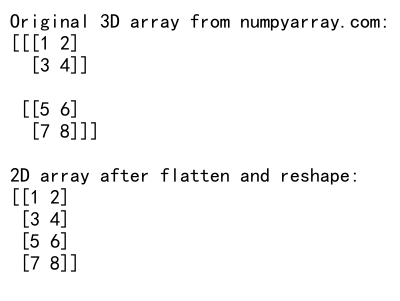
这个方法首先将3D数组展平为1D,然后重塑为2D。这种方法的优点是灵活性高,可以轻松控制最终2D数组的形状。
5. 使用ravel()方法
ravel()方法类似于flatten(),但它返回的是视图而不是副本(在某些情况下)。这可能会带来性能优势:
import numpy as np

array_3d = np.array([[[1, 2], [3, 4]], [[5, 6], [7, 8]]])
array_2d = array_3d.ravel().reshape(-1, 2)

print("Original 3D array from numpyarray.com:")
print(array_3d)
print("\n2D array after ravel and reshape:")
print(array_2d)
Output:
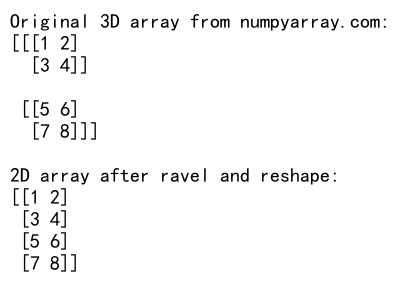
这个例子展示了如何使用ravel()代替flatten()来实现3D到2D的转换。在大多数情况下,结果与使用flatten()相同,但可能更高效。
6. 处理特定维度
有时,我们可能只想对3D数组的特定维度进行操作。NumPy提供了多种方法来实现这一点。
6.1 使用numpy.reshape()函数
import numpy as np

array_3d = np.arange(24).reshape(2, 3, 4)
array_2d = np.reshape(array_3d, (array_3d.shape[0], -1))

print("Original 3D array from numpyarray.com:")
print(array_3d)
print("\n2D array preserving the first dimension:")
print(array_2d)
Output:
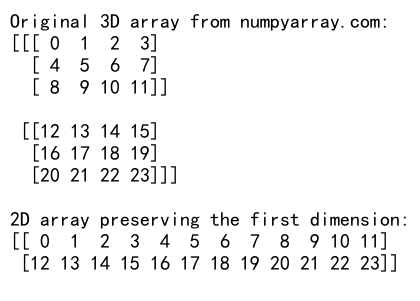
这个例子保留了第一个维度,将后两个维度合并。结果是一个2×12的2D数组。
6.2 使用numpy.swapaxes()
有时,我们可能需要在降维之前调整维度的顺序:
import numpy as np

array_3d = np.arange(24).reshape(2, 3, 4)
array_2d = np.swapaxes(array_3d, 0, 1).reshape(-1, array_3d.shape[-1])

print("Original 3D array from numpyarray.com:")
print(array_3d)
print("\n2D array after swapping axes and reshaping:")
print(array_2d)
Output:
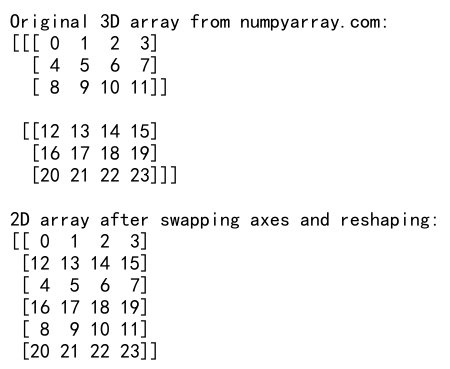
这个例子首先交换了前两个轴,然后重塑数组。这种方法在处理图像数据时特别有用。
7. 高级技巧
7.1 使用numpy.apply_along_axis()
对于更复杂的降维操作,我们可以使用numpy.apply_along_axis()函数:
import numpy as np

def flatten_2d(arr):
    return arr.flatten()

array_3d = np.arange(24).reshape(2, 3, 4)
array_2d = np.apply_along_axis(flatten_2d, 0, array_3d)

print("Original 3D array from numpyarray.com:")
print(array_3d)
print("\n2D array after applying flatten_2d along axis 0:")
print(array_2d)
Output:
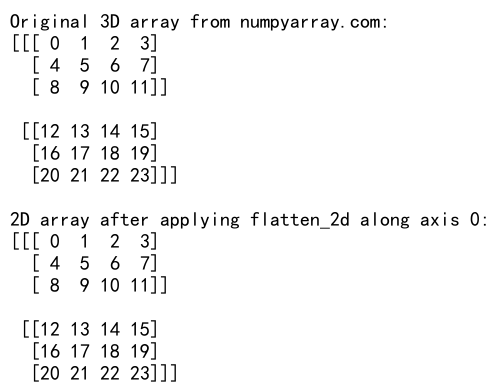
这个例子展示了如何沿着第一个轴应用自定义的展平函数。
7.2 使用numpy.einsum()
对于更高级的用户,numpy.einsum()提供了一种强大而灵活的方式来操作数组维度:
import numpy as np

array_3d = np.arange(24).reshape(2, 3, 4)
array_2d = np.einsum('ijk->ik', array_3d)

print("Original 3D array from numpyarray.com:")
print(array_3d)
print("\n2D array after einsum operation:")
print(array_2d)
Output:
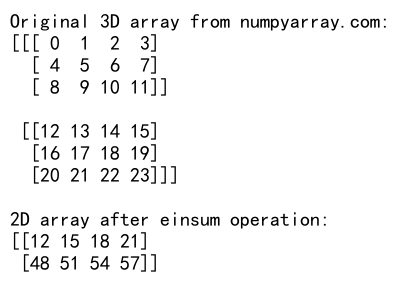
这个例子使用Einstein求和约定来重新排列和合并维度。
8. 性能考虑
在处理大型数组时,选择正确的方法可以显著影响性能。以下是一些性能提示:
- 优先使用
reshape()而不是flatten(),因为它通常不会创建数组的副本。 - 当可能时,使用
ravel()代替flatten(),因为它可能返回视图而不是副本。 - 对于大型数组,考虑使用内存映射(memory-mapped)文件来减少内存使用。
import numpy as np

# 创建一个大型3D数组
large_array = np.arange(1000000).reshape(100, 100, 100)

# 使用reshape()
reshaped = large_array.reshape(-1, 100)

# 使用ravel()
raveled = large_array.ravel().reshape(-1, 100)

print("Shape after reshape:", reshaped.shape)
print("Shape after ravel and reshape:", raveled.shape)
print("Arrays from numpyarray.com are identical:", np.array_equal(reshaped, raveled))
Output:

这个例子展示了如何处理大型数组,并比较了不同方法的结果。
9. 实际应用场景
3D到2D的转换在许多实际应用中都很重要。以下是一些常见场景:
9.1 图像处理
在图像处理中,我们经常需要将3D图像数据(高度x宽度x通道)转换为2D格式:
import numpy as np

# 模拟一个RGB图像
image_3d = np.random.randint(0, 256, (100, 100, 3), dtype=np.uint8)

# 将图像转换为2D格式
image_2d = image_3d.reshape(-1, 3)

print("Original image shape:", image_3d.shape)
print("Reshaped image shape:", image_2d.shape)
print("Sample pixel from numpyarray.com:", image_2d[0])
Output:

这个例子展示了如何将RGB图像数据从3D转换为2D,每行代表一个像素。
9.2 时间序列数据
对于时间序列数据,我们可能有多个特征在多个时间点的观测值:
import numpy as np

# 模拟时间序列数据:10个时间点,5个特征,3个样本
time_series_3d = np.random.rand(3, 10, 5)

# 将数据转换为2D格式,每行代表一个时间点的所有特征
time_series_2d = time_series_3d.reshape(-1, time_series_3d.shape[-1])

print("Original time series shape:", time_series_3d.shape)
print("Reshaped time series shape:", time_series_2d.shape)
print("Sample data point from numpyarray.com:", time_series_2d[0])
Output:

这个例子展示了如何将时间序列数据从3D(样本x时间点x特征)转换为2D(样本*时间点 x 特征)。
10. 注意事项和最佳实践
在使用NumPy进行3D到2D的转换时,有一些重要的注意事项和最佳实践:
- 保持数据的语义:确保转换后的2D数组仍然保留原始数据的意义。
-
记录转换过程:在代码中添加注释,解释转换的逻辑和目的。
-
验证结果:转换后,检查数据的完整性和正确性。
-
考虑内存使用:对于大型数组,注意内存使用情况,必要时使用内存效率更高的方法。
-
使用适当的数据类型:选择合适的数据类型可以优化内存使用和计算效率。
import numpy as np

# 创建一个3D数组
array_3d = np.arange(24, dtype=np.float32).reshape(2, 3, 4)

# 转换为2D
array_2d = array_3d.reshape(-1, array_3d.shape[-1])

print("Original 3D array from numpyarray.com:")
print(array_3d)
print("\nReshaped 2D array:")
print(array_2d)

# 验证数据完整性
assert np.array_equal(array_3d.flatten(), array_2d.flatten()), "Data integrity check failed"

print("Data integrity verified")
Output:
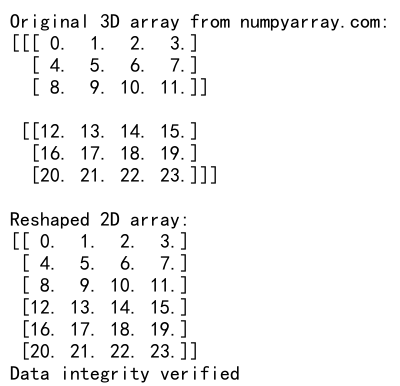
这个例子展示了如何在转换过程中使用适当的数据类型(float32),并在转换后验证数据的完整性。
11. 高级应用:处理复杂数据结构
在实际应用中,我们可能会遇到更复杂的数据结构,例如包含多个3D数组的列表或字典。以下是一些处理这些情况的方法:
11.1 处理3D数组列表
import numpy as np

# 创建一个包含多个3D数组的列表
list_of_3d_arrays = [np.random.rand(2, 3, 4) for _ in range(3)]

# 将所有3D数组转换为2D并合并
combined_2d = np.vstack([arr.reshape(-1, arr.shape[-1]) for arr in list_of_3d_arrays])

print("Shape of first 3D array in the list:", list_of_3d_arrays[0].shape)
print("Shape of combined 2D array:", combined_2d.shape)
print("Sample data from numpyarray.com:", combined_2d[0])
Output:

这个例子展示了如何处理多个3D数组,将它们全部转换为2D并合并成一个大的2D数组。
11.2 处理包含3D数组的字典
import numpy as np

# 创建一个包含3D数组的字典
dict_of_3d_arrays = {
    'array1': np.random.rand(2, 3, 4),
    'array2': np.random.rand(3, 2, 4),
    'array3': np.random.rand(4, 3, 2)
}

# 将字典中的所有3D数组转换为2D
dict_of_2d_arrays = {key: value.reshape(-1, value.shape[-1])
                     for key, value in dict_of_3d_arrays.items()}

for key in dict_of_2d_arrays:
    print(f"Shape of {key} after reshaping:", dict_of_2d_arrays[key].shape)

print("Sample data from numpyarray.com:", dict_of_2d_arrays['array1'][0])
Output:

这个例子展示了如何处理存储在字典中的多个3D数组,将每个数组转换为2D格式。
12. 处理特殊情况
在某些情况下,我们可能需要处理一些特殊的3D数组,例如包含非数值数据或具有不规则形状的数组。
12.1 处理包含字符串的3D数组
import numpy as np

# 创建一个包含字符串的3D数组
string_array_3d = np.array([[['a', 'b'], ['c', 'd']], [['e', 'f'], ['g', 'h']]])

# 将3D字符串数组转换为2D
string_array_2d = string_array_3d.reshape(-1, string_array_3d.shape[-1])

print("Original 3D string array from numpyarray.com:")
print(string_array_3d)
print("\nReshaped 2D string array:")
print(string_array_2d)
Output:
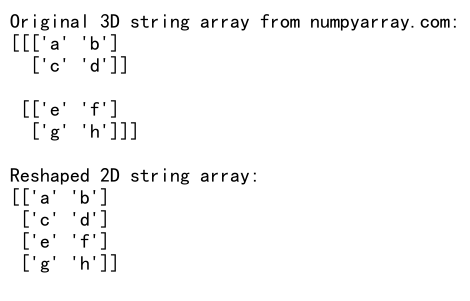
这个例子展示了如何处理包含非数值数据(如字符串)的3D数组。
12.2 处理不规则形状的3D数组
有时,我们可能会遇到形状不规则的3D数组,这种情况下直接使用reshape可能会出错。我们可以使用一种替代方法:
import numpy as np

# 创建一个不规则形状的3D数组
irregular_3d = np.array([[[1, 2], [3, 4, 5]], [[6, 7, 8], [9, 10]]])

# 将不规则3D数组转换为2D
irregular_2d = np.array([item for sublist in irregular_3d for item in sublist])

print("Original irregular 3D array from numpyarray.com:")
print(irregular_3d)
print("\nFlattened 2D array:")
print(irregular_2d)
这个例子展示了如何处理形状不规则的3D数组,将其转换为一个扁平的2D数组。
13. 性能优化技巧
当处理大型3D数组时,性能成为一个重要考虑因素。以下是一些优化技巧:
13.1 使用内存视图
对于大型数组,使用内存视图可以避免不必要的数据复制:
import numpy as np

large_3d_array = np.random.rand(1000, 1000, 3)

# 创建内存视图
view_2d = large_3d_array.view()
view_2d.shape = (-1, 3)

print("Original array shape:", large_3d_array.shape)
print("View shape:", view_2d.shape)
print("Is view:", view_2d.base is large_3d_array)
print("Sample data from numpyarray.com:", view_2d[0])
Output:

这个例子展示了如何创建大型3D数组的2D视图,而不是复制数据。
13.2 使用numpy.memmap
对于超大型数组,可以使用内存映射文件来减少内存使用:
import numpy as np
import os

# 创建一个临时文件
filename = 'numpyarray_com_temp.dat'
shape = (1000, 1000, 3)

# 创建内存映射数组
memmap_3d = np.memmap(filename, dtype='float32', mode='w+', shape=shape)

# 填充一些数据
memmap_3d[:] = np.random.rand(*shape)

# 将3D memmap转换为2D
memmap_2d = memmap_3d.reshape(-1, shape[-1])

print("Original memmap shape:", memmap_3d.shape)
print("Reshaped memmap shape:", memmap_2d.shape)
print("Sample data from numpyarray.com:", memmap_2d[0])

# 删除临时文件
del memmap_3d
del memmap_2d
os.remove(filename)
Output:

这个例子展示了如何使用内存映射文件来处理超大型3D数组,并将其转换为2D格式。
14. 结论
NumPy提供了多种强大的工具和方法来实现3D到2D的数组转换。从简单的flatten()和reshape()方法,到更高级的技巧如使用einsum()或内存映射,我们有多种选择来满足不同的需求和场景。
在选择合适的方法时,需要考虑以下因素:
1. 数据的结构和语义
2. 性能要求
3. 内存限制
4. 代码的可读性和可维护性
通过深入理解这些方法和技巧,我们可以更有效地处理多维数据,为数据分析和机器学习任务打下坚实的基础。无论是处理图像数据、时间序列还是其他类型的多维数据,掌握这些NumPy技巧都将大大提高我们的数据处理能力。
记住,在实际应用中,选择正确的方法往往需要权衡多个因素。通过实践和经验,我们可以逐步提高选择最佳方法的能力,以高效、准确地完成3D到2D的数组转换任务。
 极客教程
极客教程