如何使用Node.js在GET方法中检查用户身份验证
有许多身份验证方法,如Web令牌身份验证、基于Cookie的身份验证等。在本文中,我们将讨论使用express.js处理客户端请求时的一种最简单的身份验证方法,通过使用HTTP头部帮助get请求。
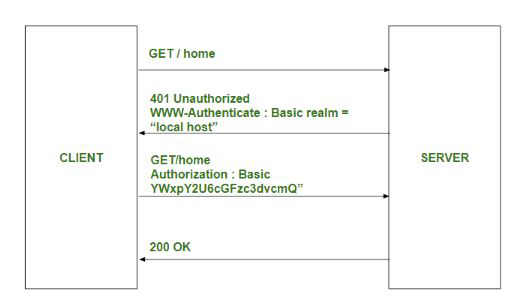
方法:HTTP协议使用各种类型的头部来验证客户端,我们将使用WWW-Authenticate头部进行身份验证。HTTP WWW-Authenticate头部是一种响应类型的头部,并且作为支持各种身份验证机制的重要工具,可以控制对页面和其他资源的访问。
身份验证的解释:

当客户端的请求头中不包含WWW-Authenticate头时,服务器的响应头会设置该头。
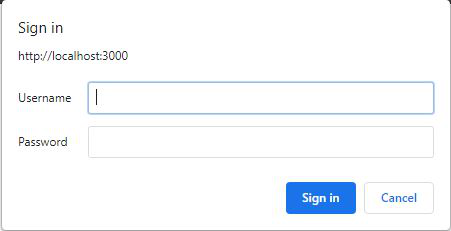
header的设置是res.setHeader("WWW-Authenticate", "Basic"),并设置状态码为401。之后,在客户端会弹出一个窗口用于有效的身份验证。
身份验证表单:

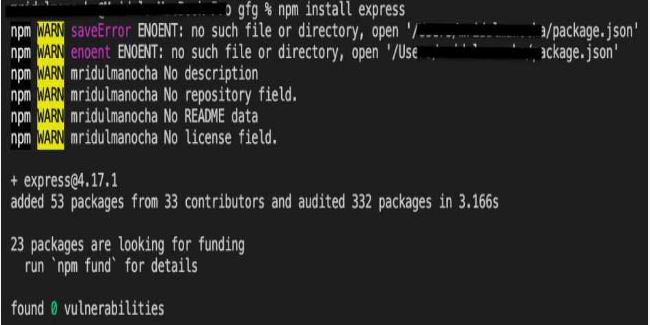
模块安装: 使用以下命令安装express模块。
npm install express

项目结构:

index.js
// Importing required modules
const { response } = require("express");
const express = require("express");
const app=express()

// Handling get request from the client side
app.get("/",(req,res,next)=>{

     // Checking the header of the authorization
    var authheader=req.headers.authorization;
    console.log(authheader)
    if(!authheader){

        var err=new Error("You are not authenticated")
        // Set the header for the response
        res.setHeader("WWW-Authenticate",'Basic')
        err.status=401
        return next(err)

    }
    console.log(authheader)

    // Decrypt the user name and the password
    var auth = new Buffer.from(authheader.split(' ')[1],
    'base64').toString().split(':');
    var user = auth[0];
    var pass = auth[1];

    // Checking the details
    if (user == 'admin' && pass == 'password') {
      res.send("Welcome you are authorized")
    } else {
        var err = new Error('You are not authenticated!');
        res.setHeader('WWW-Authenticate', 'Basic');
        err.status = 401;
        return next(err);
    }

})
app.listen(3000,()=>{
  console.log("Server is starting")
})
使用以下命令运行 index.js :
node index.js
输出:
- 通过在隐私窗口中打开任何带有 http://localhost:3000 地址的浏览器(为了避免保存的密码和用户名),将出现一个弹出窗口。填写代码中提到的用户名和密码。

-
如果输入的用户名和密码与提到的匹配,那么浏览器将呈现 index.html 。

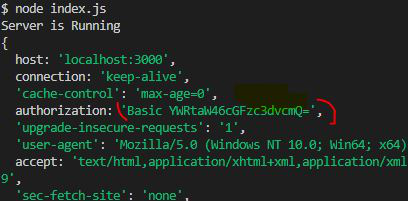
解释: 当服务器启动并且客户端输入本地主机地址时,首个中间件用于检查客户端的身份验证。最初, req.headers.authorization 未定义,并通过next()回调函数返回401状态码表示未经授权访问浏览器。客户端填写凭证,并将凭证以base64格式加密。然后,解密包含用户名和密码的base64格式数据,并在检查用户名和密码正确后,调用next()方法调用身份验证中间件之下的下一个中间件;否则,身份验证表单会一次又一次地弹出。
请求头详细信息:

 极客教程
极客教程