Node.js 解释护照
护照是一种非常容易集成的NodeJs包,用于向我们的网站或Web应用程序添加认证功能。
为了展示在Nodejs中使用护照,我们首先创建一个非常简单的Node应用程序。
使用express创建一个简单的Node应用程序:
步骤1: 创建一个新文件夹(我将文件夹命名为“NODEAPP”),在其中创建一个名为“Server.js”的新文件。
步骤2: 使用命令“npm init -y”初始化npm。Package.json文件将添加到你的项目文件夹中。
npm init-y

步骤3: 安装所有必要的包,例如, express , body-parser (稍后用于提取 HTML 表单数据), mongoose (用于连接到我们的 MongoDB 数据库),使用以下命令:
npm install express body-parser mongoose

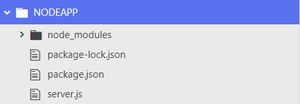
执行上面的命令后,将会向你的项目结构中添加一个名为“ package-lock.json ”的文件,以及一个名为“ node_modules ”的文件夹。
项目结构: 最终的项目结构应该如下所示:

步骤4: 在我们的 Server.js 文件中添加基本代码。
Server.js
// Telling node to include the following
// external modules
var express = require('express');
var app = express();

// Mongoose for connecting to our database
const mongoose = require("mongoose");

// Body parser to fetch HTML form data later on
const bodyParser = require("body-parser");

// Connecting mongoose to our database
// named "userDatabase"
mongoose.connect(
'mongodb://localhost:27017/userDatabase', {
  useNewUrlParser: true,
  useUnifiedTopology: true
});

// Handling get request on home route.
app.get("/", function (req, res) {
    res.send("This is the home route");
});

// Allowing app to listen on port 3000
app.listen(3000, function () {
    console.log("server started successfully");
})
步骤5: 您还可以通过打开浏览器并键入 http://localhost:3000 来进行检查。您应该看到一个带有以下响应的空白页面。

步骤6: 为我们的网站添加身份验证。为我们的网站添加身份验证功能的一种简单方法是从用户获取电子邮件和密码输入,并直接将它们保存在数据库中。类似地,当用户想要登录时,要求输入他/她的电子邮件和密码,如果有任何记录与输入的电子邮件和密码匹配,则用户是合法的,登录成功。
Server.js
/*We are going to add simple authentication to our website
We are going to collect data(email and password) entered by
user in the HTML form, created in the INDEX.HTML file, and
we are going to store that data in our database
this is how we can simply register any new user */

/* if we want to log in our already registered user,
then we collect email and password from HTML
form created in LOGIN.HTML file, and
we can find data(if any) associated with this
email, and return it to user */

var express = require('express');
var app = express();
const bodyParser = require("body-parser");

// Allowing app to use body parser
app.use(bodyParser.urlencoded({extended:true}));

// Connecting mongoose to our database
// named "userDatabase"
mongoose.connect(
'mongodb://localhost:27017/userDatabase' {
  useNewUrlParser: true,
  useUnifiedTopology: true
});

const userSchema = new mongoose.Schema({
  email: String,
  password: String
});

// Creating the User model.
const User = new mongoose.model("User", userSchema);


/* setting a simple get request on the home route,
and sending our index.html file containing a form
which will allow user to enter his details and
register. */
app.get("/", function (req, res) {
  res.sendFile(__dirname + "/index.html");
})
app.get("/login", function(req, res) {
  res.sendFile(__dirname + "/login.html");
})

// Handling the post request on /register route.
app.post("/register", function(req, res){
  console.log(req.body);

  // Getting the email and password entered
  // by the user
  var email = req.body.username;
  var password = req.body.password;

  // Creating a new user with entered credentials.
  var newuser = new User({
    email : email,
    password : password
  })

  // Saving the newuser.
  newuser.save();
  console.log("saved successfully");

  // Sending the response that user
  // is saved successfully
  res.send("saved successfully");
})

APP.post("/login", function(req, res) {
    console.log(req.body);

    // Getting the email and password entered
    // by the user
    var emailEntered = req.body.username;
    var passwordEntered = req.body.password;

    // Checking if the email entered exists
    // in database or not.
    User.findOne({email : emailEntered},
                 function(err, data){
       if(data) {

           // The email exists in the database.
           console.log(data);

           /* checking if the password entered
           is matching the original password */
           if(data.password == passwordEntered){
               res.send("login successful!");
           }
           else {

               // Password is incorrect.
               res.send("Incorrect Password");
            }
       }
       else {

           // The email does not exist in the database
           console.log(err);
       }
    });
})

// Allowing app to listen on port 3000
app.listen(3000, function () {
  console.log("server started successfully");
})
Index.html
<!DOCTYPE html>
<html>

<head>
    <title>Page Title</title>
</head>

<body>
    <form class="" action="/register"
          method="post">
        <input type="email" name="username"
               placeholder="Name" value="">
        <input type="password" name="password"
               placeholder="Password" value="">
        <button type="submit" name="button">
            Submit
        </button>
    </form>
</body>

</html>
login.html
<!DOCTYPE html>
<html lang="en" dir="ltr">

<head>
    <meta charset="utf-8">
    <title></title>
</head>

<body>
    <form class="" action="/login" method="post">
        <input type="email" name="username"
               placeholder="Name" value="">
        <input type="password" name="password"
               placeholder="Password" value="">
        <button type="submit" name="button">
            Submit
        </button>
    </form>
</body>

</html>
但是使用这种简单的身份验证方法有一些限制。
- 用户在注册过程中输入的密码 对所有人都暴露在数据库中 ,也就是说,任何可以访问数据库的组织内成员都可以看到任何用户的密码。但是,密码不能被暴露,我们需要 强大的加密 来安全存储密码在数据库中。

- 每次(可能每天20-25次甚至更多)我们想使用这个网络应用程序或网站时,都需要重新输入我们的电子邮件和密码,这非常耗时。
- 我们无法使用这个简单的身份验证代码添加社交网络登录功能。
Passport为我们消除了所有这些限制。如果使用Passport:
- 我们不必暴露密码。整个加密和解密过程由Passport完成,包括密码的哈希和加密。
- Passport允许我们创建和维护会话。例如,当你访问任何社交媒体网站或移动应用时,你不必每次想使用Instagram或Facebook时都要重新登录。相反,信息会被保存,这意味着你不必每次想使用网站时都要登录。技术上来说,一个会话已经创建,并将在接下来的几天、几周或几个月内维护。
- Passport还允许我们轻松集成使用Google、Facebook、LinkedIn和其他各种社交网络服务的身份验证。
步骤7: 为了使用Passport,我们必须安装4个npm包,分别是“passport”、“passport-local”、“passport-local-mongoose”和“express-session”(确保你下载的是“express-session”而不是“express-sessions”)。
在命令行中,写入以下命令来安装这四个包:
npm install passport passport-local passport-local-mongoose express-session

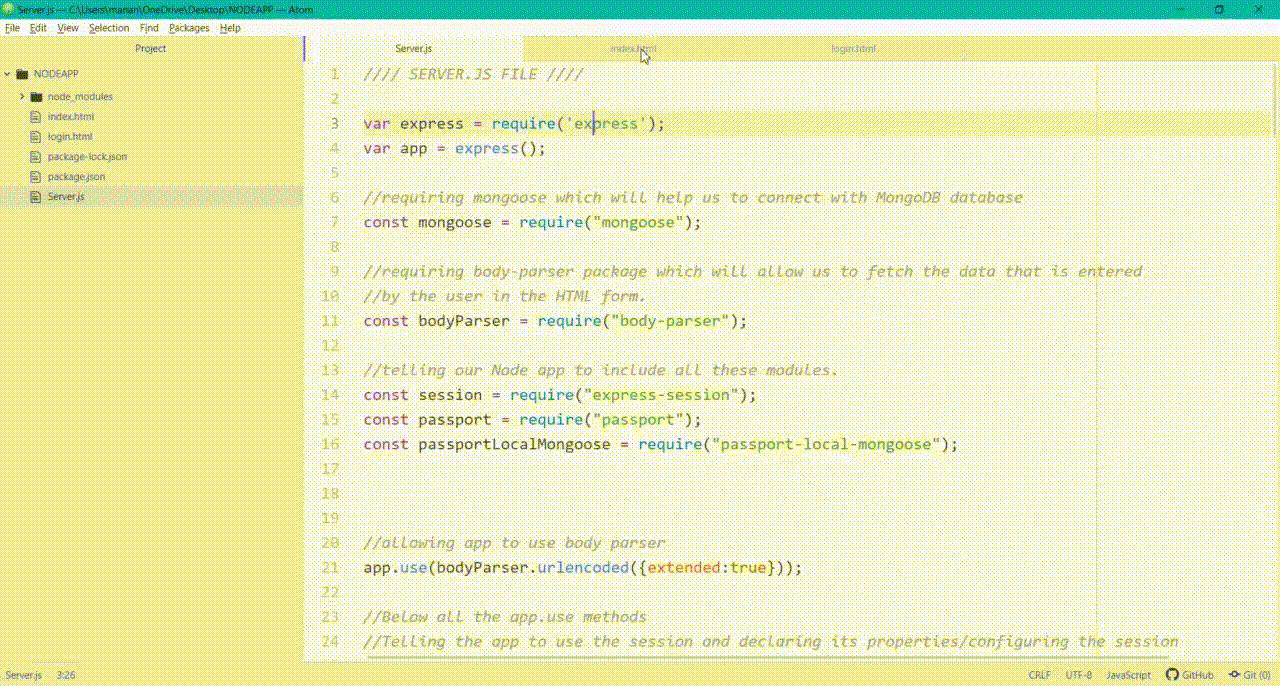
安装完成后,您需要在 Server.js 文件的顶部添加以下代码以包括护照模块。
Server.js
const session = require("express-session");
const passport = require("passport");
const passportLocalMongoose = require("passport-local-mongoose");

app.use(express.static("public"));
app.use(bodyParser.urlencoded({extended:true}));

// Below all the app.use methods
app.use(session({
    secret : "any long secret key",
    resave : false,
    saveUninitialized : false
}));
步骤8: 初始化Passport和启动会话。要初始化Passport和启动会话,请在会话声明代码的下方编写以下代码。
Server.js
app.use(session({
  secret: "any long secret key",
  resave: false,
  saveUninitialized: false
}));

// Initializing Passport
app.use(passport.initialize());

// Starting the session
app.use(passport.session());

// Creating user schema and adding a plugin to it

const userSchema = new mongoose.Schema({
  email: String,
  password: String
});
userSchema.plugin(passportLocalMongoose);
步骤9: 现在,即使我们关闭浏览器窗口,我们也希望我们能保持登录一段时间,也就是说,我们希望建立一个会话。会话使用 Cookie 来存储数据和消息,并允许服务器向用户提供正确的会话数据。创建Cookie并将消息存储到其中的过程:将Cookie序列化为消息以及从Cookie中提取消息的过程,以便向用户提供正确的数据:
Server.js
const User = new mongoose.model("User", userSchema);
passport.use(User.createStrategy());

// Serializing and deserializing
passport.serializeUser(User.serializeUser());
passport.deserializeUser(User.deserializeUser());
步骤10: 现在,我们已经准备好为我们的网站添加身份验证。 我们已经安装了必需的软件包,配置了会话,初始化了Passport和会话,并告诉Passport使用和管理cookie。
处理get请求:
Server.js
// Handling get request on the home and login route
app.get("/", function (req, res) {

  /* req.isAuthentcated() returns true or
  false depending upon whether a session
  is already running or not.*/
  if(req.isAuthenticated()) {

    /* if the request is already authenticated,
    i.e. the user has already logged in and
    there is no need to login again. Or we
    can say, the session is running. */
    res.send("
     You have already logged in. No need to login again");
  }

  else{

    // If the user is new and no session
    // is Running already
    res.sendFile(__dirname + "/index.html");
  }
})

// Handling get request on login route
app.get("/login", function(req, res) {
    if(req.isAuthenticated()){
        /* if request is already authenticated,
        i.e. user has already logged in and
        there is no need to login again. */
        res.send("
You have already logged in. No need to login again");
     }
     else{
       res.sendFile(__dirname + "/login.html");
   }
})
步骤11: 现在,在注册路由中,我们需要添加简单的代码,以便允许我们注册任何新用户。
Server.js
/* The index.html file will be same as that
used in the earlier method of authentication*/
app.post("/register", function(req, res){
  console.log(req.body);

  // Getting Email and PAssword Entered by user
  var email = req.body.username;
  var password = req.body.password;

  /* Registering the user with email and
  password in our database
  and the model used is "User" */
  User.register({ username : email },
  req.body.password, function (err, user) {
    if (err) {

      // if some error is occurring, log that error
      console.log(err);
    }
    else {
      passport.authenticate("local")
      (req, res, function() {
        res.send("successfully saved!");
      })
    }
  })
})
而且类似的代码是用来处理登录请求的。下面是处理/login路由上的POST请求的代码。(login.html文件将与之前的身份验证方法中使用的相同)
Server.js
// All handling related to login is done below.
// Here we are handling the post request on
// /login route
app.post("/login", function (req, res) {
  console.log(req.body);

  const userToBeChecked = new User({
    username: req.body.username,
    password: req.body.password,
  });

  // Checking if user if correct or not
  req.login(userToBeChecked, function (err) {
    if (err) {

      console.log(err);

      // If authentication fails, then coming
      // back to login.html page
      res.redirect("/login");
    } else {
      passport.authenticate("local")(
        req, res, function () {
        User.find({ email: req.user.username },
          function (err, docs) {
          if (err) {
            console.log(err);
          } else {
            //login is successful
            console.log("credentials are correct");
            res.send("login successful");
          }
        });
      });
    }
  });
});
只需要安装所有的软件包,编写下面的代码,启动服务器(使用“node server.js/node app.js”命令),然后您就可以使用Passport来进行用户认证。
Index.html
<!DOCTYPE html>
<html>

<head>
    <title>Page Title</title>
</head>

<body>
    <h1>REGISTER</h1>
    <form class="" action="/register" method="post">
        <input type="email" name="username"
               placeholder="Name" value="">
        <input type="password" name="password"
               placeholder="Password" value="">
        <button type="submit" name="button">
            Submit
        </button>
    </form>
</body>

</html>
login.html
<!DOCTYPE html>
<html lang="en" dir="ltr">

<head>
    <meta charset="utf-8">
    <title></title>
</head>

<body>
    <h1>LOGIN</h1>
    <form class="" action="/login" method="post">
        <input type="email" name="username"
               placeholder="Name" value="">
        <input type="password" name="password"
               placeholder="Password" value="">
        <button type="submit" name="button">
            Submit
        </button>
    </form>
</body>

</html>
server.js
var express = require('express');
var app = express();
const mongoose = require("mongoose");

/* Requiring body-parser package
to fetch the data that is entered
by the user in the HTML form.*/
const bodyParser = require("body-parser");

// Telling our Node app to include all these modules
const session = require("express-session");
const passport = require("passport");
const passportLocalMongoose =
       require("passport-local-mongoose");

// Allowing app to use body parser
app.use(bodyParser.urlencoded({ extended: true }));

app.use(session({
    secret: "long secret key",
    resave: false,
    saveUninitialized: false
}));

// Initializing Passport
app.use(passport.initialize());

// Starting the session
app.use(passport.session());

// Connecting mongoose to our database
mongoose.connect(
'mongodb://localhost:27017/userDatabase', {
    useNewUrlParser: true,
    useUnifiedTopology: true
});

/* Creating the schema of user which now
include only email and password for
simplicity.*/
const userSchema = new mongoose.Schema({
    email: String,
    password: String
});

/* Just after the creation of userSchema,
we add passportLocalMongoose plugin
to our Schema */
userSchema.plugin(passportLocalMongoose);

// Creating the User model
const User = new mongoose.model("User", userSchema);

/* After the creation of mongoose model,
we have to write the following code */
passport.use(User.createStrategy());

// Serializing and deserializing
passport.serializeUser(User.serializeUser());
passport.deserializeUser(User.deserializeUser());

// Handling get request on the home route
app.get("/", function (req, res) {

    /* req.isAuthentcated() returns true or
    false depending upon whether a session is
    already running or not. */
    if (req.isAuthenticated()) {

        /* if request is already authenticated,
        i.e. user has already logged in and
        there is no need to login again or
        we can say, session is running.*/
        res.send(
"You have already logged in. No need to login again");
    }

    else {

        // If the user is new and
        // no session is Running already
        res.sendFile(__dirname + "/index.html");
    }
})


// Handling get request on login route
app.get("/login", function (req, res) {
    if (req.isAuthenticated()) {

        /* If request is already authenticated,
        i.e. user has already logged in and
        there is no need to login again. */
        res.send(
"You have already logged in. No need to login again");
    }
    else {

        /* if session has expired, then user
         need to login back again and
         we will send the Login.html */
        res.sendFile(__dirname + "/login.html");
    }
})

/* Registering the user for the first time
handling the post request on /register route.*/
app.post("/register", function (req, res) {
    console.log(req.body);
    var email = req.body.username;
    var password = req.body.password;
    User.register({ username: email },
        req.body.password, function (err, user) {
            if (err) {
                console.log(err);
            }
            else {
                passport.authenticate("local")
                 (req, res, function () {
                    res.send("successfully saved!");
                })
            }
        })
})

// Handling the post request on /login route
app.post("/login", function (req, res) {
    console.log(req.body);

    const userToBeChecked = new User({
        username: req.body.username,
        password: req.body.password
    });

    // Checking if user if correct or not
    req.login(userToBeChecked, function (err) {
        if (err) {
            console.log(err);
            res.redirect("/login");
        }
        else {
            passport.authenticate("local")
                (req, res,function () {
                User.find({ email: req.user.username },
                    function (err, docs) {
                      if (err) {
                         console.log(err);
                      }
                     else {

                       //login is successful
                       console.log("credentials are correct");
                     res.send("login successful");
                        }
                    });
            });
        }
    })
})

// Allowing app to listen on port 3000
app.listen(3000, function () {
    console.log("server started successfully");
})
使用这段代码,并使用Passport进行身份验证,我们解决了三个主要问题:
- 一旦我们登录,就会创建一个会话。这意味着每当我们再次打开网站时,就不需要再次登录。 Cookie将存储在浏览器中(当您第一次登录时),并且在您再次回来时将被使用。(req.isAuthenticated()用于检查会话是否已经运行)。
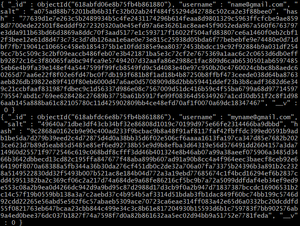
- 我们的用户密码是安全的。它们不会在我们的数据库中暴露。我们已经将所有的加密/解密任务委托给了Passport,就是这样。

- 我们可以看到,现在没有“password”这一栏。我们的密码是由Passport加密的。每当需要用于登录目的时,Passport可以再次解密密码并使用它们。
- 我们还可以使用Passport仅添加使用Google、Facebook、LinkedIn和其他各种社交网络服务的身份验证。(我们在这里没有讨论,但代码类似于此)
输出:

 极客教程
极客教程