Mongoose Timestamps
Mongoose 是用于node.js环境的MongoDB对象建模和处理。
Mongoose timestamps 由模式支持。时间戳将创建文档的当前时间和更新时间保存为一个日期。当设置为true时, mongoose会创建以下两个字段:
- createdAt :表示文档创建时间的日期
- updatedAt :表示此文档的最后更新时间的日期
这两个字段在数据库创建时自动创建, 并通过save()、updateOne()、updateMany()、findOneAndUpdate()、update()、replaceOne()或bulkWrite() 查询进行更新。
语法 : 创建带有时间戳的模式,如下所示:
const studentSchema = new Schema({ name: String }, { timestamps: true });

const Student = mongoose.model(‘Student’, studentSchema);
创建应用程序并安装模块: 我们将创建一个带有时间戳的模式,然后通过更新学生的详细信息来打印不同的时间戳,即createdAt和updatedAt。
步骤1: 创建一个文件夹并初始化:
npm init
步骤2: 在项目中安装mongoose。
npm i mongoose
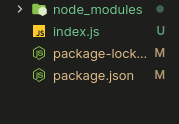
项目结构: 项目的结构如下:

示例: 创建一个名为index.js的文件。在index.js中连接到MongoDB。这里使用MongoDB Compass。首先创建Student schema,然后创建其model。现在创建一个新的document并保存它。打印document的时间戳,然后在一段时间延迟后更新document,然后再次打印时间戳的详细信息。
index.js
const mongoose = require("mongoose");

// Database connection
mongoose.connect("mongodb://localhost:27017/geeksforgeeks");

// Creating Schema
const studentSchema = new mongoose.Schema({
        name: { type: String, required: true },
        age: { type: Number, default: 8 },
    },
    { timestamps: true }
);

// Student model
const Student = mongoose.model("Student", studentSchema);

// Creating Student document from Model

// Function to save in database
const saveStudent = async (name, age) => {
    let s = new Student({
        name: name,
        age: age,
    });
    s.save().then((doc) => {
        console.log("Name:", doc.name, ", Age:", doc.age);
        console.log("Created At:", doc.createdAt);
        console.log("Updated At:", doc.updatedAt);
    });
};

const updateStudent = async () => {
    let doc = await Student.findOneAndUpdate(
        { name: "Rahul" },
        { age: 25 },
        { new: true }
    );
    console.log("Name:", doc.name, ", Age:", doc.age);
    console.log("Created At:", doc.createdAt);
    console.log("Updated At:", doc.updatedAt);
};

const start = async () => {
    await saveStudent("Rahul", 15);
    setTimeout(function () {
        updateStudent();
    }, 3000);
};

start();
步骤3: 使用下面的命令运行代码:
node index.js
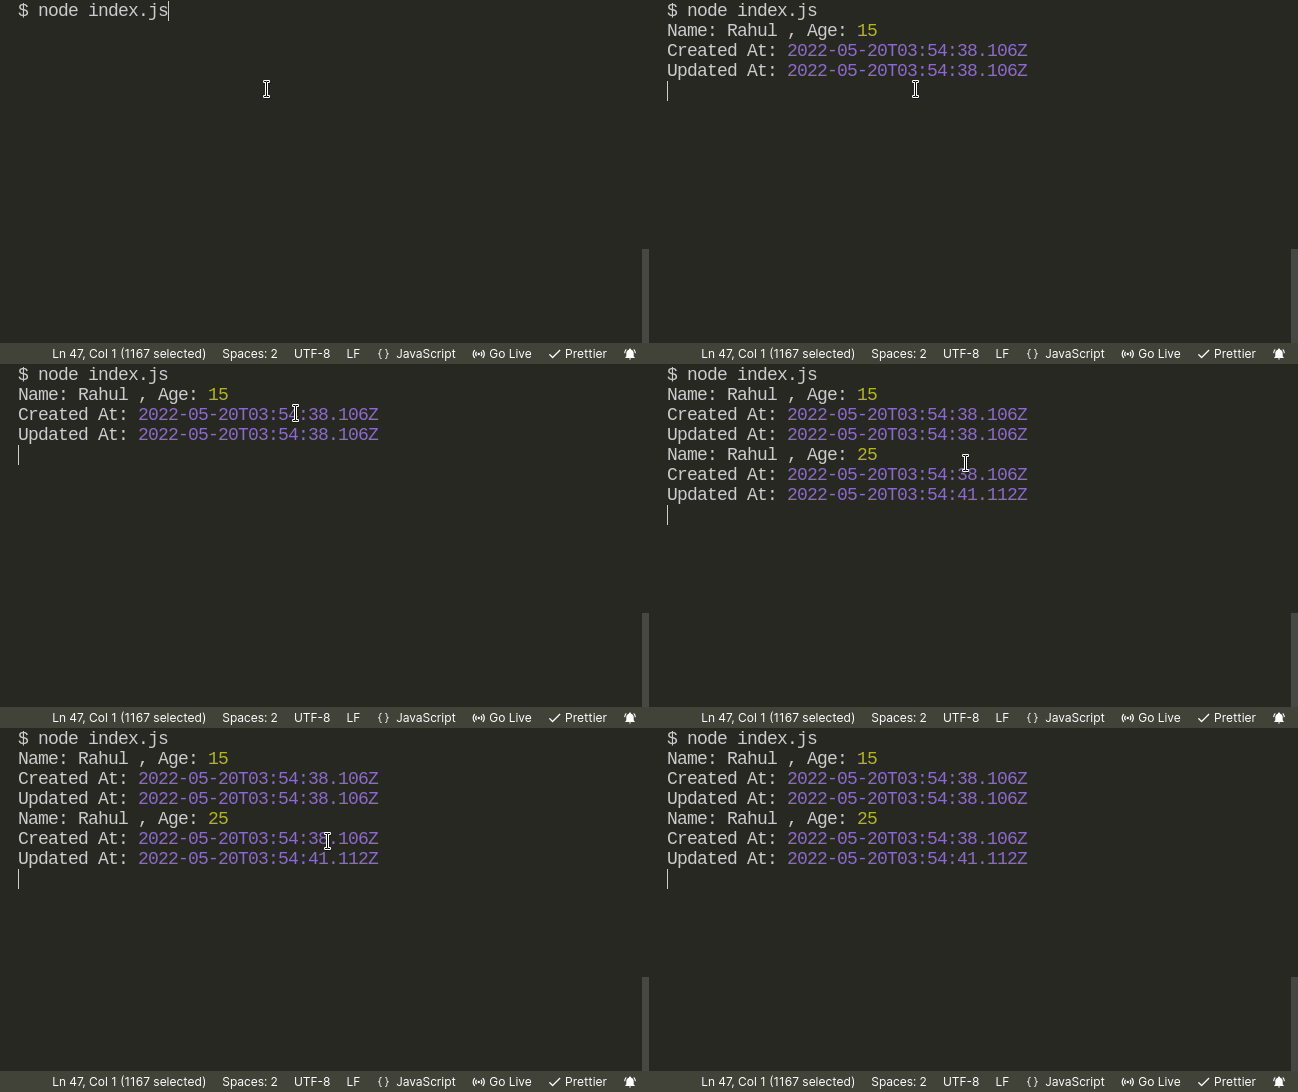
输出: 命令行中的输出如下。输出显示文档在3秒后已更新。

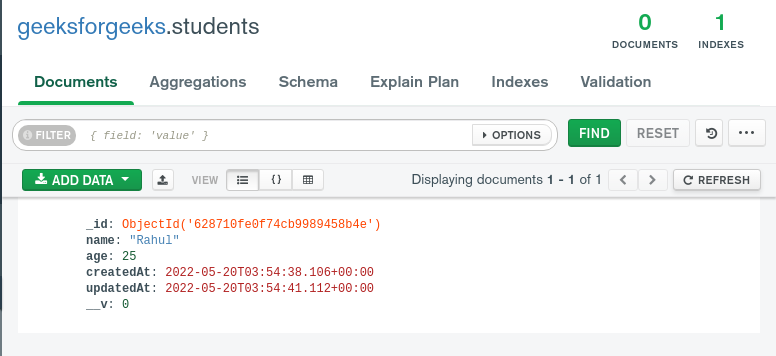
MongoDB的输出: 现在,数据库中也将反映以下字段,如下图所示:

参考:
https://mongoosejs.com/docs/timestamps.html
 极客教程
极客教程