使用Node.js和MongoDB进行CRUD操作和文件上传
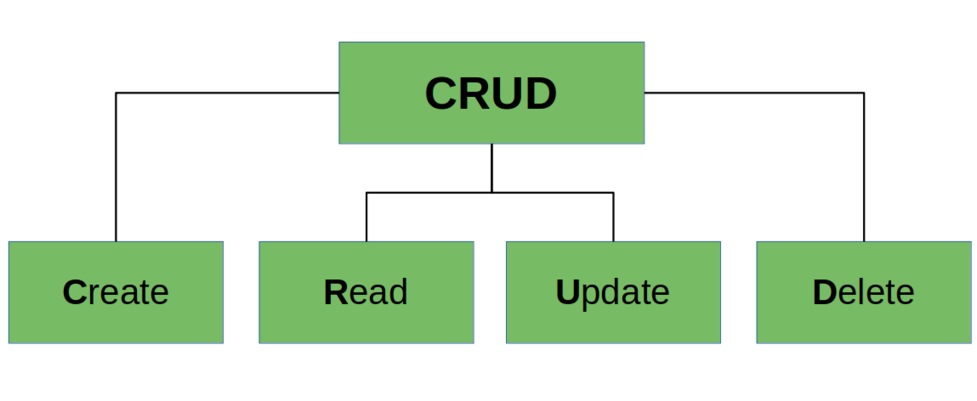
在计算机编程世界中,CRUD是四个操作Create(创建)、Read(读取)、Update(更新)和Delete(删除)的缩写。 Create(创建)、Read(读取)、Update(更新)和Delete(删除)(CRUD)是模型应该能够完成的四个基本功能。在RESTful应用中,CRUD通常对应POST、PUT、DELETE和GET等HTTP方法。每个数据库都需要调用一些函数,以便用户可以执行一些操作。这些操作由用户用于在数据库中对特定数据执行某些类型的查询。操作的基础是CRUD操作。使用Node.js框架及其包,以及MongoDB和Postman,将执行CRUD操作和文件上传。
在深入了解代码如何工作之前,让我们了解应用程序的先决条件。本地机器应具备作为先决条件安装的Node js、Postman和MongoDB。
- Node js (npm): 如果没有安装Node.js和npm,请访问官方链接安装Node.js并在终端上运行以下命令下载npm。
npm install npm@latest -g
- Postman: Postman用于管理请求。它通过GUI在不复制和粘贴每个HTTP请求的情况下,帮助测试HTTP请求。前往官方链接免费下载Postman。
- MongoDB: MongoDB是在CRUD操作中使用的数据库。如果您没有MongoDB账号,不用担心,本文也将提供逐步指导。
该项目需要使用MongoDB作为后端在Node.js中构建。通过API接口提供以下功能:
- 从多部分表单上传CSV文件
- 扫描上传的CSV并将其内容推送到MongoDB集合中
- 对上述集合进行CRUD操作的API
上述API使用passport包进行基本身份验证来管理访问权限。
所使用的框架和运行环境: 以下是项目中使用的主要框架和运行环境。
- Node.js
- NPM包管理器
- MongoDB
- Postman
步骤1: 创建Node.js项目。在终端中输入以下命令。
npm init
在将代码写入终端后,您需要填写信息。为了默认设置,请在每个部分按下 ENTER 键。最后,您将在目录中获得一个名为package.json的文件。
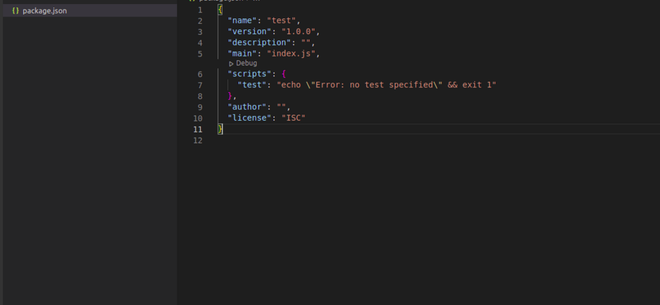
此项目中使用了一些作为依赖项的包,包括express,express-session,bcryptjs,fast-csv,csvtojson,dotenv,multer,passport,passport-local和mongoose。 运行以下命令安装这些包。

步骤2: 设置服务器。要为应用程序设置服务器,创建两个文件,分别命名为 app.js 和 .env 。app.js作为服务器文件,.env将帮助加载环境变量。
在.env文件中编写本地主机的端口号 PORT = “端口号” 并在 app.js 中写下以下代码来运行服务器。 。
const express = require('express');
const app = express();
const dotenv = require('dotenv');

dotenv.config();

app.use(express.json({limit: '20mb'}))
app.use(express.urlencoded({ extended: false, limit: '20mb' }))

/* Setting up server */
app.listen(process.env.PORT, function(){
    console.log("This server port is up and running ");
})
要访问路径文件夹,其中包含所有的请求,请输入以下命令 –
/* Initializing the path for routes */
app.use("/", require("./routes"));
目前的最终代码在 app.js 中将如下所示-
const express = require('express');
const app = express();
const dotenv = require('dotenv');

dotenv.config();

app.use(express.json({limit: '20mb'}))
app.use(express.urlencoded({ extended: false, limit: '20mb' }))

/* Initializing the path for routes */
app.use("/", require("./routes"));

/* Setting up server */
app.listen(process.env.PORT, function(){
    console.log("This server port is up and running ");
})
开始运行该应用的步骤:
打开终端并输入 “node app.js” 将启动服务器。

步骤3: 连接到MongoDB集合。如果您不知道如何连接到MongoDB,请按以下步骤操作,否则请跳过以下步骤 –
- 前往 MongoDB Atlas
- 设置一个账号
- 创建一个新项目
- 创建一个数据库(可能需要几分钟)
- 进入数据库访问并填写用户名、密码和IP地址部分(可以将当前IP地址设为默认)
- 点击连接并选择连接您的应用程序,系统将给您一个地址。复制该地址并粘贴到.env文件中

最终的.env文件将类似于这样 –
DB_CONNECT = "YOUR PATH"
PORT = "Port Number"
集合创建完成后,通过在app.js中编写以下代码将Node.js应用程序与MongoDB连接。
global.dbconn = "";

/* Connected the app with mongoose */
mongoose.connect(
    process.env.DB_CONNECT,
    { useNewUrlParser: true, useUnifiedTopology: true },
    (client, err) =>{
        try{
            console.log("Connected to db: " + client)
        }catch(err){
            console.log(err);
        }
    }
);
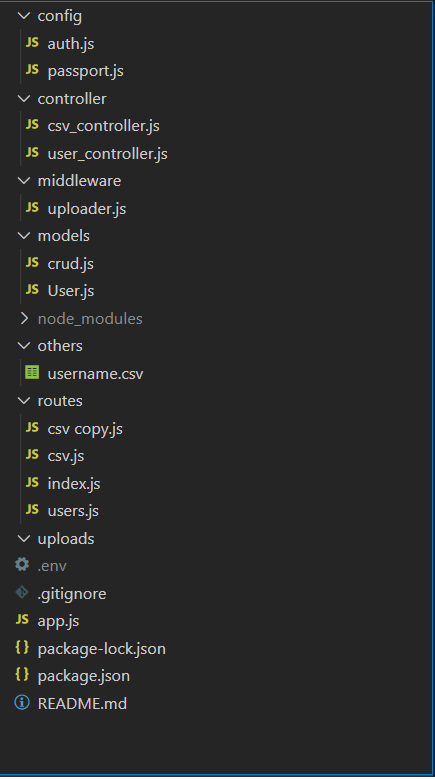
步骤4: 这一步描述了项目的流程结构。项目被划分为不同的部分。有一个 middleware 文件夹,里面包含 controller 、 routes 和 config 文件。在 others 文件夹中有一个虚拟的 CSV 文件用于上传。使用路由上传后,将会把 CSV 文件上传到 uploads 文件夹中。在每个部分中创建以下文件。
注意: csv_controller.js 和 csv.js 只是用来执行 CRUD 操作的程序。
注意: 不需要创建 csv copy.js,因为它只是一个复制 csv.js 的文件。
Schema: 简单地说,模式是整个数据库的骨架结构。它允许我们定义各种字段供用户输入。
步骤5: 为用户和CRUD操作创建一个模式。由于数据需要是动态的,我们将定义数据库的模式。
在 models: User.js
const mongoose = require('mongoose');

/* Creating the schema with name, email, password and date */
const UserSchema = new mongoose.Schema({
    name: {
      type: String,
      required: true
    },
    email: {
      type: String,
      required: true
    },
    password: {
      type: String,
      required: true
    },
    date: {
      type: Date,
      default: Date.now
    }
  });

  /* Exporting schema with collection as CrudOperations */
  const User = mongoose.model('User', UserSchema);

  module.exports = User;
创建一个名为User的模式,该模式接受名称,电子邮件,密码和日期作为其字段。
crud.js
const mongoose = require('mongoose');

/**
 * Creating the schema with username, identifier,
   firstName, lastName and updated
 */
const crud = new mongoose.Schema({
    username:{
        type: String,
        required: true,
    },
    identifier: {
        type: Number,
        required: true,
    },
    firstName:{
        type:String,
        required: true,
    },
    lastName:{
        type:String,
        required: true,
    },
    updated: {
        type: Date,
        required:true,
        default: Date.now,
    }
});

/**
 * Exporting schema with collection as CrudOperations
 */
module.exports = mongoose.model('CrudOperations', crud);
在crud.js中创建一个带有接受字段username、identifier、firstName、lastName、updated的模式。
步骤6: 在每个组织中,拥有适当的身份验证和授权非常重要。为此,每个组织都会加入一层安全措施。文件auth.js和passport.js就是这样做的。但由于本文帮助执行CRUD操作和文件上传,我们不会深入探讨这方面。
文件名:auth.js
module.exports = {
    /**
     * Ensuring authentication
     */
    ensureAuthenticated: function(req, res, next) {
      if (req.isAuthenticated()) {
        return next();
      }
      req.flash('error_msg', 'Please log in to view that resource');
      res.redirect('/users/login');
    },
    forwardAuthenticated: function(req, res, next) {
      if (!req.isAuthenticated()) {
        return next();
      }
      res.redirect('/dashboard');
    }
  };
auth.js文件检查用户是否登录了帐户。如果是,用户被授权查看页面,否则将被重定向到主页
FILENAME: passport.js
const LocalStrategy = require('passport-local').Strategy;
const bcrypt = require('bcryptjs');

// Load User model
const User = require('../models/User');

module.exports = function(passport) {
  passport.use(
    new LocalStrategy({ usernameField: 'email' }, (email, password, done) => {
      // Match user
      User.findOne({
        email: email
      }).then(user => {
        if (!user) {
          return done(null, false, { message: 'That email is not registered' });
        }

        // Match password
        bcrypt.compare(password, user.password, (err, isMatch) => {
          if (err) throw err;
          if (isMatch) {
            return done(null, user);
          } else {
            return done(null, false, { message: 'Password incorrect' });
          }
        });
      });
    })
  );

  passport.serializeUser(function(user, done) {
    done(null, user.id);
  });

  passport.deserializeUser(function(id, done) {
    User.findById(id, function(err, user) {
      done(err, user);
    });
  });
};
随着这两个文件,需要有会话变量和授权将护照(passport)包括到这个项目中。为此, app.js 被打开并初始化了护照中间件和会话(session)。
文件名: app.js
// Passport Config
require('./config/passport')(passport);

app.use(express.json({limit: '20mb'}))
app.use(express.urlencoded({ extended: false, limit: '20mb' }))

// Express session
app.use(
    session({
      secret: 'secret',
      resave: true,
      saveUninitialized: true
    })
);

  // Passport middleware
  app.use(passport.initialize());
  app.use(passport.session());
步骤7: 使用multer包创建一个中间件。要使用multer包,请在终端中写入以下命令。
npm install --save multer
封装 multer 帮助处理 multipart/form-data 数据,主要用于上传文件。Multer 会向请求对象添加一个 body 对象和一个文件对象或多个文件对象。body 对象包含了表单文本字段的值,文件对象或多个文件对象包含了通过表单上传的文件。
文件名:uploader.js
const path = require('path')
const multer = require('multer')

var storage = multer.diskStorage({
    destination: function(req, file, cb){
        cb(null, 'uploads/')
    },
    filename: function(req, file, cb){
        let ext = path.extname(file.originalname)
        cb(null, Date.now() + ext);
    }
})

var upload = multer({
    storage: storage,
    fileFilter: function(req, file, callback){
        if(
            file.minetype == "text/csv"
        ){
            callback(null, true)
        } else{
            console.log("Error in uploading")
            callback(null, false)
        }
    },
    limits: {
        fileSize: 1024 * 1024 * 2
    }
})

module.exports = upload
步骤8: 在使用passport和multer作为中间件进行认证后,需要完成文件上传和CRUD操作的路由和控制器。
在进行操作之前,首先需要初始化路由。为了做到这一点, 使用index.js 。
文件名:index.js
const express = require("express");
var router = express.Router();

/* Initializing other routes */
router.use("/", require("./csv"));
router.use('/', require('./users.js'));

module.exports = router;
使用护照验证时,用户的路由和控制器在users.js和user_controller.js中创建。
FILENAME: users.js
const express = require('express');
const router = express.Router();
const userController = require("../controller/user_controller")
/* Register router with passport package */
router.post('/register', userController.register);

/* Login router */
router.post('/login', userController.login);

/* Logout router  */
router.get('/logout', userController.logout);

module.exports = router;
它将注册和登录的路由设置为POST方法,并将注销系统设置为GET方法。在user_controller中。
文件名: user_controller.js
const express = require('express');
const router = express.Router();
const bcrypt = require('bcryptjs');
const passport = require('passport');
// Load User model
const User = require('../models/User');
const { forwardAuthenticated } = require('../config/auth');

exports.register = (req, res) => {
    console.log("Request: " + JSON.stringify(req.body))
    const { name, email, password, password2 } = req.body;
    let errors = [];

    /* If condition to check whether all credentials are filled */
    if (!name || !email || !password || !password2) {
      errors.push({ msg: 'Please enter all fields' });
    }

    /* If condition to check whether password
    and password2 matches or not */
    if (password != password2) {
      errors.push({ msg: 'Passwords do not match' });
    }

    /* If condition to check in case password
    length is greater than 3 or not */
    if (password.length < 3) {
      errors.push({ msg: 'Password must be at least 3 characters' });
    }

    if (errors.length > 0) {
      res.send('register error')
    } else {

    /* Checking if user exists */
      User.findOne({ email: email }).then(user => {
        if (user) {
          errors.push({ msg: 'Email already exists' });
          res.send('register user exists');
        }

       /* Creating the user */
       else {
          const newUser = new User({
            name,
            email,
            password
          });

          /* Bcrypt hashing the password for user privacy */
          bcrypt.genSalt(10, (err, salt) => {
            bcrypt.hash(newUser.password, salt, (err, hash) => {
              if (err) throw err;
              newUser.password = hash;
              newUser
                .save()
                .then(user => {
                  res.send("Register Successful");
                })
                .catch(err => console.log(err));
            });
          });
        }
      });
    }
  }

exports.login = (req, res, next) => {

    /* Authenticating if login was successful or
    not with the help of passport */
passport.authenticate('local', {
    successRedirect: res.send("Login Successful"),
    failureRedirect: res.send("Error in Login"),
    failureFlash: false
})(req, res, next);
}

exports.logout = (req, res) => {
    req.logout();
   /* Logging out */
    res.send("User Logout");
}
注册导出器首先检查提供的凭据是否正确。如果正确,则使用 bcrypt 对密码进行加密。 ****然后在模式中保存新用户。为了检查函数是否工作,使用 postman 发送一个请求进行注册、登录和注销。
注册: 使用 postman 发送一个 post 请求 http://localhost:3000/register 。

登录: 发送一个 post 请求 http://localhost:3000/login
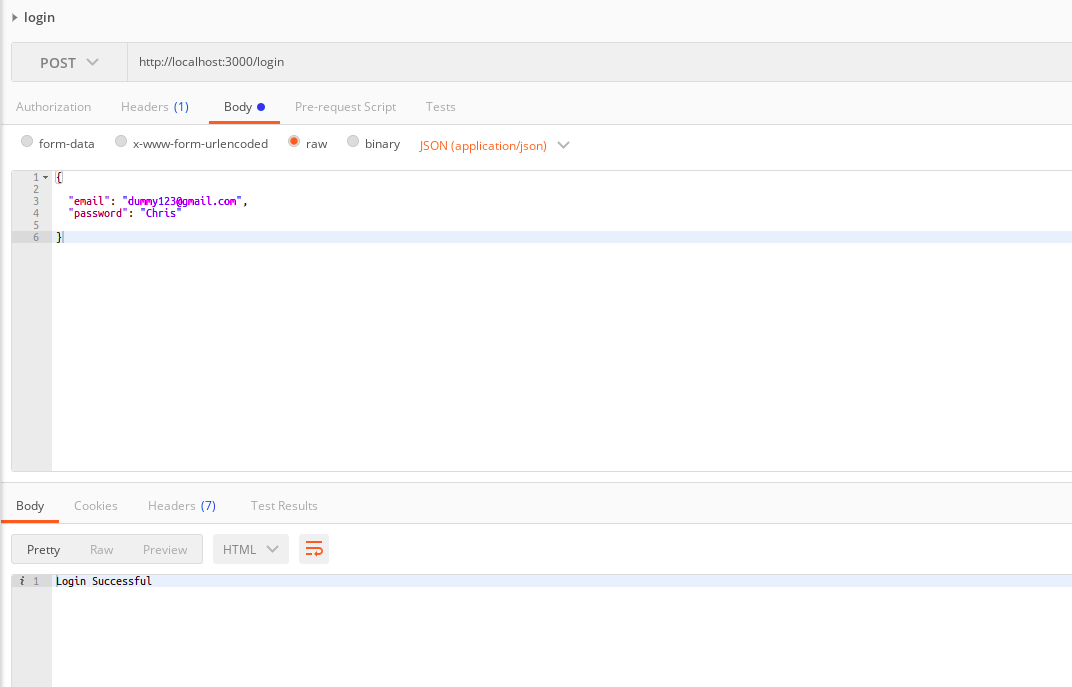
注销: 注销发送一个 get 请求。
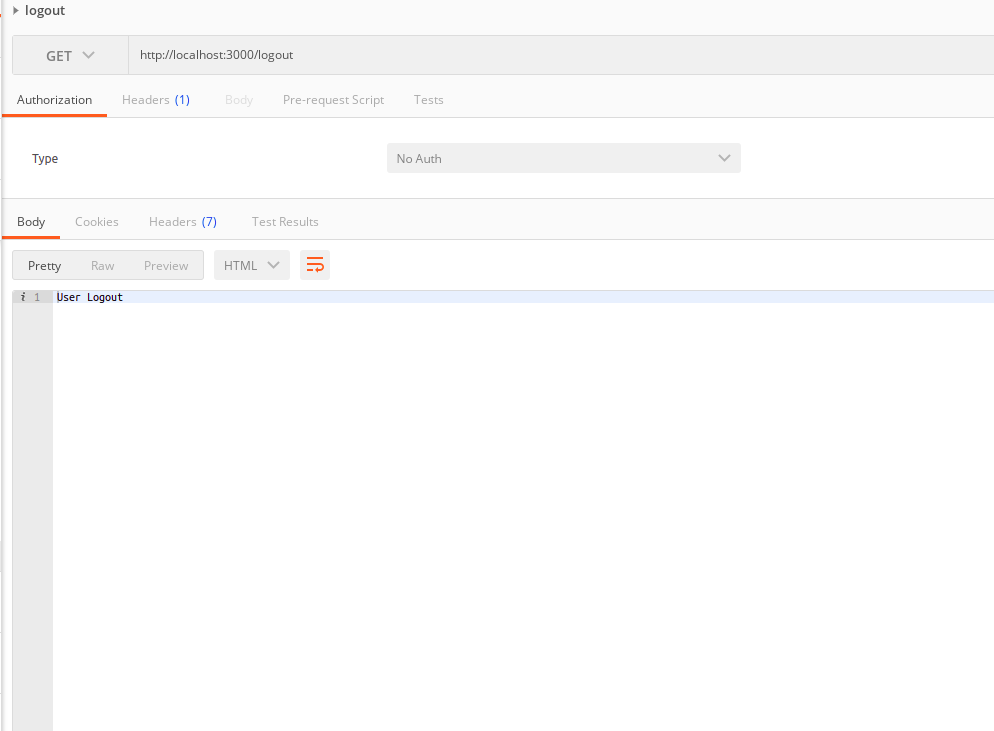
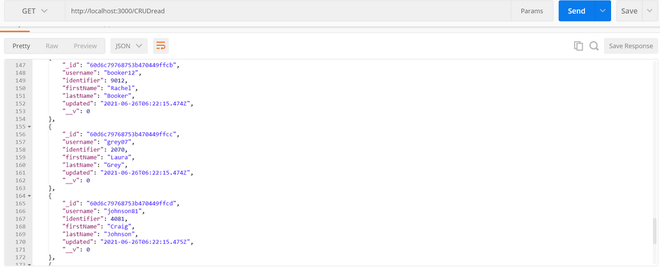
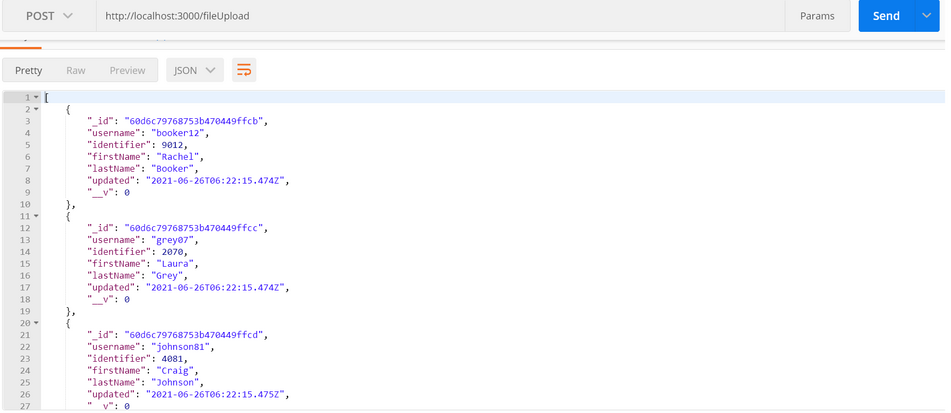
增删改查操作和文件上传: 使用文件 csv.js 和 csv_controller.js, 执行所有的增删改查操作和文件上传。调用各种API来实现不同的功能。例如, http://localhost:3000/fileUpload 用于上传CSV文件并将数据推送到Mongoose。同样地, http://localhost:3000/CRUDcreate, http://localhost:3000/CRUDread, http://localhost:3000/CRUDupdate, http://localhost:3000/CRUDdelete 分别用于其他增删改查操作,即CREATE, READ, UPDATE, DELETE。
创建: 我们将发送 post 请求。如名称所示,它们创建函数允许所有用户在数据库中输入新记录。对于关系型数据库,创建函数称为INSERT。在非关系型数据库(如MongoDB)中,提供了两种不同的选项来将文档插入集合中 – db.collection.insertOne()
db.collection.insertMany()。
文件名:csv.js
/* Creating a schema for crud operation C: Create */
router.post("/CRUDcreate",  forwardAuthenticated, csvController.create)
文件名:csv_controller.js
exports.create = async function(req, res){
    /* Initializing the schema and putting in CRUDcreate */
    const CRUDcreate = new CRUDoperations ({
        username: req.body.username,
        identifier:req.body.identifier,
        firstName: req.body.firstName,
        lastName: req.body.lastName
    });

    /* Try Catch */
    try{
        /* Saving the data in mongoose */
        const savedCRUD = await CRUDcreate.save();
        /* Sending the response back */
        res.status(200);
        res.send(savedCRUD);
    }catch(err){
        /* Sending the error back */
        res.status(400).send(err);
    }
}
添加所需的包到文件中后,完成操作后,使用.save()将信息保存到数据库中。

阅读: CRUD操作中的阅读功能类似于搜索功能。它帮助用户搜索和检索特定数据的特定信息。在MongoDB中,我们使用db.collection.find()或db.collection.findOne()来检索信息。
文件名:csv.js
/* Router for CRUD operation R: read */
router.get("/CRUDread", csvController.read)
文件名:csv_controller.js
exports.read = function(req, res){
    /* Using find() for reading all the data */
    CRUDoperations.find({}, function(err, fetch){
        /* In case of error */
        if(err) res.status(400).send(err);

        /* Sending back the response */
        res.status(200).send(fetch);
    });
}
更新: 更新函数用于修改MongoDB数据库中集合中的数据。要更改记录,用户可能需要修改多个字段。这需要仔细更新文档,因为在更新集合时所做的更改是永久且不可逆的。MongoDB中可以使用3种不同的方法进行更新- db.collection.updateOne(),db.collection.updateMany(),db.collection.replaceOne()。
文件名:csv.js
/* CRUD operation 'update' router */
router.post("/CRUDupdate", csvController.update)
文件名: csv_controller.js
exports.update = async function(req, res){
    /* Taking the id */
    let id = req.body._id;

    try{
        /* Using findByIdAndUpdate */
        const CRUDupdate = await CRUDoperations.findByIdAndUpdate({_id: id},

        /* Setting the value of identifier as 1967 of corresponding id */
        {$set:{
                identifier: 1969
              }
        },
        {
            useFindAndModify: false
        });

        /* Sending the response back to the server */
        res.status(200).send(CRUDupdate);
    }catch(err){
        /* Sending error back to the server */
        res.status(400).send(err);
    }
}

删除: 最后一种CRUD操作是删除。顾名思义,它帮助我们从一个文档中删除一个集合。
db.collection.deleteOne()
db.collection.deleteMany()
文件名:csv.js
/* Router to perform delete of CRUD operations */
router.post("/CRUDdelete", csvController.delete)
文件名:csv_controller.js
exports.delete =  async function(req, res){
    /* Taking the id of the collection */
    let id = req.body._id;

    /* Using Try and catch for deletion */
    try{
        /* Using findbyIdAndRemove operation to remove
        the data with corresponding id */
        const CRUDdel = await CRUDoperations.findByIdAndRemove(
        id, function(err, res){
            if (err){
                /* Sending error back to the server */
                res.status(400).send(err);
                console.log(err)
            }
            else{

                /* Sending the response back to the server */
                console.log("Removed User : ", res);
            }
        },
        {
            useFindAndModify: false
        })
    }catch(err){
        res.status(400).send(err);
    }
}

文件上传: 如前所述,文件上传是通过multer包来完成的。
文件名: csv.js
const fileStorageEngine = multer.diskStorage({
    destination: (req, file, cb) => {
        cb(null, './uploads')
    },
    filename: (req, file, cb) => {
        cb(null, Date.now() + "--" + file.originalname);
    },
});

const upload = multer({ storage: fileStorageEngine });

router.post('/single', upload.single('fileUpload'), (req, res) => {
    console.log('single route')
    console.log('file:'+JSON.stringify(req.file));
    res.send("single file upload success");
});


router.post("/fileUpload",upload.single('fileCSV'),
    csvController.fileupload)
文件名:csv_controller.js
exports.fileupload = function(req, res){
    console.log("Inside file Upload!!")
    console.log('single route')
    console.log('file:'+JSON.stringify(req.file.path));


    let stream = fs.createReadStream(req.file.path)

    let csvData = [];

    let csvStream = fastcsv
        .parse()
        .on('error', error => console.error(error))
        .on("data", function(data) {
            //console.log("Data Parse: " + JSON.stringify(data))
            dt = data[0].split(',')
            //console.log("DT: " + dt[0])
            csvData.push({
                username: dt[0],
                identifier: dt[1],
                firstName: dt[2],
                lastName: dt[3]
            });
            //console.log((csvData));
        })
        .on("end", async function() {
            // remove the first line: header
            csvData.shift();

            // save to the MongoDB database collection
            try{
                console.log("client:" + CRUDoperations);
                let CRUDinsert = await CRUDoperations.insertMany(
                    csvData
                )
                console.log("CRUD Insert Many" + CRUDinsert)
                res.status(200).send(CRUDinsert);

            } catch(err){
                console.log("db error:"+err);
                res.status(400).send(err);
            }
            console.log(JSON.stringify(csvData));
        });

    stream.pipe(csvStream);
}
 极客教程
极客教程