Mongoose SchemaTypes类型键
Mongoose SchemaType 具有一个名为 type 的特殊属性。Schema的每个属性都需要具有一些类型。当mongoose看到名为 type 的嵌套属性并且具有有效值时,它会认为必须使用给定类型声明 SchemaType 。
语法:
Schema({
    property : {
        type: value
        // other options
        }
});
设置 Node.js Mongoose 模块:
步骤1: 使用以下命令创建一个 Node.js 应用程序:
npm init
步骤2: 创建NodeJS应用程序后,使用以下命令安装所需模块:
npm install mongoose
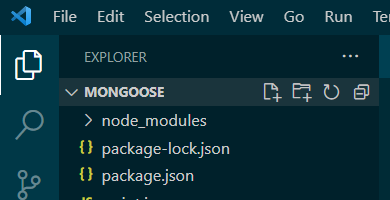
项目结构: 项目的结构如下所示:

示例1:
下面的示例说明了Mongoose SchemaType 的功能性。使用type键定义属性的类型,而不使用对象。通过控制台获取属性的接受数据。
const mongoose = require('mongoose');

// Path to our cloud DataBase
const url = 'mongodb://localhost:27017/GFG'

// Connecting to database
mongoose.set('strictQuery', false);
mongoose.connect(url)
    .then((ans) => {
        console.log("Connected Successful")
    })
    .catch((err) => {
        console.log("Error in the Connection")
    })

// Calling Schema class
const Schema = mongoose.Schema;

// Creating Structure of the model
const schema = new Schema({
    firstName: String,
    lastName: String,
    age: Number,
    Gender: String,
});

// Compile our model
const Person = mongoose.model('Person', schema);

// Inspecting the options using schema.path() function
console.log('firstName property is :',
    schema.path('firstName').instance);
console.log('lastName property is :',
    schema.path('lastName').instance);
console.log('Age property is :',
    schema.path('age').instance);
console.log('Gender property is :',
    schema.path('Gender').instance);
运行程序的步骤: 从项目的根目录中执行以下命令来运行应用程序:
node app.js
输出:
firstName property is : String
lastName property is : String
Age property is : Number
Gender property is : String
Connected Successful
示例2: 下面的示例说明了Mongoose SchemaType类型键的功能。在这个示例中,我们使用类型键定义了嵌套属性的类型。并在控制台中查看属性的接受数据类型。
const mongoose = require('mongoose');

// Path to our cloud DataBase
const url = 'mongodb://localhost:27017/GFG'

// Connecting to database
mongoose.set('strictQuery', false);

mongoose.connect(url)
    .then((ans) => {
        console.log("Connected Successful")
    })
    .catch((err) => {
        console.log("Error in the Connection")
    })

// Creating Structure of the model
const studentSchema = new mongoose.Schema({
    name: { type: String },
    rollNumber: { type: Number },
    class: { type: Number },
});

console.log('Name property accepts: ',
    studentSchema.path('name').instance);
console.log('Roll Number property accepts: ',
    studentSchema.path('rollNumber').instance);
console.log('Class property accepts: ',
    studentSchema.path('class').instance);
运行程序的步骤: 要运行应用程序,请从项目的根目录执行以下命令:
node app.js
输出:
Name property accepts: String
Roll Number property accepts: String
Class property accepts: Number
Connected Successful
参考: https://mongoosejs.com/docs/schematypes.html#type-key
 极客教程
极客教程