这是 Jtwig Java 模板引擎的入门教程。 我们介绍 Jtwig 模板引擎,并创建几个控制台和 Web 应用。 Maven 用于构建我们的示例。 NetBeans 用于管理应用。
Jtwig 是 Java 编程语言的现代模板引擎。 它是模块化,可配置且易于使用的模板引擎。 它的灵感来自 Django 的模板引擎。 Jtwig 的主页是 jtwig.org 。
模板引擎将静态数据与动态数据结合起来以产生内容。 模板是内容的中间表示。 它指定如何生成输出。
模板引擎的优点是:
- 关注点分离,
- 避免重复代码,
- 更容易在视图之间切换,
- 可重用性。
Jtwig 不限于 HTML 页面的模板; 它也可以用于纯文本。
控制台应用
前四个应用是控制台应用。 我们在 NetBeans 中创建新的 Maven Java 应用。 他们使用以下 Maven 构建文件:
Excerpt from pom.xml
<repositories>
    <repository>
        <id>jcenter</id>
        <url>https://jcenter.bintray.com/</url>
    </repository>
</repositories>

<dependencies>
    <dependency>
        <groupId>org.jtwig</groupId>
        <artifactId>jtwig-core</artifactId>
        <version>5.58</version>
    </dependency>
    <dependency>
        <groupId>org.slf4j</groupId>
        <artifactId>slf4j-simple</artifactId>
        <version>1.7.21</version>
    </dependency>
</dependencies>
在 Maven pom.xml文件中,我们为 Jtwig 和jtwig-core和slf4j-simple依赖项指定存储库。
变量
在第一个应用中,我们探索 Jtwig set命令。 set命令允许在 Jtwig 模板中指定分配操作。 它将表达式的结果分配给指定的变量。
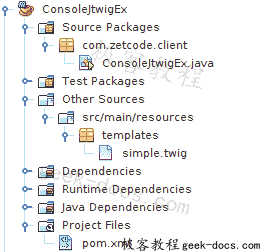
Figure: Java console project structure in NetBeans
这是 NetBeans 中的项目结构。
ConsoleJtwigEx.java
package com.zetcode.client;

import org.jtwig.JtwigModel;
import org.jtwig.JtwigTemplate;

public class ConsoleJtwigEx {

    public static void main(String[] args) {

        JtwigTemplate template
                = JtwigTemplate.classpathTemplate("templates/simple.twig");
        JtwigModel model = JtwigModel.newModel();

        template.render(model, System.out);
    }
}
我们创建一个处理 Jtwig 模板文件的 Java 控制台应用。
JtwigTemplate template
        = JtwigTemplate.classpathTemplate("templates/simple.twig");
创建了JtwigTemplate。 它加载位于src/main/java/resources/templates目录中的simple.twig模板文件。
JtwigModel model = JtwigModel.newModel();
JtwigModel已创建。 该模型是键和值对的容器,这些键和值对与模板结合生成输出。
template.render(model, System.out);
render()方法创建最终输出。 它使用模型并将其输出到系统输出。
simple.twig
{% set v = 3 + 3 %}
{{ v -}}

{% set a = [1, 2, 3] %}
{{ a[1] -}}

{% set m = { k1: "apple", k2: "banana"} %}
{{ m["k1"] }}
在simple.twig文件中,我们使用set命令定义三个变量并显示它们。
{% set v = 3 + 3 %}
Jtwig 代码岛以{%开头,以%}结尾。
{{ v -}}
Jtwig 使用{{和}}显示表达式和变量的值。 -是可选的空格控制字符。 在这里,它删除了代码岛后的空白。
6
2
apple
这是应用的输出。
你好应用
在第二个应用中,我们将一个变量传递给模板。
ConsoleJtwigEx2.java
package com.zetcode.client;

import org.jtwig.JtwigModel;
import org.jtwig.JtwigTemplate;

public class ConsoleJtwigEx2 {

    public static void main(String[] args) {

        JtwigTemplate template =
                JtwigTemplate.classpathTemplate("templates/hello.twig");
        JtwigModel model = JtwigModel.newModel().with("name", "Peter");

        template.render(model, System.out);
    }
}
使用with()方法,我们将变量传递给模板文件。
hello.twig
Hello {{ name }}
在模板中,我们显示变量。
Hello Peter
这是示例的输出。
传递列表
在下一个应用中,我们将值列表传递给模板。
Excerpt from pom.xml
<dependencies>
    <dependency>
        <groupId>org.jtwig</groupId>
        <artifactId>jtwig-core</artifactId>
        <version>5.58</version>
    </dependency>
    <dependency>
        <groupId>org.slf4j</groupId>
        <artifactId>slf4j-simple</artifactId>
        <version>1.7.21</version>
    </dependency>

    <dependency>
        <groupId>com.google.guava</groupId>
        <artifactId>guava</artifactId>
        <version>19.0</version>
    </dependency>

</dependencies>
除了jtwi-core和slf4j-simple库外,我们还将guava库添加到项目依赖项中。
ConsoleJtwigEx3.java
package com.zetcode.client;

import com.google.common.collect.Lists;
import java.util.List;
import org.jtwig.JtwigModel;
import org.jtwig.JtwigTemplate;

public class ConsoleJtwigEx3 {

    public static void main(String[] args) {

        List<String> names = Lists.newArrayList("Jan", "Peter", "Jane");

        JtwigTemplate template =
                JtwigTemplate.classpathTemplate("templates/friends.twig");
        JtwigModel model = JtwigModel.newModel().with("names", names);

        template.render(model, System.out);
    }
}
在代码示例中,我们将名称列表传递给模板。
List<String> names = Lists.newArrayList("Jan", "Peter", "Jane");
使用 Google Guava,我们创建了一个名称列表。
JtwigModel model = JtwigModel.newModel().with("names", names);
该列表将传递到模板。
friends.twig
{% for name in names %}
    {{ name }}
{% endfor %}
使用for命令,我们浏览列表并显示其元素。
包含模板
使用include命令,我们可以包含其他模板文件。
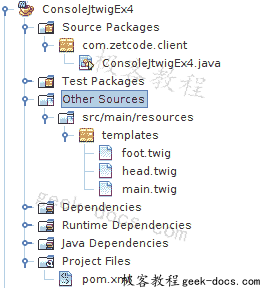
Figure: Java console project structure in NetBeans 2
templates目录中有三个文件。
ConsoleEx4.java
package com.zetcode.client;

import org.jtwig.JtwigModel;
import org.jtwig.JtwigTemplate;

public class ConsoleJtwigEx4 {

    public static void main(String[] args) {

        JtwigTemplate template
             = JtwigTemplate.classpathTemplate("templates/main.twig");
        JtwigModel model = JtwigModel.newModel();

        template.render(model, System.out);
    }
}
该示例加载main.twig模板,其中包括其他两个模板。
foot.twig
Footer.
这是foot.twig模板。
head.twig
Header.
这是head.twig模板。
main.twig
{% include "classpath:/templates/head.twig" ignore missing %}

Main content.

{% include 'classpath:/templates/foot.twig' ignore missing %}
这是main.twig模板。 它包括foot.twig和head.twig模板。
Header.

Main content.

Footer.
This is the output of the example.
Jtwig servlet 示例
在下面的示例中,我们在标准 Java Web 应用中使用 Jtwig。 该应用打包到war文件中,并部署在 NetBeans 的内置 Tomcat 服务器上。
在 NetBeans 中,我们创建一个新的 Maven Web 应用。
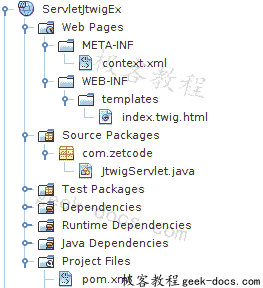
Figure: Jtwig servlet project structure in NetBeans
这是 NetBeans 中 Jtwig servlet 示例的项目结构。
context.xml
<?xml version="1.0" encoding="UTF-8"?>
<Context path="/JtwigServlet"/>
这是context.xml文件。
pom.xml
<?xml version="1.0" encoding="UTF-8"?>
<project xmlns="http://maven.apache.org/POM/4.0.0"
         xmlns:xsi="http://www.w3.org/2001/XMLSchema-instance"
         xsi:schemaLocation="http://maven.apache.org/POM/4.0.0
                http://maven.apache.org/xsd/maven-4.0.0.xsd">

    <modelVersion>4.0.0</modelVersion>
    <groupId>com.zetcode</groupId>
    <artifactId>ServletJtwigEx</artifactId>
    <version>1.0-SNAPSHOT</version>
    <packaging>war</packaging>
    <properties>
        <project.build.sourceEncoding>UTF-8</project.build.sourceEncoding>
        <maven.compiler.source>1.8</maven.compiler.source>
        <maven.compiler.target>1.8</maven.compiler.target>
    </properties>

    <name>ServletJtwigEx</name>

    <repositories>
        <repository>
            <id>jcenter</id>
            <url>https://jcenter.bintray.com/</url>
        </repository>
    </repositories>

    <dependencies>
        <dependency>
            <groupId>javax</groupId>
            <artifactId>javaee-web-api</artifactId>
            <version>7.0</version>
            <scope>provided</scope>
        </dependency>

        <dependency>
            <groupId>org.jtwig</groupId>
            <artifactId>jtwig-web</artifactId>
            <version>1.52</version>
        </dependency>
    </dependencies>

    <build>
        <plugins>
            <plugin>
                <groupId>org.apache.maven.plugins</groupId>
                <artifactId>maven-war-plugin</artifactId>
                <version>2.3</version>
                <configuration>
                    <failOnMissingWebXml>false</failOnMissingWebXml>
                </configuration>
            </plugin>
        </plugins>
    </build>

</project>
这是pom.xml文件。 我们使用jtwig-web依赖项。
JtwigServlet.java
package com.zetcode;

import java.io.IOException;
import javax.servlet.ServletException;
import javax.servlet.annotation.WebServlet;
import javax.servlet.http.HttpServlet;
import javax.servlet.http.HttpServletRequest;
import javax.servlet.http.HttpServletResponse;
import org.jtwig.web.servlet.JtwigRenderer;

@WebServlet(name = "JtwigServlet", urlPatterns = {""})
public class JtwigServlet extends HttpServlet {

    private final JtwigRenderer renderer = JtwigRenderer.defaultRenderer();

    @Override
    protected void service(HttpServletRequest request, HttpServletResponse response)
            throws ServletException, IOException {

        renderer.dispatcherFor("/WEB-INF/templates/index.twig.html")
                .with("greet", "Jtwig servlet example")
                .render(request, response);
    }
}
我们设置 servlet 并将其分发到模板文件。 我们将greet变量传递给模板。
@WebServlet(name = "JtwigServlet", urlPatterns = {""})
JtwigServlet映射到应用的上下文根。
index.twig.html
{{ greet }}
index.twig.html文件位于WEB-INF/templates目录中。 模板显示greet变量。
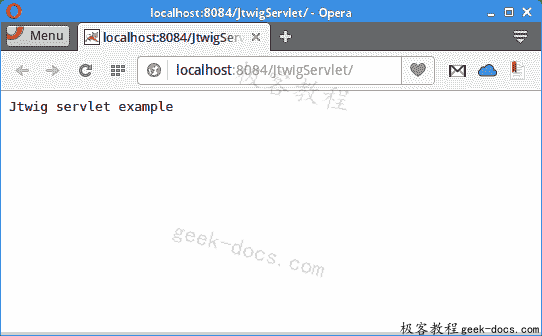
Figure: Jtwig servlet example
我们在 Opera 网络浏览器中显示应用输出。 NetBeans 中的内置 Tomcat 在 8084 端口上运行。
Spring Boot
Spring 是流行的 Java 应用框架。 Spring Boot 是通过最小的努力来创建独立的,生产级的基于 Spring 的应用的产物。
Spring Boot 命令行应用
在下一个应用中,我们将 Jtwig 集成到 Spring Boot 命令行应用中。 它是放置在 Spring Boot 框架中的控制台应用。
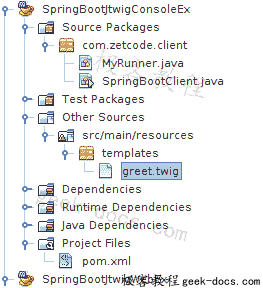
Figure: Spring Boot project structure in NetBeans
这是在 NetBeans 中使用 Jtwig 的 Spring Boot 应用的项目结构。
pom.xml
<?xml version="1.0" encoding="UTF-8"?>
<project xmlns="http://maven.apache.org/POM/4.0.0"
         xmlns:xsi="http://www.w3.org/2001/XMLSchema-instance"
         xsi:schemaLocation="http://maven.apache.org/POM/4.0.0
            http://maven.apache.org/xsd/maven-4.0.0.xsd">

    <modelVersion>4.0.0</modelVersion>
    <groupId>com.zetcode</groupId>
    <artifactId>SpringBootJtwigConsoleEx</artifactId>
    <version>1.0-SNAPSHOT</version>
    <packaging>jar</packaging>
    <properties>
        <project.build.sourceEncoding>UTF-8</project.build.sourceEncoding>
        <maven.compiler.source>1.8</maven.compiler.source>
        <maven.compiler.target>1.8</maven.compiler.target>
    </properties>

    <repositories>
        <repository>
            <id>jcenter</id>
            <url>https://jcenter.bintray.com/</url>
        </repository>
    </repositories>

    <parent>
        <groupId>org.springframework.boot</groupId>
        <artifactId>spring-boot-starter-parent</artifactId>
        <version>1.3.5.RELEASE</version>
        <relativePath />
    </parent>

    <dependencies>

        <dependency>
            <groupId>org.jtwig</groupId>
            <artifactId>jtwig-core</artifactId>
            <version>5.58</version>
        </dependency>

        <dependency>
            <groupId>org.springframework.boot</groupId>
            <artifactId>spring-boot-starter</artifactId>
        </dependency>

    </dependencies>
    <name>SpringBootJtwigConsoleEx</name>
</project>
这是 Maven 构建文件。 它包括 Spring Boot 和 Jtwig 的依赖项。
SpringBootClient.java
package com.zetcode.client;

import org.springframework.boot.SpringApplication;
import org.springframework.boot.autoconfigure.EnableAutoConfiguration;
import org.springframework.context.annotation.ComponentScan;

@EnableAutoConfiguration
@ComponentScan(basePackages="com.zetcode")
public class SpringBootClient {

    public static void main(String[] args) {

        SpringApplication.run(SpringBootClient.class, args);
    }
}
SpringBootClient设置 Spring Boot 应用。 @EnableAutoConfiguration注释启用 Spring Application Context 的自动配置,尝试猜测和配置我们可能需要的 bean。
MyRunner.java
package com.zetcode.client;

import org.jtwig.JtwigModel;
import org.jtwig.JtwigTemplate;
import org.springframework.boot.CommandLineRunner;
import org.springframework.stereotype.Component;

@Component
public class MyRunner implements CommandLineRunner {

    @Override
    public void run(String... args) throws Exception {

        JtwigTemplate template =
                JtwigTemplate.classpathTemplate("templates/greet.twig");
        JtwigModel model = JtwigModel.newModel().with("name", "Peter");

        template.render(model, System.out);
    }
}
MyRunner是 Spring Boot 应用的命令行运行程序。 我们加载并渲染模板。
greet.twig
Hello {{name}}!
这是greet.twig模板文件。
Hello Peter!
This is the output of the application.
Spring Boot Web 应用
本教程的最后一个示例使用 Jtwig 模板引擎创建了一个 Spring Boot Web 应用。 请注意,我们正在 NetBeans 中创建 Java SE Maven 应用,而不是 Java Web Maven 应用。 这是因为我们已将 Tomcat 嵌入到我们的 JAR 文件中。
pom.xml
<?xml version="1.0" encoding="UTF-8"?>
<project xmlns="http://maven.apache.org/POM/4.0.0"
         xmlns:xsi="http://www.w3.org/2001/XMLSchema-instance"
         xsi:schemaLocation="http://maven.apache.org/POM/4.0.0
                http://maven.apache.org/xsd/maven-4.0.0.xsd">

    <modelVersion>4.0.0</modelVersion>
    <groupId>com.zetcode</groupId>
    <artifactId>SpringBootJtwigWebEx</artifactId>
    <version>1.0-SNAPSHOT</version>
    <packaging>jar</packaging>
    <properties>
        <project.build.sourceEncoding>UTF-8</project.build.sourceEncoding>
        <maven.compiler.source>1.8</maven.compiler.source>
        <maven.compiler.target>1.8</maven.compiler.target>
    </properties>

    <repositories>
        <repository>
            <id>jcenter</id>
            <url>https://jcenter.bintray.com/</url>
        </repository>
    </repositories>

    <parent>
        <groupId>org.springframework.boot</groupId>
        <artifactId>spring-boot-starter-parent</artifactId>
        <version>1.3.5.RELEASE</version>
        <relativePath />
    </parent>

    <dependencies>
        <dependency>
            <groupId>org.springframework.boot</groupId>
            <artifactId>spring-boot-starter</artifactId>
        </dependency>

        <dependency>
            <groupId>org.springframework</groupId>
            <artifactId>spring-web</artifactId>
        </dependency>

        <dependency>
            <groupId>org.jtwig</groupId>
            <artifactId>jtwig-spring-boot-starter</artifactId>
            <version>5.55</version>
        </dependency>

        <dependency>
            <groupId>org.slf4j</groupId>
            <artifactId>slf4j-simple</artifactId>
            <version>1.7.21</version>
        </dependency>
    </dependencies>

</project>
在pom.xml文件中,我们具有以下依赖性:spring-boot-starter,spring-web,jtwig-spring-boot-starter和slf4j-simple。
MyController.java
package com.zetcode.controller;

import org.springframework.boot.SpringApplication;
import org.springframework.boot.autoconfigure.EnableAutoConfiguration;
import org.springframework.stereotype.Controller;
import org.springframework.ui.ModelMap;
import org.springframework.web.bind.annotation.PathVariable;
import org.springframework.web.bind.annotation.RequestMapping;

@Controller
@EnableAutoConfiguration
public class MyController {

    @RequestMapping("/{name}")
    public String indexAction (ModelMap model, @PathVariable("name") String name) {

        model.addAttribute("name", name);
        return "index";
    }

    public static void main(String[] args) throws Exception {
        SpringApplication.run(MyController.class, args);
    }
}
这是 Spring Boot Web 应用的控制器类。 控制器从请求中读取一个属性,并将其放入模型中。 然后,控制器将映射解析为模板文件。
index.twig
Hello {{name}}!
这是index.twig文件。
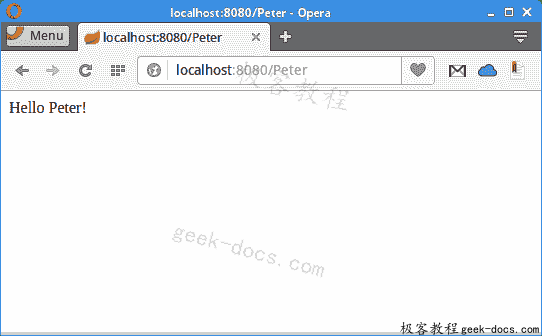
Figure: Spring Boot web example
Spring Boot 启动一个嵌入式 Tomcat 服务器,侦听端口 8080。
本教程专门针对 Jtwig 模板引擎。