React.js Blueprint Select2 Props接口
Blueprint 是一个基于React的用于Web的UI工具包。该库在构建复杂且数据密集的桌面应用程序界面方面非常优化和受欢迎。
本文中,我们将讨论 React.js Blueprint Select2 Props接口 。Select2组件显示一个选择项列表,选项子项被包装在一个包含列表的MenuItem中,并可选择性地使用InputGroup来过滤选项。
React.js Blueprint Select2 Props:
- activeItem : 它表示当前激活的项,用于键盘交互。
- children : 它表示触发选择弹出窗口的元素。
- className : 它表示要传递给子元素的类名列表。
- createNewItemFromQuery : 它允许根据当前提供的查询字符串创建新项目。
- createNewItemPosition : 它表示在列表中的createNewItem位置,可以是第一个或最后一个。
- createNewItemRenderer : 它有助于从当前查询字符串中创建可选择的创建项目选项。
- disabled : 它表示是否禁用。
- disabled :它指定组件是禁用状态还是交互状态。
- fill :它确定组件是否应占据其容器的整个宽度。
- filterable :它确定下拉列表是否可过滤。
- initialContent :当查询字符串为空时,它表示默认渲染的React组件。
- inputProps :它表示用于传播给查询InputGroup的props。
- itemDisabled :它确定给定的项是否被禁用。
- itemListPredicate :它用于自定义整个项数组的查询,作为props传递。
- itemListRenderer : 用于自定义渲染下拉菜单中的内容。
- itemPredicate : 用于自定义查询items数组中的各个项。
- itemRenderer : 用于自定义渲染下拉列表中的项。
- items : 表示列表中的项目数组。
- itemsEqual : 用于确定两个项目是否相等。
- menuProps :表示要传递给包含可选择选项的菜单列表框的props。
- noResults : 当过滤返回零个结果时,用于渲染一个React组件。
- onActiveItemChange :这是一个回调函数,当用户交互改变活动项时调用。
- onItemSelect :这是一个回调函数,当列表中的项被选中时调用,通常是通过点击或按Enter键实现的。
- onItemsPaste :这是一个回调函数,当多个项同时被选中时调用。
- onQueryChange :这是一个回调函数,当查询字符串被改变时调用。
- popoverContentProps :它表示要传播到Popover2内容包装器元素的props。
- popoverProps :它表示要传播到Popover的props。
- popoverRef – 它表示Popover2实例的可选ref。
- popoverTargetProps – 它表示用于添加到popover目标包装元素的props。
- query : 它表示传递给itemListPredicate或itemPredicate的查询字符串,用于过滤项目。
- resetOnClose – 它确定当popover关闭时,是否应将活动项重置为第一个匹配项。
- resetOnQuery : 它确定每次查询变化时,活动项是否应重置为第一个匹配项。
- resetOnSelect : 它确定当选择项时,是否应将活动项重置为第一个匹配项。
- scrollToActiveItem : 它决定了当属性变化时,是否始终将活动项滚动到视图内。
语法:
<Select2
    items={ITEM_DATA}
    itemPredicate={filterData}
    ...
>
    <Button disabled={true}>
</Select2>
创建React应用程序和安装模块:
步骤1: 使用以下命令创建React应用程序:
npm create-react-app appname
步骤2: 在创建你的项目文件夹(即appname)之后,使用以下命令切换到该文件夹:
cd appname
步骤3: 创建了ReactJS应用程序后,使用以下命令安装所需的模块:
npm install @blueprintjs/core
npm install @blueprintjs/select
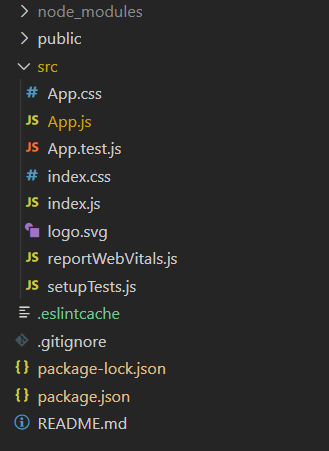
项目结构:

步骤4 : 按照以下方式运行项目:
npm start
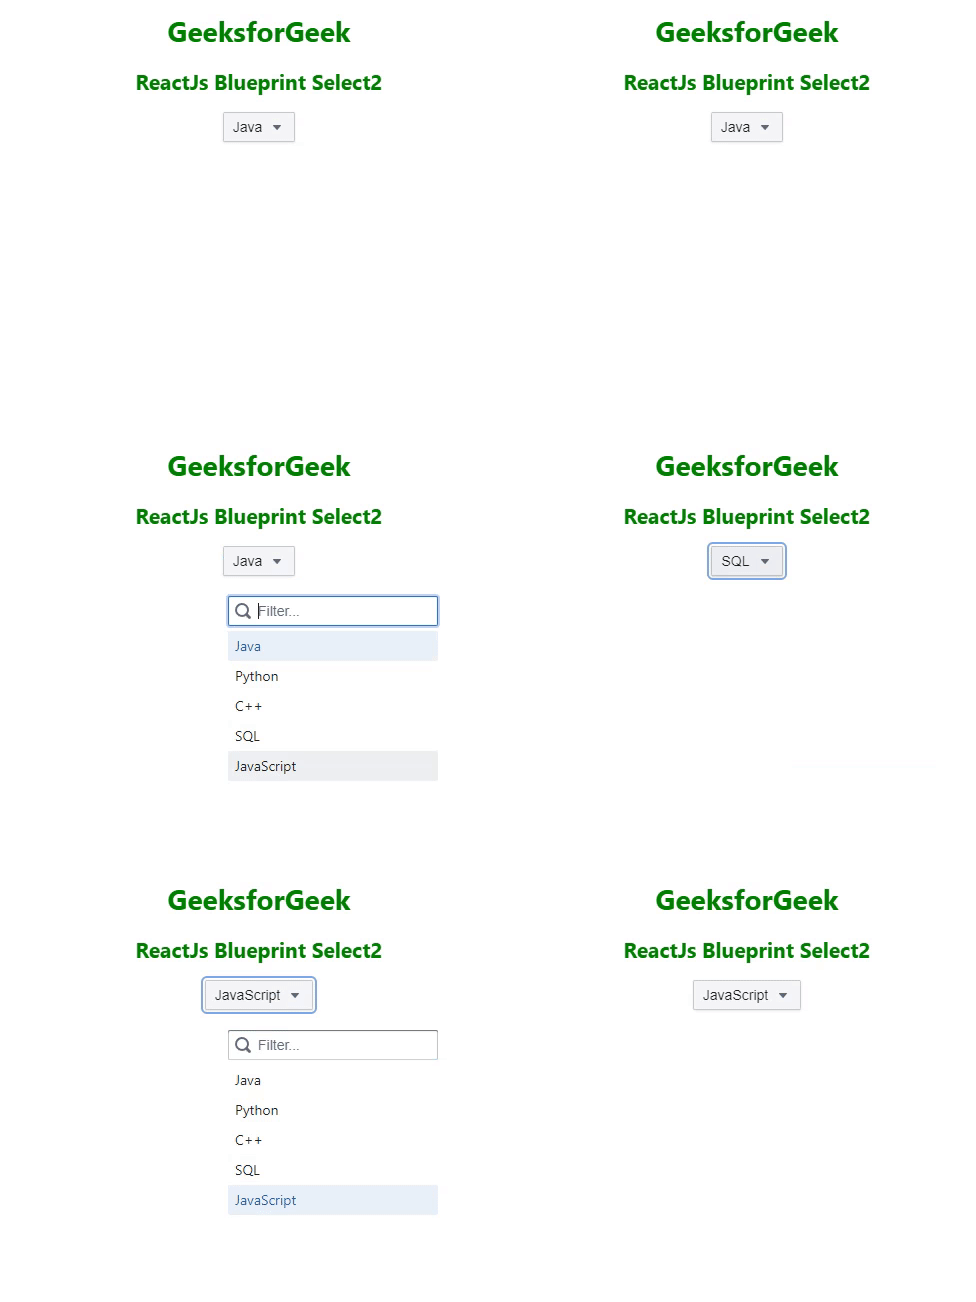
示例1: 下面的示例演示了select2组件的 items, itemRenderer, 和 onItemSelect 属性的用法。
import React, { useState } from "react";
import { Button, MenuItem } from "@blueprintjs/core";
import { Select2 } from "@blueprintjs/select";
import "@blueprintjs/core/lib/css/blueprint.css";
import "@blueprintjs/select/lib/css/blueprint-select.css";

function App() {
    const [item, setItem] = useState("Java");
    const [items, setItems] = useState([]);

    return (
        <center>
            <div style={{ textAlign: "center", color: "green" }}>
                <h1>GeeksforGeek</h1>
                <h2>ReactJs Blueprint Select2</h2>
            </div>
            <Select2
                items={["Java", "Python", "C++", "SQL", "JavaScript"]}
                selectedItems={items}
                itemRenderer={(val, itemProps) => {
                    return (
                        <MenuItem
                            disabled={itemProps.modifiers.disabled}
                            key={val}
                            text={val}
                            onClick={(elm) => {
                                setItem(elm.target.textContent);
                                setItems((items) => {
                                    return [...items, elm.target.textContent];
                                });
                            }}
                            active={itemProps.modifiers.active}
                        />
                    );
                }}
                onItemSelect={setItem}>
                <Button text={item} rightIcon="caret-down" />
            </Select2>
        </center>
    );
}

export default App;
输出:

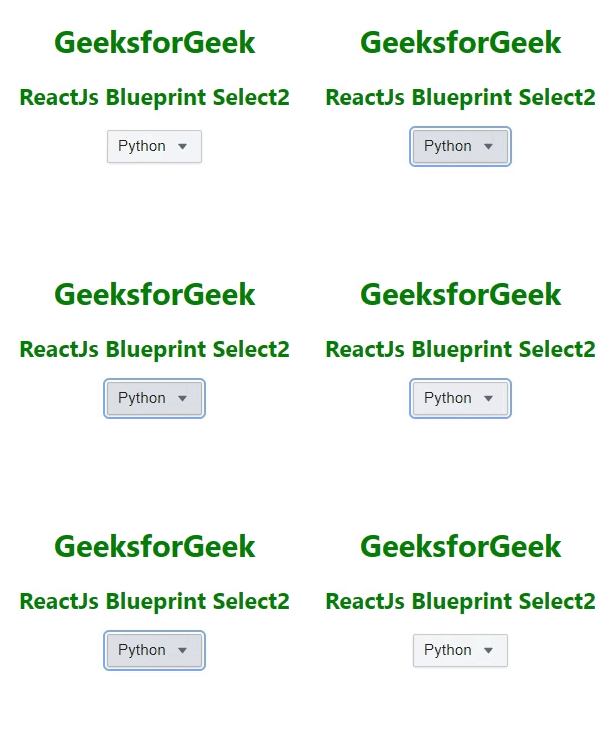
示例2: 下面是另一个示例,演示了 disabled 属性在 select2 组件中的用法。
import React, { useState } from "react";
import { Button, MenuItem } from "@blueprintjs/core";
import { Select2 } from "@blueprintjs/select";
import "@blueprintjs/core/lib/css/blueprint.css";
import "@blueprintjs/select/lib/css/blueprint-select.css";

function App() {
    const [item, setItem] = useState("Java");
    const [items, setItems] = useState([]);

    return (
        <center>
            <div style={{ textAlign: "center", color: "green" }}>
                <h1>GeeksforGeek</h1>
                <h2>ReactJs Blueprint Select2</h2>
            </div>
            <Select2
                items={["Java", "Python", "C++", "SQL", "JavaScript"]}
                selectedItems={items}
                disabled={true}
                itemRenderer={(val, itemProps) => {
                    return (
                        <MenuItem
                            key={val}
                            text={val}
                            onClick={(elm) => {
                                setItem(elm.target.textContent);
                                setItems((items) => {
                                    return [...items, elm.target.textContent];
                                });
                            }}
                            active={itemProps.modifiers.active}
                        />
                    );
                }}
                onItemSelect={setItem}>
                <Button text={item} rightIcon="caret-down" />
            </Select2>
        </center>
    );
}

export default App;
输出:

参考: https://blueprintjs.com/docs/#select/select2.props-interface
 极客教程
极客教程