React.js蓝图变量分层
在本文中,我们将学习由blueprint.js库提供的 变量分层 。BlueprintJS是一个基于React的用于Web的UI工具包。它是用Typescript编写的。该库非常优化和流行,用于构建在现代Web浏览器中运行的复杂和数据密集的桌面应用程序的界面。
变量分层 这些变量用于复制BlueprintJS使用的堆叠上下文。开发人员可以在Sass或Less变量文件中使用它们。
变量分层
- $pt-z-index-base: 它对应于CSS中的以下值
$pt-z-index-base: 0
- $pt-z-index-content: 它对应CSS中的以下值
$pt-z-index-content: 10
- $pt-z-index-overlay: 它在CSS中对应以下值
$pt-z-index-overlay: 20
创建React应用程序并安装模块
步骤1 :使用以下命令创建一个React应用程序:
npx create-react-app foldername
步骤2 :在创建项目文件夹(即文件夹名称)后,使用以下命令进入该文件夹:
cd foldername
步骤3 : 创建ReactJS应用后,使用以下命令安装所需的模块:
npm install @blueprintjs/core
npm install @blueprint/datetime @blueprintjs/datetime2
npm install sass
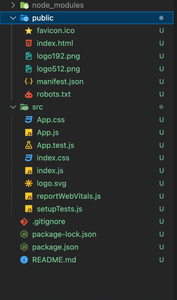
项目结构: 它将如下所示。

示例1: 下面的示例演示了BlueprintJS使用的不同分层变量的用法。
现在在App.js文件中编写以下代码。这里,App是我们的默认组件,我们在其中编写了我们的代码。
文件名:App.js
import './App.scss'
import "@blueprintjs/core/lib/css/blueprint.css";

export default function App() {
    return (
        <div>
            <div
                className="head"
                style={{
                    width: "fit-content",
                    margin: "auto",
                }}
            >
                <h1
                    style={{
                        color: "green",
                    }}
                >
                    GeeksforGeeks
                </h1>
                <strong>
                    React blueprint Layering Variables:
                </strong>
                <br />
                <br />
            </div>
            <div className="container">
                <div class="box box-1"></div>
                <div class="box box-2"></div>
                <div class="box box-3"></div>
            </div>
        </div>
    );
}
创建一个新文件,App.scss,并为不同的盒子分配不同的z-index值。
文件名:App.scss
@import "@blueprintjs/core/lib/scss/variables";

.container {
    position: relative;
    margin-left: 300px;
}

.box {
    width: 100px;
    height: 100px;
    position: absolute;
}

.box-1 {
    background-color: skyblue;
    z-index: pt-z-index-base;
    left: 0;
}

.box-2 {
    background-color: limegreen;
    z-index:pt-z-index-content;
    top: 50px;
    left: 50px;
}

.box-3 {
    background-color: orange;
    z-index: $pt-z-index-overlay;
    top: 100px;
    left: 100px;
}
运行应用程序的步骤:
使用以下命令从项目的根目录运行应用程序:
npm start
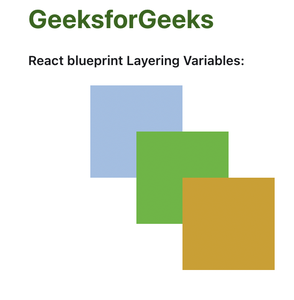
输出: 现在打开你的浏览器并访问 http://localhost:3000/,你将看到以下输出:

示例2: 下面的示例展示了BlueprintJS使用的不同分层变量的用法,但稍微修改了一些预定义的变量计算。
文件名:App.js
import './App.scss'
import "@blueprintjs/core/lib/css/blueprint.css";

export default function App() {
    return (
        <div>
            <div
                className="head"
                style={{
                    width: "fit-content",
                    margin: "auto",
                }}
            >
                <h1
                    style={{
                        color: "green",
                    }}
                >
                    GeeksforGeeks
                </h1>
                <strong>
                    React blueprint Layering Variables:
                </strong>
                <br />
                <br />
            </div>
            <div className="container">
                <div class="box box-1"></div>
                <div class="box box-2"></div>
                <div class="box box-3"></div>
            </div>
        </div>
    );
}
创建一个新的文件,App.scss,并给不同的框分配不同的z-indexes。
文件名:App.scss
@import "@blueprintjs/core/lib/scss/variables";

.container {
    position: relative;
    margin-left: 300px;
}

.box {
    width: 100px;
    height: 100px;
    position: absolute;
}

.box-1 {
    background-color: skyblue;
    z-index: pt-z-index-base;
    left: 0;
}

.box-2 {
    background-color: limegreen;
    z-index: calc(3 *pt-z-index-content);
    top: 50px;
    left: 50px;
}

.box-3 {
    background-color: orange;
    z-index: $pt-z-index-overlay;
    top: 100px;
    left: 100px;
}
运行应用程序的步骤: 从项目的根目录使用以下命令运行应用程序:
npm start
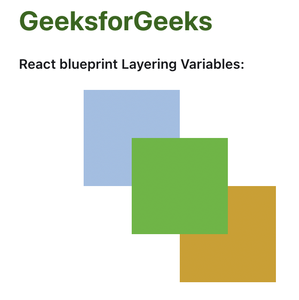
输出:

参考: https://blueprintjs.com/docs/#core/variables.layering
 极客教程
极客教程