React MUI 从右到左
Material-UI 是一个用户界面框架,提供了预定义和可自定义的 React 组件,用于更快速和简便的 Web 开发。Material-UI 组件基于 Google 的 Material Design。在本文中,让我们讨论 Material-UI 库中的从右到左实用工具。
Material-UI 提供的从右到左实用工具用于将 MUI 组件的对齐方向从右到左改变。当支持阿拉伯语、波斯语或希伯来语等语言时,这非常有益。
语法:
<ParentComponent dir="rtl">
    <ChildComponent />
</ParentComponent>
创建React应用并安装模块:
步骤1: 使用以下命令创建React应用:
npx create-react-app foldername
步骤2: 创建项目文件夹,例如文件夹名称,然后使用以下命令进入该文件夹:
cd foldername
步骤3: 创建ReactJS应用程序后,使用以下命令安装所需模块:
npm install @mui/material
npm install stylis stylis-plugin-rtl
npm install @emotion/react @emotion/cache
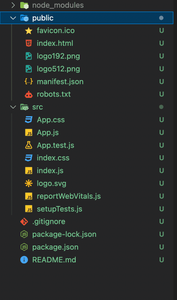
项目结构: 它将呈现如下所示。

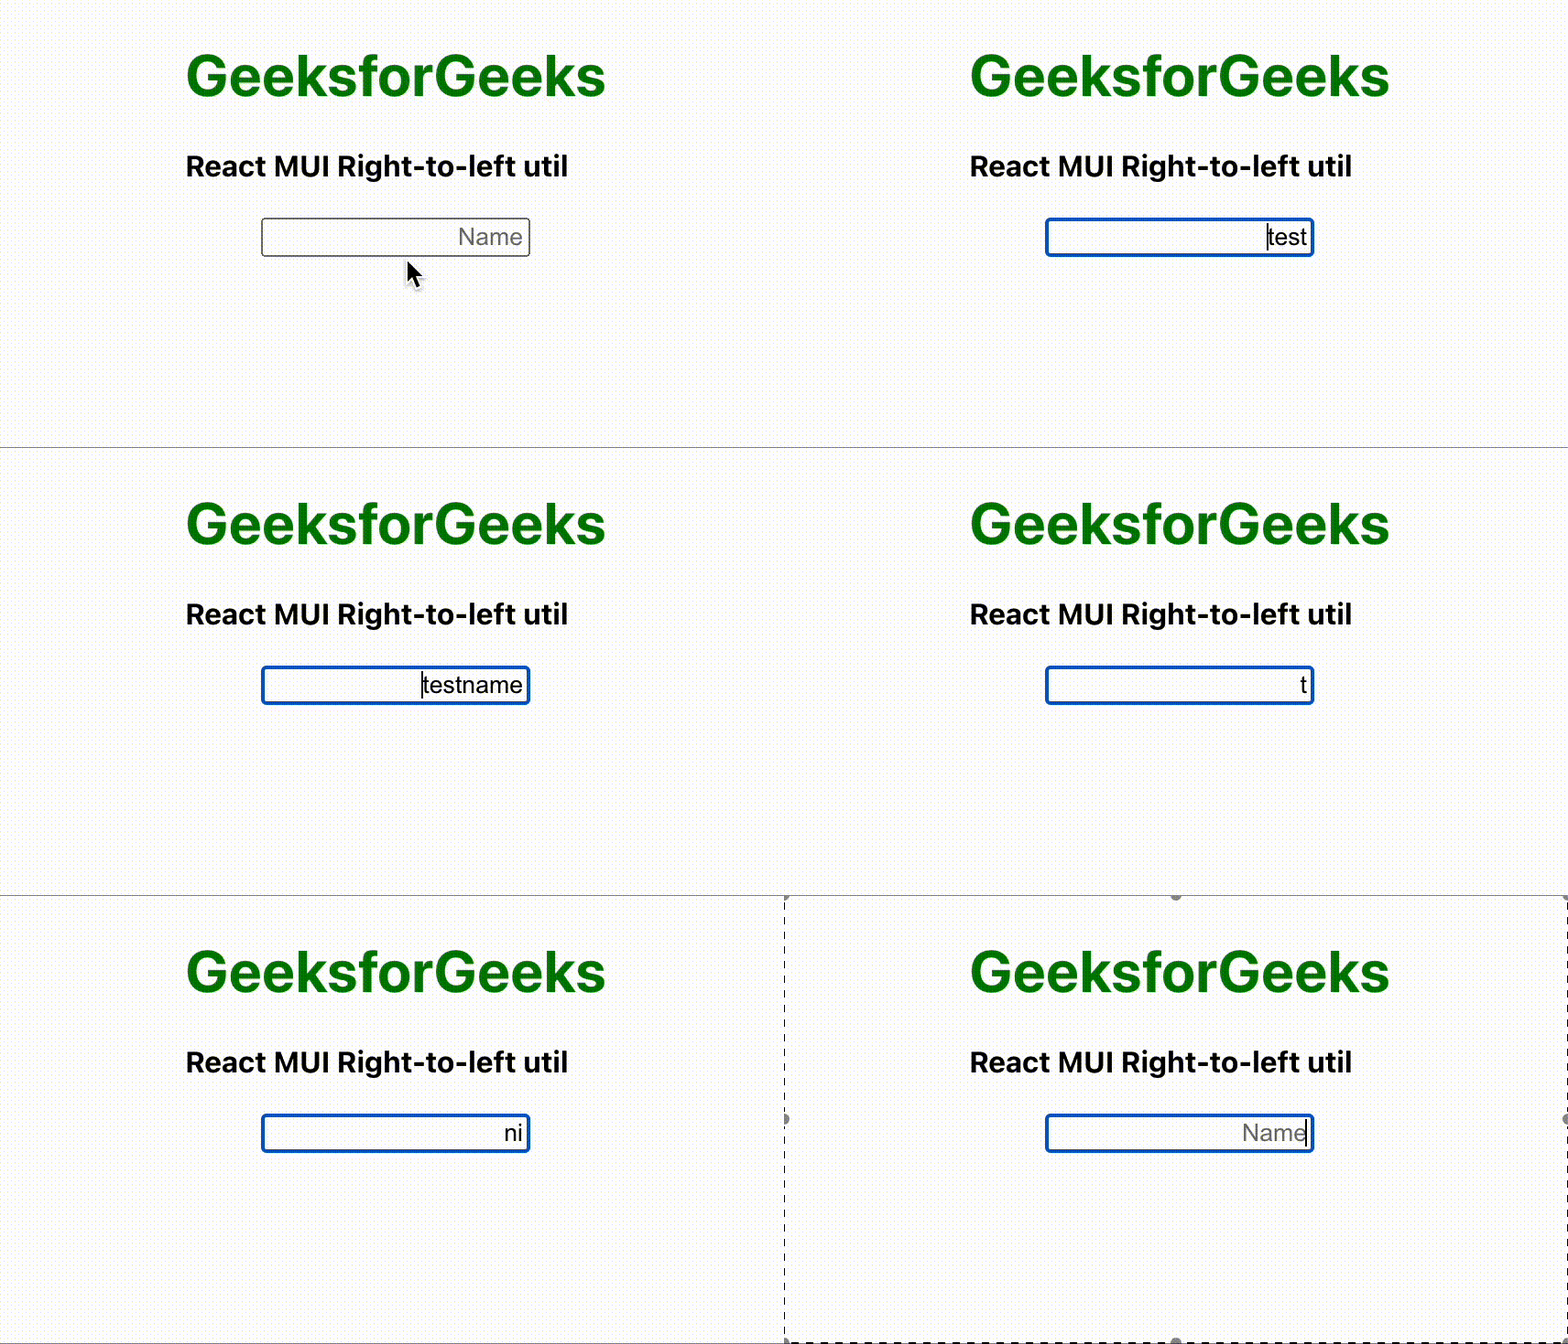
示例1: 在本示例中,我们将创建一个简单的应用程序,使用从右到左的实用程序来创建一个输入HTML元素,以从右到左显示文本。
现在在App.js文件中编写以下代码。这里,App是我们的默认组件,我们在这里编写了我们的代码:
文件名:App.js
import * as React from 'react';
import { createTheme, ThemeProvider } from '@mui/material/styles';
import rtlPlugin from 'stylis-plugin-rtl';
import { prefixer } from 'stylis';
import { CacheProvider } from '@emotion/react';
import createCache from '@emotion/cache';

const theme = createTheme({
    direction: 'rtl', // Both here and <body dir="rtl">
});

// Create rtl cache
const cacheRtl = createCache({
    key: 'muirtl',
    stylisPlugins: [prefixer, rtlPlugin],
});

export default function Direction() {
    return (
        <CacheProvider value={cacheRtl}>
            <ThemeProvider theme={theme}>
                <div
                    className="head"
                    style={{
                        width: "fit-content",
                        margin: "auto",
                    }}
                >
                    <h1
                        style={{
                            color: "green",
                        }}
                    >
                        GeeksforGeeks
                    </h1>
                    <strong>React MUI Right-to-left util</strong>
                    <br />
                    <br />
                </div>
                <div dir="rtl" style={{ display: 'flex',
                    justifyContent: 'center' }}>
                    <input type="text" placeholder="Name" />
                </div>
            </ThemeProvider>
        </CacheProvider>
    );
}
运行应用程序的步骤: 从项目的根目录使用以下命令运行应用程序:
npm start
输出: 现在打开您的浏览器并转到http://localhost:3000/,您将看到以下输出:

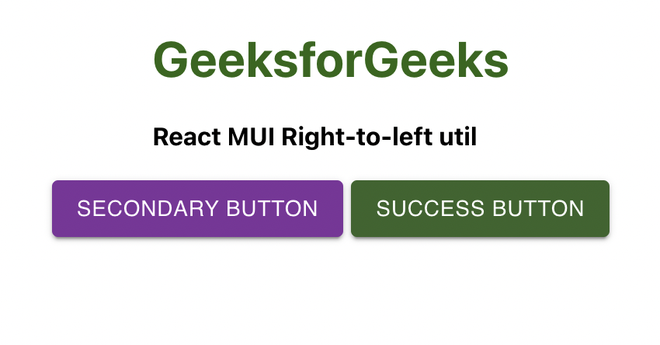
示例2: 在这个示例中,我们将创建一个简单的应用程序,使用从右到左的实用程序来改变按钮的顺序。将您的App.js更改为如下所示。
import * as React from 'react';
import { createTheme, ThemeProvider } from '@mui/material/styles';
import rtlPlugin from 'stylis-plugin-rtl';
import { prefixer } from 'stylis';
import { CacheProvider } from '@emotion/react';
import createCache from '@emotion/cache';
import { Button } from '@mui/material';

const theme = createTheme({
    direction: 'rtl', // Both here and <body dir="rtl">
});

// Create rtl cache
const cacheRtl = createCache({
    key: 'muirtl',
    stylisPlugins: [prefixer, rtlPlugin],
});
export default function Direction() {
    return (
        <CacheProvider value={cacheRtl}>
            <ThemeProvider theme={theme}>
                <div
                    className="head"
                    style={{
                        width: "fit-content",
                        margin: "auto",
                    }}
                >
                    <h1
                        style={{
                            color: "green",
                        }}
                    >
                        GeeksforGeeks
                    </h1>
                    <strong>
                        React MUI Right-to-left util
                    </strong>
                    <br />
                    <br />
                </div>
                <div dir="rtl" style={{ display: 'flex',
                    justifyContent: 'center', gap: '5px' }}>
                    <Button variant='contained' color='success'>
                        Success button
                    </Button>
                    <Button variant='contained'
                        color='secondary'>
                        Secondary button
                    </Button>
                </div>
            </ThemeProvider>
        </CacheProvider>
    );
}
运行应用程序的步骤: 从项目的根目录中使用以下命令运行应用程序:
npm start
输出:

参考: https://mui.com/material-ui/guides/right-to-left/#main-content
 极客教程
极客教程